Method 1: Using the Xbox Game Bar
Xbox Game Bar is baked into Windows 10 and Windows 11. So, you don’t need to install it separately to show the FPS counter in Windows 11. You can use the Xbox Game Bar to capture gameplay photos, record videos, and track game performance.
Step 1: Launch any Game on your PC.
Step 2: Press the Windows + G keyboard shortcut to open the Xbox Game Bar.
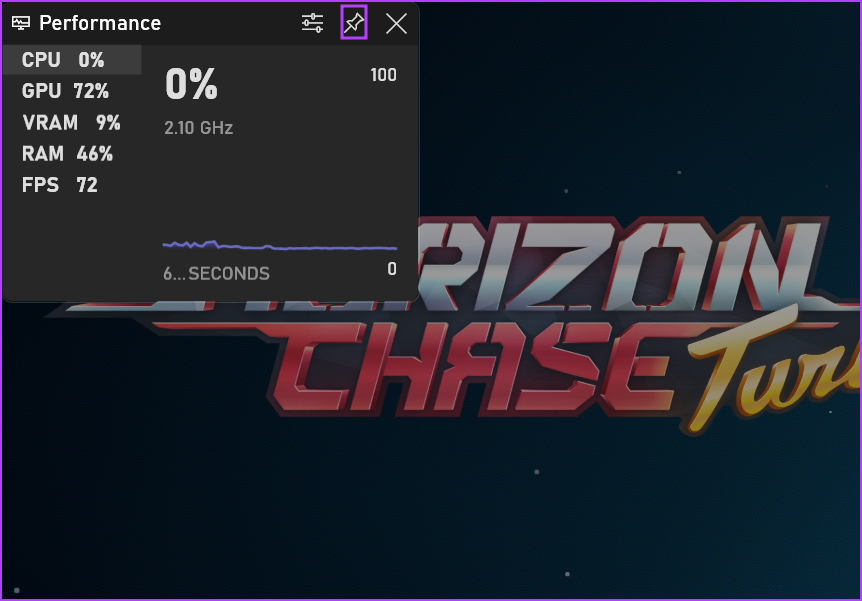
Step 3: Click on the Performance icon (monitor) to launch the overlay. You will see metrics in a small window.

Step 4: Move the overlay to one corner of the display and click on the Pin icon to fix it there.
Step 5: Click on anywhere on the game screen. It will minimize the Xbox Game Bar but keep the Performance overlay pinned on the screen.

Method 2: Using NVIDIA GeForce Experience
NVIDIA GeForce Experience is a dedicated utility to manage game and studio drivers, customize your game settings, and record and share gameplay. You can use the in-built overlays feature to display the framerates while gaming. If you don’t have the NVIDIA GeForce Experience app installed on your PC, firstly download and install it.
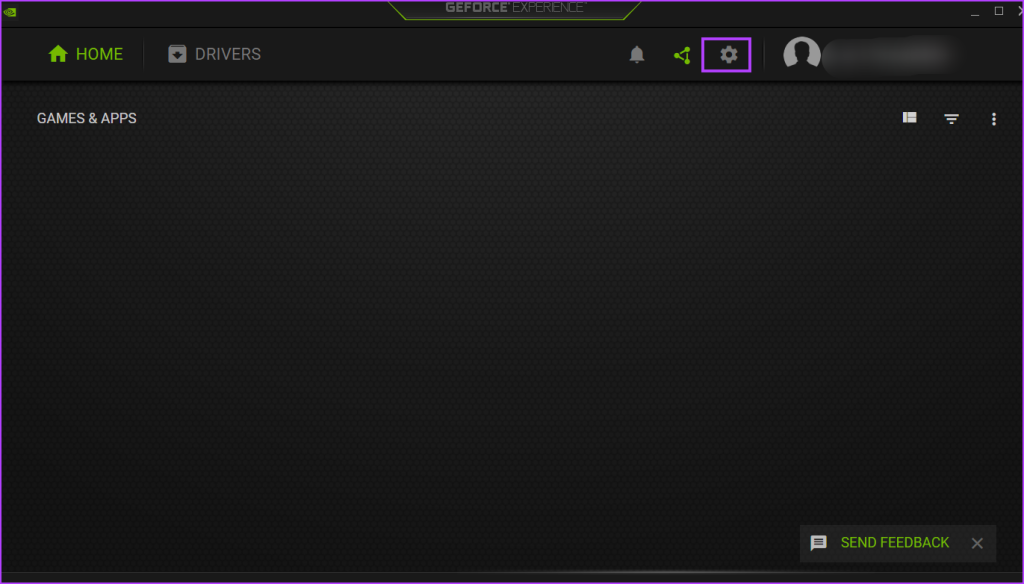
Step 1: Open the NVIDIA GeForce Experience app.
Step 2: Go to the top-right area and click on the Settings icon.
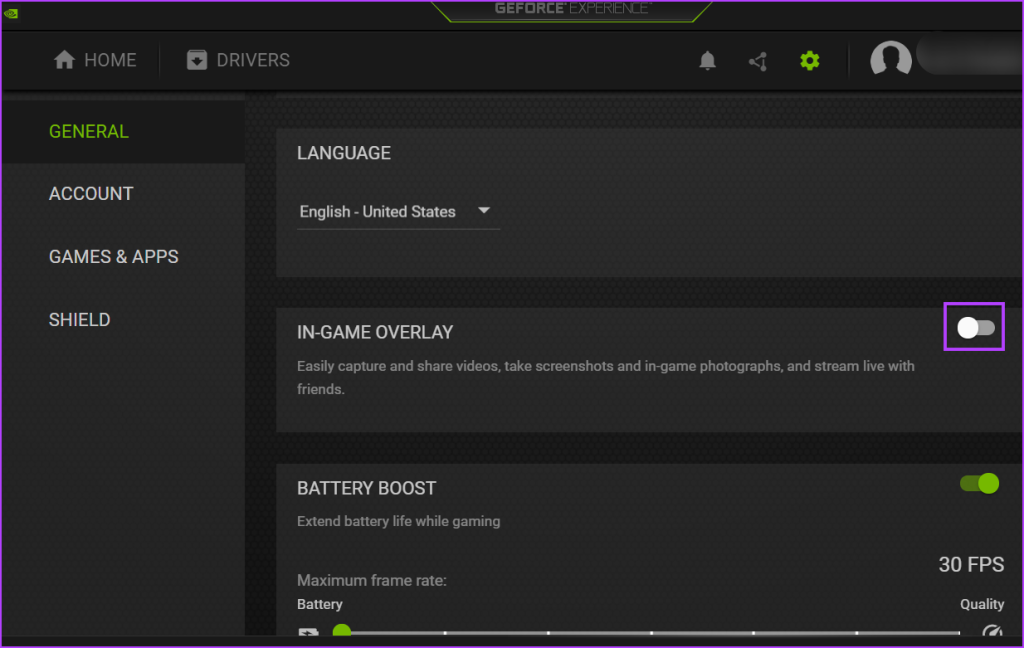
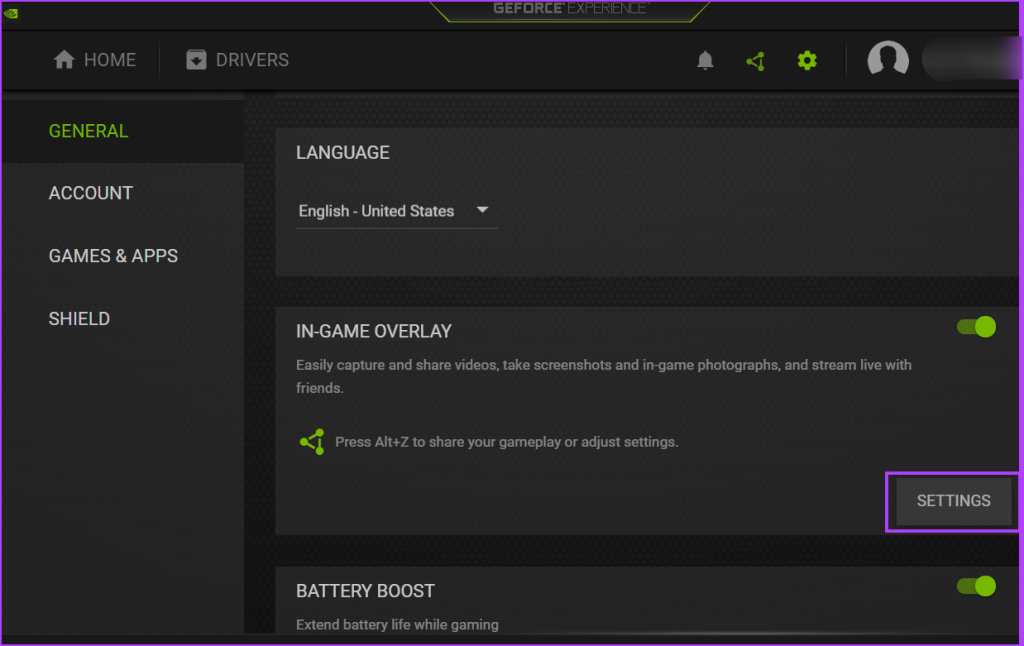
Step 3: Scroll down to the In-Game Overlay section. Click on the toggle to enable the overlay feature if it isn’t active.
Step 4: Click on the Settings option.
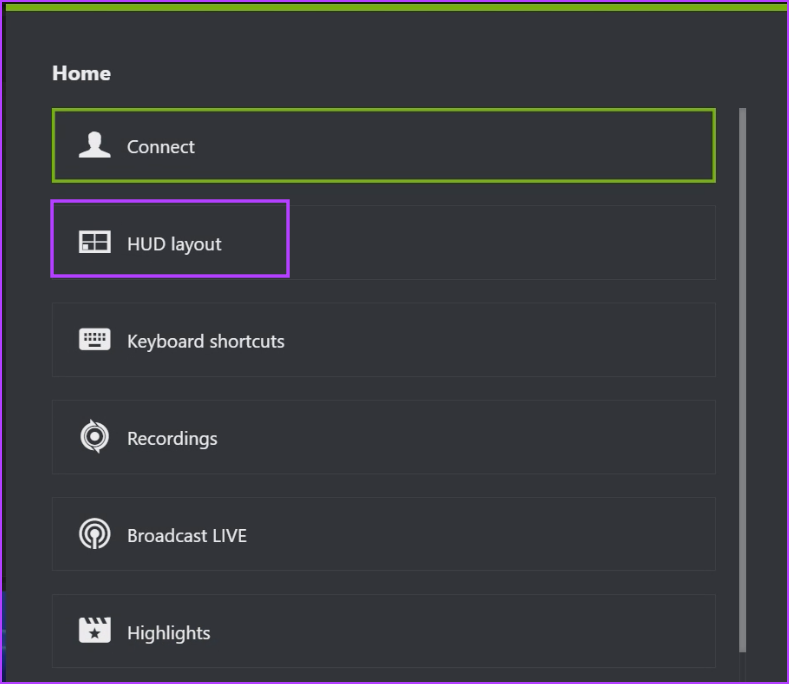
Step 5: Click on the HUD layout option.
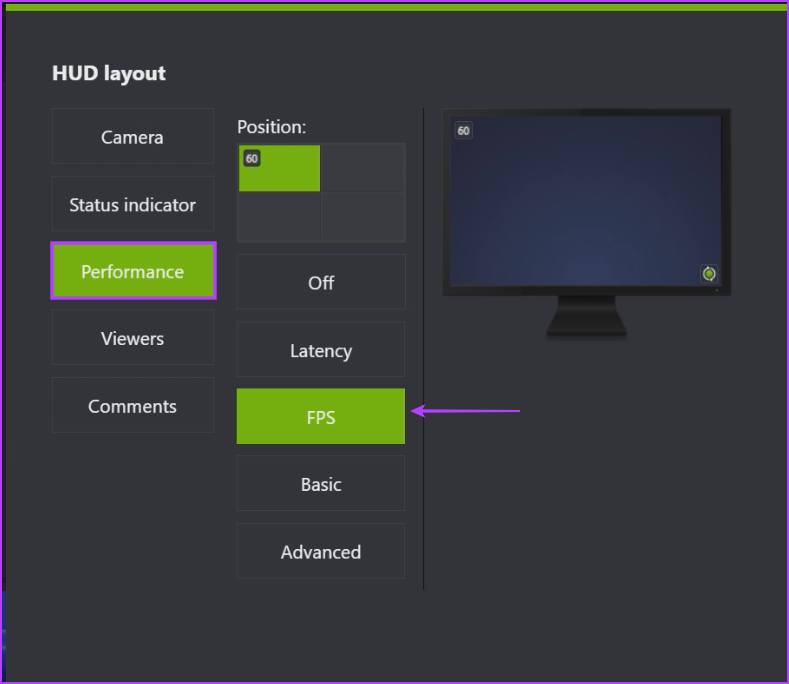
Step 6: Click on the Performance option. Then click on the FPS option.
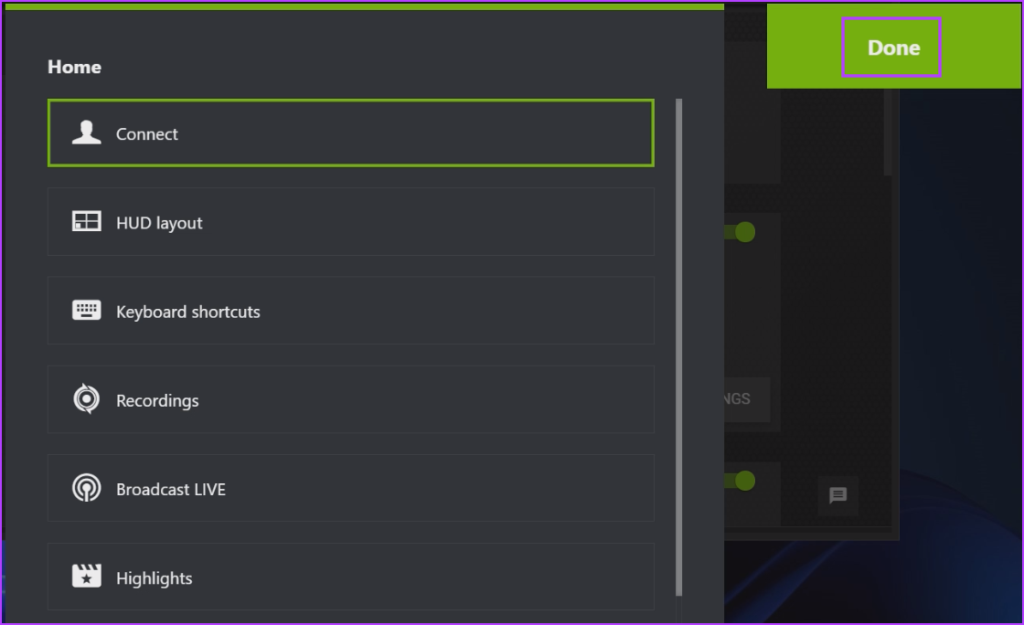
Step 7: Click on the Done button. Close the NVIDIA overlay.
Step 8: Launch a Game on your PC.
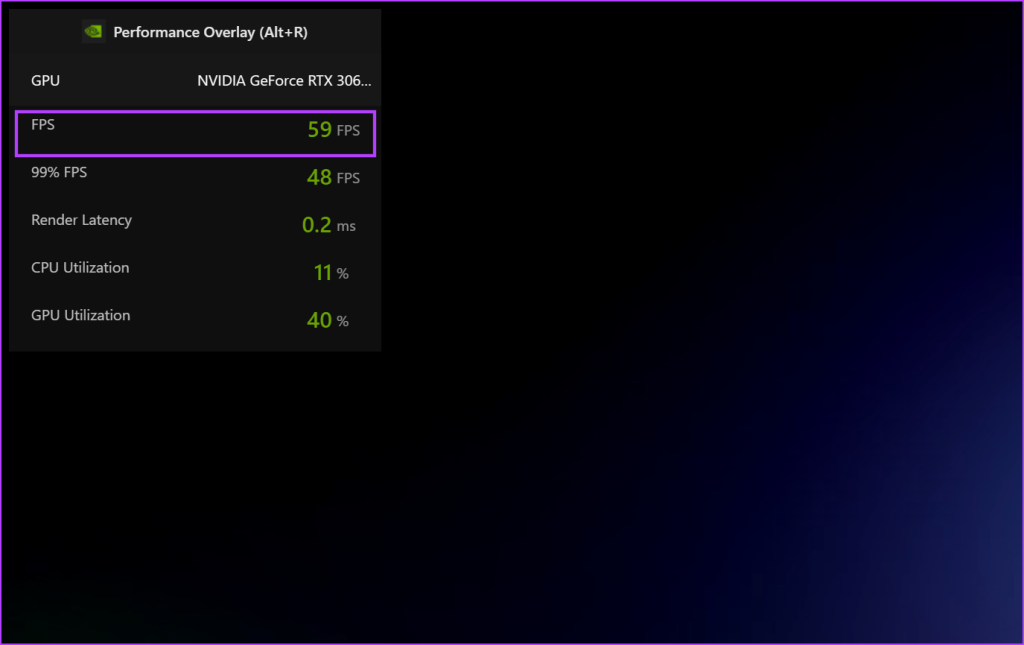
Step 9: Press the Alt + R keyboard shortcut to launch the overlay. You will see an FPS and other metrics in the corner.
Method 3: Using the In-Game FPS Counter in Steam
Steam Client also offers an overlay option to display the current FPS while playing any game. Like the NVIDIA GeForce Experience, you can adjust the FPS overlay position too.
Step 1: Press the Windows key to open the Start menu, type Steam in the search bar, and press Enter.

Step 2: Click on the Steam menu at the top-left corner and click on the Settings from the context menu.

Step 3: Click on the In-Game from the left sidebar. Locate the ‘In-game FPS counter’ option and click on the drop-down list.
Select the screen area where you want the FPS counter to be positioned. We picked the Top-right option.

Step 4: Close the Settings page.
Step 5: Click on the Library option. Select a game from the list and click on the Play button.
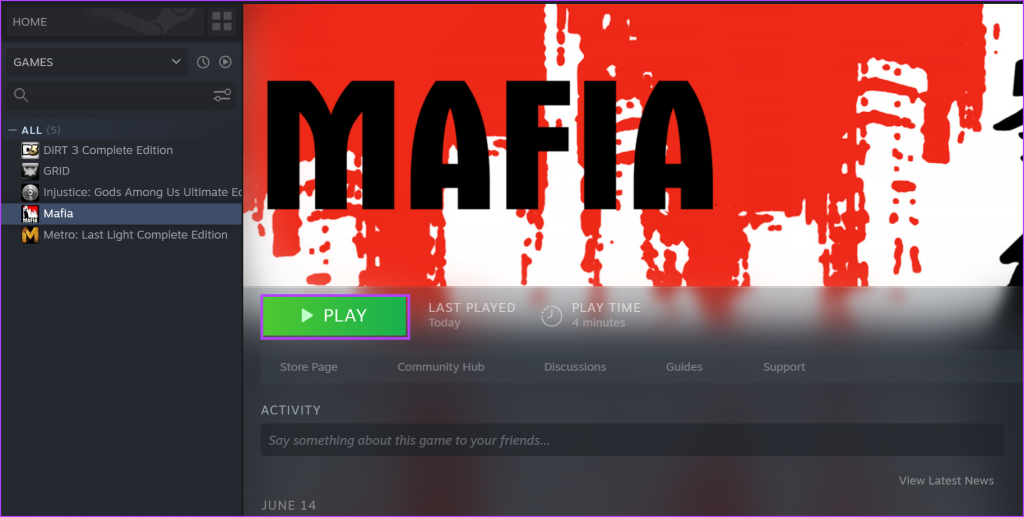
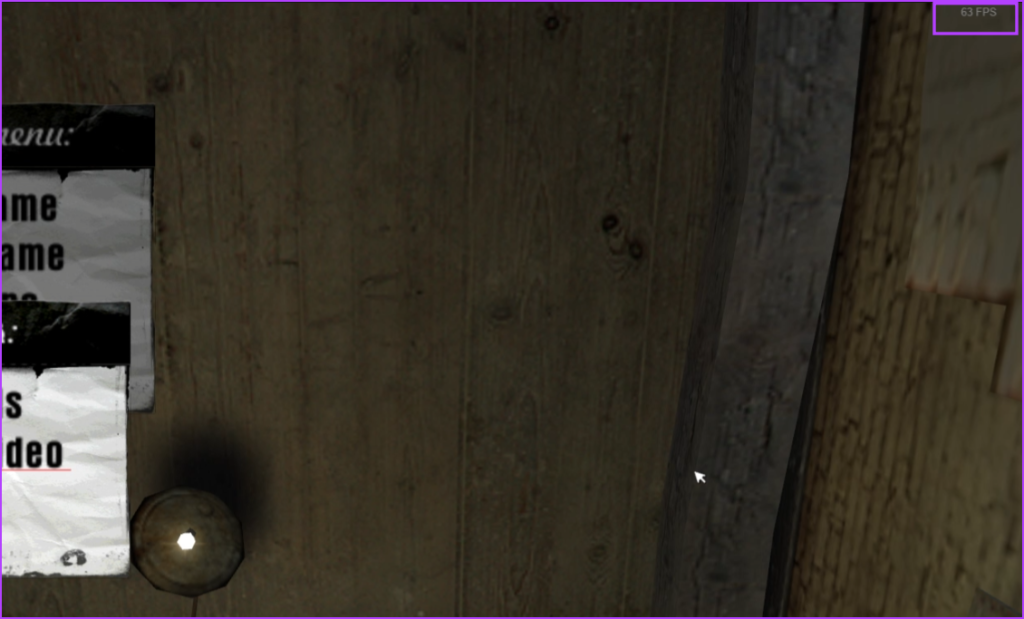
The FPS will appear in the top-right corner of the display.
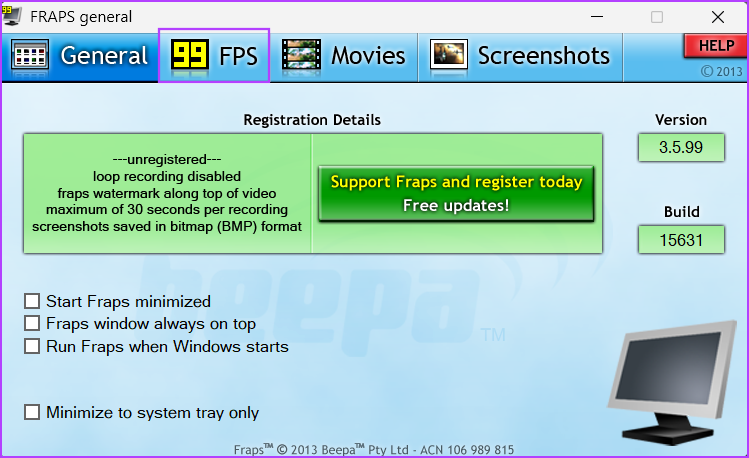
Method 4: Using FRAPS
FRAPS is a freemium FPS monitoring tool that has been around for decades. You can measure FPS, record gameplay, and capture screenshots with this tool. There is a paid tier of the app, which unlocks support for multiple image formats and removes watermarks.
Step 1: Download and install FRAPS on your PC.
Step 2: Launch FRAPS on your PC. Switch to the FPS tab.
Step 3: By default, the overlay hotkey for the FPS counter is F12. Don’t change it.
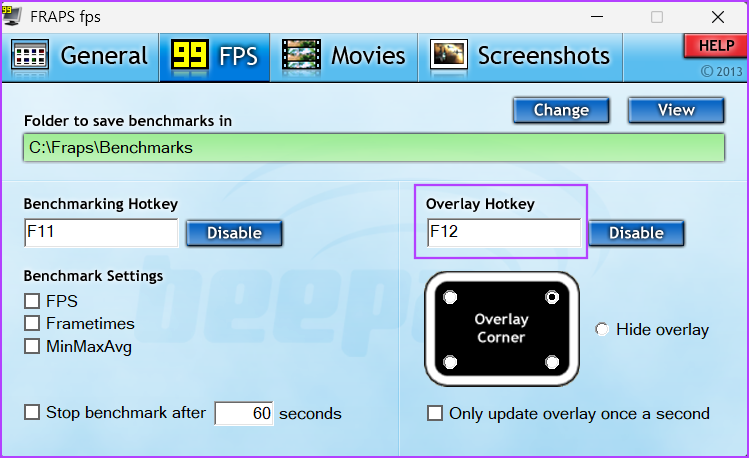
Step 4: Minimize the FRAPS windows and launch a game. The FPS counter overlay will appear in the top left corner of the game. You can press the F12 key repeatedly to change the position of the overlay.

Method 5: Using RTSS With MSI Afterburner
MSI Afterburner is an excellent overclocking utility. But it can also display the FPS and other hardware usage statistics while gaming and can even record and save benchmarks. However, it needs a Riva Tuner Statistics Server (RTSS) to gain OSD properties and display the metrics on the screen.
Step 1: Download MSI Afterburner on your PC.
Step 2: Install MSI Afterburner on your PC and launch it. Click on the Settings icon.
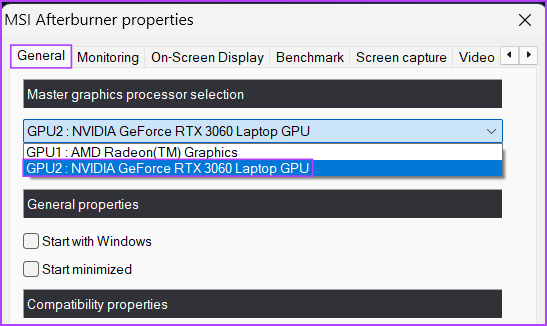
Step 3: In the General tab, expand the drop-down list below the Master graphics processor selection option. Select the GPU you use while playing games.
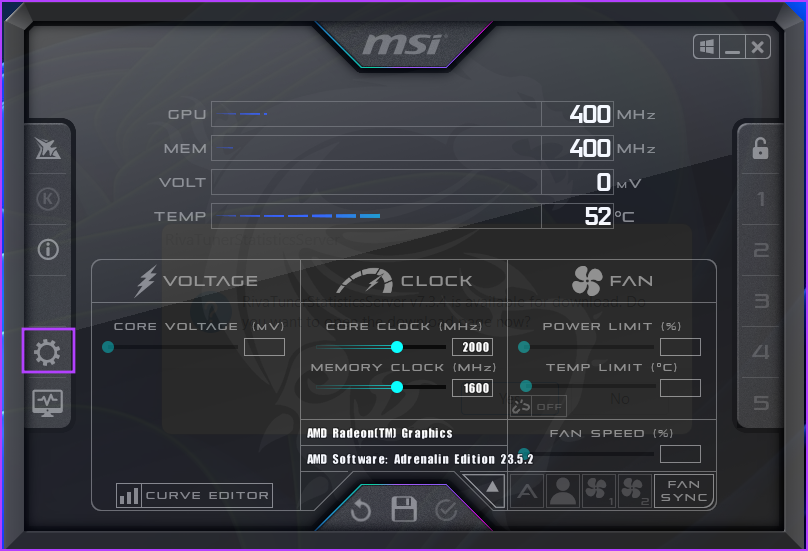
Step 4: Switch to the Monitoring tab and locate the Active hardware monitoring graphs option. Find and click on the Framerate option in the list.

Step 5: Switch to the On-screen display tab. Click on the box next to the Toggle On-screen display option. Press the F12 key.

Step 6: Click on the Apply button and then hit the OK button.
Step 7: Minimize the MSI Afterburner window and launch a game. The FPS counter will appear on the screen. You can press the F12 key to toggle it on or off.

Was this helpful?
Last updated on 26 August, 2024
Read Next
 6 Best FPS Gaming Mouse for Counter-Strike 2 (CS2): Wired and Wireless
Counter-Strike 2, the successor to Counter-Strike: Global Offensive, is shaping up to be one of the best competitive FPS titles.
6 Best FPS Gaming Mouse for Counter-Strike 2 (CS2): Wired and Wireless
Counter-Strike 2, the successor to Counter-Strike: Global Offensive, is shaping up to be one of the best competitive FPS titles.
 How to Make Echo Show Only Show the Clock
I have my Echo Show on my desk in front of me, and it’s distracting when the display keeps changing every few seconds.
How to Make Echo Show Only Show the Clock
I have my Echo Show on my desk in front of me, and it’s distracting when the display keeps changing every few seconds.
 5 Best Free Calorie Counter Apps for iPhone
1.
5 Best Free Calorie Counter Apps for iPhone
1.
 5 Best Gaming Monitors for Counter-Strike 2
Counter-Strike 2 is not a demanding game, and most gaming PCs will be able to offer well over 100 FPS when running the title.
5 Best Gaming Monitors for Counter-Strike 2
Counter-Strike 2 is not a demanding game, and most gaming PCs will be able to offer well over 100 FPS when running the title.
 3 Quick Ways to Find Product Key on Windows 10 or Windows 11
1.
3 Quick Ways to Find Product Key on Windows 10 or Windows 11
1.
 Top 3 Ways to Show Folder Size in Windows 11
Method 1: Hover the Mouse Pointer over the Folder By far, the easiest way to show the folder size on Windows is to hover the mouse pointer over the folder in the
Top 3 Ways to Show Folder Size in Windows 11
Method 1: Hover the Mouse Pointer over the Folder By far, the easiest way to show the folder size on Windows is to hover the mouse pointer over the folder in the
 2 Ways to Disable the Show More Options Context Menu in Windows 11
Method 1: Revert to Old Context Menu Using Command Prompt Command Prompt is a command-line interpreter that lets you perform various complicated tasks on your PC with a few text
2 Ways to Disable the Show More Options Context Menu in Windows 11
Method 1: Revert to Old Context Menu Using Command Prompt Command Prompt is a command-line interpreter that lets you perform various complicated tasks on your PC with a few text
 4 Ways to Disable Delivery Optimization in Windows 11
Method 1: Disable Delivery Optimization Using the Settings App The Settings app is the go-to option to configure important Windows settings like Delivery Optimization.
4 Ways to Disable Delivery Optimization in Windows 11
Method 1: Disable Delivery Optimization Using the Settings App The Settings app is the go-to option to configure important Windows settings like Delivery Optimization.
The article above may contain affiliate links which help support Guiding Tech. The content remains unbiased and authentic and will never affect our editorial integrity.

