Method 1: Disable Delivery Optimization Using the Settings App
The Settings app is the go-to option to configure important Windows settings like Delivery Optimization. You can use it to quickly turn off Delivery Optimization on Windows. Here are the steps to do that:
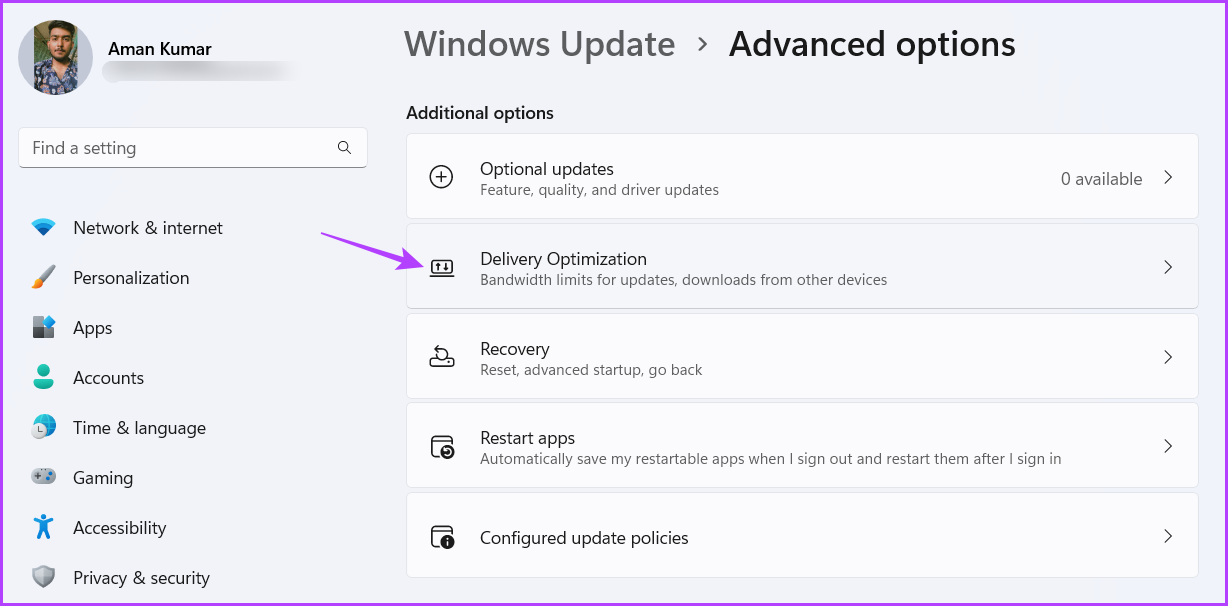
Step 1: Press the Windows + I keyboard shortcut to open the Settings app. Then, choose Windows Update from the left sidebar and Advanced options from the right pane.

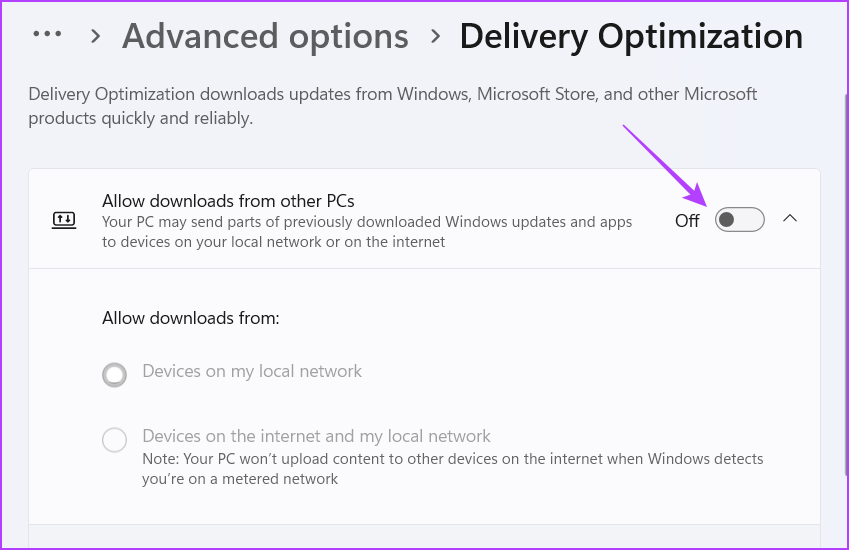
Step 2: Click on Delivery Optimization.
Step 3: Disable the toggle for the Allow download from other PCs option.
Method 2: Disable Delivery Optimization Using the Local Group Policy Editor
The Local Group Policy Editor is a Windows tool that lets you manage and configure important Windows settings and policies. You can also use it to turn off Delivery Optimization and reduce data usage on Windows. Here’s how to do that:
Note: The Local Group Policy Editor is exclusively available for the Pro and Professional versions of Windows. If you try to access it on Windows Home, you’ll get gpedit.msc not found error. Fortunately, by making some tweaks, you can eliminate this error and access the Local Group Policy Editor on Windows Home.
Step 1: Press the Windows + R keyboard shortcut to open the Run tool. Then, type gpedit.msc in the search bar and click OK.

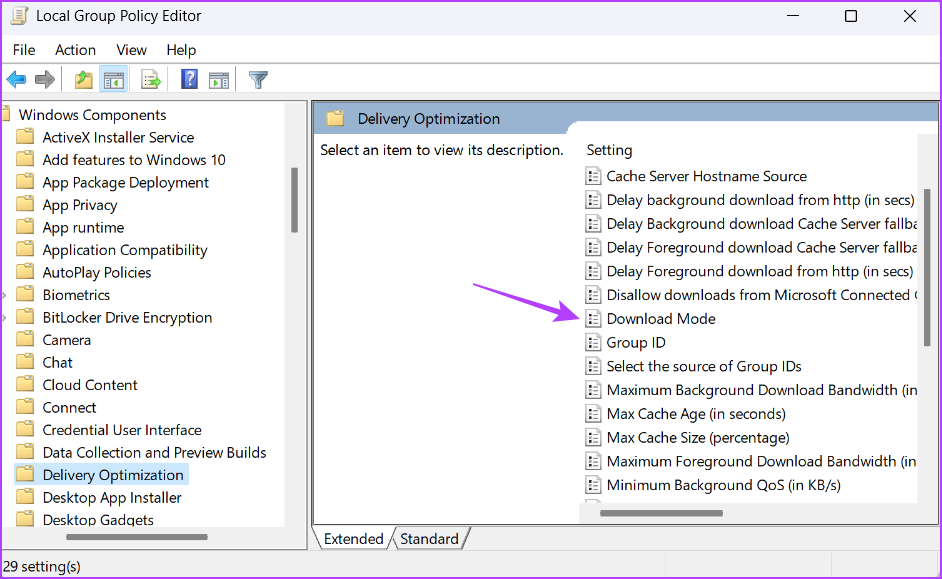
Step 2: In the Local Group Policy Editor, navigate to the following location:
Computer Configuration > Administrative Templates > Windows Components > Delivery Optimization
Step 3: Double-click on Download Mode in the right pane to access its edit window.
Step 4: Select the Enabled option and click the drop-down next to Download Mode, and choose Simple (99). Then, click Apply and OK to save the changes.

Configuring the Download Mode to Simple (99) ensures the Delivery Optimization downloads using HTTP instead of Delivery Optimization cloud services.
Method 3: Disable Delivery Optimization Using the Registry Editor
The Registry Editor is another Windows tool to configure Delivery Optimization in Windows 11. However, make sure to back up the registry and create a restore point before making any changes to the Registry.
This ensures your data remain safe even if something goes wrong.
Follow these steps to disable Delivery Optimization using the Registry Editor:
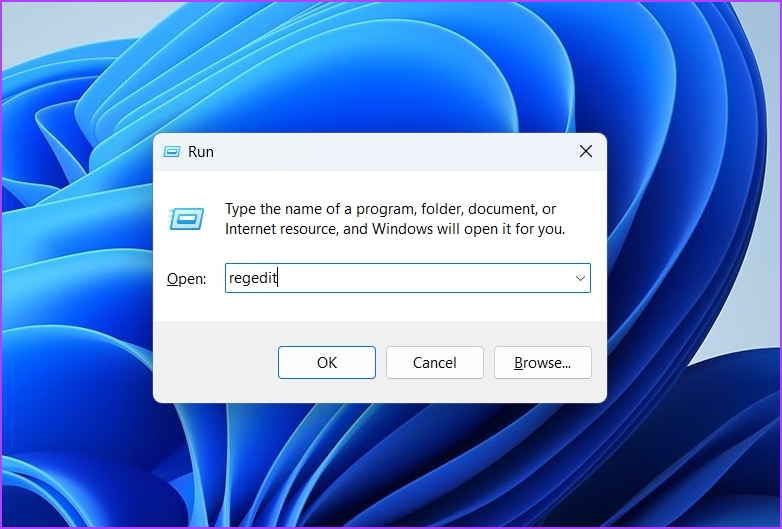
Step 1: Press Windows + R keyboard shortcut to open the Run tool, type regedit in the search bar, and press Enter.
Step 2: In the Registry Editor, navigate to the following location:
Computer\HKEY_LOCAL_MACHINE\SYSTEM\CurrentControlSet\Services\DoSvc
Step 3: Double-click on the Start key in the right pane to access it’s edit window.
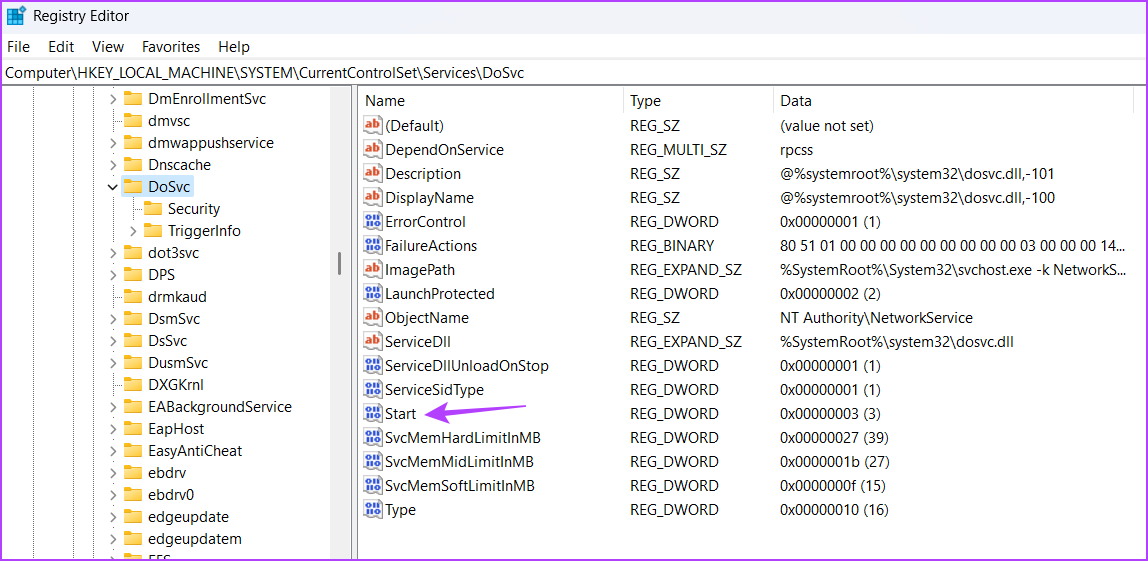
Step 4: Type 4 in the Value data section and click OK.

Restart your computer for the changes to take effect. If you want to enable Delivery Optimization in the future, type 2 in the Value data section of the Start Key and save the changes.
Method 4: Disable Delivery Optimization Using the Services App
The Services app on Windows allows you to start, view, stop, and configure important services. You can use it to disable the Delivery Optimization service on Windows 11. To do that, follow these steps:
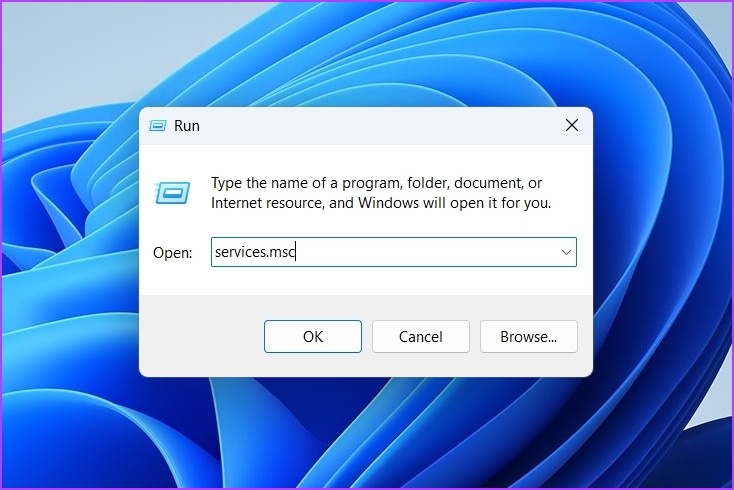
Step 1: Open the Run tool, type services.msc, and press Enter.
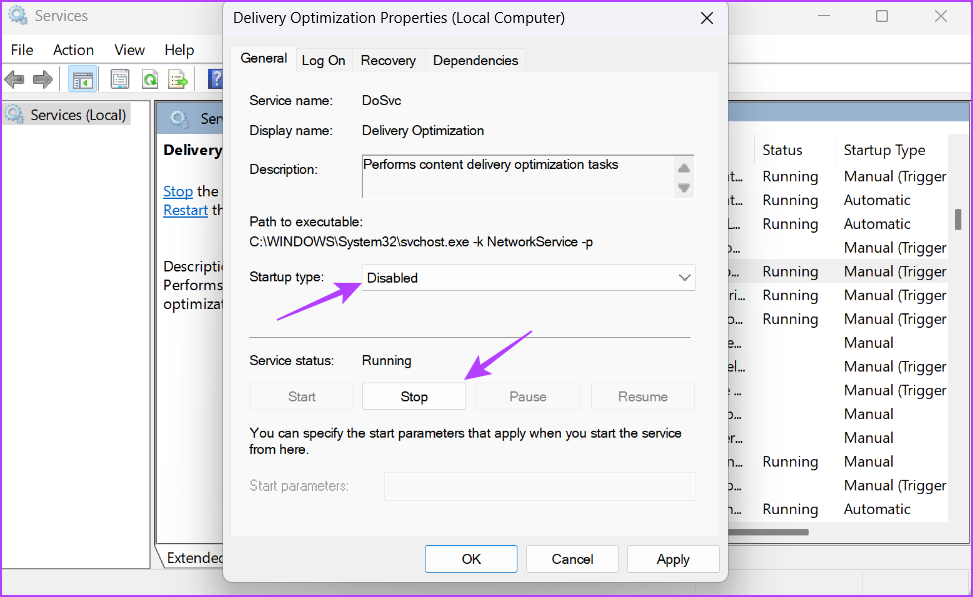
Step 2: Double-click on the Delivery Optimization service to access its edit window.

Step 3: Change the Startup type to Disabled and click the Stop button. Then, click Apply and OK to save the changes.
What Are Delivery Optimization Files and How to Delete Them
Delivery Optimization files are files that are downloaded and uploaded among devices using the Delivery Optimization feature. The only drawback of these files is that they can consume a lot of system space.
Therefore, if your computer is running out of space and you rarely use the Delivery Optimization feature, it’s a good idea to delete the Delivery Optimization files. Here’s how to do that:
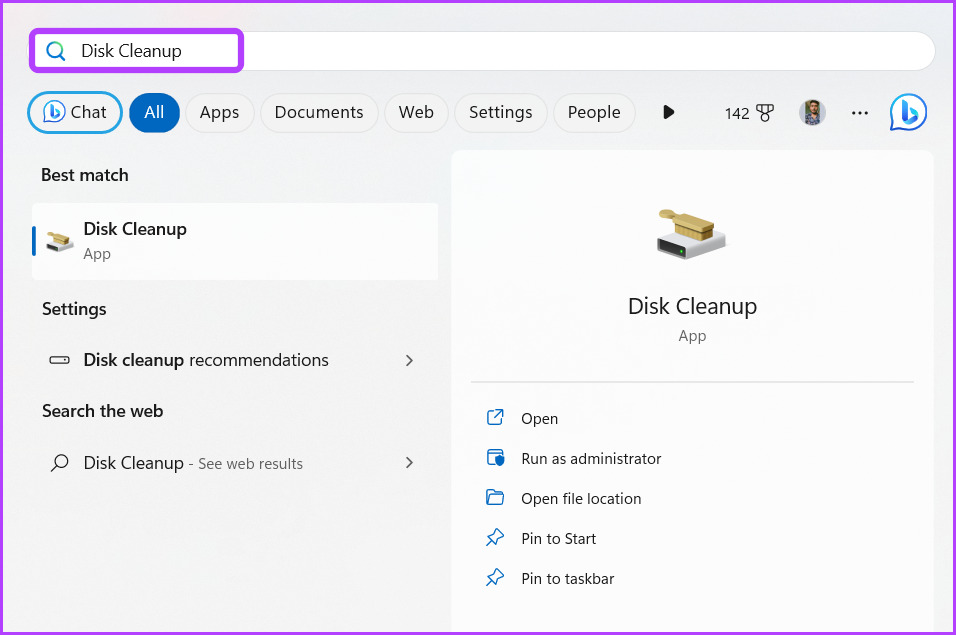
Step 1: Open the Start Menu, type Disk Cleanup in the search bar and press Enter.
Step 2: Check the Delivery Optimization Files box. Then, click OK.

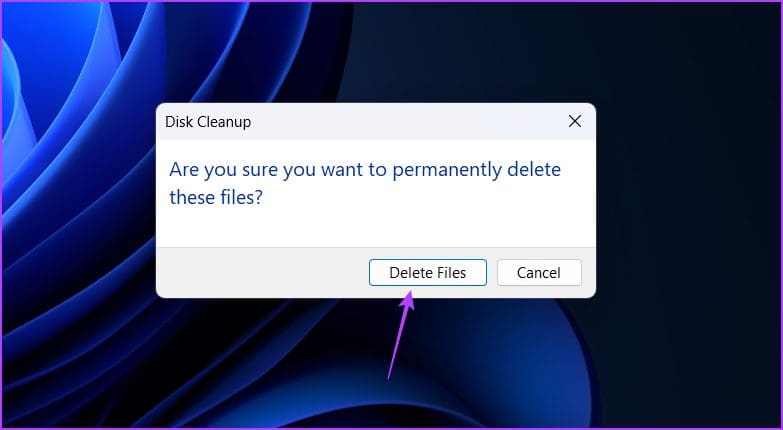
Step 3: Click Delete Files on the prompt that crops up.
Also Read: 5 Ways to Open the Settings App on Windows 11
Was this helpful?
Last updated on 30 August, 2024
Read Next
 6 Best USB-C Docking Stations With Power Delivery
Modern-day laptop docks offer advanced features such as dual HDMI ports, Thunderbolt 3 high-speed connections, and power delivery.
6 Best USB-C Docking Stations With Power Delivery
Modern-day laptop docks offer advanced features such as dual HDMI ports, Thunderbolt 3 high-speed connections, and power delivery.
 USB Power Delivery vs Qualcomm Quick Charge: What’s the Difference
It's 2020, and the smartphone market is buzzing with fast charging standards such as Qualcomm Quick Charge, USB Power Delivery, Samsung Adaptive Fast Charge, and OnePlus Warp Charge.
USB Power Delivery vs Qualcomm Quick Charge: What’s the Difference
It's 2020, and the smartphone market is buzzing with fast charging standards such as Qualcomm Quick Charge, USB Power Delivery, Samsung Adaptive Fast Charge, and OnePlus Warp Charge.
 6 Best Power Banks With USB Type-C Power Delivery
A power bank is a must-have for many of us who are often on the road.
6 Best Power Banks With USB Type-C Power Delivery
A power bank is a must-have for many of us who are often on the road.
 3 Ways to Disable or Enable Search Highlights in Windows 10 and Windows 11
Method 1: Disable or Enable Search Highlights From the Settings App The Settings app on Windows allows you to control most things on your PC.
3 Ways to Disable or Enable Search Highlights in Windows 10 and Windows 11
Method 1: Disable or Enable Search Highlights From the Settings App The Settings app on Windows allows you to control most things on your PC.
 4 Ways to Disable Login Screen After Sleep on Windows 11
Method 1: Disable Login After Sleep From Settings The easiest way to skip the login screen after sleep mode is by modifying the sign-in options in the Settings app.
4 Ways to Disable Login Screen After Sleep on Windows 11
Method 1: Disable Login After Sleep From Settings The easiest way to skip the login screen after sleep mode is by modifying the sign-in options in the Settings app.
 5 Ways to Completely Disable Windows Defender
Method 1: Using Command Prompt Step 1: Press the Windows key on your keyboard, type Command Prompt, and click Run as administrator.
5 Ways to Completely Disable Windows Defender
Method 1: Using Command Prompt Step 1: Press the Windows key on your keyboard, type Command Prompt, and click Run as administrator.
 3 Ways to Disable Taskbar Thumbnail Preview in Windows 11
Method 1: Disable Taskbar Thumbnail Preview Using the Settings App The Settings app is the primary destination for making important changes to your Windows PC.
3 Ways to Disable Taskbar Thumbnail Preview in Windows 11
Method 1: Disable Taskbar Thumbnail Preview Using the Settings App The Settings app is the primary destination for making important changes to your Windows PC.
 4 Ways to Disable Hyper-V in Windows
Method 1: Using Control Panel The simplest method to disable Hyper-V is by using the Control Panel.
4 Ways to Disable Hyper-V in Windows
Method 1: Using Control Panel The simplest method to disable Hyper-V is by using the Control Panel.
The article above may contain affiliate links which help support Guiding Tech. The content remains unbiased and authentic and will never affect our editorial integrity.