Note: The methods and steps below are demonstrated on Windows 11; however, you can follow the same on Windows 10.
Method 1: Using the Control Panel
Step 1: Press the Windows key on your keyboard, type Control Panel, and click Open.
Step 2: Select System and Security.
Step 3: Under Power Options, choose Change what the power buttons do.

Step 4: Click on Change settings that are currently unavailable.

Step 5: In the Shut-down settings, uncheck the Hibernate option and click Save changes.

Method 2: Using the Command Prompt
Note: This method doesn’t work on Virtual Machines.
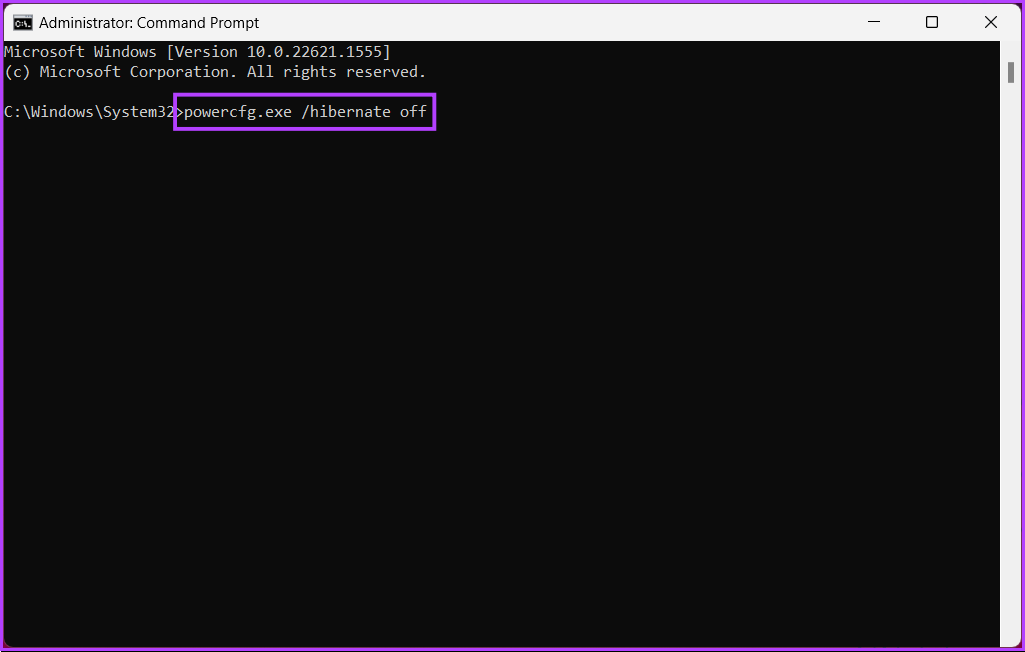
Step 1: Press the Windows key on your keyboard, type Command Prompt, and click Run as administrator.
Step 2: Type the below command and press Enter.
powercfg.exe /hibernate off
Method 3: Using the Windows Registry
Because we will be using Registry Editor, we strongly advise backing up the Windows Registry before proceeding with the steps below.
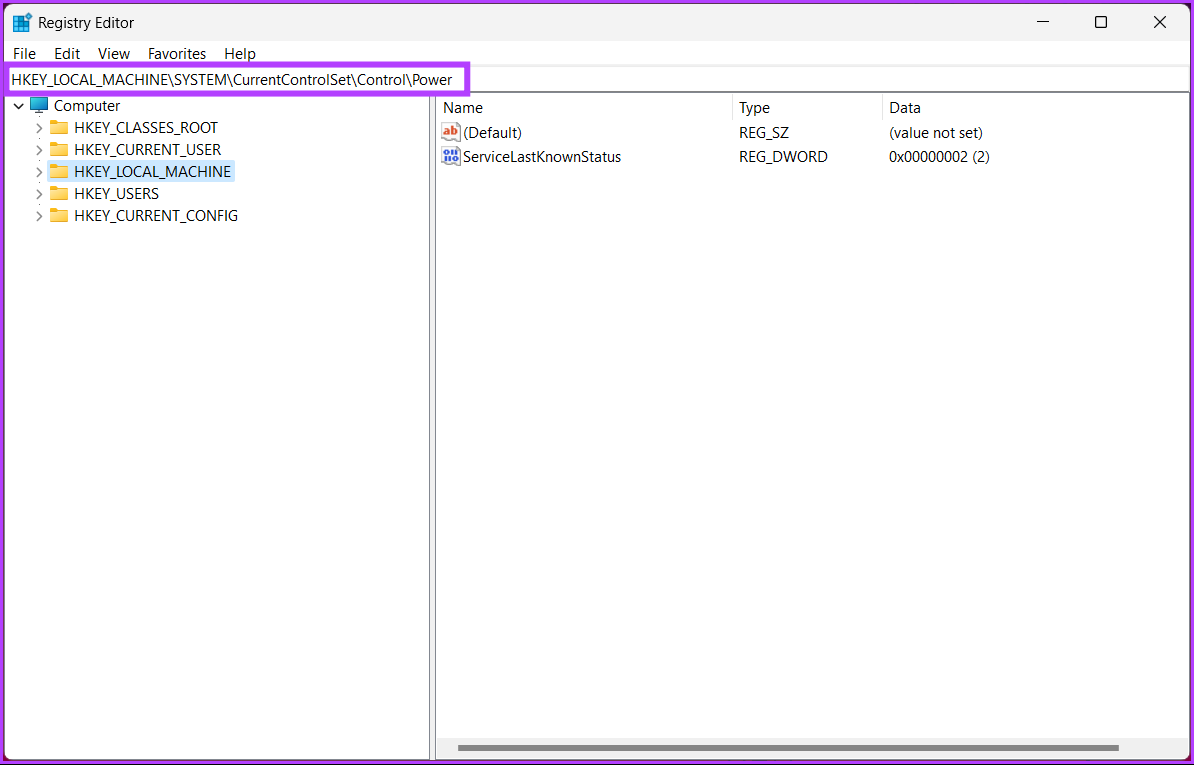
Step 1: Press the Windows key on your keyboard, type Registry Editor, and click Run as administrator. In the prompt, select Yes.
Step 2: In the top address bar, enter the mentioned address.
HKEY_LOCAL_MACHINE\SYSTEM\CurrentControlSet\Control\Power
Note: You can manually navigate to the section too.
Step 3: Double-click HibernateEnabled.

Step 4: Under ‘Edit DWORD (32-bit) Value’, type 0 in the Value Data field and press OK.
Note: Type 1 to enable the hibernation option on Windows.

Finally, restart the system to implement the changes. And that’s it! When the system boots back up, Windows’ hibernation mode will be disabled.
If you don’t want to disable hibernation from the registry, go with the Group Policy editor; check out the next method.
Method 4: Using Windows Group Policy
Group Policy Editor is only available in the Windows 11 Pro and Enterprise versions. You cannot use this method using Windows 11 Home Edition.
Step 1: Press the Windows keys on your keyboard, type gpedit, and click Open.
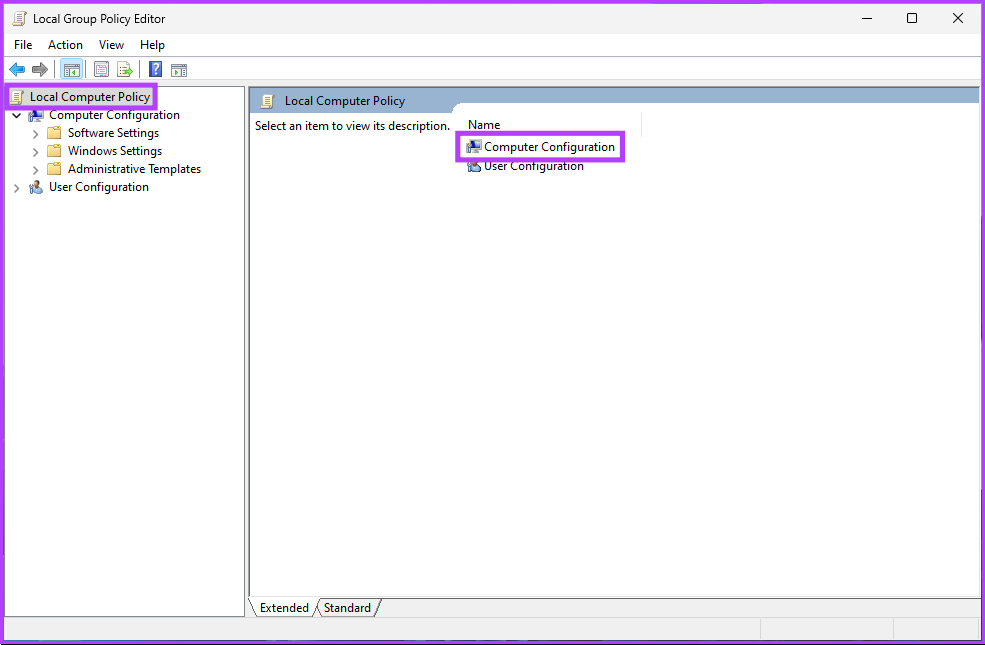
Step 2: In the left pane, under Local Computer Policy, select Computer Configuration.
Step 3: In the right pane, double-click on Administrative Templates.
Step 4: Select the Windows Components option.

Step 5: Under the Windows Components option, locate and click on File Explorer.
Step 6: Navigate to the Show hibernate in the power options menu.
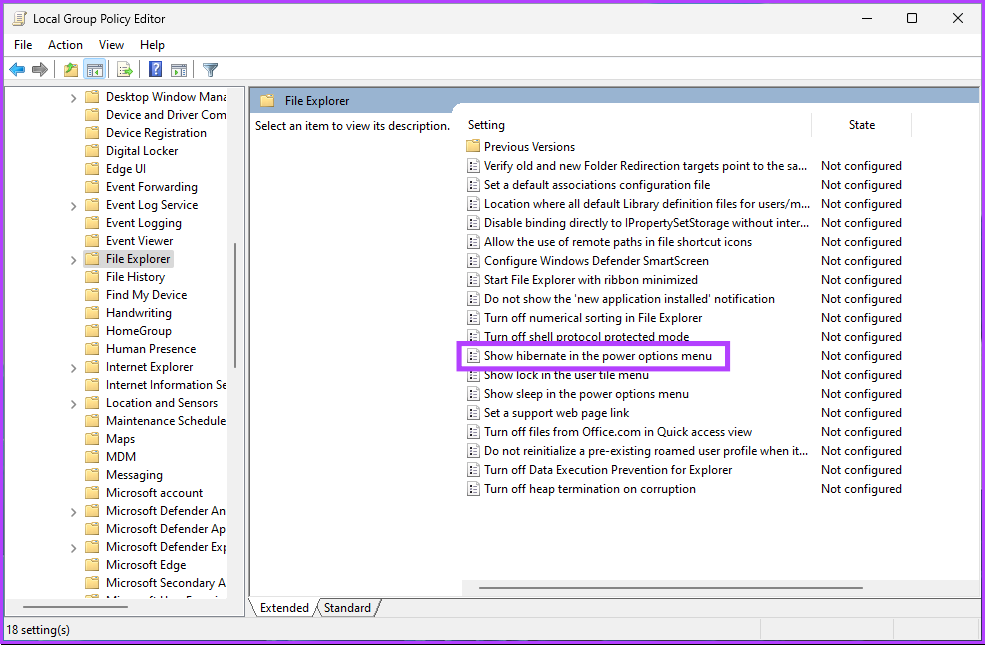
Step 7: In the ‘Show hibernate in the power options menu’ window, select Disabled. Finally, click on Apply > OK.

There you go. Now, all you need to do is reboot Windows. And once it boots back up, it will disable the hibernation mode. If you want to roll back, select the Enable option and click Apply followed by OK under the ‘Show hibernate in the power options menu’ window.
If you are running short of disk space because of hibernation, you can delete the hibernation file on Windows and free up some space.
FAQs
This is because hibernation requires a certain amount of disk space to store the contents of the RAM when the computer goes into hibernation mode. Some devices may not have enough disk space to support hibernation, which is why hibernation mode is disabled by default on certain devices.
Sleep and hibernate are two power-saving modes on Windows. However, they differ in how they save the system state. When you put your computer to sleep, it goes into a low-power state. This means the computer’s state is saved in RAM, and the hardware components are put into low-power mode.
When you put your computer into hibernation, it saves the current system state to the hard drive and then powers off. The next time you turn on your computer, it will restore the previous system state from the hard drive and start-up as if you restarted it. This can be useful when saving power or resuming your work later.
Was this helpful?
Last updated on 31 May, 2024
Read Next
 3 Ways to Disable or Enable Search Highlights in Windows 10 and Windows 11
Method 1: Disable or Enable Search Highlights From the Settings App The Settings app on Windows allows you to control most things on your PC.
3 Ways to Disable or Enable Search Highlights in Windows 10 and Windows 11
Method 1: Disable or Enable Search Highlights From the Settings App The Settings app on Windows allows you to control most things on your PC.
 4 Ways to Disable Touchpad on Windows 11 Laptops
Method 1: Disable Touchpad From Settings The Windows 11 Settings app offers nifty features for modifying touchpad gestures, sensitivity, cursor, and more.
4 Ways to Disable Touchpad on Windows 11 Laptops
Method 1: Disable Touchpad From Settings The Windows 11 Settings app offers nifty features for modifying touchpad gestures, sensitivity, cursor, and more.
 6 Ways to Disable Firewall on Windows
Method 1.
6 Ways to Disable Firewall on Windows
Method 1.
 4 Ways to Disable Sleep Mode in Windows 11
Method 1: Using the Settings App Whether it's something as simple as changing your desktop background or more advanced tasks like turning off sleep mode, you can accomplish it all
4 Ways to Disable Sleep Mode in Windows 11
Method 1: Using the Settings App Whether it's something as simple as changing your desktop background or more advanced tasks like turning off sleep mode, you can accomplish it all
 4 Ways to Disable Office Updates on Windows 11
Method 1: Using an Office App You can use any Microsoft Office app to turn off automatic updates for all Office applications.
4 Ways to Disable Office Updates on Windows 11
Method 1: Using an Office App You can use any Microsoft Office app to turn off automatic updates for all Office applications.
 6 Ways to Disable Virtualization-Based Security (VBS) in Windows
Method 1: Disable VBS/HVCI in Windows Using Core Isolation Step 1: Click on the Start icon, and search and open Core Isolation.
6 Ways to Disable Virtualization-Based Security (VBS) in Windows
Method 1: Disable VBS/HVCI in Windows Using Core Isolation Step 1: Click on the Start icon, and search and open Core Isolation.
 4 Ways to Disable USB Ports on Windows
Method 1: Disable USB Ports Using Device Manager Device Manager is a handy utility that lets you manage all the hardware devices connected to your system.
4 Ways to Disable USB Ports on Windows
Method 1: Disable USB Ports Using Device Manager Device Manager is a handy utility that lets you manage all the hardware devices connected to your system.
 4 Ways to Disable Hyper-V in Windows
Method 1: Using Control Panel The simplest method to disable Hyper-V is by using the Control Panel.
4 Ways to Disable Hyper-V in Windows
Method 1: Using Control Panel The simplest method to disable Hyper-V is by using the Control Panel.
The article above may contain affiliate links which help support Guiding Tech. The content remains unbiased and authentic and will never affect our editorial integrity.