Fix 1: Run the Office Repair Tool
Microsoft offers a handy repair tool that can automatically detect and fix problems with all Office apps, including Outlook. You can start by running this tool to see if that gets Outlook search to work again.
Step 1: Press the Windows key + R to launch the Run dialog box, type appwiz.cpl, and press Enter.
Step 2: In the Programs and Features window, locate and select Microsoft Office Suite or Microsoft 365. Then, click Change at the top.

Step 3: Select Online Repair and click Repair to continue.

Fix 2: Check the Indexing Status
Next, check Outlook’s indexing status on your PC. If Outlook is in the process of indexing your emails, the search feature may not work as well.
Step 1: Open the Outlook app and click the search box at the top.
Step 2: Click the Search Tools menu and select Indexing Status.
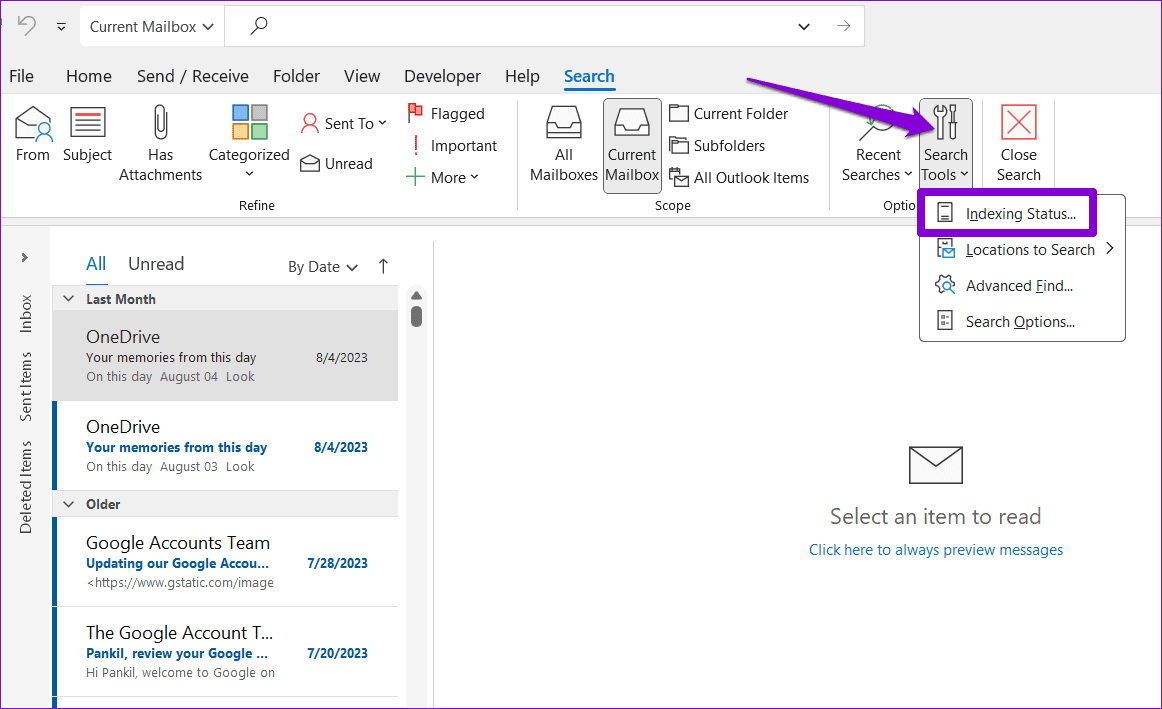
If Outlook is indexing files, wait for the process to finish and then use the search function again.

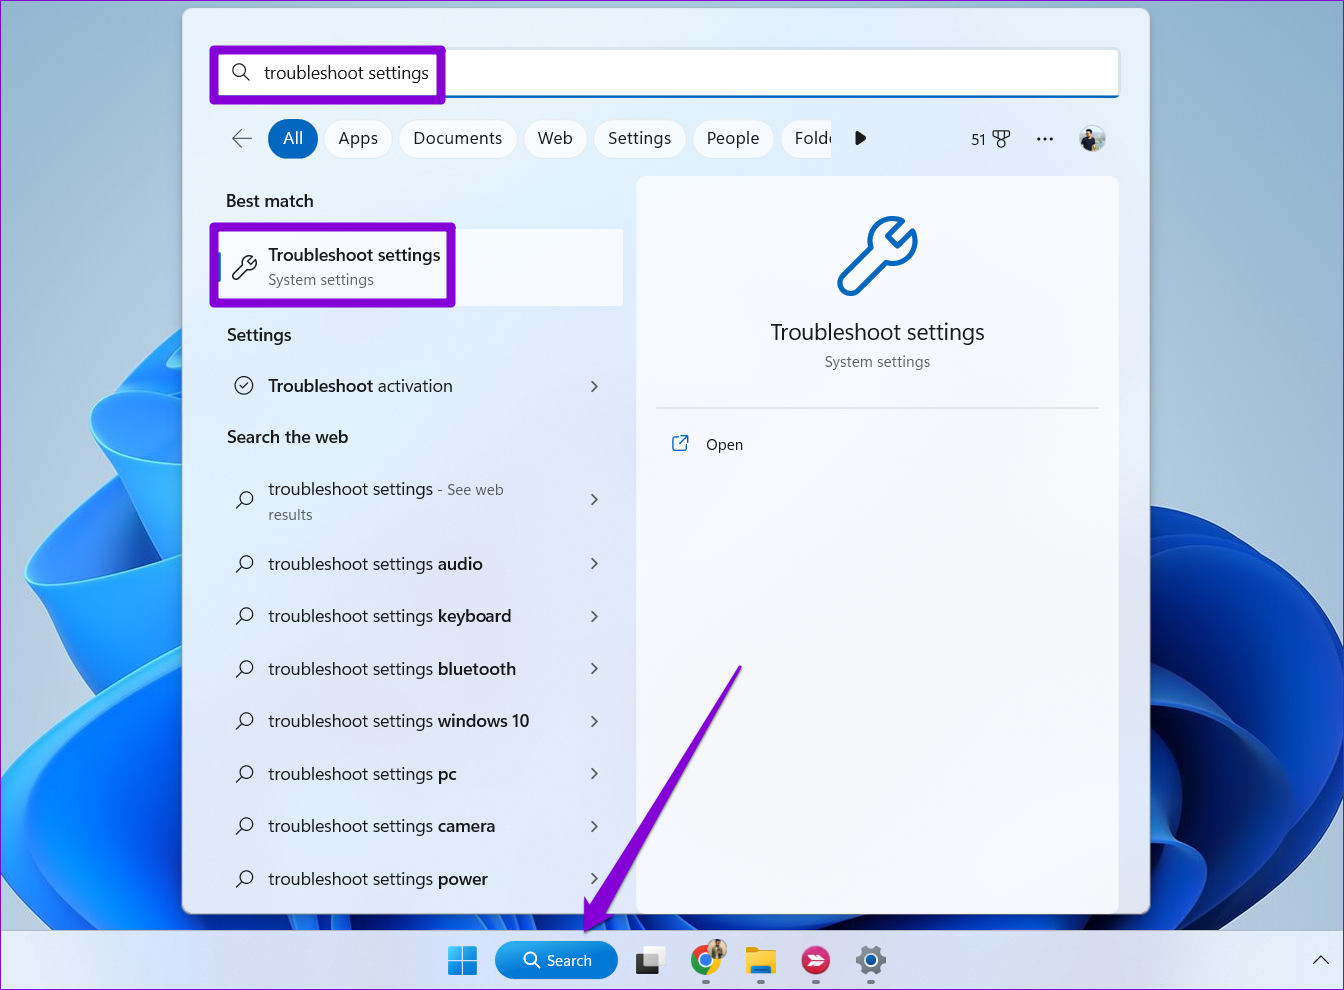
Fix 3: Run the Search and Indexing Troubleshooter
Another thing you can do to fix issues related to Outlook search is run the search and indexing troubleshooter on Windows. Here are the steps for the same.
Step 1: Open the search menu, type troubleshoot settings, and press Enter.
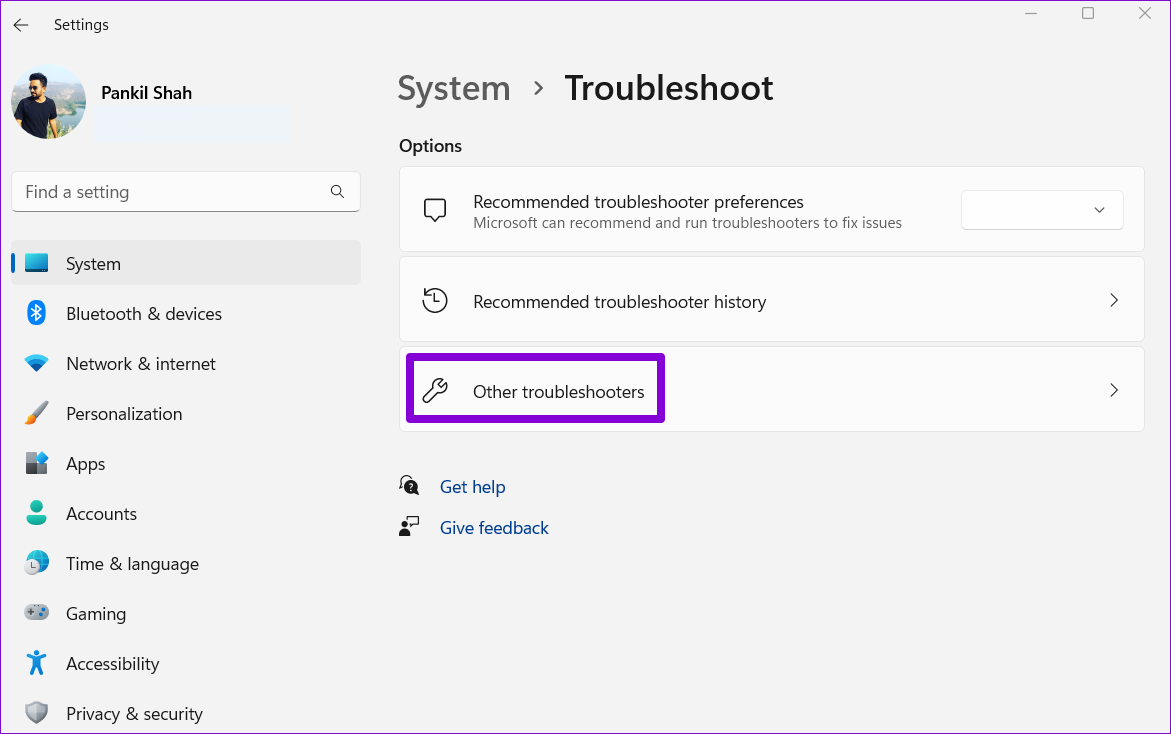
Step 2: Select Other troubleshooters.
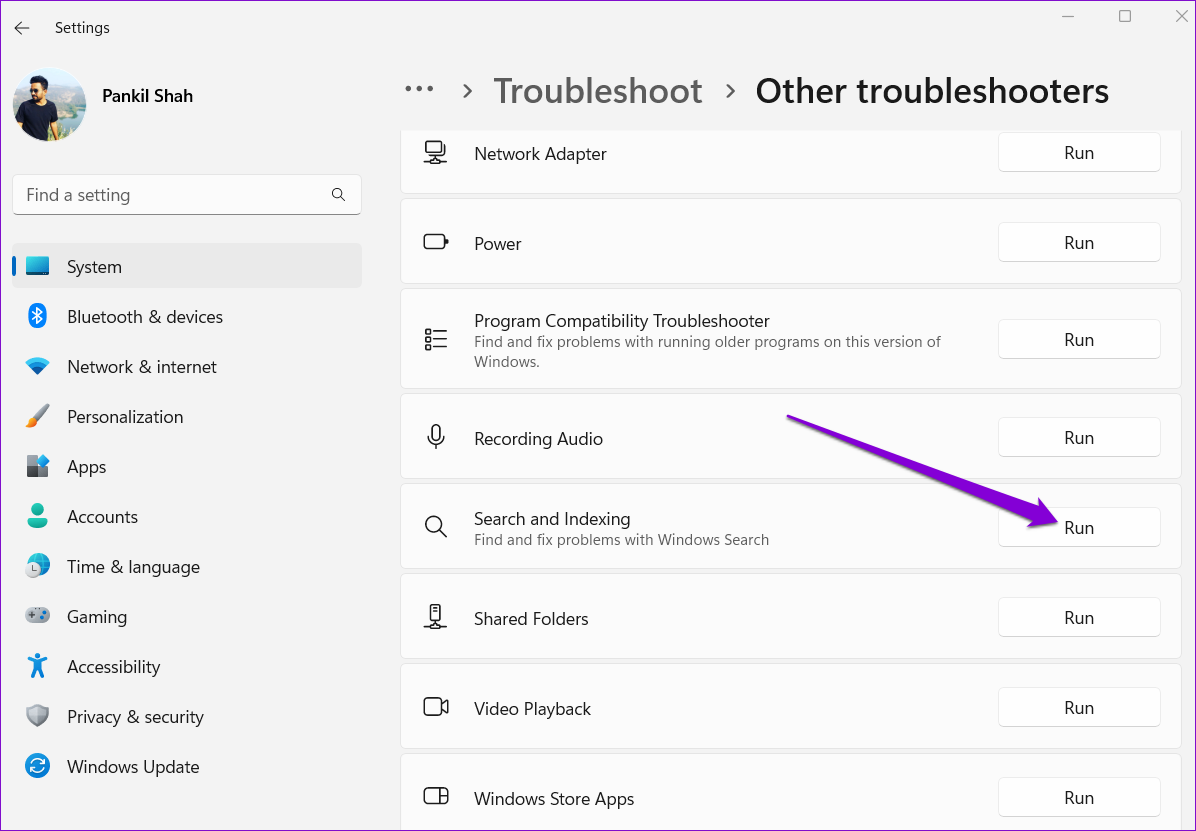
Step 3: Scroll down and click the Run button next to Search and Indexing. Then, follow the on-screen prompts to run the tool.
Fix 4: Rebuild Search Index
Such issues with Outlook search on Windows can also occur if the existing search index has become corrupted. To fix this, you must rebuild the search index on Windows using the following steps.
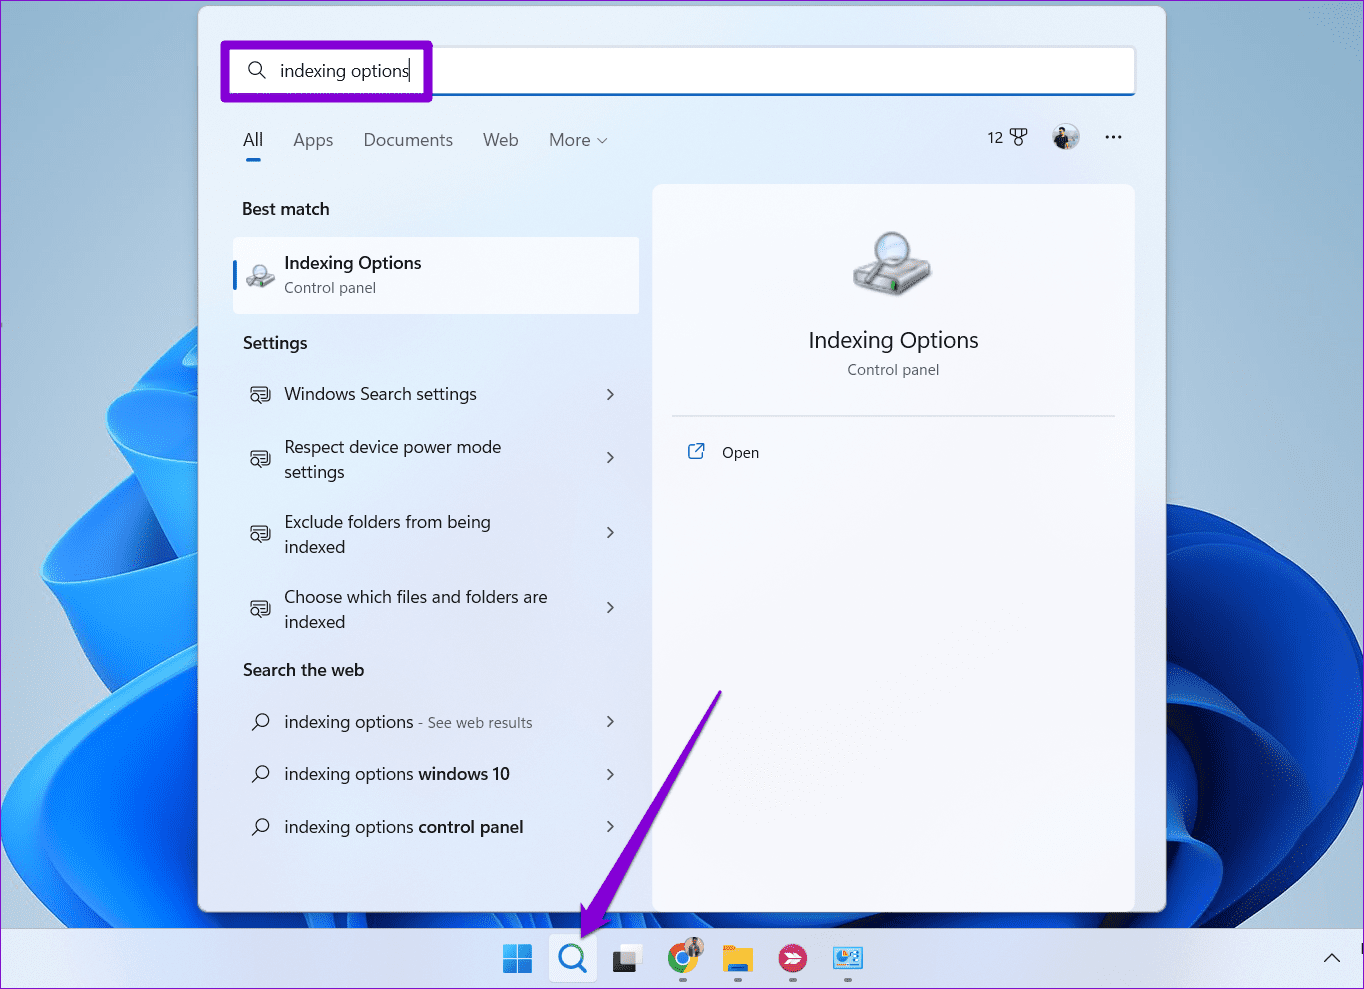
Step 1: Click on the search icon on the taskbar, type indexing options, and press Enter.
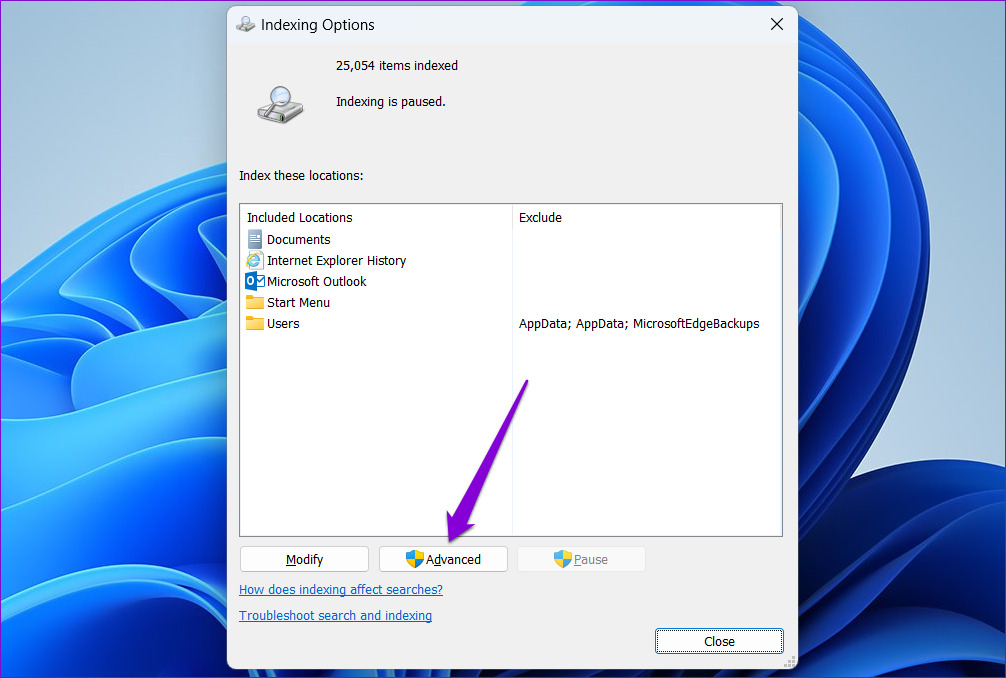
Step 2: In the Indexing Options window, click on Advanced.
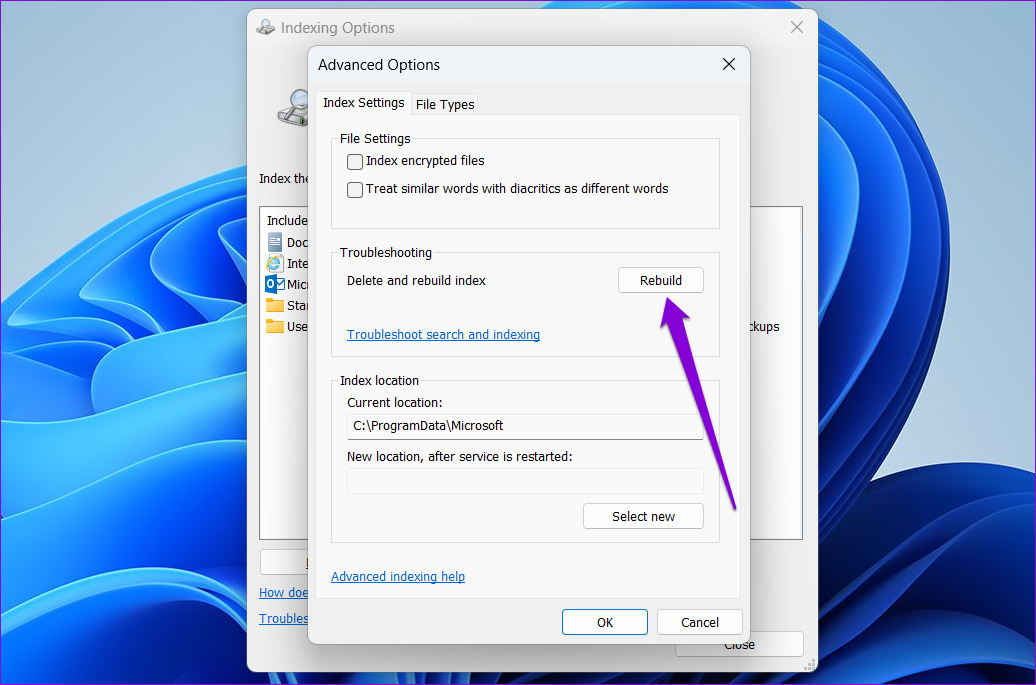
Step 3: Under the Troubleshooting section, click on Rebuild.
This might take a while, so be patient. After Windows finishes rebuilding the index, restart the Outlook app and see if the search works.
Fix 5: Remove Microsoft Outlook From Indexed Locations
If rebuilding the search index proves ineffective, you can prevent Windows from indexing Microsoft Outlook. Several users on a Microsoft Community post managed to resolve the issue with Outlook search using this method. You can also try it.
Step 1: Click the search icon on the taskbar. Type indexing options in the box and press Enter.
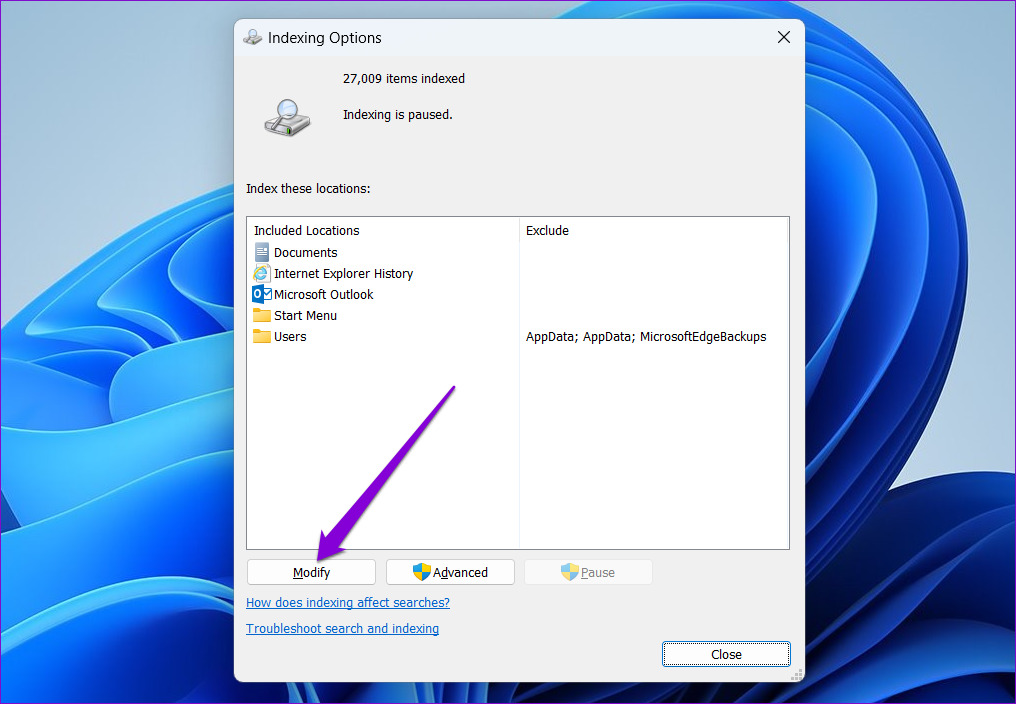
Step 2: Click the Modify button.
Step 3: Uncheck the Microsoft Outlook box and click OK.
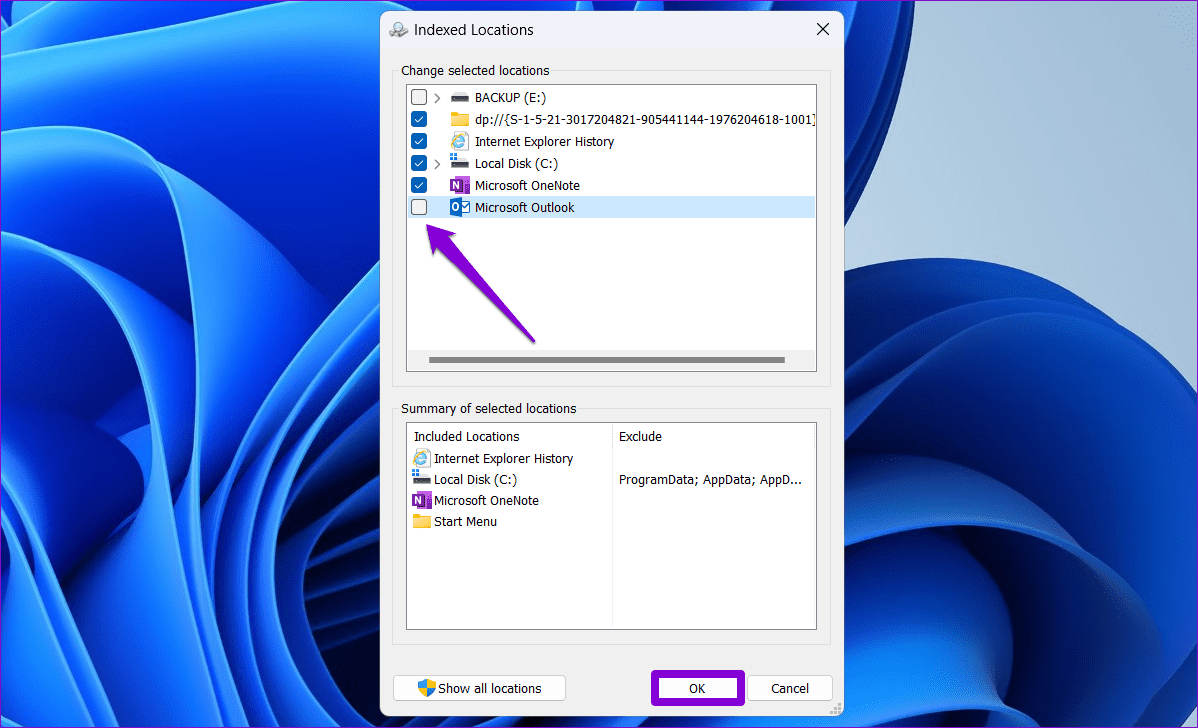
Step 4: Restart Outlook after this and use the search feature again.
Fix 6: Repair Outlook PST Files
Outlook’s search function may stop working on Windows if the existing data files are damaged. Fortunately, Outlook offers a tool that can automatically fix problems with the data files. Here’s how to run it.
Step 1: Press the Windows key + E to open File Explorer and navigate to the following folder.
C:\Program Files\Microsoft Office\root\Office16
Step 2: Double-click the SCANPST.EXE file.

Step 3: Click Start to initiate the scan.
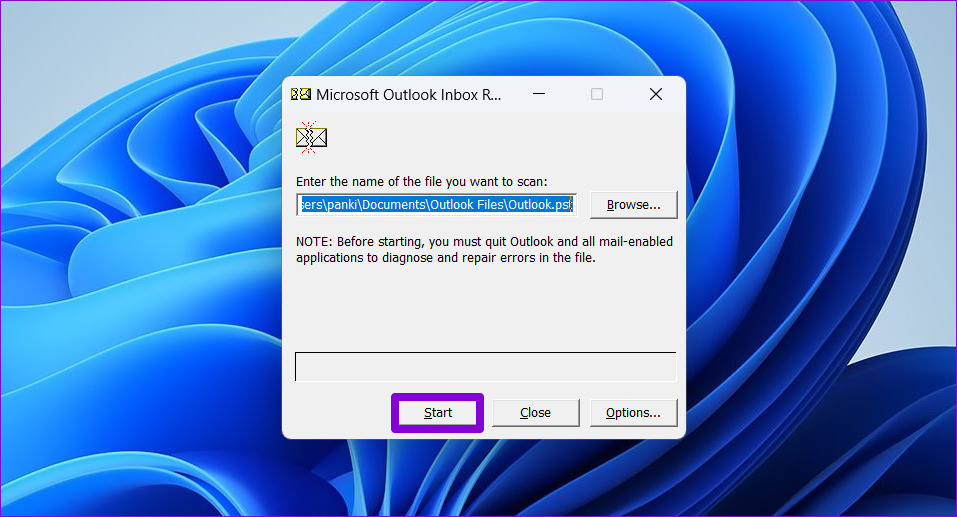
Step 4: If the tool finds any issues, click Repair.

Was this helpful?
Last updated on 30 April, 2024
7 Comments
Leave a Reply
Read Next
 A Guide to Using the Search Bar and Search Operators in Microsoft Outlook
How to Use the Microsoft Outlook Search Bar There are two ways to use the Microsoft Outlook Search bar.
A Guide to Using the Search Bar and Search Operators in Microsoft Outlook
How to Use the Microsoft Outlook Search Bar There are two ways to use the Microsoft Outlook Search bar.
 Top 4 Ways to Change New Outlook Back to Old (Classic View) Outlook on Windows and Mac
The new Outlook app for desktop boasts a modern and simplified design, aligning it more closely with the web version of Microsoft Outlook.
Top 4 Ways to Change New Outlook Back to Old (Classic View) Outlook on Windows and Mac
The new Outlook app for desktop boasts a modern and simplified design, aligning it more closely with the web version of Microsoft Outlook.
 How to Fix Outlook Search Not Working on Mac
Basic Fixes Check your internet speed: When you search from your inbox having numerous email conversations, a good internet connection speeds up the mail search.
How to Fix Outlook Search Not Working on Mac
Basic Fixes Check your internet speed: When you search from your inbox having numerous email conversations, a good internet connection speeds up the mail search.
 5 Ways to Fix File Explorer Search Not Working on Windows 11
Basic Fixes Perform a clean boot: An installed PC software may conflict with the File Explorer app, causing the search issue.
5 Ways to Fix File Explorer Search Not Working on Windows 11
Basic Fixes Perform a clean boot: An installed PC software may conflict with the File Explorer app, causing the search issue.
 Top 9 Ways to Fix Windows 10 Search Not Working
While Windows updates bring new features, at times, they also mess up other things.
Top 9 Ways to Fix Windows 10 Search Not Working
While Windows updates bring new features, at times, they also mess up other things.
 8 Ways to Fix Search Not Working in Windows 11
Fix 1: Restart Windows Search Step 1: Press the Windows key and search for Services.
8 Ways to Fix Search Not Working in Windows 11
Fix 1: Restart Windows Search Step 1: Press the Windows key and search for Services.
 8 Ways to Fix File Explorer Search Not Working on Windows 11
Before you begin, try restarting the File Explorer app and fixing corrupted files using an SFC scan.
8 Ways to Fix File Explorer Search Not Working on Windows 11
Before you begin, try restarting the File Explorer app and fixing corrupted files using an SFC scan.
 3 Ways to Disable or Enable Search Highlights in Windows 10 and Windows 11
Method 1: Disable or Enable Search Highlights From the Settings App The Settings app on Windows allows you to control most things on your PC.
3 Ways to Disable or Enable Search Highlights in Windows 10 and Windows 11
Method 1: Disable or Enable Search Highlights From the Settings App The Settings app on Windows allows you to control most things on your PC.
The article above may contain affiliate links which help support Guiding Tech. The content remains unbiased and authentic and will never affect our editorial integrity.


I’ve applied every method in this article. Nothing works. Outlook 2021 search either does not work at all, or sits for 3 minutes and slowly starts to populate with e-mails from 2017, never displaying anything recent. Quitting search freezes the program. Spent hours on phone with Microsoft tech support; useless. Then they claimed (admitted?) that there is a bug in Win11 which causes this and had idea when it would be fixed.
worked for me from this site :
: https://techcommunity.microsoft.com/t5/outlook/outlook-2007-search-on-windows-11-fails-by-returning-no-results/m-p/2769140
beker
replied to TomP_1475
Sep 24 2021 05:04 PM
@TomP_1475
Hi, I finally fixed the problem on Windows 11 by simply going to:
Control Panel->Indexing Options->Modify->Unchecked “Microsoft Office Outlook”
Save everything and restart the Outlook.
Now I can search my mail box.
I thought keeping outlook checked is the right thing to do.
But Microsoft interface and docs, sometimes are not intuitive.
Hope this helps.
this worked for me.. thanks!
This worked for me-
1. Unchecked “Microsoft office outlook” from Indexing options
2. modify registry settings for PreventIndexingOutlook with value 1
3. restart Outlook, started indexing
Hi, This article is very helpful! My Outlook always mis-indexed recent (around one week) mails, and for now this issue is fixed with registry-editor approach. Thank you.
There is a small mistake the Key name must not be –> “WindowsSearch” but “Windows Search”!
There must be a space in between!
Thanks for bringing that up. We’ve fixed it.