Basic Fixes:
- Turn off the Night Light: While Night Light helps reduce eye strain by turning your screen to a warmer shade, it can make the computer monitor screen appear yellow. So, turn off the Night Light on your laptop and check again.
- Check the screen for damage: If your laptop’s screen is damaged, it can cause issues with the screen colors. So, ensure your device’s screen and body are free of any kind of damage.
- Restart Windows 11: Restarting your Windows 11 laptop will apply any setting change and might solve the yellow screen issue, especially if it is caused due to a temporary glitch.
- Uninstall recently installed apps: Certain apps can influence your device’s color settings. If you have been seeing a yellowish screen after installing an app, uninstall it. This will help your device take back display color control, setting the screen back to normal.
Fix 1: Add New sRGB Profile
Issues with existing color profiles can cause display issues, like the screen appearing yellowish or colors not displaying properly. When this happens, you can set a new sRGB profile for your laptop’s screen. Follow the below steps to do it.
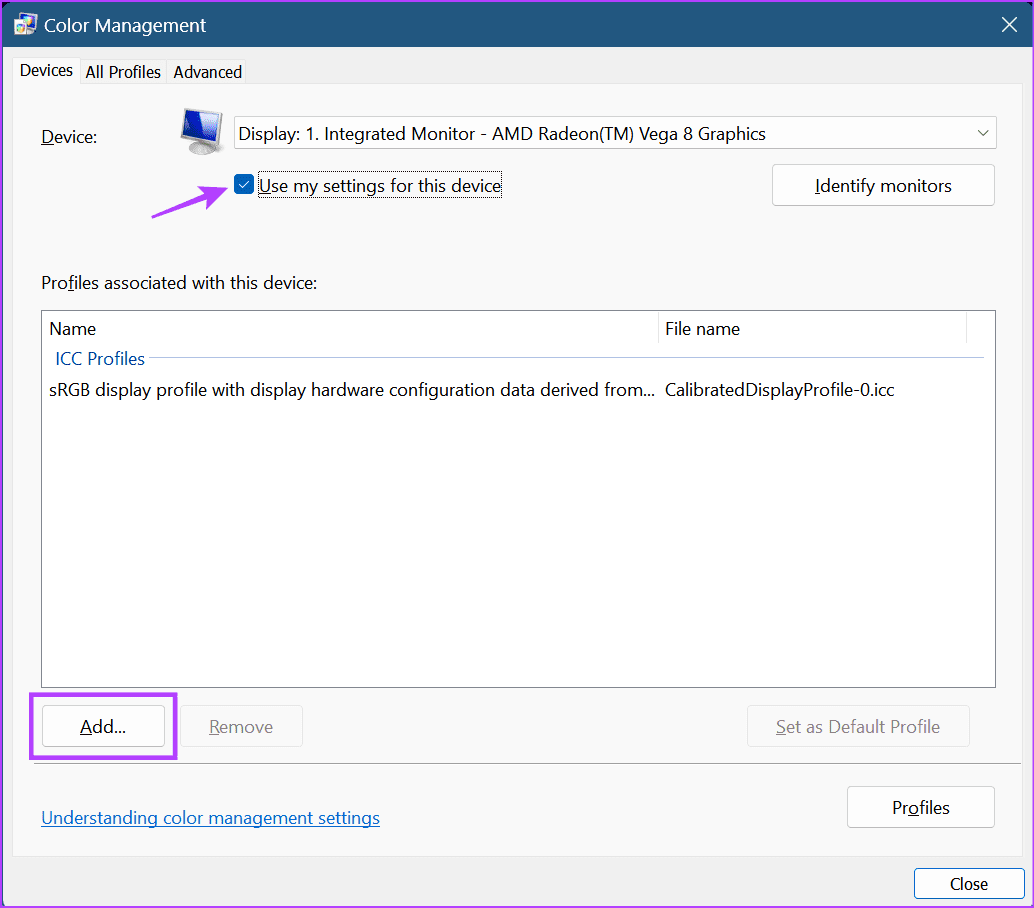
Step 1: Open Color Management and check the Use my settings for this device option.
Step 2: When the option becomes available, click on Add.
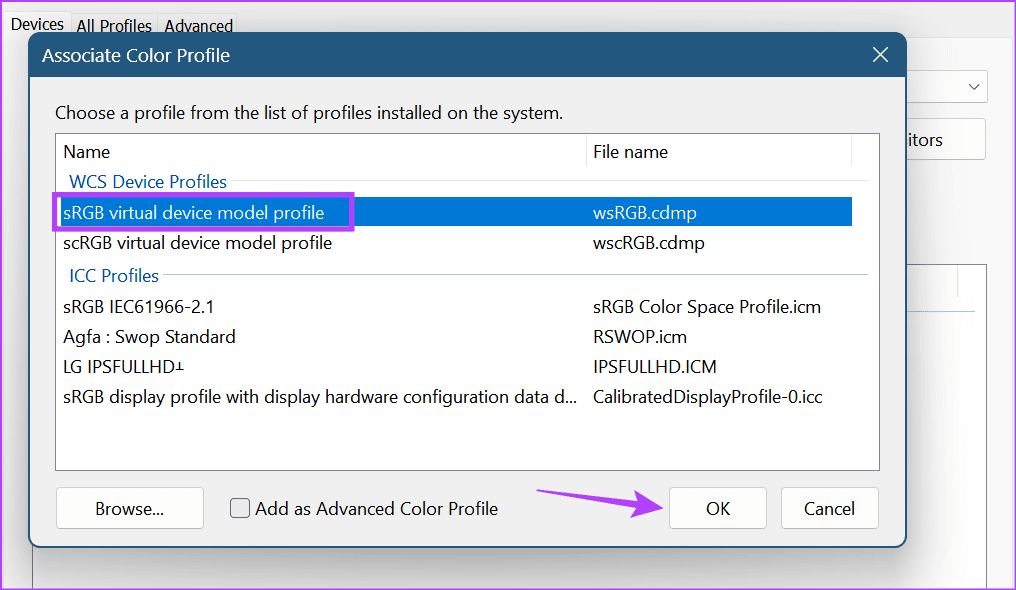
Step 3: From the list of options, select the relevant color profile and click on OK.
Step 4: Click on the selected color profile and click on Set as Default Profile.

After that, click on Close to save the settings and close the window. Then, check if the issue is resolved.
Fix 2: Reset Color Profile Settings to Default
If changing the color profile doesn’t work, you can reset all color management settings to default. This will help set all display color settings to system default and remove the yellow tint from your Windows 11 laptop screen. Here’s how.
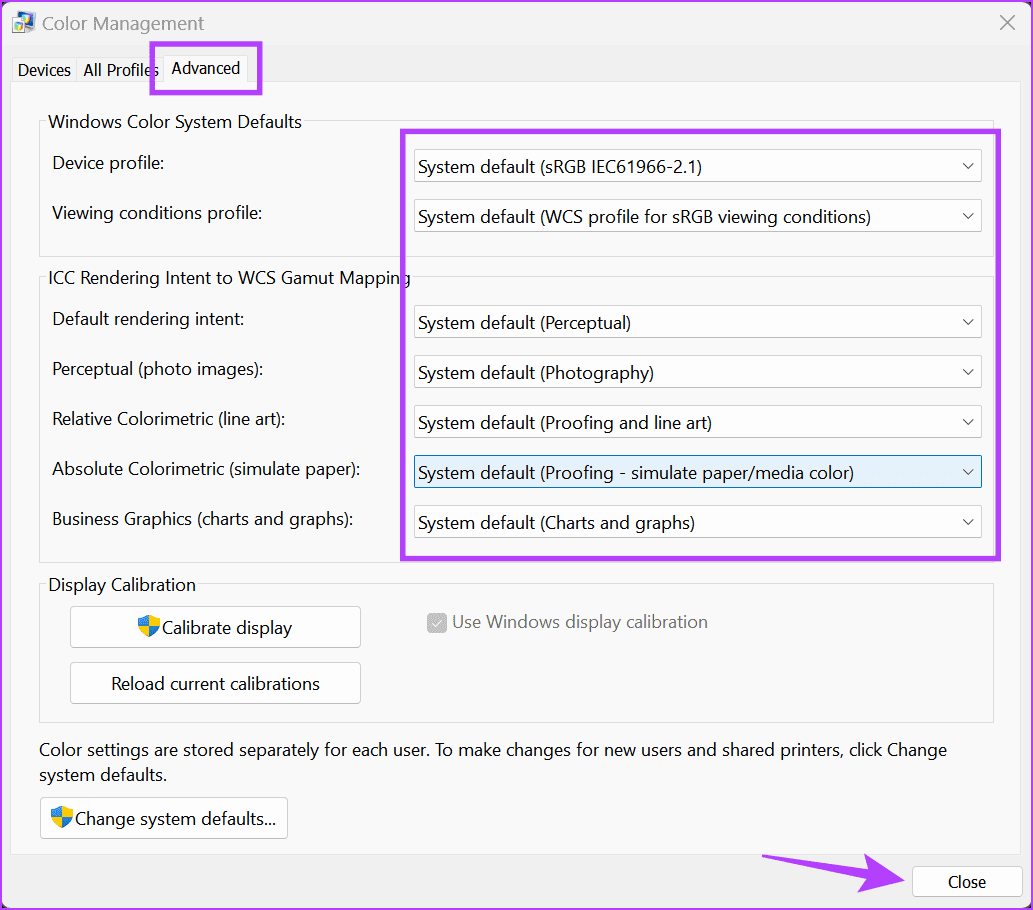
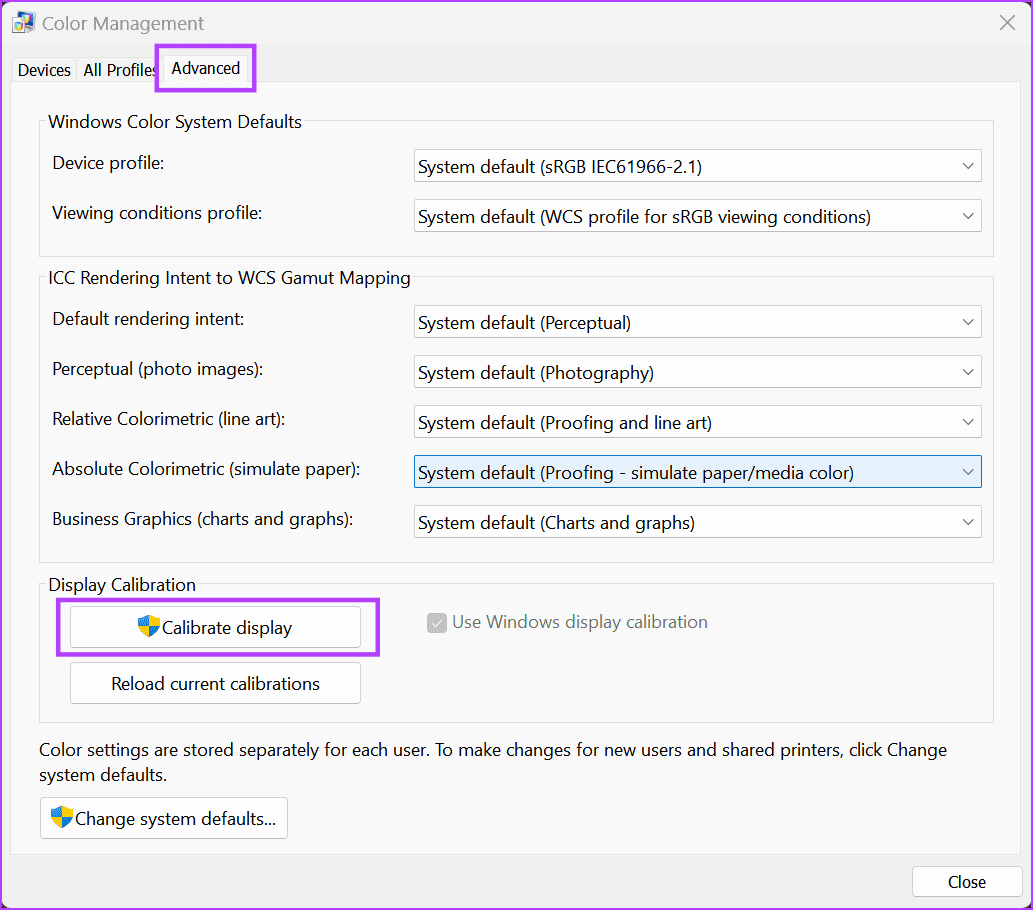
Step 1: Open the Color Management and, from the menu options, click on Advanced.
Step 2: Use all the drop-downs and set all the settings to System default. Once done, click on Close.
Also Read: How to fix washed out colors after Windows 11 update
Fix 3: Calibrate Display Color
While laptop screens don’t regularly require calibration, it can be done when required. Do this if you’ve been seeing a yellowish tint or if the HDR looks washed out on Windows 11. This will help ensure your device colors are displayed as accurately as possible. Here’s how.
Step 1: Open Color Management and click on Advanced. Click on Calibrate display.
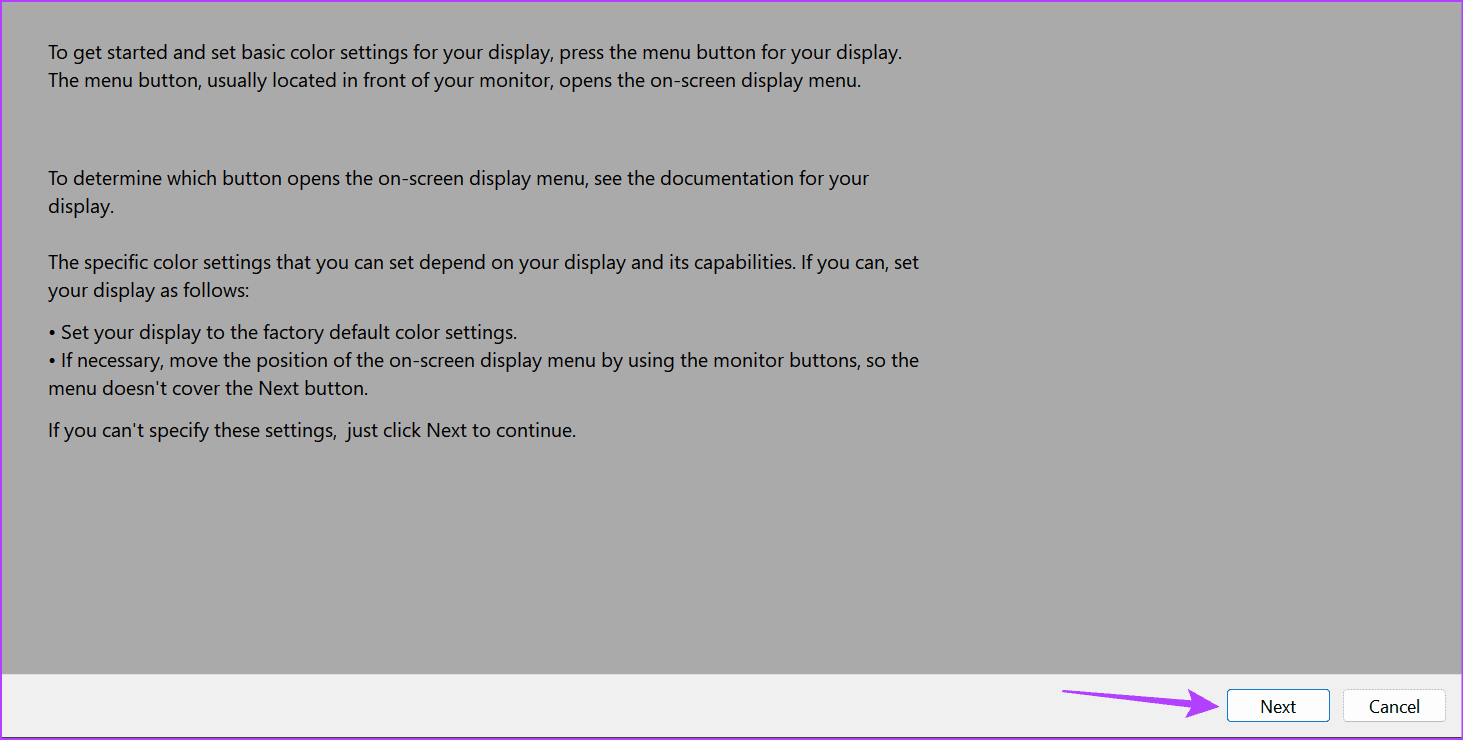
Step 2: Click on Next to proceed.

Step 3: Again, click on Next.
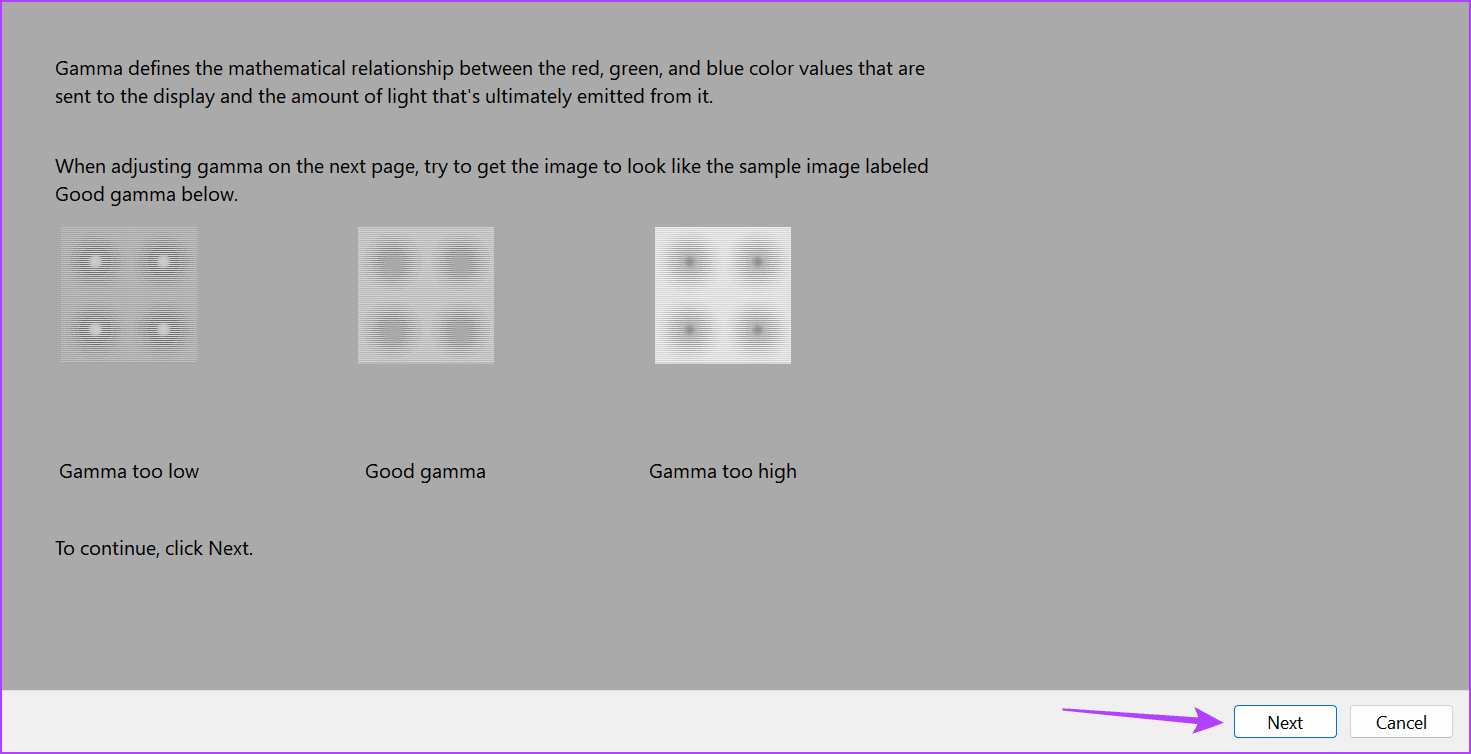
Step 4: Go through the information for checking your device’s display color settings and click on Next.
Step 5: Use the slider to make the dots invisible as per the previous page. Once done, click on Next.

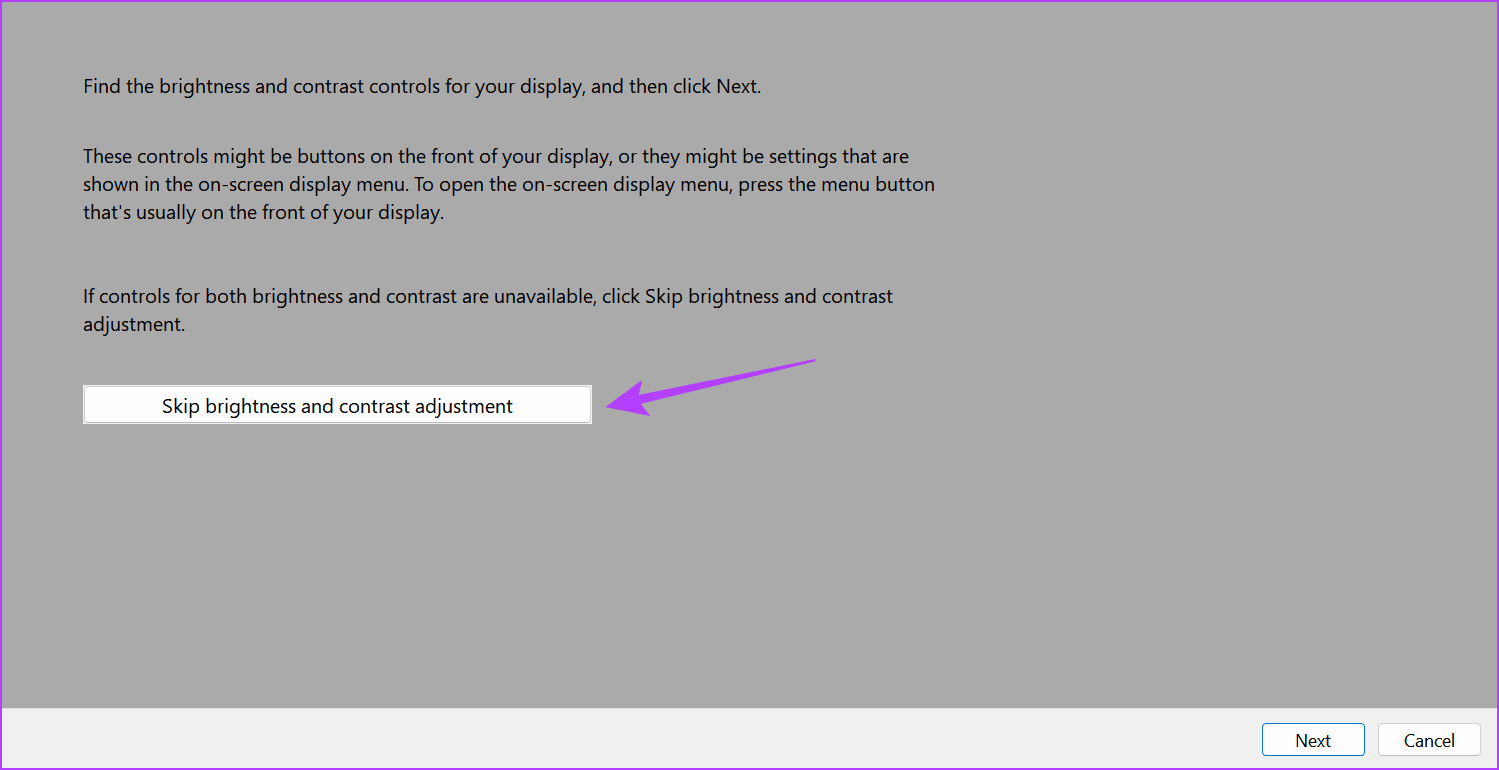
Step 6: Click on Skip brightness and contrast adjustment to start screen color adjustment.
Note: If you wish to recalibrate your device’s brightness and contrast settings, click on Next and follow the on-screen instructions.
Step 7: Click on Next.
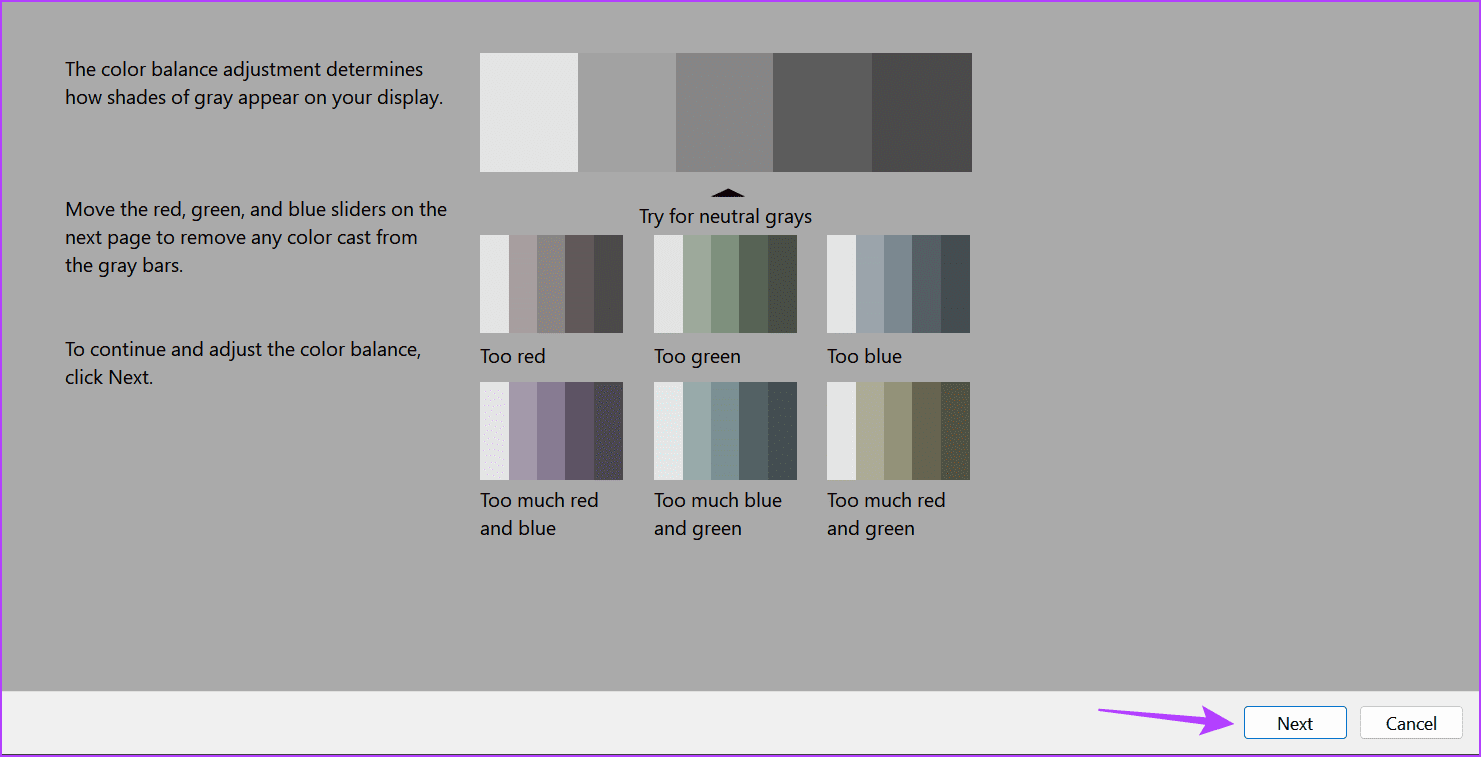
Step 8: Use the sliders to make the pallet colors appear as neutral gray as possible. Then, click on Next.

Step 9: Click on Finish to save the changes.

Fix 4: Update the Display Driver
In case your device’s display drivers are out of date, it might cause certain functions to not work as expected. This might also be one of the reasons why your computer monitor screen turned yellow. In this case, you can check and install the relevant driver updates on your Windows 11 device. Here’s how.
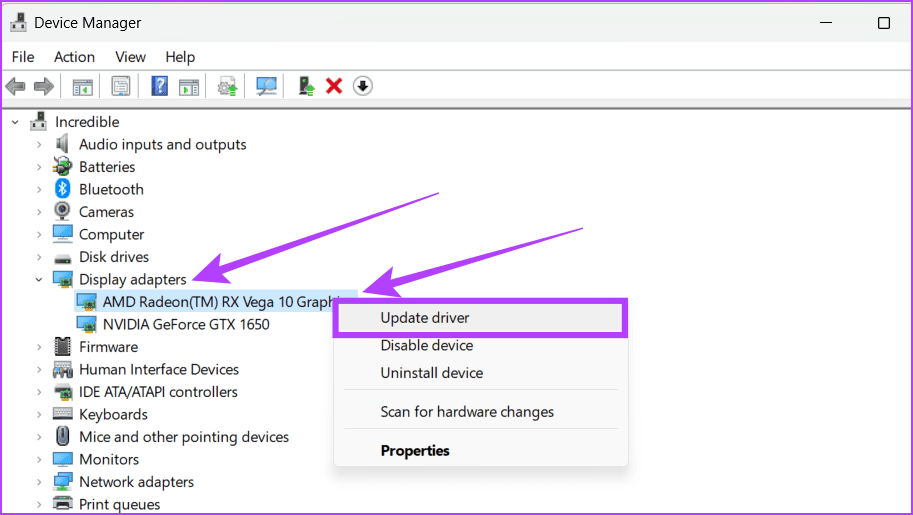
Step 1: Open Device Manager and click on Display adapters.
Step 2: Right-click on the available display driver and click on Update driver.
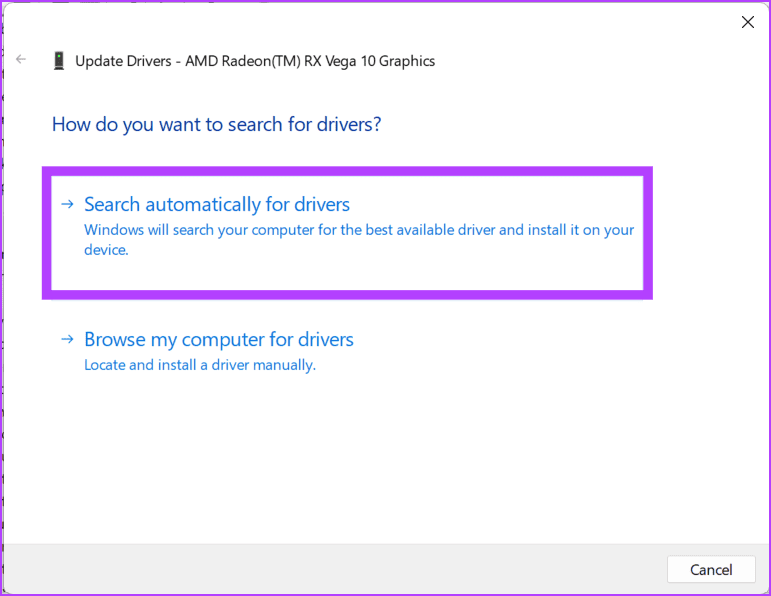
Step 3: Click on Search automatically for drivers.
If an update is available, wait for it to download and install. You can repeat this process for other display drivers as well. Then, restart your Windows 11 laptop and see if the issue has been fixed.
Also Read: How to fix ‘Display Driver Failed to Start’ error in Windows 10 and 11
Fix 5: Reset Windows 11
While using the Reset this PC option might seem daunting, it can help you fix most device issues. You get the option to keep your computer’s data while resetting all your computer settings back to default. Do this if you still see a yellowish tint on your device’s display and can’t figure out why. Here’s how.
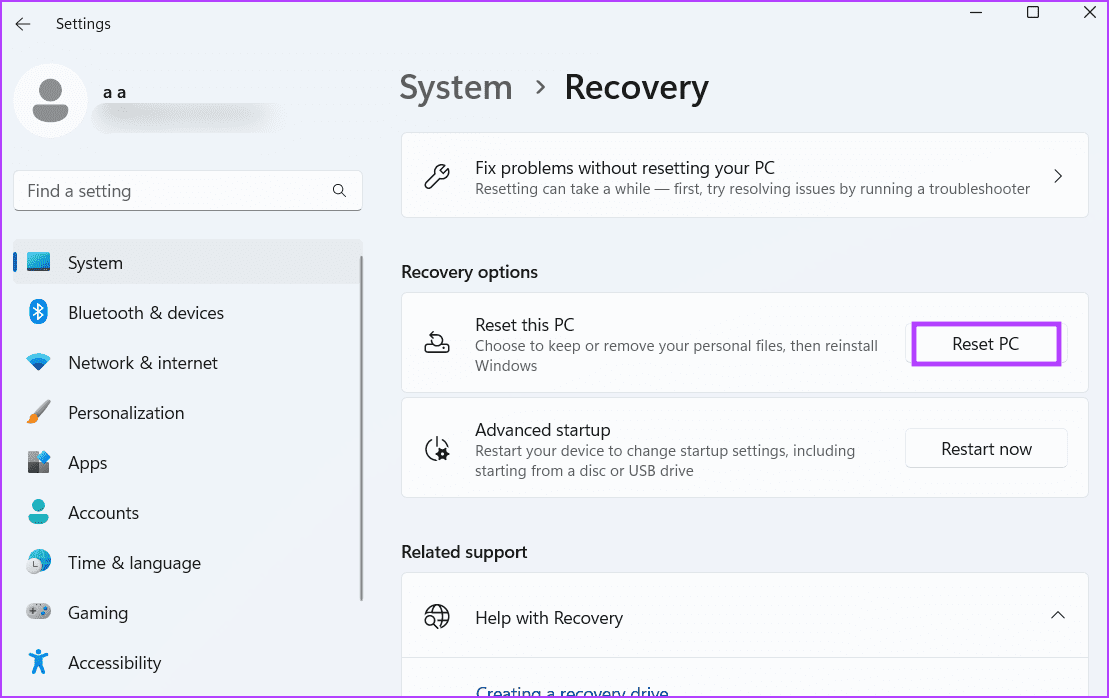
Step 1: Open Settings and select System from the left sidebar. Click on the Recovery.

Step 2: Go to the Reset this PC option and click on Reset PC.
Step 3: Here, click on Keep my files to save your personal files.
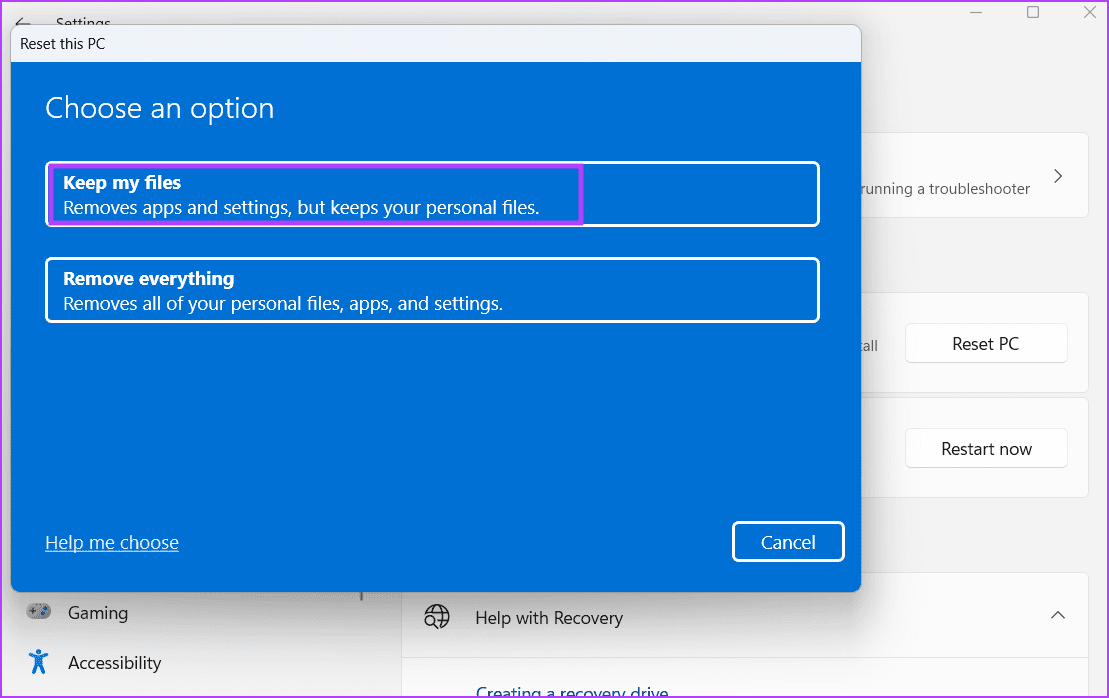
Once done, follow the on-screen instructions to finish resetting your PC. Then, wait for Windows to restart and check if your PC’s screen colors have returned to normal.
Was this helpful?
Last updated on 09 July, 2024
Read Next
 4 Ways to Fix Windows 11 Black Screen Issue
Try Basic Fixes Check connections: If you are using a Windows 11 desktop, check the wired connections between your CPU and the monitor.
4 Ways to Fix Windows 11 Black Screen Issue
Try Basic Fixes Check connections: If you are using a Windows 11 desktop, check the wired connections between your CPU and the monitor.
 5 Ways to Fix Blurry Screen Issue on Windows 11
Fix 1: Change Display Resolution and Scale One of the most common causes of a blurry Windows 11 screen is the incorrect display resolution or scale.
5 Ways to Fix Blurry Screen Issue on Windows 11
Fix 1: Change Display Resolution and Scale One of the most common causes of a blurry Windows 11 screen is the incorrect display resolution or scale.
 5 Ways to Fix the Black Screen Issue in Amazon Prime Video on Windows
Try Basic Fixes Temporarily disable your VPN connection: Although VPNs are great for maintaining privacy, they can often cause problems with streaming services such as Prime Video, especially if you
5 Ways to Fix the Black Screen Issue in Amazon Prime Video on Windows
Try Basic Fixes Temporarily disable your VPN connection: Although VPNs are great for maintaining privacy, they can often cause problems with streaming services such as Prime Video, especially if you
 How to Solve Vertical Blue Lines Appearing on Laptop Screen
Check if the Error is Software or Hardware-based To fix the vertical blue lines on your laptop screen, you need to find the root cause.
How to Solve Vertical Blue Lines Appearing on Laptop Screen
Check if the Error is Software or Hardware-based To fix the vertical blue lines on your laptop screen, you need to find the root cause.
 4 Ways to Fix Windows Laptop Not Connecting to Mobile Hotspot on Android
Try Basic Fixes Switch to Airplane Mode or Restart Devices: It will ensure the removal of temporary blocks that show up if the device is turned on for a long
4 Ways to Fix Windows Laptop Not Connecting to Mobile Hotspot on Android
Try Basic Fixes Switch to Airplane Mode or Restart Devices: It will ensure the removal of temporary blocks that show up if the device is turned on for a long
 4 Ways to Fix No Battery Is Detected on Windows 11 Laptop
Fix 1: Reconnect the Battery and Perform a Power Cycle You can start by removing your laptop’s battery if possible and installing it again.
4 Ways to Fix No Battery Is Detected on Windows 11 Laptop
Fix 1: Reconnect the Battery and Perform a Power Cycle You can start by removing your laptop’s battery if possible and installing it again.
 3 Ways to Fix Windows 11 Laptop Showing Wrong Battery Percentage
https://youtu.be/5XEdrPhBF9s Try Basic Fixes Install Windows updates: If you have disabled automatic updates on your device, you might need to look for newer updates manually.
3 Ways to Fix Windows 11 Laptop Showing Wrong Battery Percentage
https://youtu.be/5XEdrPhBF9s Try Basic Fixes Install Windows updates: If you have disabled automatic updates on your device, you might need to look for newer updates manually.
 Top 11 Ways to Fix Overheating on a Windows Laptop
You are up for a below-average experience when your Windows laptop reaches an abnormal high You notice app crashes, glitchy gaming, and a major slowdown in basic tasks.
Top 11 Ways to Fix Overheating on a Windows Laptop
You are up for a below-average experience when your Windows laptop reaches an abnormal high You notice app crashes, glitchy gaming, and a major slowdown in basic tasks.
The article above may contain affiliate links which help support Guiding Tech. The content remains unbiased and authentic and will never affect our editorial integrity.