Your laptop’s battery is an important piece of hardware that allows you to work from anywhere. However, when Windows 11 fails to detect your laptop’s battery, it may throw a ‘No battery is detected’ error at you and force you to stay connected to a power source at all times.

If you’re experiencing a similar issue yourself, then fret not. In this post, we’ve put together 6 effective troubleshooting tips to help you fix the ‘No battery is detected’ error on your Windows 11 laptop. So, let’s check them out.
1. Reconnect the Battery
You can start by removing your laptop’s battery and installing it again. While you’re at it, clean the connecting points and the battery compartment with a dry cloth. The idea is to rule out any connection issues caused by an unintentional fall or loose contact.
After putting the battery back in its place, check to see if Windows can detect it.
2. Perform a Power Cycle
If reconnecting the battery doesn’t work, you can try performing a power cycle. This will help discharge residual power from the laptop’s capacitor and reset all the temporary configurations. As a result, Windows will have to do a complete scan of the system, including the battery.
To perform a power cycle on your laptop, follow the steps below.
Step 1: Power off your laptop and unplug all the external devices.
Step 2: Remove your laptop’s battery and press the physical power button for around 15 seconds.
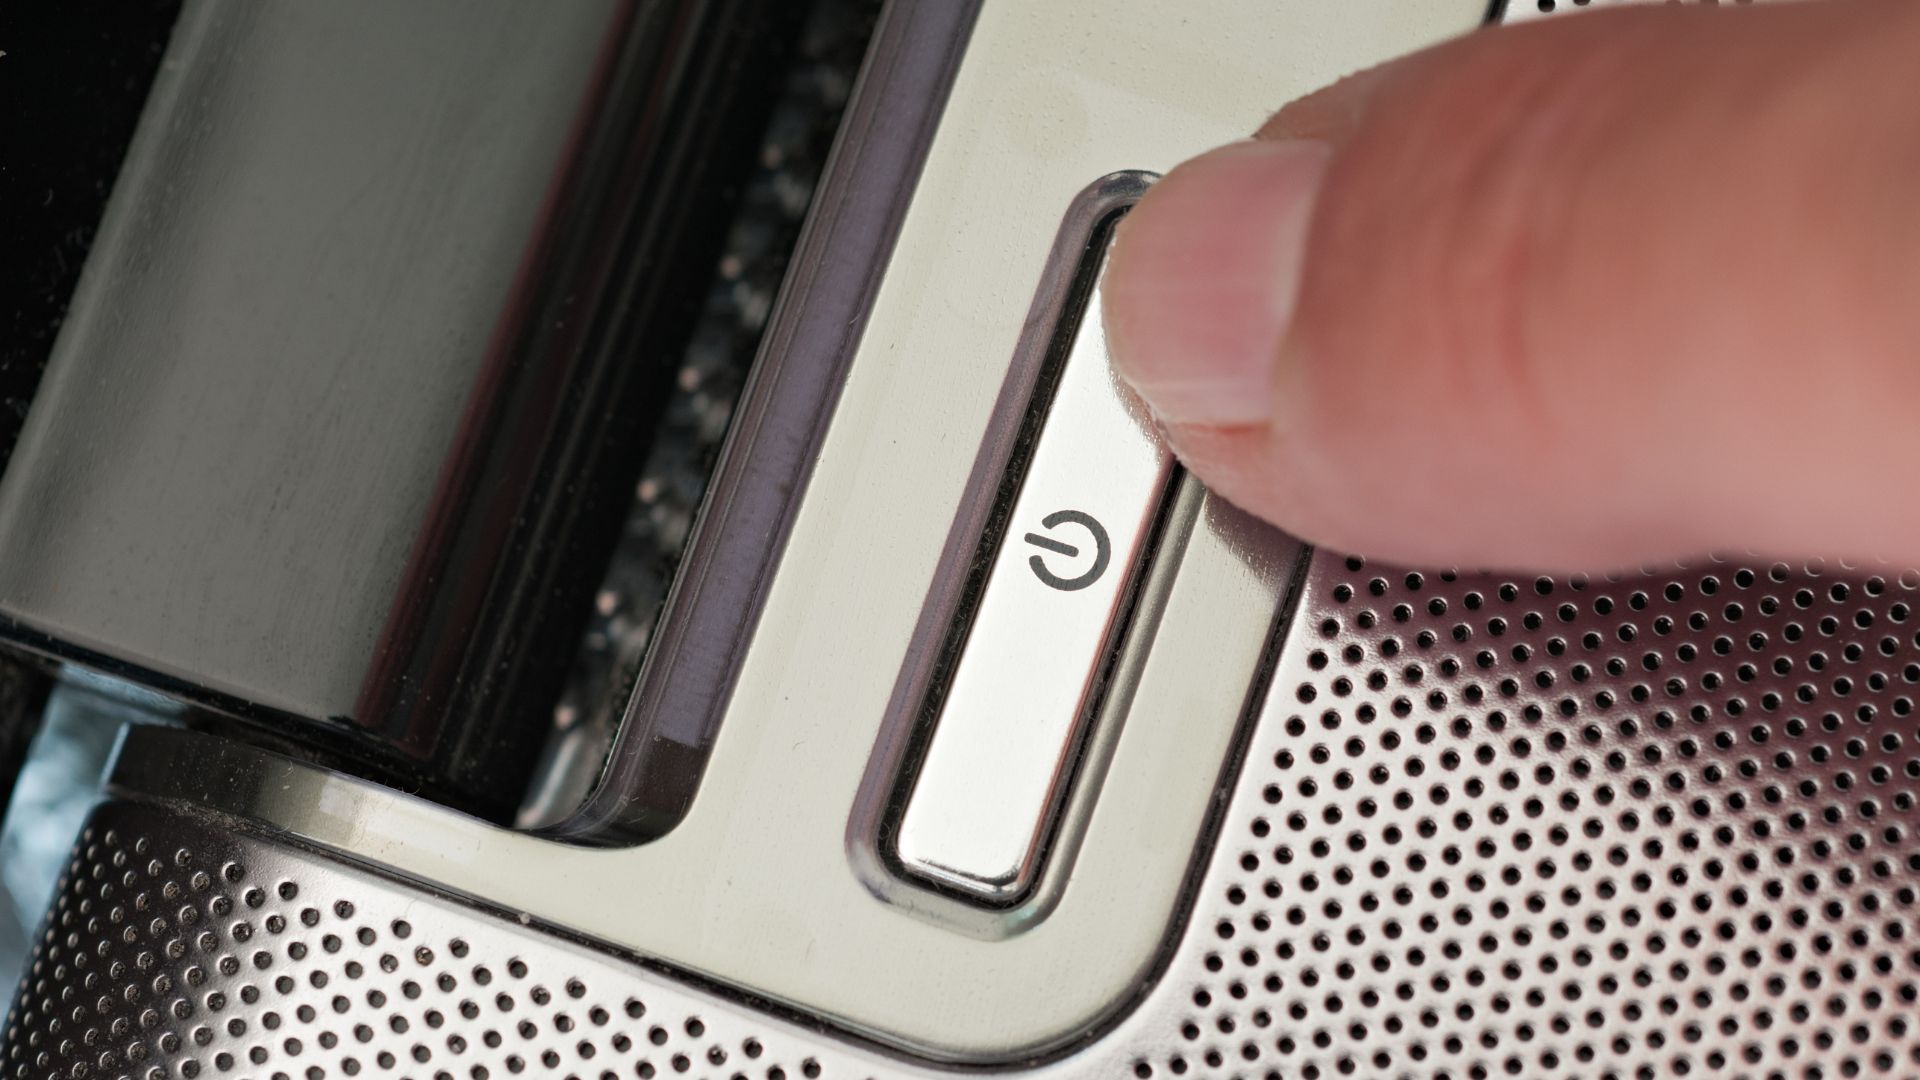
Step 3: Re-insert the battery and boot your PC. After that, plug in the power cord and see if Windows can detect the battery.
3. Run Power Troubleshooter
Windows 11 offers a troubleshooter for just about every utility. You can employ the Power troubleshooter to allow Windows to automatically detect and resolve any battery-related issues. Here’s how.
Step 1: Open the Start menu, type in troubleshooter settings, and press Enter.
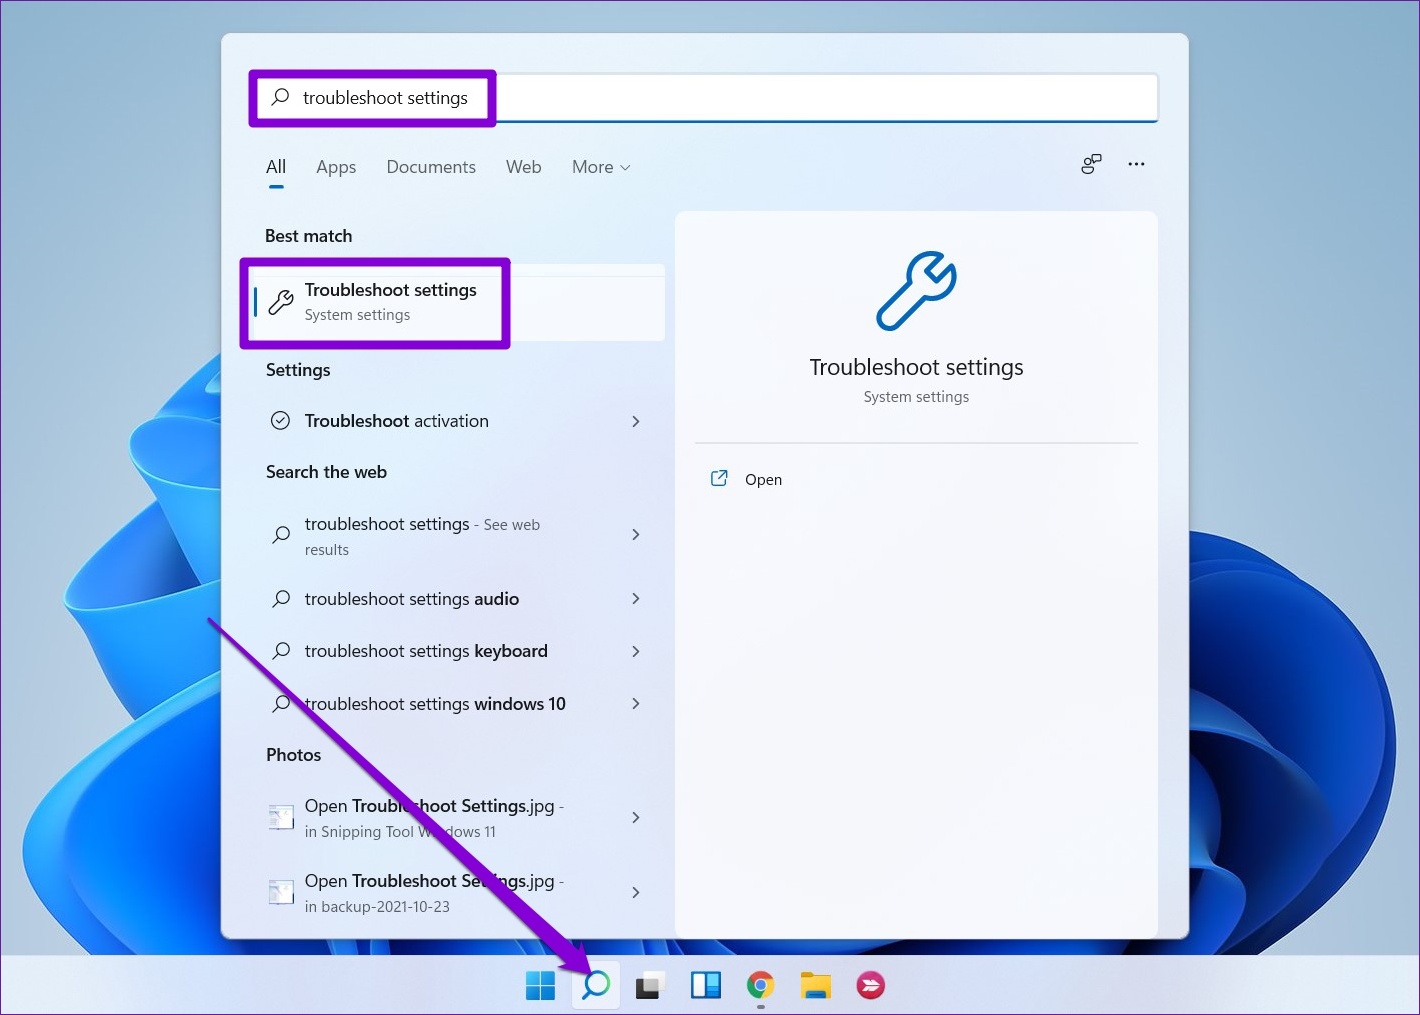
Step 2: Go to Other troubleshooters.

Step 3: Lastly, click on the Run button next to Power.
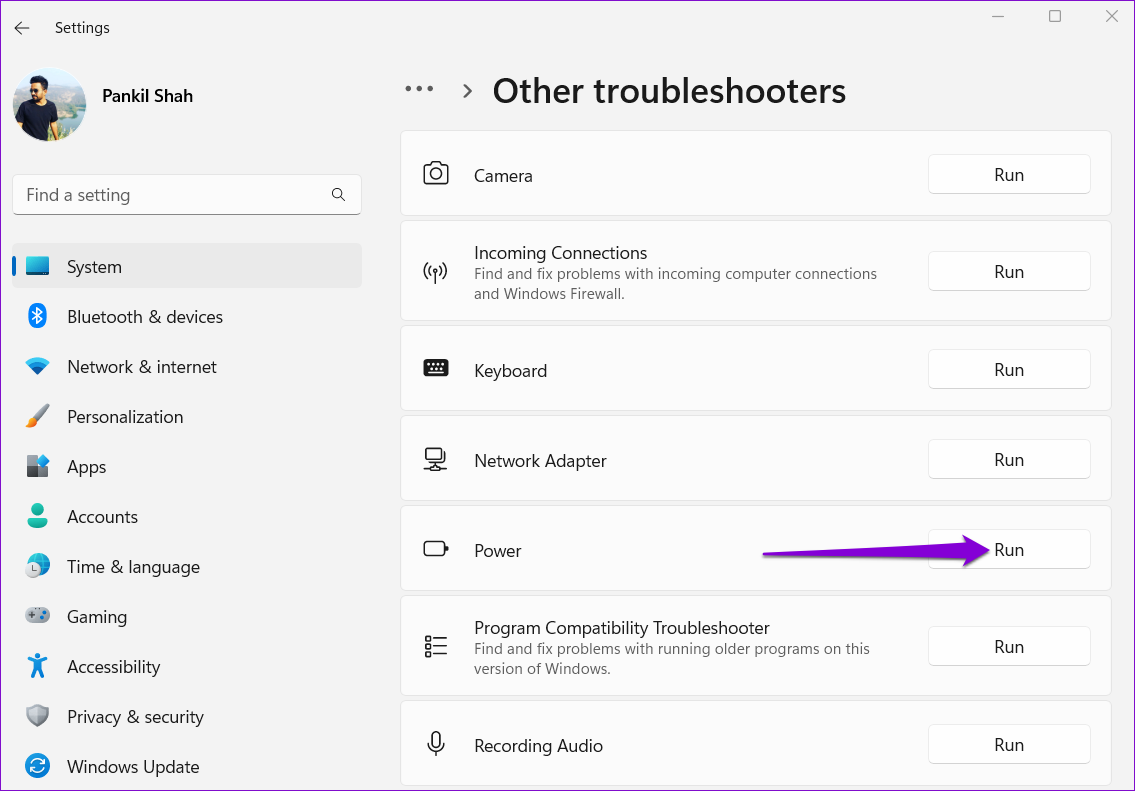
After running the troubleshooter, check to see if Windows can detect the battery.
4. Re-enable Battery Adapter
Battery drivers on your PC help Windows connect and communicate with your laptop’s battery. However, if those drivers aren’t functioning properly, Windows may fail to detect your laptop’s battery. You can try disabling the battery adapter and enabling it again to fix it.
Step 1: Right-click on the Start button and select Device Manager from the list.

Step 2: In the Device Manager window, double click on Batteries to expand it.
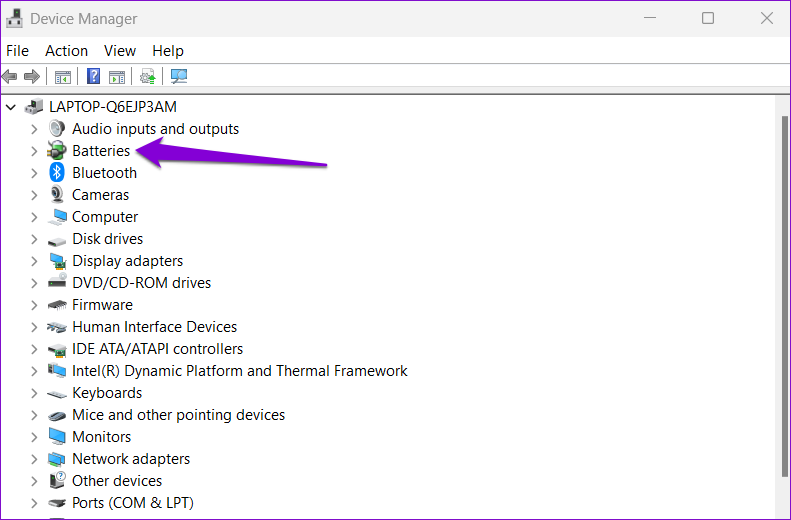
Step 3: Right-click on the battery adapter and select Disable device.

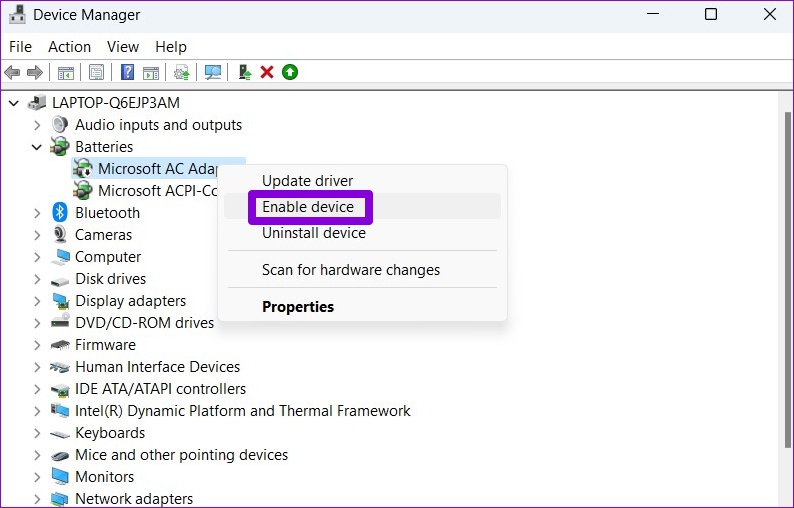
Step 4: Right-click on the battery adapter again and select Enable device.
5. Update Battery Driver
If re-enabling the battery driver doesn’t help, you can try updating it to see if that gets rid of the ‘No battery is detected’ message on Windows. Here’s how.
Step 1: Click on the search icon on the Taskbar, type in device manager, and select the first result that appears.

Step 2: Under Batteries, right-click on the battery adapter and select Update driver.
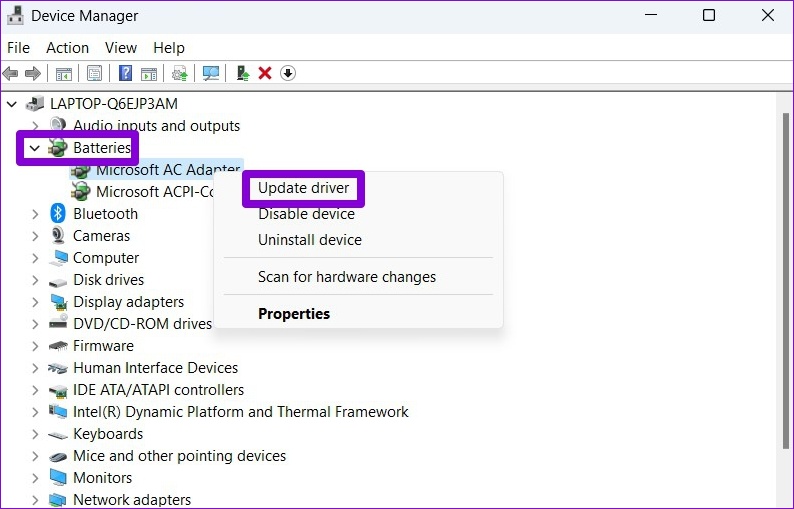
From there, follow the on-screen instructions to finish updating the driver. If the error remains, it could be caused by a corrupted battery driver. In that case, you can try uninstalling the driver instead.

After you remove, reboot your PC to allow Windows to install the driver again. Then, check to see if it can detect your laptop’s battery.
6. Reset BIOS
BIOS (or Basic Input Output System) is the software esponsible for booting up your system correctly. At times, issues with your PC’s BIOS can also lead to the ‘No battery is detected’ message on Windows 11. To fix it, you can try resetting the BIOS to its default settings. Here’s how.
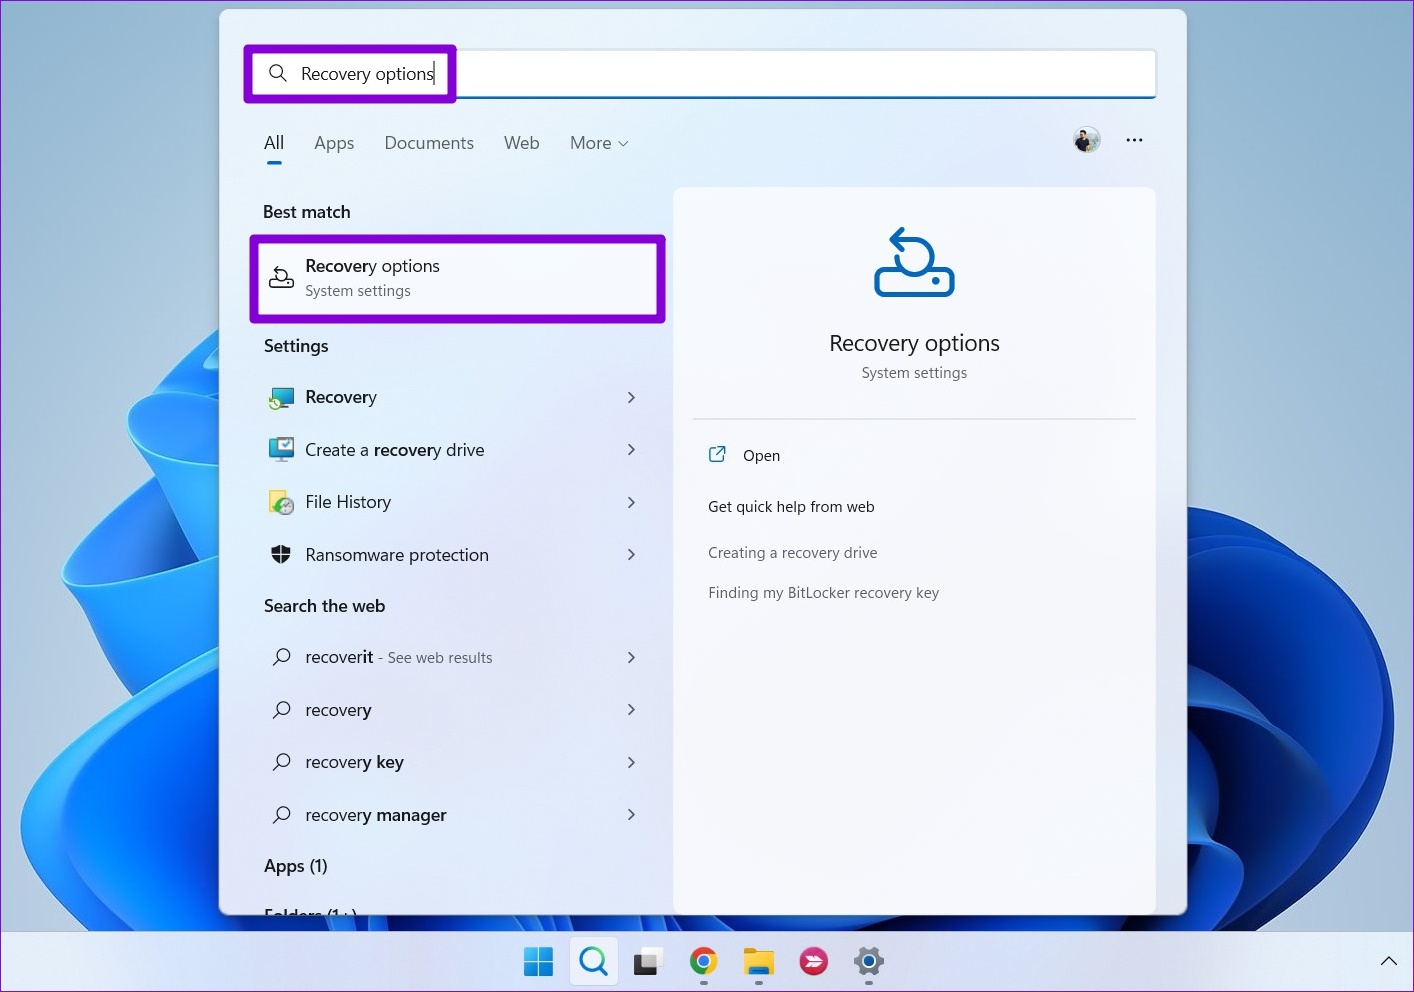
Step 1: Press the Windows key + S to open the search menu. Type in recovery options in the box and press Enter.
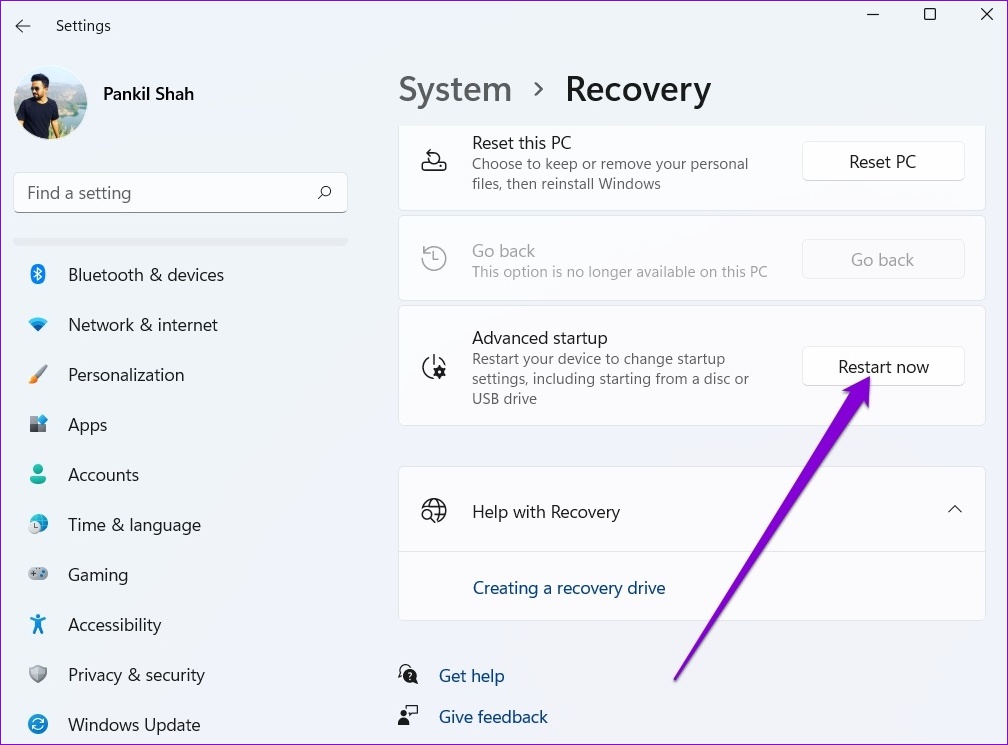
Step 2: Click on the Restart now button next to Advanced startup.
Step 3: Click on Troubleshoot.
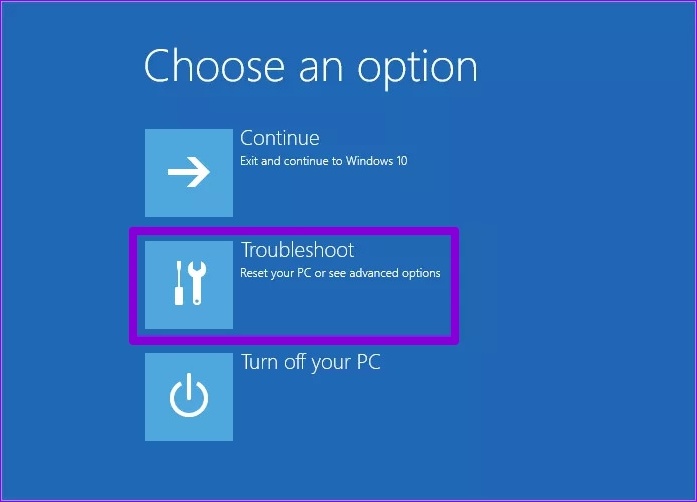
Step 4: Go to Advanced options.

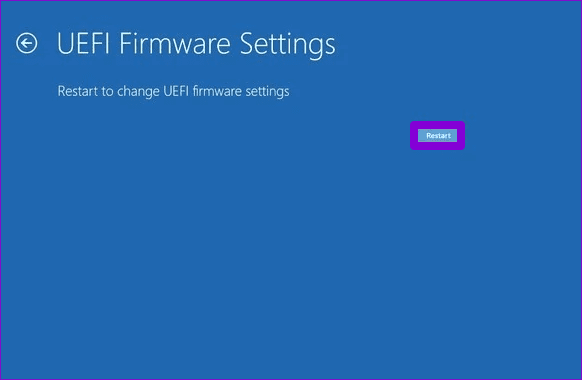
Step 5: Next, select the UEFI Firmware Settings option.

Step 6: Click on Restart. Your PC will then boot into BIOS. Note that the UEFI settings screen will differ based on the manufacturer and the computer model.
Step 7: Once you’re in BIOS, press F9 to access the Setup Defaults option. Then, select Yes.
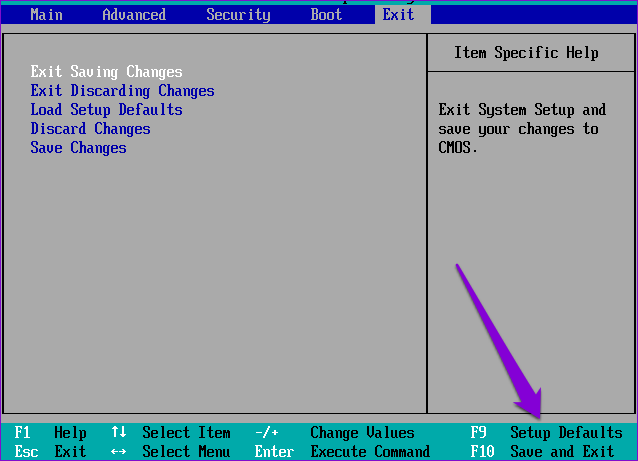
Step 8: Finally, press F10 to save changes and exit BIOS.
Restart your PC after this and see if the error still appears.
Detected Successfully
In most cases, the software is to blame rather than the hardware for such battery detection errors. Thankfully, troubleshooting such issues isn’t very difficult if you use the right solutions.
Was this helpful?
Last updated on 20 June, 2022
The article above may contain affiliate links which help support Guiding Tech. The content remains unbiased and authentic and will never affect our editorial integrity.

