Fix 1: Use Disk Cleanup
Disk Cleanup is a disk maintenance utility built into the Windows operating system to help users clear unwanted system files from their PC’s hard drive. Of course, it won’t appear on the desktop like other programs. If the Windows Settings menu refuses to delete temporary files, you can use the Windows Disk Cleanup utility; it analyzes and deletes temporary files just as well.
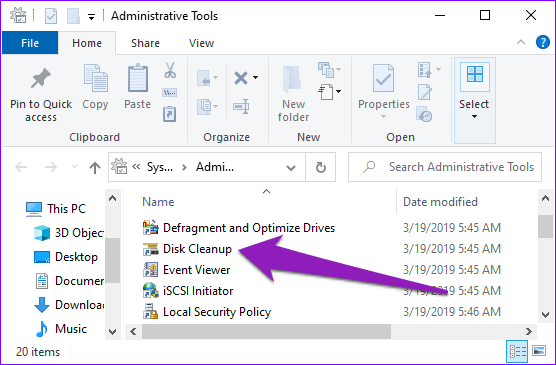
Step 1: On your Windows PC, navigate to Control Panel > System and Security > Administrative Tools to launch a new Administrative Tools window.

Step 2: Next, double-click on Disk Cleanup.
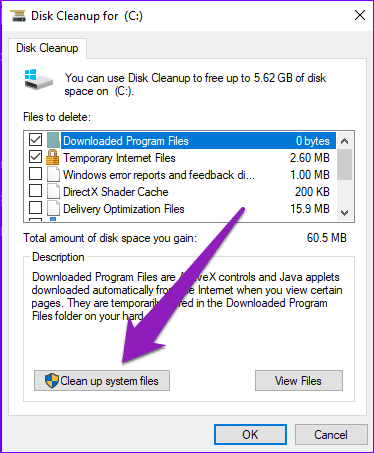
Step 3: On the Disk Cleanup window, tap the ‘Clean up system files.’
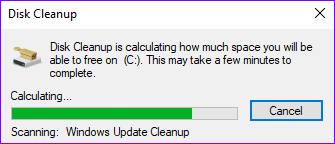
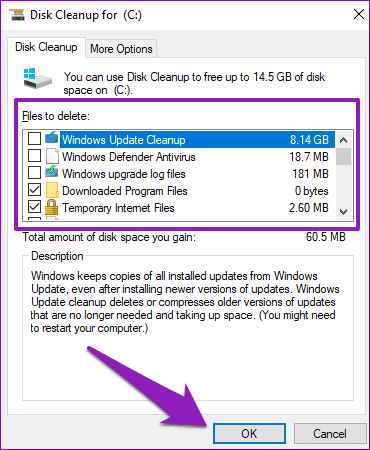
Step 4: The Disk Cleanup utility now will proceed to analyze how much space you can free up on your computer.
Step 5: Check the files you want to delete in the ‘Files to delete‘ section and tap OK to proceed.
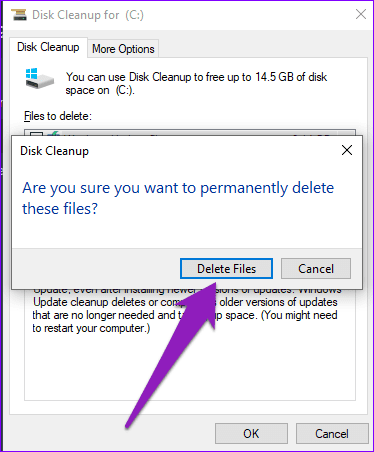
Step 6: Tap Delete Files on the confirmation prompt to proceed.
Fix 2: Use Command Prompt
If the Windows Settings menu doesn’t do it, you can also use the Command Prompt to delete temporary files on your PC. It’s a somewhat easier process and less complicated than using Windows Disk Cleanup.
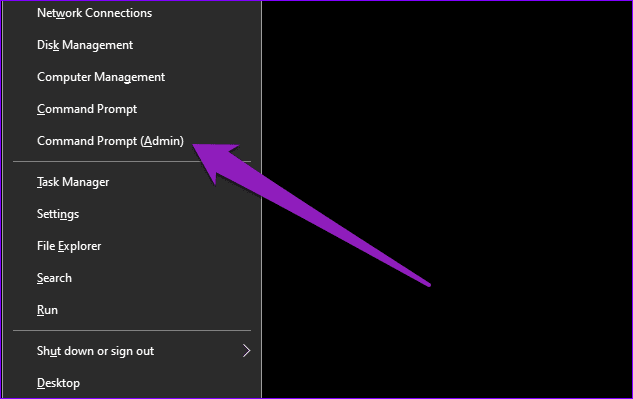
Step 1: Launch the Windows Quick Access Menu using the Windows logo + X keyboard shortcut and select ‘Command Prompt (Admin).’
Step 2: Paste the command below into the Command Prompt console and hit the Enter key on your keyboard.
del /q /f /s %temp%\* && del /s /q C:\Windows\temp\*

The above is a combined command line that deletes both temporary users’ files and temporary system files on your Windows computer. Here’s a breakdown of the command line.
del /q /f /s %temp%\* —— this deletes temporary users files.
del /s /q C:\Windows\temp\* —— this deletes temporary system files.
Note: We recommend that you close all active apps and reboot your PC before running this command.
Fix 3: Use Microsoft PC Manager
Another way to easily remove temporary files that aren’t deleted from the Windows Settings menu is to use third-party storage optimization software/tools. Some of these tools are free and will effectively wipe out temporary files from your Windows computer at the click of a button. In this space, the best solution comes officially from Microsoft in the form of PC Manager. Here’s how to use it.
Step 1: Download and install the Microsoft PC Manager on your Windows PC. Once done, launch it.
Step 2: Switch to the Storage section from the left sidebar. Then, next to the Deep Cleanup option, click on Scan.

Step 3: The PC Manager will now scan for all files that you should remove, including temporary files and other cache. You can select which files to remove and which to keep. Once you’ve made your selection, click on Proceed.

And that’s it. Based on your selection, Microsoft PC Manager will remove all temporary and unnecessary files. Once done, just restart your PC and you will be able to feel the swiftness.
Was this helpful?
Last updated on 09 July, 2024
Read Next
 5 Ways to Delete Temporary Files on Windows 11
Method 1: Clear Temporary Files Using the Settings App The Settings app on Windows gives you a complete breakdown of different temporary files stored on your PC.
5 Ways to Delete Temporary Files on Windows 11
Method 1: Clear Temporary Files Using the Settings App The Settings app on Windows gives you a complete breakdown of different temporary files stored on your PC.
 3 Ways to Stop OneDrive From Deleting Files Automatically on Windows 11
Basic Fixes: Check for Windows updates: An out-of-date Windows version can also cause issues, such as OneDrive moving files to the recycle bin by itself. So, install the latest software updates
3 Ways to Stop OneDrive From Deleting Files Automatically on Windows 11
Basic Fixes: Check for Windows updates: An out-of-date Windows version can also cause issues, such as OneDrive moving files to the recycle bin by itself. So, install the latest software updates
 5 Fixes for Logged in With a Temporary Profile Error on Windows
Try Basic Fixes Disable the antivirus program: Sometimes antivirus programs on your PC can interfere with Windows and force it to log you in with a temporary profile.
5 Fixes for Logged in With a Temporary Profile Error on Windows
Try Basic Fixes Disable the antivirus program: Sometimes antivirus programs on your PC can interfere with Windows and force it to log you in with a temporary profile.
 6 Ways to Free Up Space on Windows 11 Without Deleting Apps
Method 1.
6 Ways to Free Up Space on Windows 11 Without Deleting Apps
Method 1.
 How to Disconnect iPhone From Mac (Temporary or Permanently)
Basic Ways Unpair Bluetooth connection: Do note that turning off Bluetooth will also disconnect your Mac and iPhone from other Apple devices.
How to Disconnect iPhone From Mac (Temporary or Permanently)
Basic Ways Unpair Bluetooth connection: Do note that turning off Bluetooth will also disconnect your Mac and iPhone from other Apple devices.
 4 Ways to Fix Chrome Bookmarks Not Deleting Issue
Basic Fixes: Check for software updates: Software glitches can cause Chrome bookmarks to show up even after being deleted.
4 Ways to Fix Chrome Bookmarks Not Deleting Issue
Basic Fixes: Check for software updates: Software glitches can cause Chrome bookmarks to show up even after being deleted.
 4 Ways to Free Up Space on Android Without Deleting Apps
Basic Fixes: Find and remove large files: You can use Google's Files app to auto-detect and remove large files from your phone.
4 Ways to Free Up Space on Android Without Deleting Apps
Basic Fixes: Find and remove large files: You can use Google's Files app to auto-detect and remove large files from your phone.
 How Does Deleting Messages on WhatsApp Work
What Happens When You Use Delete for Me WhatsApp offers four ways to delete messages and chats: Delete for me, Delete for everyone, Delete chat, and Clear chat.
How Does Deleting Messages on WhatsApp Work
What Happens When You Use Delete for Me WhatsApp offers four ways to delete messages and chats: Delete for me, Delete for everyone, Delete chat, and Clear chat.
The article above may contain affiliate links which help support Guiding Tech. The content remains unbiased and authentic and will never affect our editorial integrity.