Method 1: Delete Old Windows Update Files via Settings
The Storage section of the Settings app provides a detailed breakdown of all temporary files on your PC, including old Windows update files. Here’s how to access it to delete old copies of Windows updates.
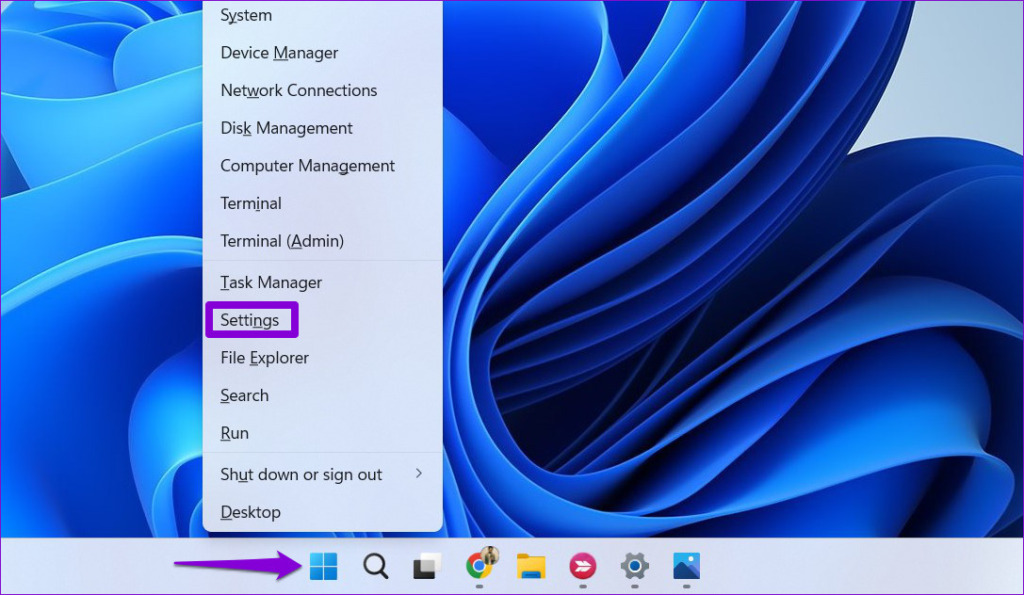
Step 1: Right-click on the Start icon and select Settings from the list.
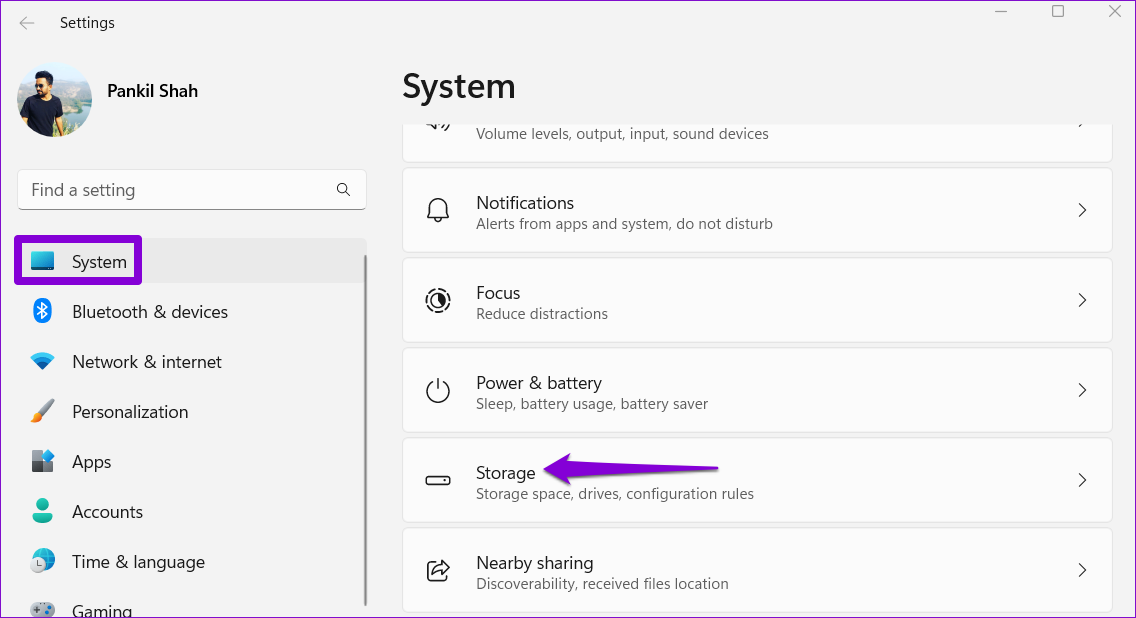
Step 2: Head to System > Storage.
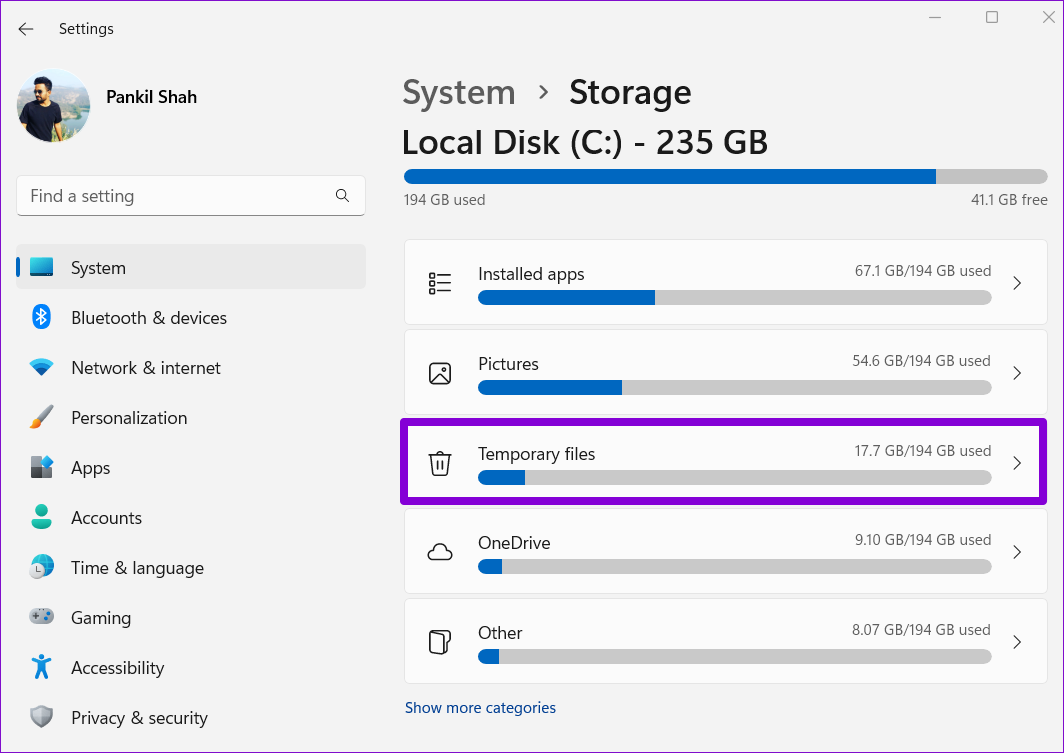
Step 3: Click on Temporary files.
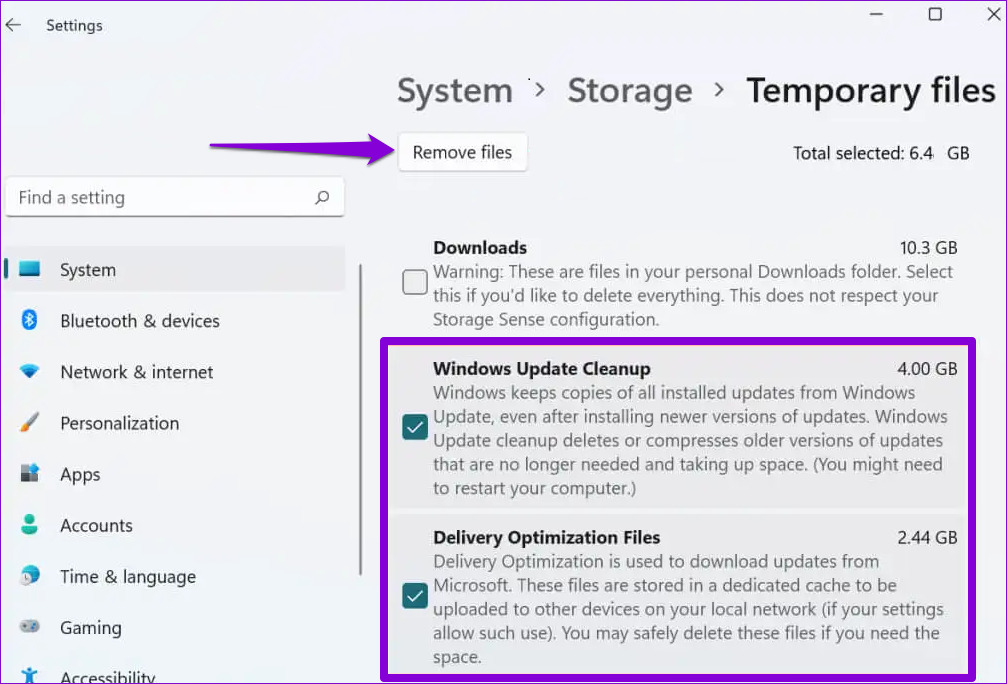
Step 4: Check the boxes for Windows Update Cleanup and Delivery Optimization Files. Uncheck everything else.
Step 5: Once done, click the Remove files button at the top.
Wait for Windows to delete the selected files and free up the storage space.
Method 2: Delete Old Windows Update Files With Disk Cleanup
Disk Cleanup is a handy Windows tool that allows you to free up valuable storage space on your PC by deleting unnecessary files. You can also use it to delete old Windows update files. Here’s how.
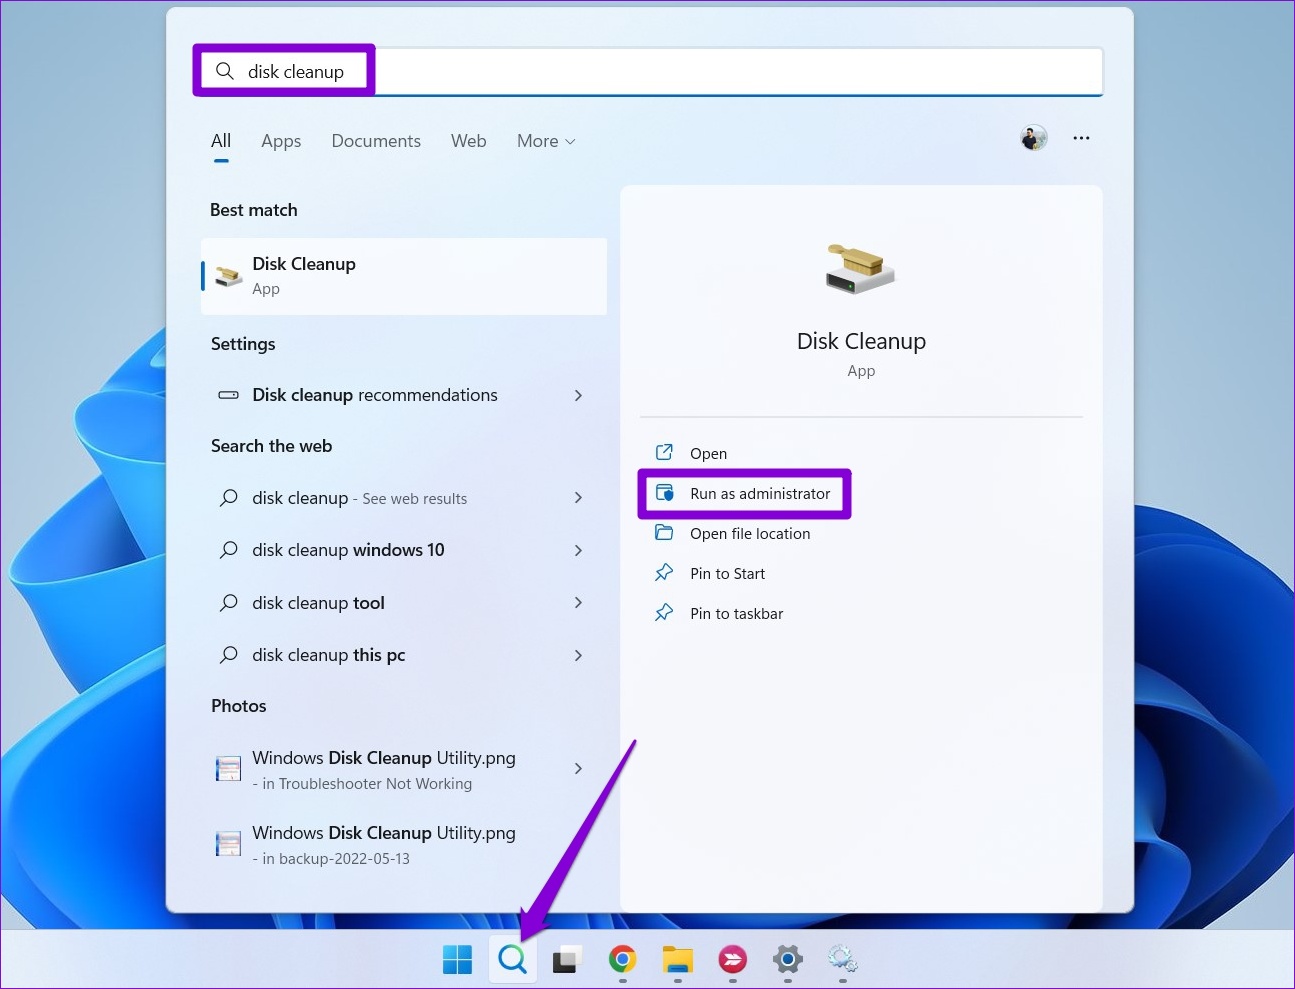
Step 1: Click on the search icon on the taskbar, type disk cleanup, and select Run as administrator.
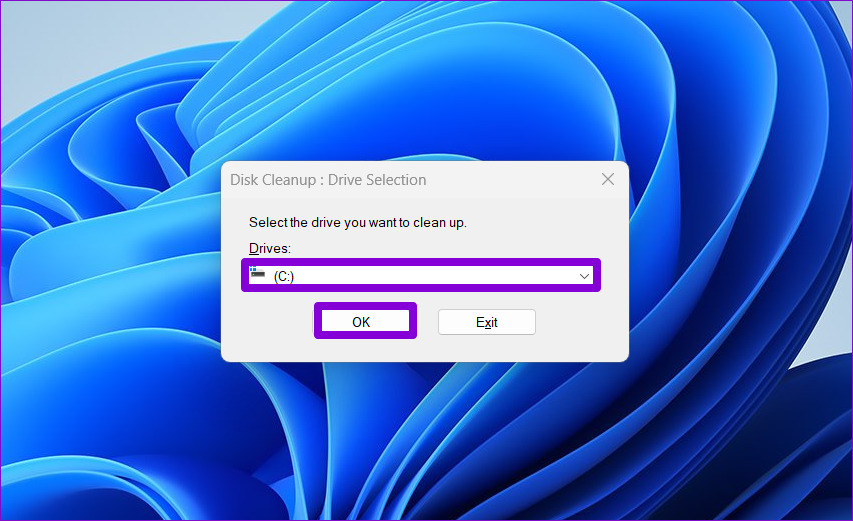
Step 2: Use the drop-down menu to select your primary drive and click OK.
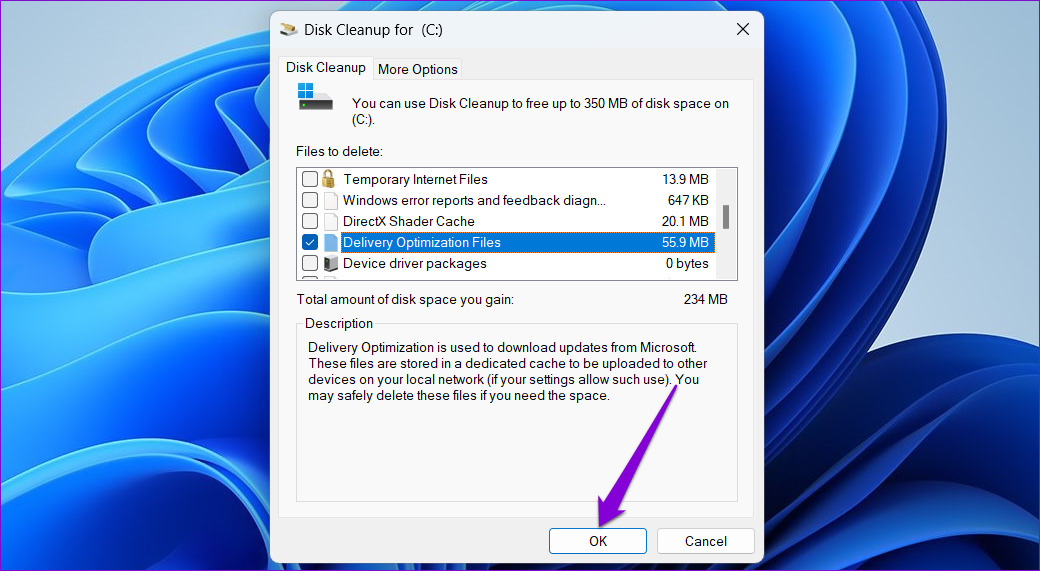
Step 3: Check the boxes for Windows Update Cleanup and Delivery Optimization Files. Then, click OK.
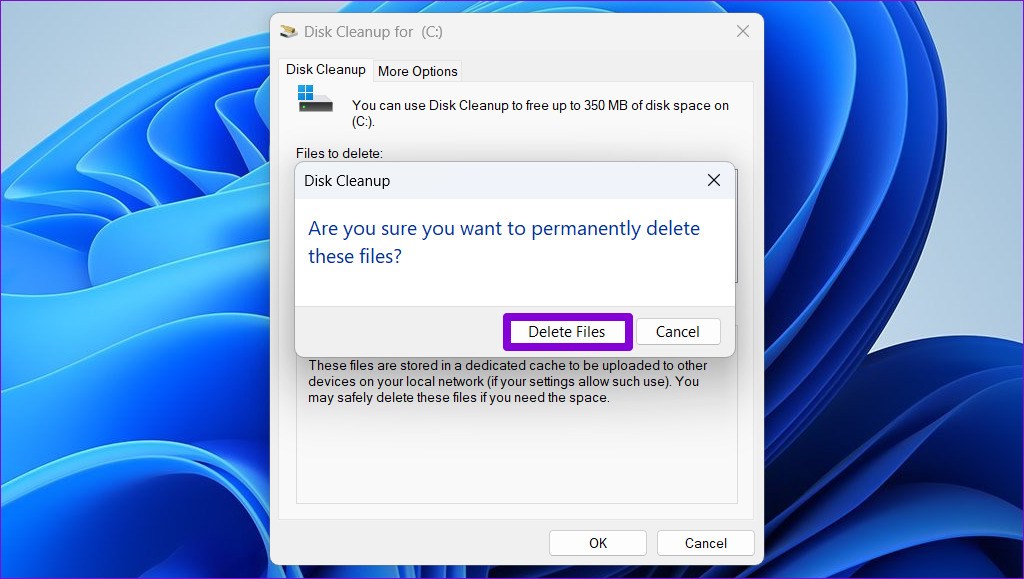
Step 4: Choose Delete Files to confirm.
Method 3: Delete Old Windows Update Files From SoftwareDistribution Folder
Windows stores all the downloaded update files in the SoftwareDistribution folder. Occasionally, these files remain when the Windows Update process gets stuck or fails to complete. After Windows installs the updates, you can safely delete the files from the SoftwareDistribution folder to free up storage space.
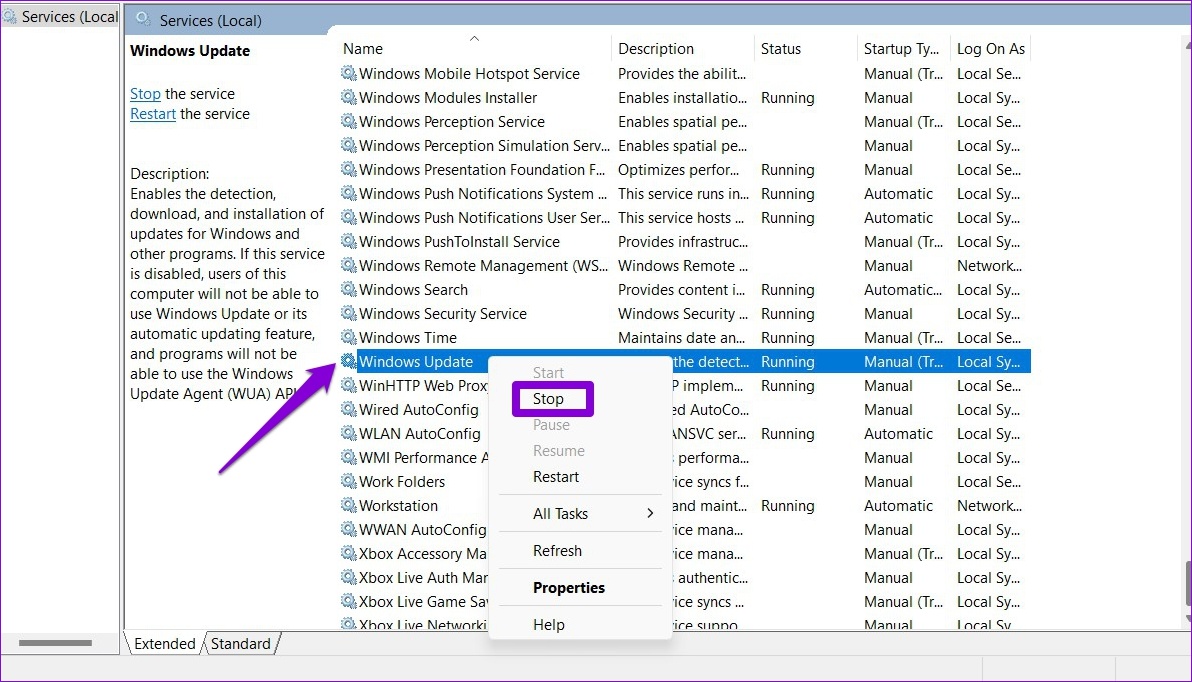
To do this, first stop the Windows Update service by following the steps below.
Step 1: Click the search icon on the taskbar, type services in the box, and press Enter.

Step 2: Scroll down to locate Windows Update service, right-click on it, and select Stop.
After the Windows Update service stops, you can use the following steps to delete old Windows update files from the SoftwareDistribution folder.
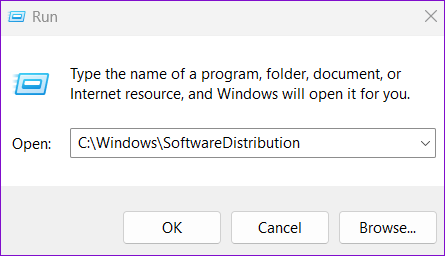
Step 1: Press the Windows key + R to open the Run dialog box.
Step 2: Type C:\Windows\SoftwareDistribution in the text field and press Enter.
Step 3: Select all files in the SoftwareDistribution folder and click on the trash icon at the top to delete them.
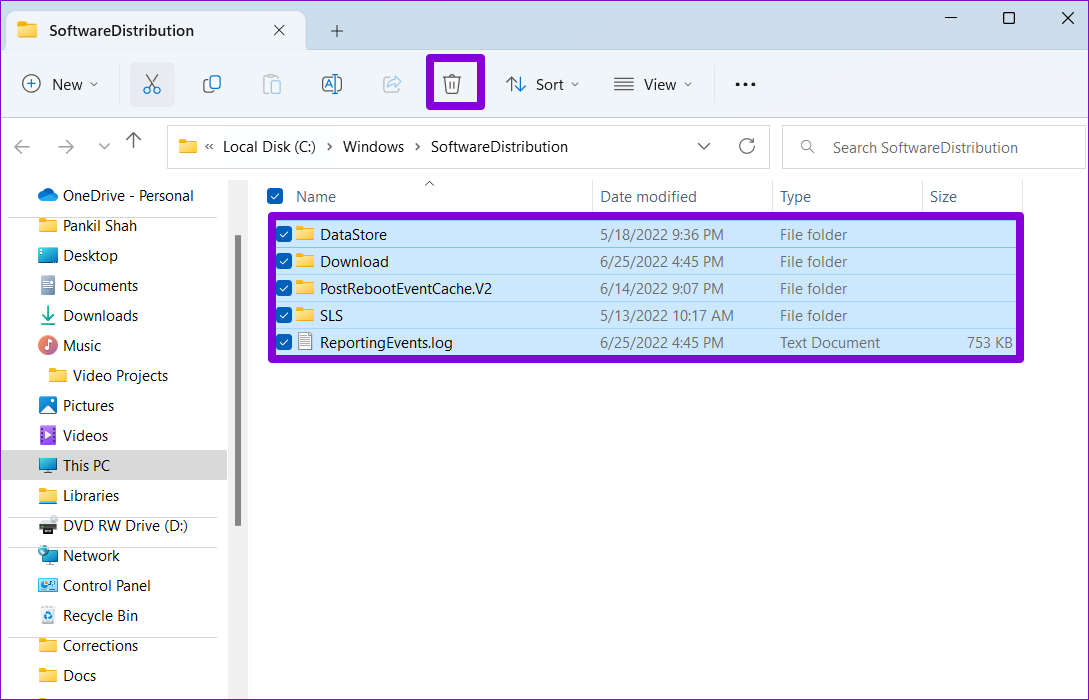
After you delete the folder, open the Services window again (check the steps above) and start the Windows Update service.

Was this helpful?
Last updated on 01 May, 2024
2 Comments
Leave a Reply
Read Next
 5 Ways to Fix Some Update Files are Missing or Have Problems Error on Windows 11
Fix 1: Run the Windows Update Troubleshooter Windows 11 includes a dedicated troubleshooter to automatically identify and resolve any common issues with the Windows Update process.
5 Ways to Fix Some Update Files are Missing or Have Problems Error on Windows 11
Fix 1: Run the Windows Update Troubleshooter Windows 11 includes a dedicated troubleshooter to automatically identify and resolve any common issues with the Windows Update process.
 5 Ways to Delete Temporary Files on Windows 11
Method 1: Clear Temporary Files Using the Settings App The Settings app on Windows gives you a complete breakdown of different temporary files stored on your PC.
5 Ways to Delete Temporary Files on Windows 11
Method 1: Clear Temporary Files Using the Settings App The Settings app on Windows gives you a complete breakdown of different temporary files stored on your PC.
 How to Enable or Disable Confirm on Delete Files Pop-up in Windows 10
Windows 10 packs multiple safety and security features to help you save your data from deleting due to accidental clicks and presses.
How to Enable or Disable Confirm on Delete Files Pop-up in Windows 10
Windows 10 packs multiple safety and security features to help you save your data from deleting due to accidental clicks and presses.
 5 Best Ways To View Windows Update History In Windows 11
By constantly updating your Windows 11 operating system, you get access to new or improved features to deliver a better user experience.
5 Best Ways To View Windows Update History In Windows 11
By constantly updating your Windows 11 operating system, you get access to new or improved features to deliver a better user experience.
 3 Ways to Fix if You Can’t Delete Files on Google Drive
Basic Fixes Try other methods: If a certain method doesn't work, you may try a different one to delete the file.
3 Ways to Fix if You Can’t Delete Files on Google Drive
Basic Fixes Try other methods: If a certain method doesn't work, you may try a different one to delete the file.
 Samsung My Files vs Google Files: Which File Manager Is Better on Galaxy Phones
Samsung apps are bundled to replace the official Google Apps in the One UI.
Samsung My Files vs Google Files: Which File Manager Is Better on Galaxy Phones
Samsung apps are bundled to replace the official Google Apps in the One UI.
 9 Ways to Fix “Update Device Settings to Accept Media Transfers” Error on Windows 11
When you connect your Android or iPhone to your Windows device, you can see most files in the Photos app.
9 Ways to Fix “Update Device Settings to Accept Media Transfers” Error on Windows 11
When you connect your Android or iPhone to your Windows device, you can see most files in the Photos app.
The article above may contain affiliate links which help support Guiding Tech. The content remains unbiased and authentic and will never affect our editorial integrity.


Awesome directions it works and very easy to follow thank you for your help.
Upgraded a DELL G3 3779 from W10 to W11. Update history shows both W10 & W11 mixed together.
W10 leftovers seemed wrong. Tried all methods you described to clear history. “SoftwareDistribution” folder was completely empty, but ALL W10 & W11 updates still showed up after restart.
There must be another history data source providing that information. I’m puzzled.
Previously tried a W11 “repair” keeping programs and settings (1 & 1/2hrs long) providing NO FIX for my long history (193 entries).