Basic Fixes:
- Check for Windows updates: An out-of-date Windows version can also cause issues, such as OneDrive moving files to the recycle bin by itself. So, install the latest software updates for Windows 11. Then, restart OneDrive and check again.
- Reinstall OneDrive: If OneDrive keeps deleting files from your desktop, uninstall OneDrive on your Windows 11 device. Once done, reinstall OneDrive to get rid of unwanted settings or features causing this issue.
Fix 1: Turn off Storage Sense on Windows
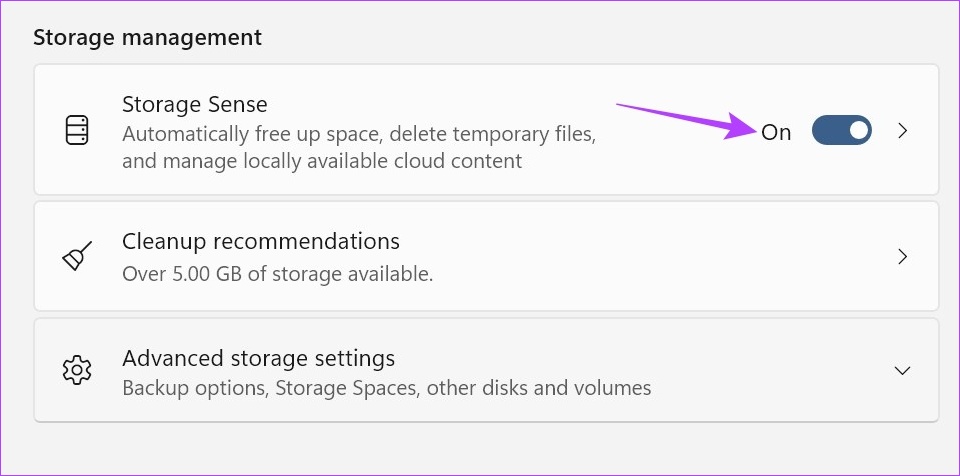
Windows Storage Sense tracks the storage space available on your device. Once this space runs low, it deletes temporary files automatically. This can also be why OneDrive files keep getting deleted from your desktop. To stop this, turn off Storage Sense on Windows. Here’s how.
Step 1: Use the Windows + I key to open Settings. From the menu options, click on System > Storage.

Step 2: Turn off the Storage Sense toggle.
Also Read: How to fix OneDrive not showing up in File Explorer on Windows
Fix 2: Unlink and Relink OneDrive
If OneDrive accidentally deletes files from your computer due to sync issues, you can unlink the account. Then, link it back again and establish a new connection, resolving any issues that might have occurred previously. Here’s how to do it.
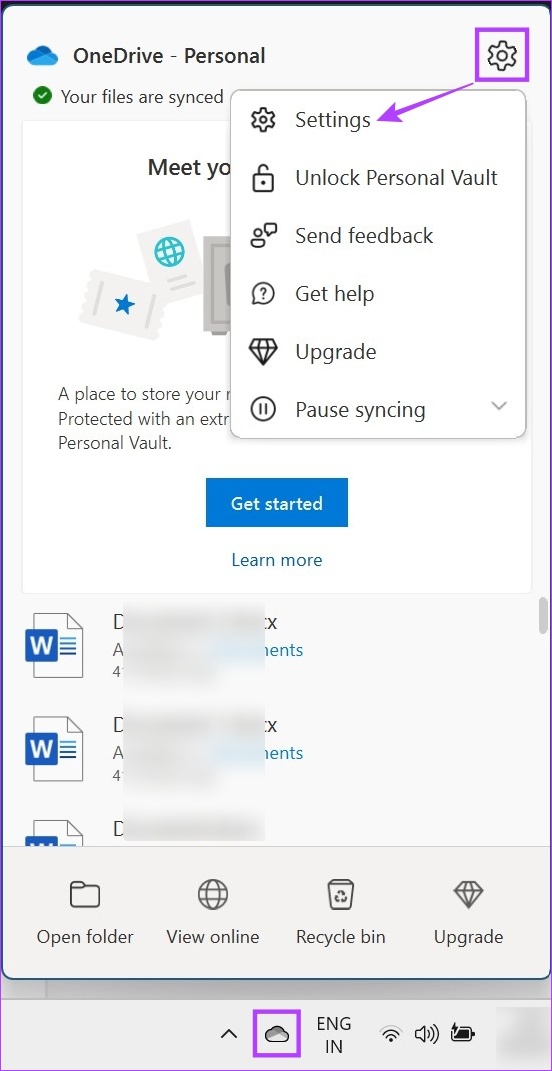
Step 1: Go to the Windows taskbar > click on the OneDrive icon. Then, click on the cogwheel icon > select Settings.
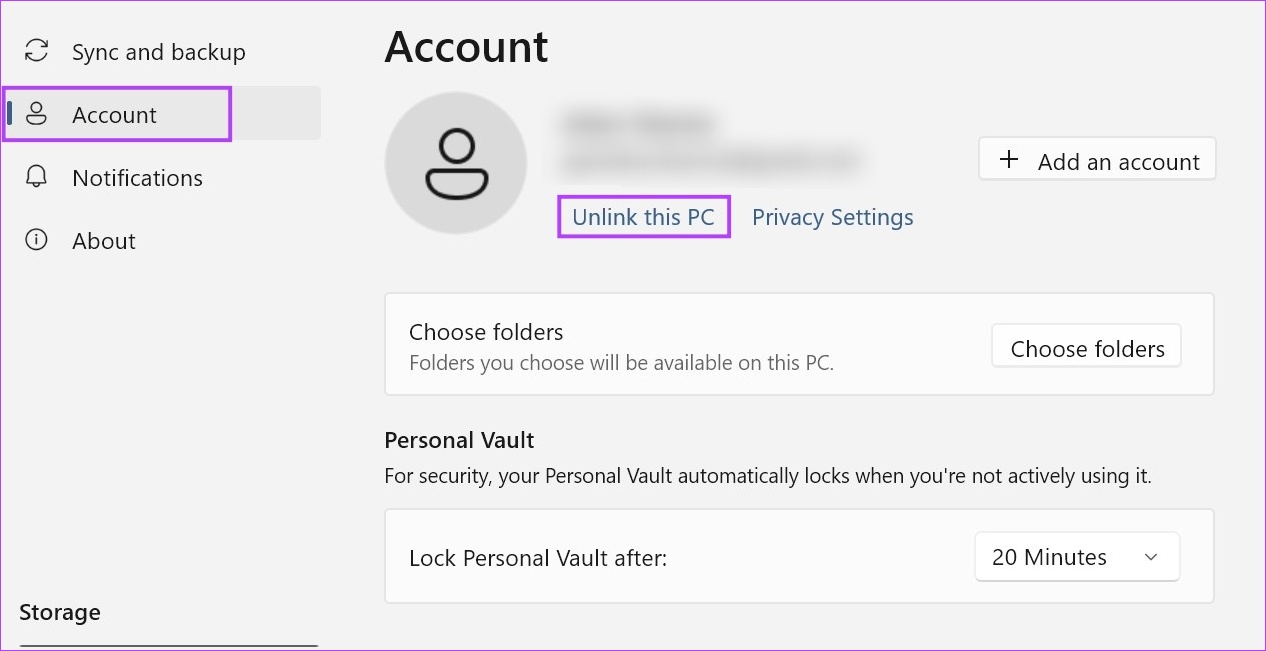
Step 2: From the menu options, click on Account > Unlink this PC.
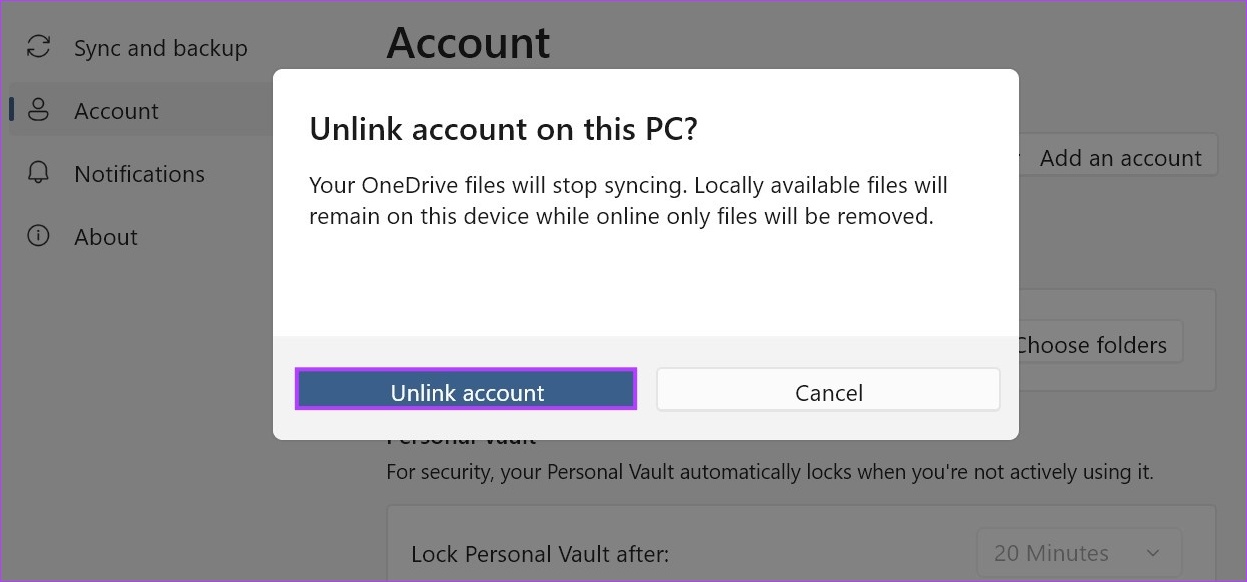
Step 3: Here, click on Unlink account.
Step 4: Now, restart OneDrive and enter your registered email ID to re-link the account. Once done, click on Sign in.

Step 5: Enter the Microsoft account password > click on Sign in. Finish signing in and check OneDrive to see if any files are missing.

Fix 3: Use Command Prompt to Reset OneDrive
If OneDrive is automatically deleting files due to a setting or error, resetting the OneDrive app might help fix it. It can also help fix other issues caused by a corrupt cache or bad update. Follow the below steps to reset OneDrive using Command Prompt.
Step 1: Open the Command Prompt with administrator privileges on Windows 11. When prompted, click on Yes.
Step 2: Now, enter the following command and press enter to execute it.
%localappdata%\Microsoft\OneDrive\onedrive.exe /reset
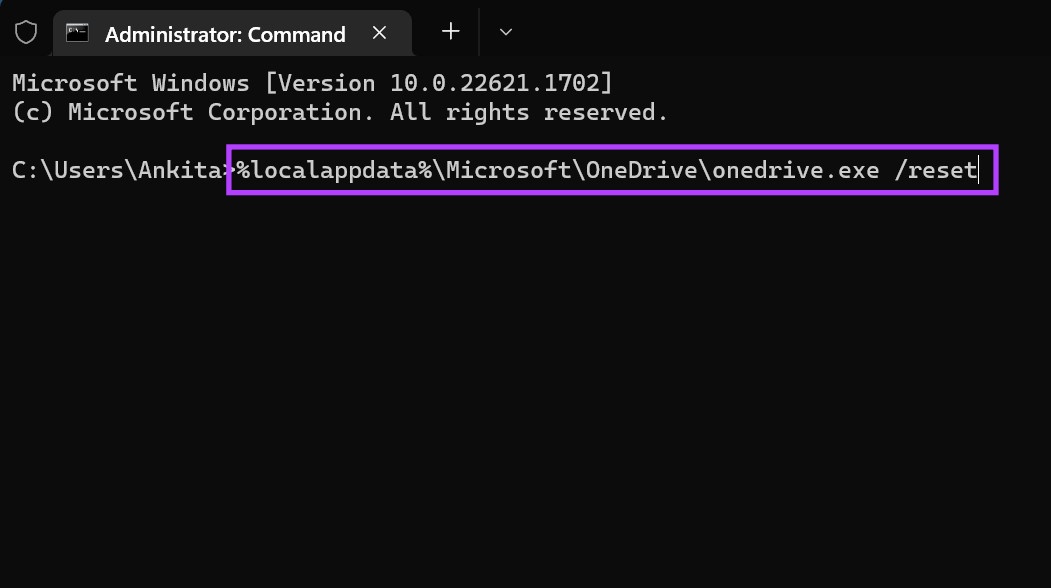
Wait for OneDrive to reset. Then, open OneDrive and observe if more files are missing.
Was this helpful?
Last updated on 17 May, 2024
Read Next
 Top 4 Ways to Stop Windows 10 From Saving Files to OneDrive
Microsoft's OneDrive is a cloud storage service that comes baked into Windows.
Top 4 Ways to Stop Windows 10 From Saving Files to OneDrive
Microsoft's OneDrive is a cloud storage service that comes baked into Windows.
 Top 3 Ways to Fix Windows Temporary Files Not Deleting
Fix 1: Use Disk Cleanup Disk Cleanup is a disk maintenance utility built into the Windows operating system to help users clear unwanted system files from their PC's hard drive.
Top 3 Ways to Fix Windows Temporary Files Not Deleting
Fix 1: Use Disk Cleanup Disk Cleanup is a disk maintenance utility built into the Windows operating system to help users clear unwanted system files from their PC's hard drive.
 Top 3 Ways to Stop Microsoft Teams From Starting Automatically on Windows 10
Microsoft Teams app is great for team management and communication.
Top 3 Ways to Stop Microsoft Teams From Starting Automatically on Windows 10
Microsoft Teams app is great for team management and communication.
 6 Ways to Free Up Space on Windows 11 Without Deleting Apps
Method 1.
6 Ways to Free Up Space on Windows 11 Without Deleting Apps
Method 1.
 5 Best Ways to Fix Can’t Open Files in OneDrive Error in Windows
People use OneDrive for storing and saving files in all formats.
5 Best Ways to Fix Can’t Open Files in OneDrive Error in Windows
People use OneDrive for storing and saving files in all formats.
 5 Fixes for OneDrive Creating Duplicate Files and Folders on Windows
Fix 1: Remove OneDrive Cached Credentials A common reason why OneDrive may keep creating duplicate files with the computer name added to the filename is due to its cached credentials.
5 Fixes for OneDrive Creating Duplicate Files and Folders on Windows
Fix 1: Remove OneDrive Cached Credentials A common reason why OneDrive may keep creating duplicate files with the computer name added to the filename is due to its cached credentials.
 4 Ways to Stop Bluetooth From Turning on Automatically on iPhone
Why Does My iPhone’s Bluetooth Keep Turning On?
4 Ways to Stop Bluetooth From Turning on Automatically on iPhone
Why Does My iPhone’s Bluetooth Keep Turning On?
 3 Ways to Stop Instagram From Automatically Following Accounts
Fix 1: Unlink Third-Party Apps and Websites Third-party apps and services linked to your Instagram account may auto-follow specific accounts in the background.
3 Ways to Stop Instagram From Automatically Following Accounts
Fix 1: Unlink Third-Party Apps and Websites Third-party apps and services linked to your Instagram account may auto-follow specific accounts in the background.
The article above may contain affiliate links which help support Guiding Tech. The content remains unbiased and authentic and will never affect our editorial integrity.