Did you know that Windows 10 comes with an autocorrect tool built-in? The tool does what it’s meant for — spot grammatical errors while typing — and does that smartly. The Windows autocorrect tool highlights misspelled words as you type in certain apps to grab your attention and let you fix those errors. You can even let the autocorrect too to fix the misspelled words automatically. If the autocorrect doesn’t work on your Windows 10 PC for some reason, refer to the solutions in this guide to rekindle your PC’s autocorrect.

Before you proceed, it is important to note that autocorrect (on Windows) only works with Universal Windows Platform (UWP) applications (i.e., Windows Store apps). Apps developed by Microsoft or apps installed from the Microsoft Store fall under this category. Examples include Outlook, Microsoft Edge, Mail, and so on.
If Windows autocorrect doesn’t pick out grammatical errors while you’re typing in third-party apps, that’s how the tool was designed (not) to work. However, if autocorrect doesn’t work for native Windows Store apps, it is a cause for concern. Here are some solutions you should try.
1. Re-Enable Autocorrect
Turn off the autocorrect tool, restart your PC, and turn it back on. There are several ways to do this.
From the Settings Menu
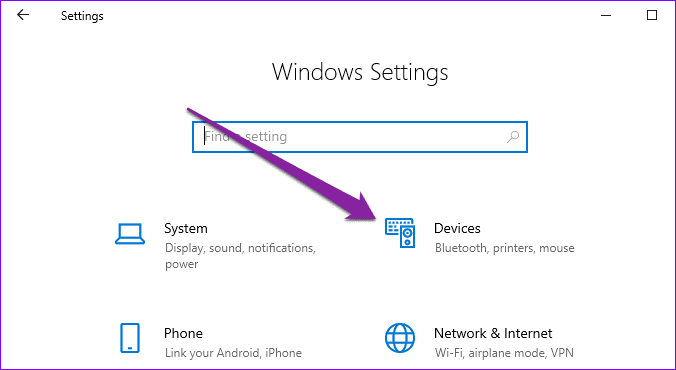
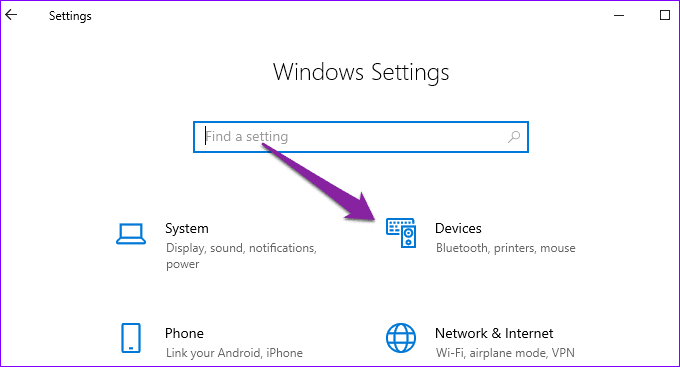
Step 1: Launch the Windows Settings menu and select Devices.
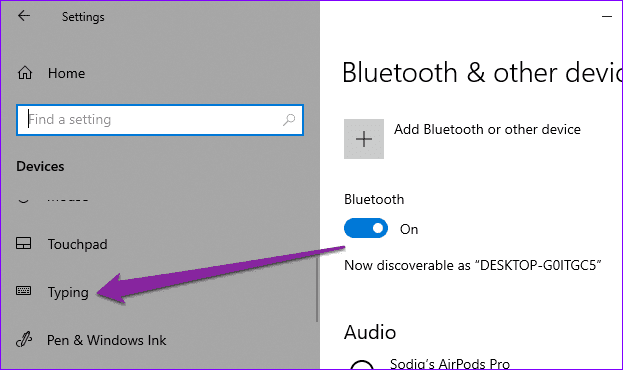
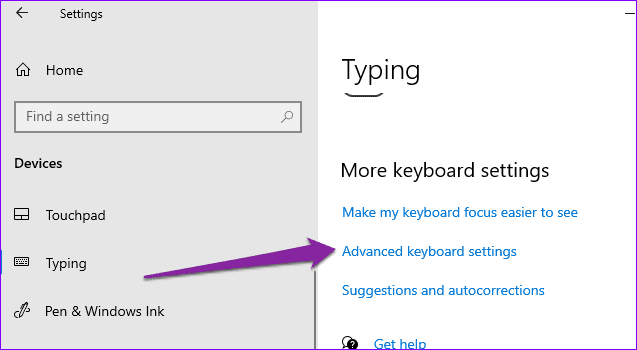
Step 2: On the left-hand menu, click Typing.
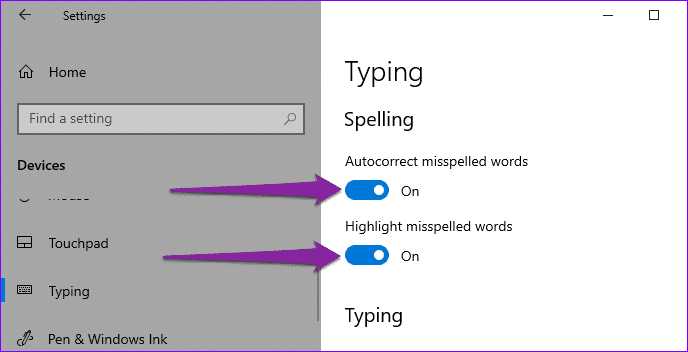
Step 3: In the spelling section, toggle off both ‘Autocorrect misspelled words’ and ‘Highlight misspelled words.’
Step 4: Restart your computer.
Step 5: Revisit the Windows Typing menu (Settings > Devices > Typing) and toggle both options in the Spelling section.

Return to typing within the affected app(s) and check if autocorrect now works.
From Registry Editor
You can also re-enable autocorrect on your PC by modifying the registry file that powers the (autocorrect) functionality. Here’s how.
Step 1: Launch the Windows Run dialog box using the ‘Windows + R’ keyboard shortcut.
Step 2: Type regedit into the dialog box and click OK or hit Enter on your keyboard.
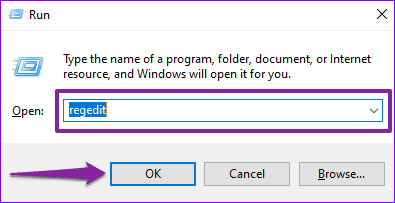
Grant the Registry Editor administrative (User Account Control) permission and proceed.
Step 3: Paste the path below into the Registry Editor’s address bar and hit Enter on your keyboard.
HKEY_CURRENT_USER\SOFTWARE\Microsoft\TabletTip\1.7
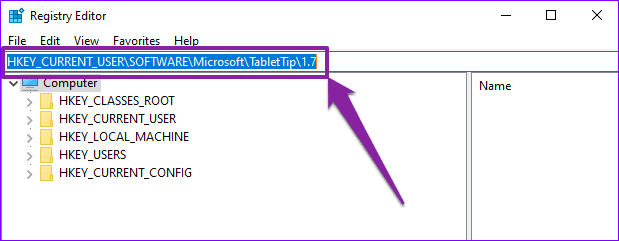
Step 4: Double-click on EnableAutocorrection.

Step 5: Change the value (in the Value data box) from 1 to 0 and click OK.

That will disable your computer’s autocorrect. To have it re-enabled, restart your PC and follow step #1 — #4.
Step 6: Next, change the value data of the EnableAutocorrection registry file from 0 to 1.

2. Modify Keyboard Language
Switching your PC’s default keyboard language or region could help get autocorrect working again. From research, we discovered that some Windows 10 users got autocorrect working again by changing their keyboard language from United States (US) English to United Kingdom (UK) English. Perhaps, the Windows autocorrect feature isn’t fully optimized for the keyboard or language of your choice. Change your keyboard language and see if it helps.
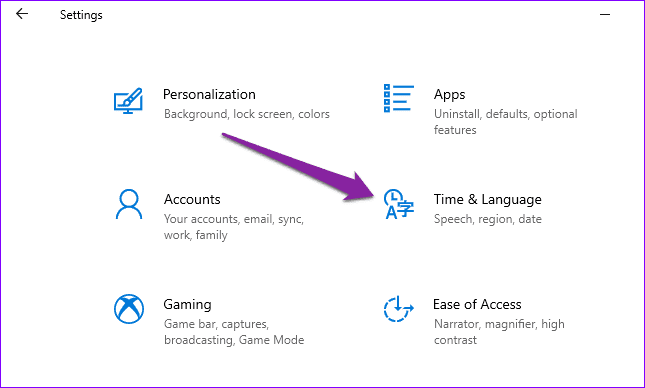
Step 1: Launch the Windows Settings menu and select ‘Time & Language.’
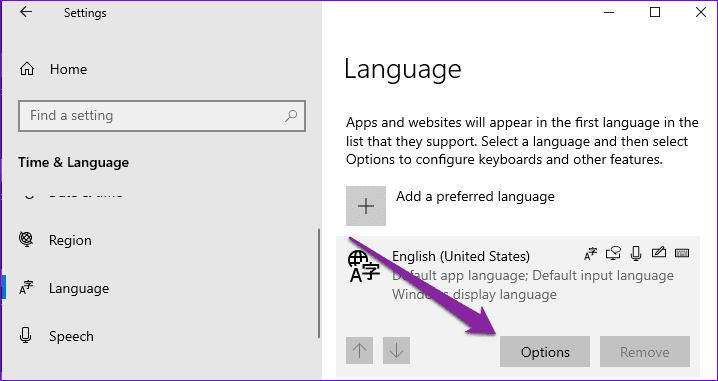
Step 2: On the left-hand pane, select Language.

Step 3: Click on the default language of your PC.

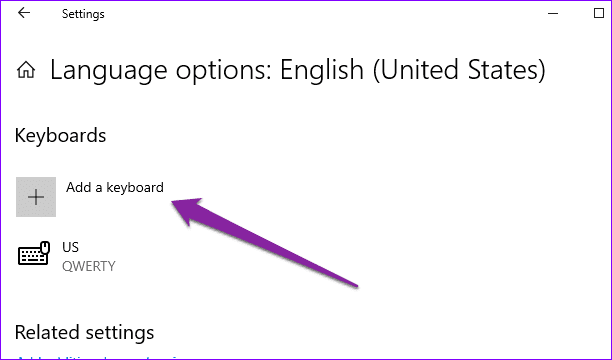
Step 4: Next, click Options.
Step 5: Select ‘Add a keyboard’ option.
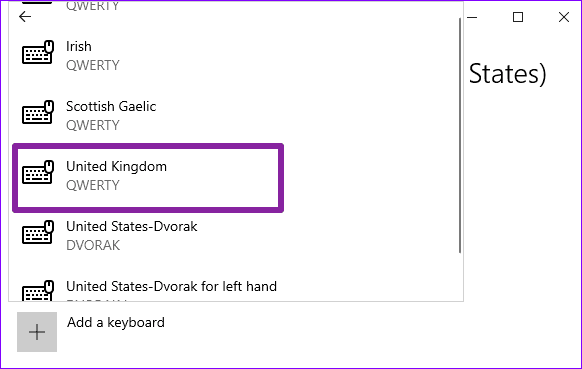
Step 6: Choose United Kingdom (QWERTY) from the list or your preferred language.
That’s not all. The next step is to make the newly-added keyboard language the default language input for your PC.
Step 7: Return to the Windows Settings menu and select Devices.
Step 8: Select Typing on the left-hand menu.

Step 9: Scroll to the ‘More keyboard settings’ section and click ‘Advanced keyboard settings.’
Step 10: Click the drop-down button in the ‘Override for default input method’ section and select the ‘United Kingdom English’ as the default language for your keyboard.

3. Install Language Pack
Another effective way to resolve autocorrect problems is to check whether you have the correct keyboard language pack installed on your Windows computer. For instance, you should have a UK English language pack installed on your PC if you want to have Windows to efficiently autocorrect the word in UK English. You need to install respective language packs on Windows for the feature to working accordingly.
Follow the steps below to download and install a language pack that corresponds with the language you want your PC to autocorrect.
Step 1: Launch the Windows Settings menu and select ‘Time & Language.’
Step 2: On the left-hand pane, select Language.
Step 3: In the Preferred languages section, click ‘Add a preferred language.’

Step 4: Enter the language you want to add into the search box. Alternatively, you can also search for a language by entering a country/region name.

Step 5: Select the language you want to add and click Next.
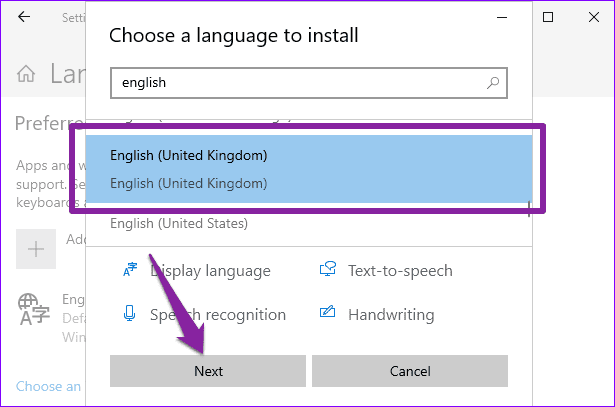
Step 6: Click Install to commence the download and installation of the keyboard on your computer.
Note: This process requires an active internet connection.

Wait till the downloads are complete and check if autocorrect now works.

Eliminate Grammatical Errors
Updating your PC’s operating could also help fix this problem — if a bug causes it, that is. And if autocorrect isn’t working for a particular app, launch the Microsoft Store and update it. You could also troubleshoot the app using methods from our guide on fixing faulty Windows apps. As for non-UWP (Universal Windows Platform) apps, you might have to resort to third-party grammar checking tools to enjoy even more advanced features like autocorrection, plagiarism detection, synonym suggestion, etc.
Next up: Keyboard shortcuts foster productivity and give a newfound appreciation of the Windows OS. Read the article below to see a full list of Windows 10 keyboard shortcuts.
Was this helpful?
Last updated on 13 July, 2021
Read Next
 3 Fixes for Autocorrect Not Working on Android
Basic Fixes Temporarily remove other keyboard languages: The autocorrect feature might not work for some other languages that you wish to use.
3 Fixes for Autocorrect Not Working on Android
Basic Fixes Temporarily remove other keyboard languages: The autocorrect feature might not work for some other languages that you wish to use.
 How to Adjust AutoCorrect Settings in Microsoft Word
How to Enable or Disable AutoCorrect on Microsoft Word By default, the AutoCorrect feature relies on the library of the words from the language you've chosen to use in the
How to Adjust AutoCorrect Settings in Microsoft Word
How to Enable or Disable AutoCorrect on Microsoft Word By default, the AutoCorrect feature relies on the library of the words from the language you've chosen to use in the
 8 Fixes for “Your Device Is Missing Important Security and Quality Fixes” on Windows
Is there anything more frustrating than seeing the "Your Device Is Missing Important Security and Quality Fixes" message when waiting for your Windows updates to complete?
8 Fixes for “Your Device Is Missing Important Security and Quality Fixes” on Windows
Is there anything more frustrating than seeing the "Your Device Is Missing Important Security and Quality Fixes" message when waiting for your Windows updates to complete?
 9 Fixes for Windows Subsystem for Android Not Working on Windows 11
Reminder: Windows Subsystem for Android and the Amazon App Store will no longer be available in the Microsoft Store after March 5, 2025.
9 Fixes for Windows Subsystem for Android Not Working on Windows 11
Reminder: Windows Subsystem for Android and the Amazon App Store will no longer be available in the Microsoft Store after March 5, 2025.
 Top 8 Fixes for Preview Pane Not Working in Windows 10
Microsoft's Windows Explorer lets you take a peek at a file with the Preview Pane.
Top 8 Fixes for Preview Pane Not Working in Windows 10
Microsoft's Windows Explorer lets you take a peek at a file with the Preview Pane.
 4 Fixes for Audio Not Working in Microsoft Teams on Windows 11
Common Fixes Reboot Windows - Open the Start Menu, click Power in the bottom right, and select Restart.
4 Fixes for Audio Not Working in Microsoft Teams on Windows 11
Common Fixes Reboot Windows - Open the Start Menu, click Power in the bottom right, and select Restart.
 3 Fixes for Right Click Not Working on Windows 11
Basic Fixes: Unplug peripheral devices: This will work because it isolates possible software interference and hardware conflicts that may trigger the problem.
3 Fixes for Right Click Not Working on Windows 11
Basic Fixes: Unplug peripheral devices: This will work because it isolates possible software interference and hardware conflicts that may trigger the problem.
 Top 6 Fixes for Lightshot Not Working on Windows 11
Lightshot is a free screen capture tool available for Windows and Mac.
Top 6 Fixes for Lightshot Not Working on Windows 11
Lightshot is a free screen capture tool available for Windows and Mac.
The article above may contain affiliate links which help support Guiding Tech. The content remains unbiased and authentic and will never affect our editorial integrity.