Reminder: Windows Subsystem for Android and the Amazon App Store will no longer be available in the Microsoft Store after March 5, 2025.
Fix 1: Terminate and Restart Windows Subsystem for Android
Terminating and restarting the Windows Subsystem for Android refreshes it, fixing existing glitches causing it to work inaccurately.
Step 1: Press the Windows + I shortcut to open the Settings app, select Apps from the left sidebar, and click Installed apps.
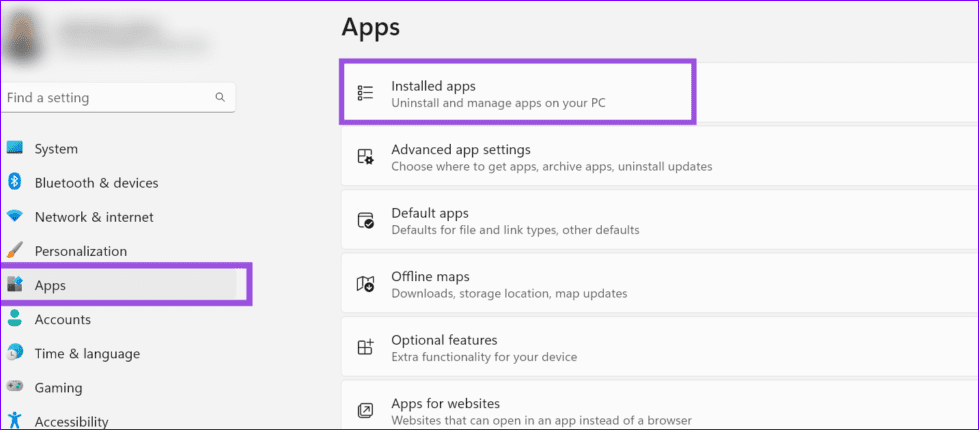
Step 2: Click the three-dot menu next to Windows Subsystem for Android and select Advanced options.

Step 3: Select Terminate to close it and shut down all its related processes. Restart your PC.

Fix 2: Tweak the Windows Registry
If terminating the app didn’t work, tweak the Windows Registry to fix the Windows Subsystem for Android not working on Windows 11.
Note: We recommend backing up Windows Registry values using File > Export before making any changes.
Step 1: Press the Windows + R shortcut to open the Run dialog, type regedit, and press Enter.

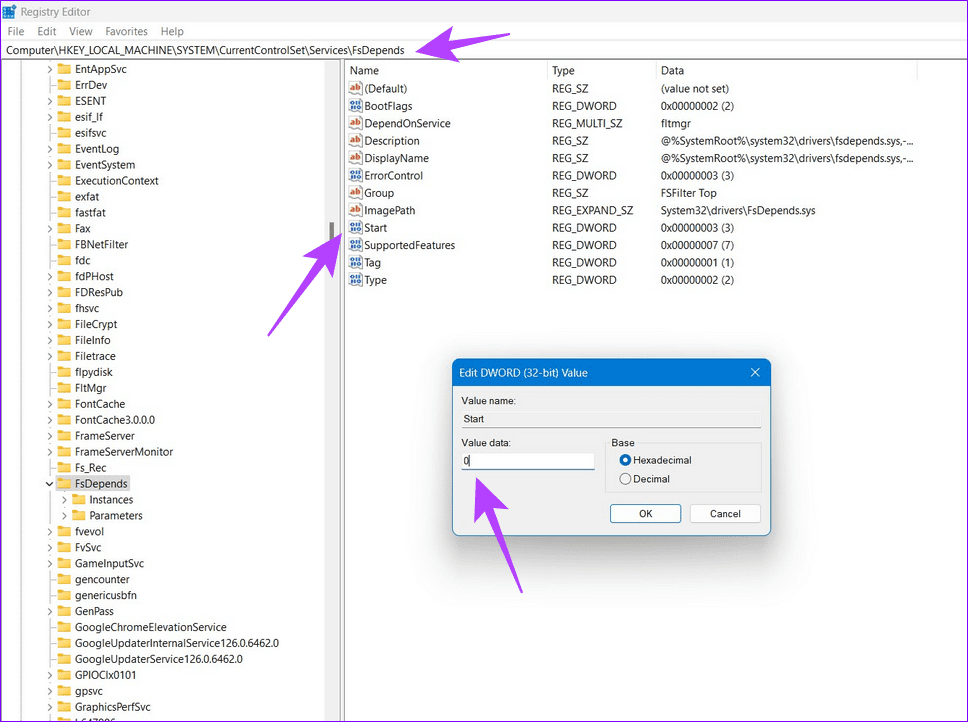
Step 2: Approve the UAC prompt and copy-paste the following path in the navigation bar.
HKLM\SYSTEM\CurrentControlSet\Services\FsDepends
Step 3: Double-click Start, set its value to 0, and click OK to apply the changes. Then, restart your PC.
Fix 3: Enable Hardware Virtualization
Windows Subsystem for Android might fail to open if Hardware Virtualization isn’t enabled on your PC. To fix this, enable it manually in your system settings.
Step 1: Press the Alt + F4 keys (on your desktop) to open the Shut Down Windows utility, select Restart, and click OK.

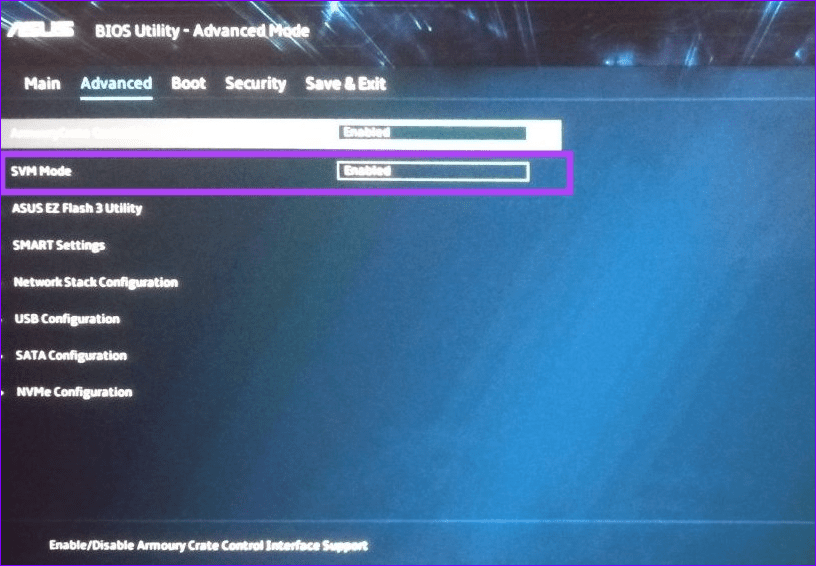
Step 2: Press the designated function key (e.g., F2) while restarting to open BIOS settings.
Step 3: Enable Virtualization (SVM mode), press F10 to save changes, and exit BIOS. Reboot the system to verify if the issue is resolved.
Note: BIOS virtualization settings may appear different on your computer.
Fix 4: Turn on Hyper-V
If Hyper-V isn’t enabled on Windows 11, Windows Subsystem for Android might not function accurately. Access Optional features to turn it on.
Step 1: Press the Windows key, search Optional features, and click to open it.

Step 2: Scroll to the bottom and select More Windows features.
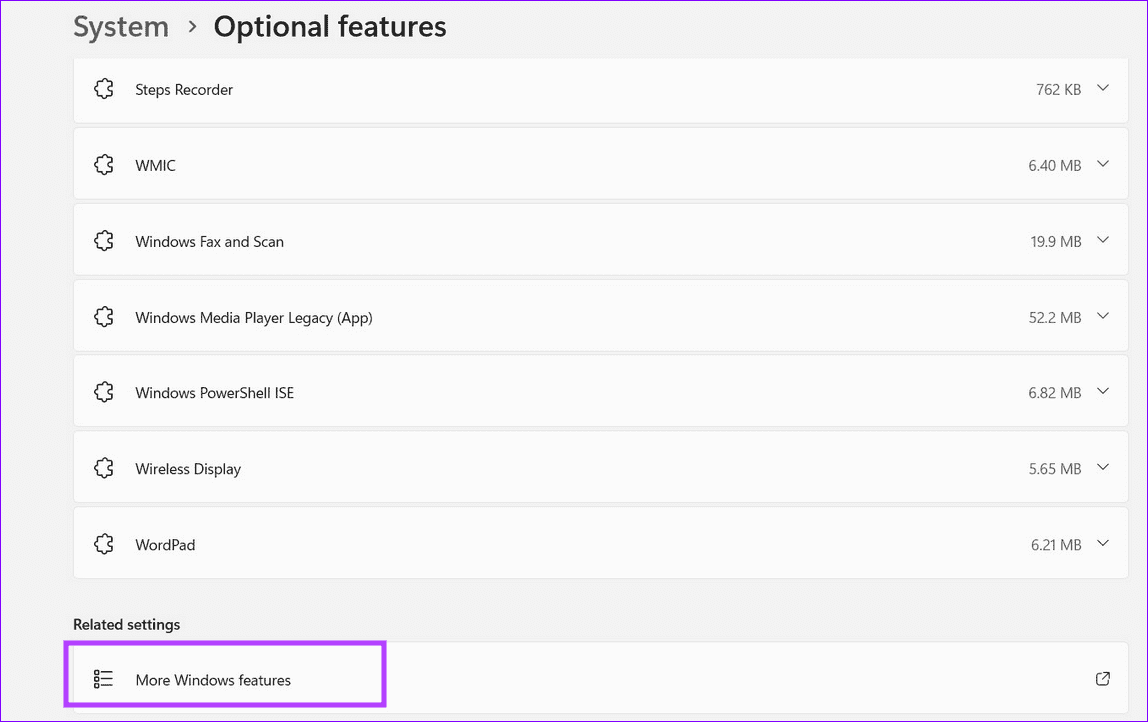
Step 3: Locate and enable Hyper-V in Windows features and click OK to apply changes.

Fix 5: Enable Virtual Machine Platform on Windows 11
Similar to Hardware Virtualization and Hyper-V, Windows Subsystem for Android requires the Virtual Machine Platform feature to work accurately on Windows 11.
Step 1: Open the Run dialog (press the Windows key + R shortcut), type appwiz.cpl, and press Enter.

Step 2: Select Turn Windows features on or off in the left sidebar and approve the UAC prompt.

Step 3: Locate and enable the Virtual Machine Platform feature and click OK to apply changes.

Step 4: Select Restart now when prompted to finish installing the requested system changes.

Fix 6: Uninstall a Third-Party Hypervisor App
Third-party hypervisor apps (e.g., Oracle VM VirtualBox and VMware) are known to create conflicts with Windows Subsystem for Android. Uninstall them manually to use the latter without errors.
Step 1: Press the Windows key, type appwiz.cpl, and click to open it.

Step 2: Locate the third-party hypervisor app, right-click it, and select Uninstall. Approve the UAC prompt when it appears and reboot the system after uninstallation.

Fix 7: Disable Windows Defender Temporarily
Windows Defender can block apps from running and accessing system components. To rule out the issue, disable it temporarily and launch Windows Subsystem for Android.
Note: For security, we recommend re-enabling the Windows Defender once you’re finished working with the Windows Subsystem for Android.
Step 1: Press the Windows key, search Windows Security, and click to open it.

Step 2: Select Virus & threat protection.

Step 3: Scroll to the bottom and click Manage settings.

Step 4: Disable the toggle for Real-time protection and approve the UAC prompt when it appears.

Fix 8: Repair or Reset the Windows Subsystem for Android App
Windows Subsystem for Android may fail to work on Windows 11 if its installation is corrupt. Head to Windows settings to repair or reset the app.
Note: Resetting the app removes all its data from Windows 11.
Step 1: Press the Windows + X shortcut to open the Power User Menu and click Installed apps.

Step 2: Locate Windows Subsystem for Android, click its three-dot menu, and select Advanced options.

Step 3: Scroll down and select Repair. If repairing doesn’t fix it, click Reset to reset the app to its default values.

Fix 9: Rollback the Recent Windows Update
If the Windows Subsystem for Android abruptly stopped working after a recent automatic Windows Update, revert the system update manually to resolve the problem.
Step 1: Open Windows Settings, select Windows Update from the left sidebar, and click Update history.
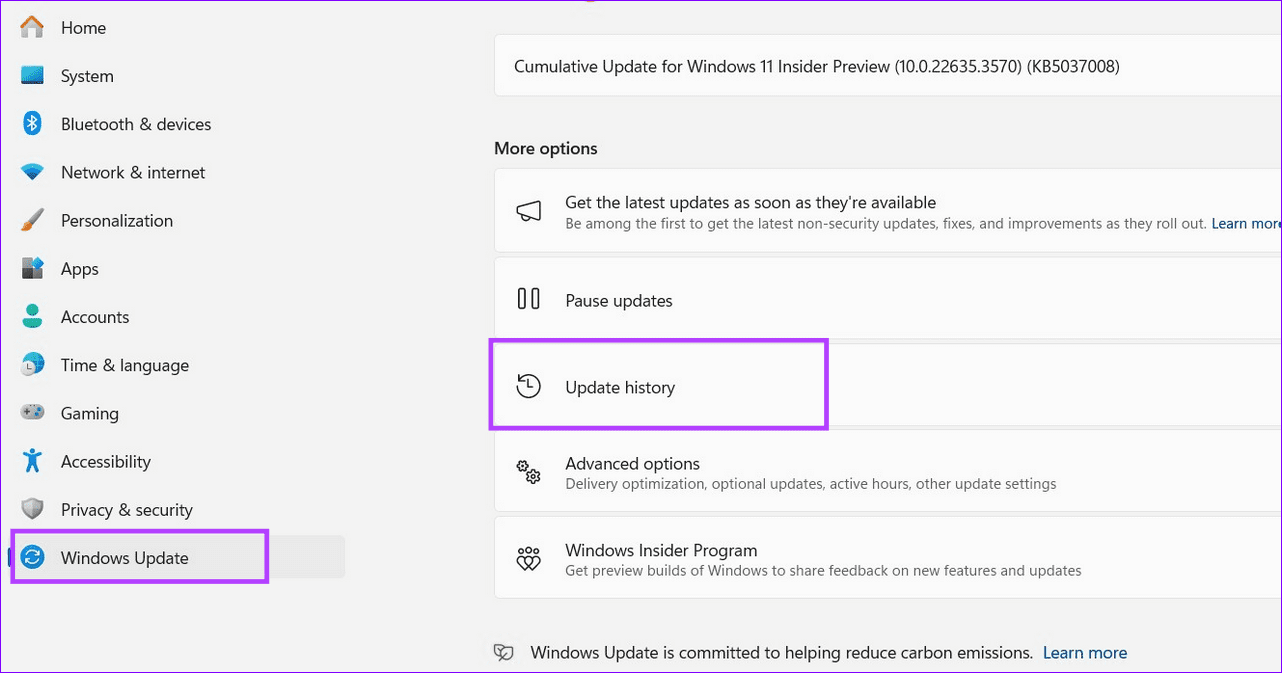
Step 2: Scroll to the bottom and select Uninstall updates.

Step 3: Locate the recent Windows Update using the Installed on label and click Uninstall to remove it.

Was this helpful?
Last updated on 22 May, 2024
Read Next
 8 Fixes for “Your Device Is Missing Important Security and Quality Fixes” on Windows
Is there anything more frustrating than seeing the "Your Device Is Missing Important Security and Quality Fixes" message when waiting for your Windows updates to complete?
8 Fixes for “Your Device Is Missing Important Security and Quality Fixes” on Windows
Is there anything more frustrating than seeing the "Your Device Is Missing Important Security and Quality Fixes" message when waiting for your Windows updates to complete?
 4 Fixes for “Compress to ZIP File” Option Not Working in Windows 11
Try Basic Fixes Try another file or folder: Compressing another file or folder should help confirm if it's a system-wide issue.
4 Fixes for “Compress to ZIP File” Option Not Working in Windows 11
Try Basic Fixes Try another file or folder: Compressing another file or folder should help confirm if it's a system-wide issue.
 6 Fixes for Roblox Chat Not Working on Windows
Fix 1: Modify Roblox Privacy Settings to Unblock Messages A common reason why the chat option may not show up or work in Roblox is if you have previously turned
6 Fixes for Roblox Chat Not Working on Windows
Fix 1: Modify Roblox Privacy Settings to Unblock Messages A common reason why the chat option may not show up or work in Roblox is if you have previously turned
 4 Fixes For Desktop Shortcuts Not Working on Windows 11
Basic Fixes: Restart the computer: Sometimes, a restart is all you need because it is strong enough to force problematic processes that trigger the problem to shut down.
4 Fixes For Desktop Shortcuts Not Working on Windows 11
Basic Fixes: Restart the computer: Sometimes, a restart is all you need because it is strong enough to force problematic processes that trigger the problem to shut down.
 5 Fixes When the Hosts File Is Not Working on Windows
Basic Fixes: Name the Hosts file correctly: Naming is essential.
5 Fixes When the Hosts File Is Not Working on Windows
Basic Fixes: Name the Hosts file correctly: Naming is essential.
 Top 9 Fixes for ‘Samsung DeX Not Working’ on Windows 11
Samsung DeX is a feature that allows users to connect and use their device on a larger display such as a PC or a TV.
Top 9 Fixes for ‘Samsung DeX Not Working’ on Windows 11
Samsung DeX is a feature that allows users to connect and use their device on a larger display such as a PC or a TV.
 4 Fixes for Outlook Add-In Missing or Not Working on Windows
Fix 1: Make Sure the Add-In Is Enabled One possible reason for an Outlook add-in to disappear is if it has been disabled, either by the user or system administrator.
4 Fixes for Outlook Add-In Missing or Not Working on Windows
Fix 1: Make Sure the Add-In Is Enabled One possible reason for an Outlook add-in to disappear is if it has been disabled, either by the user or system administrator.
 2 Fixes When the Windows 11 Caps Lock Light Is Not Working
Basic Fixes: Check for keyboard problems: If the Caps Lock light does not work on Windows 11, it may indicate a physical or mechanical issue.
2 Fixes When the Windows 11 Caps Lock Light Is Not Working
Basic Fixes: Check for keyboard problems: If the Caps Lock light does not work on Windows 11, it may indicate a physical or mechanical issue.
The article above may contain affiliate links which help support Guiding Tech. The content remains unbiased and authentic and will never affect our editorial integrity.

