Microsoft’s Windows Explorer lets you take a peek at a file with the Preview Pane. That way, you get a preview of the file’s content without actually opening it. Explorer offers preview for images, text, PDF files, videos, and documents related to Microsoft Office. However, some Windows 10 users are unable to see a preview of their files in Explorer. For them, the Preview pane option is either grayed out or doesn’t show a preview for specific files.
If the Preview pane isn’t working in the Explorer on your Windows PC, try out the solutions below. Let’s start.
1. Enable Preview Pane
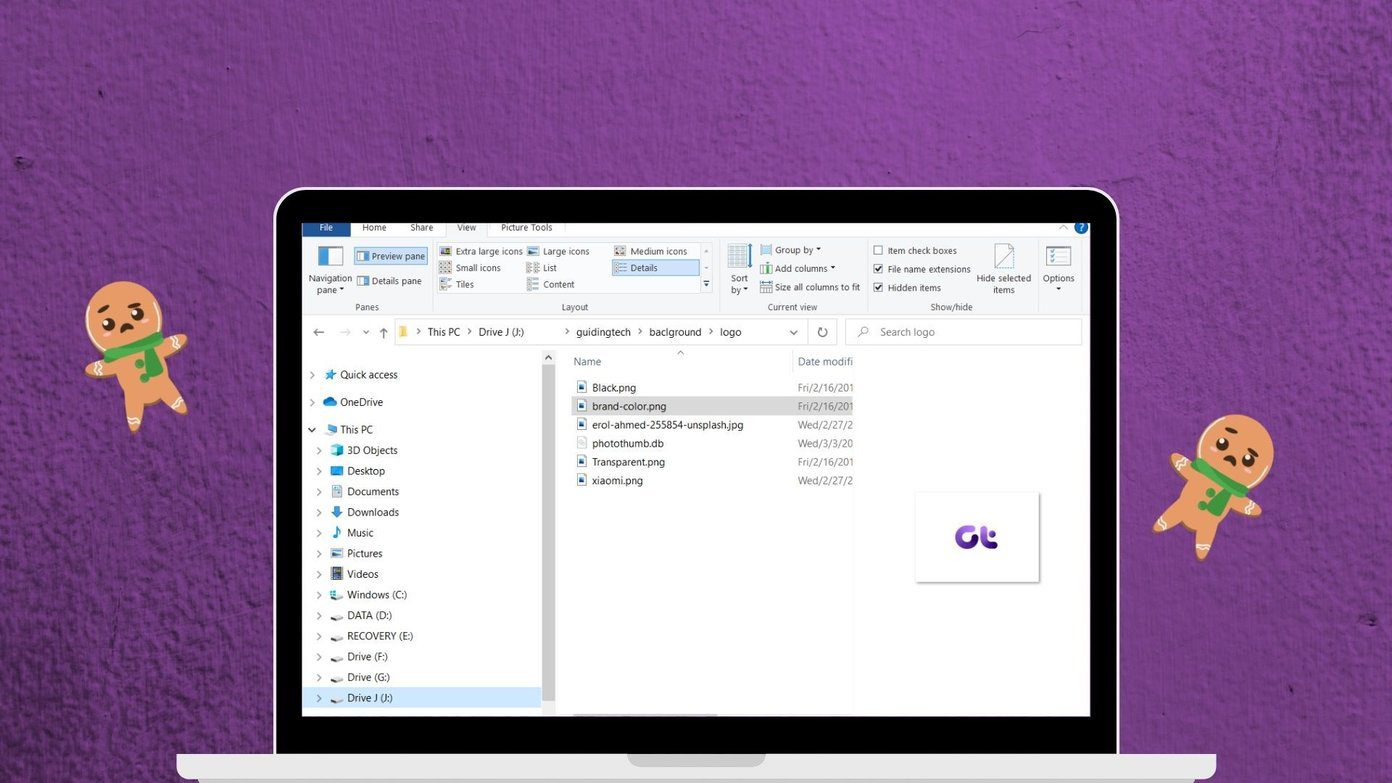
You might have accidentally turned off the Preview pane in File Explorer. You need to check and enable it. For that, open File Explorer using the Windows key + E keyboard shortcut and maximize it to take the full screen.
Click on the View tab at the top. Check if the Preview Pane option appears highlighted to ensure it is enabled. In case it’s not, click on the Preview pane option to enable it. As soon as you turn it on, you should see the Preview pane on the right side of the File Explorer.

To ensure the Preview pane works properly or not, use the Windows Explorer in maximized mode or ensure it’s wide enough to see the options in the View ribbon at the top.
2. Enable Show Preview Handlers
From the Folder Options, you need to enable the ‘Show preview handlers in preview pane’ setting for the proper functioning of the Preview pane. For that, follow these steps:
Step 1: Open File Explorer and click on the View tab. Click on Options.

Step 2: The Folder options window will open. Go to the View tab.
Step 3: Under Advanced settings, check the box next to ‘Show preview handlers in preview pane’.
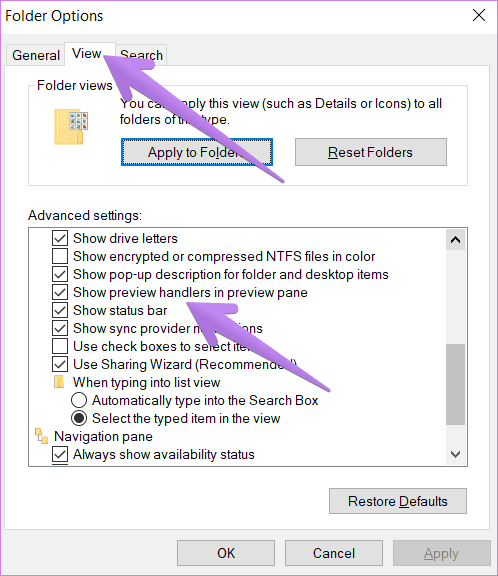
Step 4: Click on Apply followed by Ok.
Step 5: Relaunch File Explorer. The Preview pane should show you a preview of the relevant files.
3. Disable Always Show Icons Setting
In the Folder Options, you will find the ‘Always show icons, never thumbnails’ setting. If that is enabled, the Preview pane will not show anything. You need to disable it for the Preview pane to show content. Here’s how to do that:
Step 1: Open File Explorer. Click on the View tab at the top, and then click on the Options icon at the end of the ribbon. Alternatively, search for File Explorer options in Windows search.
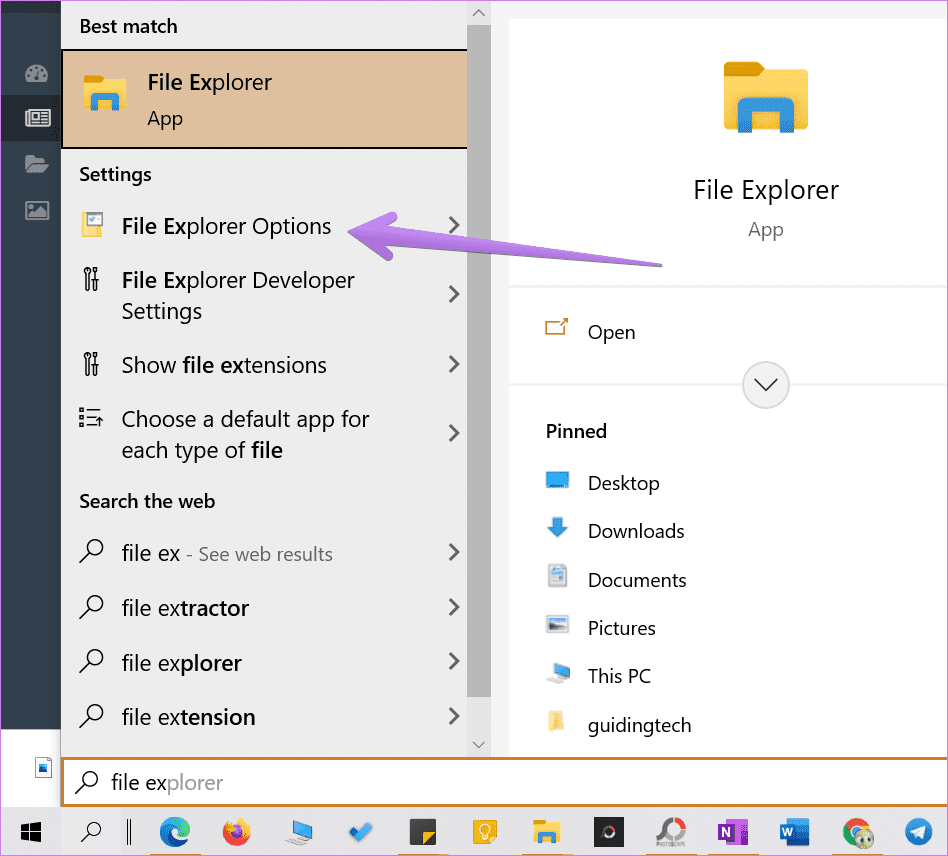
Step 2: When the Folder Options open, click on the View tab.
Step 3: Uncheck the box next to ‘Always show icons, never thumbnails.’
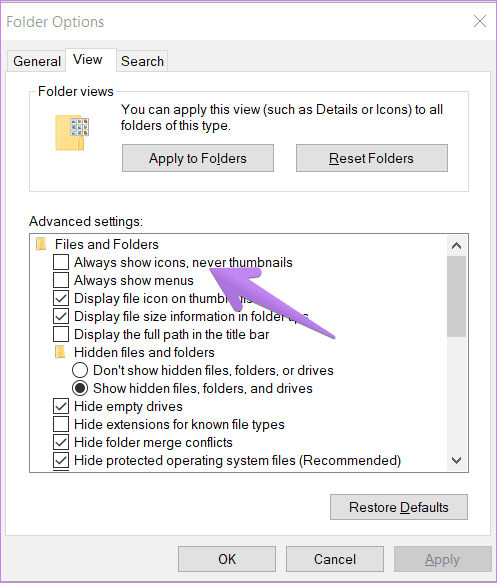
Step 4: Click on Apply to save the changes. Relaunch File Explorer.
The issue should be resolved now.
4. Change File Explorer Startup Mode
One of the solutions at Microsoft Forum suggests that making File Explorer open to This PC instead of Quick Access fixes the issues with the Preview pane.
For that, open the File Explorer Options window either from File Explorer or using search as we did above. When the Folder Options window opens, click on the drop-down box next to ‘Open File Explorer to’ under the General tab.
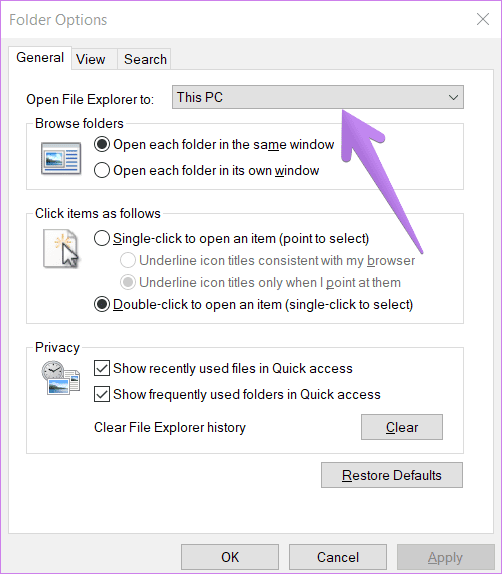
Select This PC. Click on Apply to save the changes.
5. Change Performance Mode
Another solution that has helped users is changing the Performance mode from ‘Let Windows choose what’s best for my computer’ to ‘Adjust for best appearance.’ Here are the steps to achieve that:
Step 1: Open Windows Search on your PC. You can use the Windows key + S keyboard shortcut to open search.
Step 2: Type View Advanced system settings. Click on it.
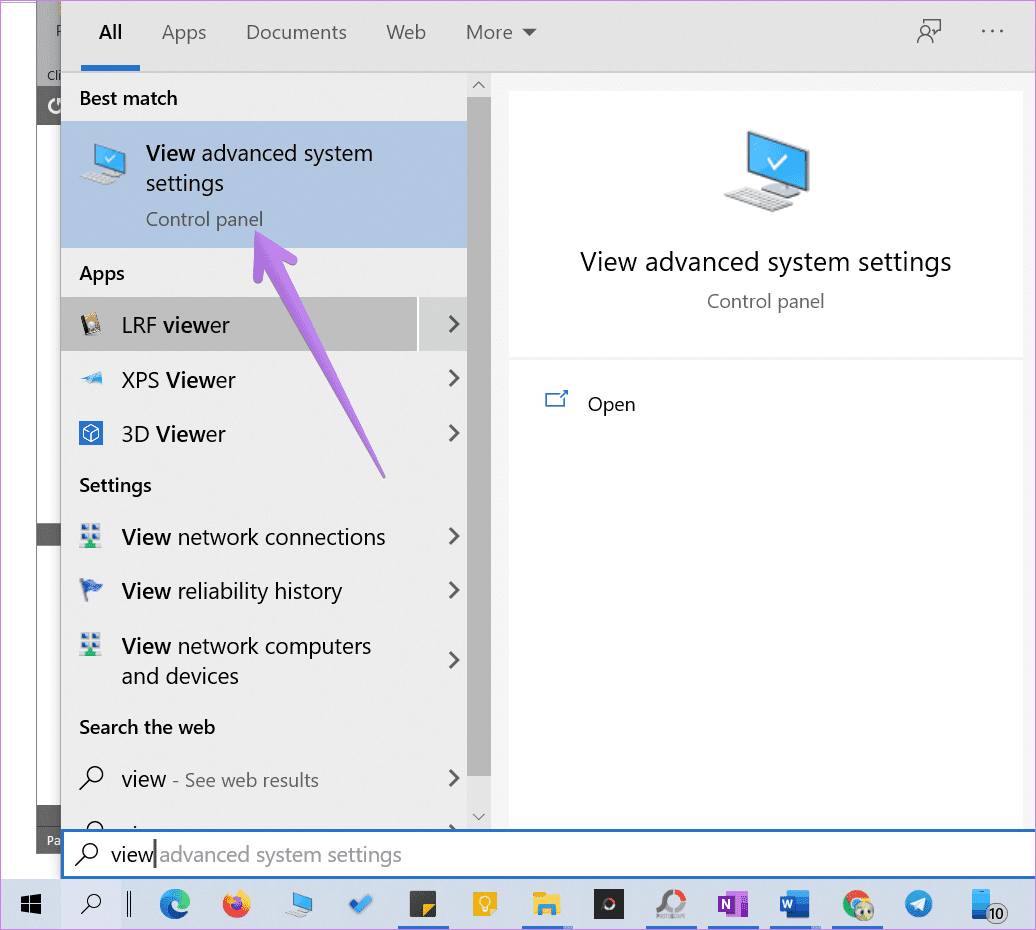
Tip: You can open the Advanced system settings from Settings > System > About. Under Related settings, click on Advanced system settings.
Step 3: Under the Advanced tab, click on Settings next to Performance.
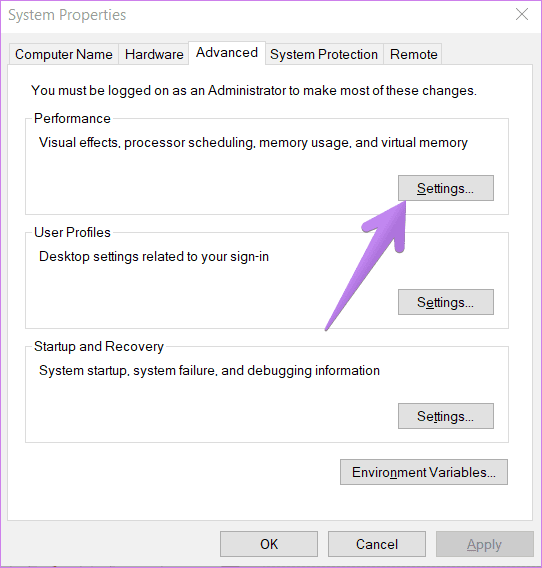
Step 4: Choose ‘Adjust for best appearance.’

Step 5: Click on Apply.
6. Run SFC Scan
Sometimes, problems in Windows 10 can occur if system files are corrupt. You can easily fix them by running an SFC scan. Here are the steps for the same:
Step 1: Open Command Prompt on your computer. For that, type CMD or Command Prompt in Windows search. Right-click on the Command Prompt icon and select Run as administrator.
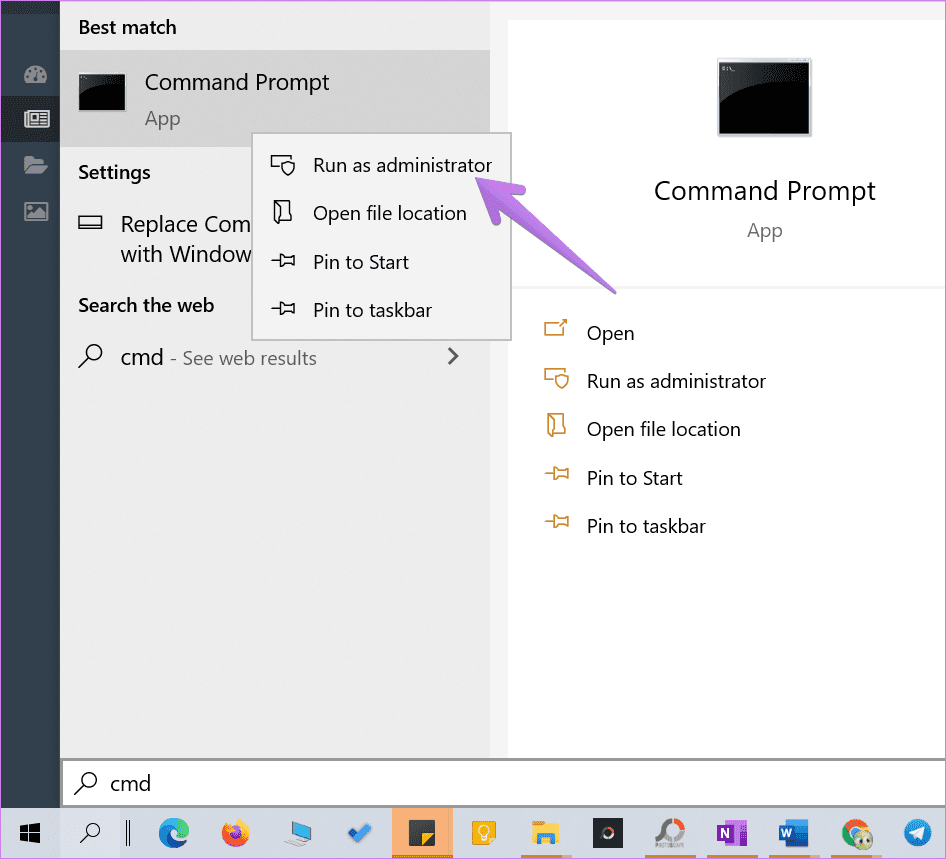
Step 2: Type sfc /scannow in the Command Prompt window and hit the Enter key. Windows will now scan your computer and fix any corrupted files.
Note: The scan may take at least 15 minutes to complete. Kindly be patient and do not close the window.
Step 3: Restart the computer after the scan has finished.
7. Reset File Explorer
If nothing seems to help, you must try to reset File Explorer settings to default. Here’s how to do so:
Step 1: Open File Explorer Options as shown above.
Step 2: Click on the Restore defaults button under the General tab.
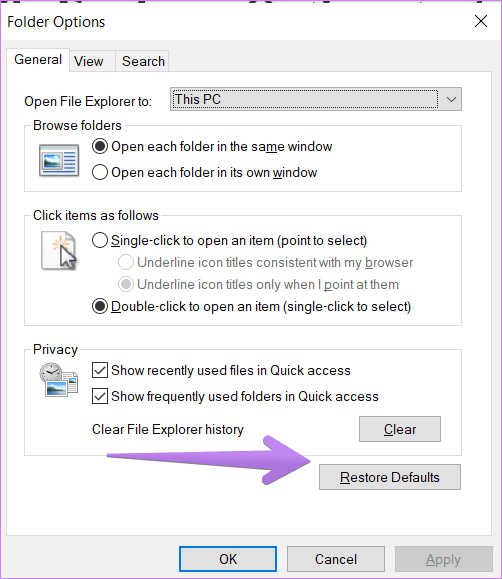
Step 3: Go to the View tab and click on Restore defaults.
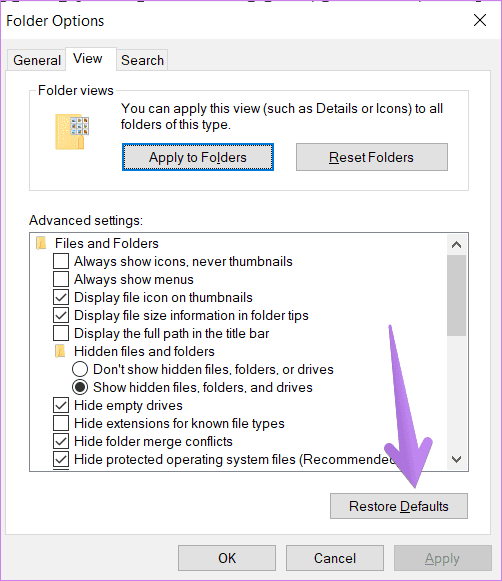
Step 4: Hit apply to save the changes.
Tip: Resetting File Explorer also comes in handy if File Explorer is loading slowly.
8. Use Third-Party App
In case resetting File Explorer also doesn’t come to the rescue, you can use the QuickLook app for the same purpose. It’s a third-party app that shows the file’s preview when you hit the spacebar. Interestingly, it supports more file formats as compared to the Preview feature in Windows 10.
Previews Can Be Helpful
Some files take a bit longer to appear in the Preview pane. You should wait for a few seconds before picking holes in the Preview pane, especially if you are using an old PC.
Was this helpful?
Last updated on 13 July, 2021
The article above may contain affiliate links which help support Guiding Tech. The content remains unbiased and authentic and will never affect our editorial integrity.


