Basic Fixes
- Disable Audio Enhancements on Windows: It conflicts with the VLC audio output. Disable it from Windows Settings > System > Sound > Audio Device, and set ‘Audio enhancements’ to Off.
- Clear the VLC app cache: Press the Windows + R shortcut to open the Run dialog, paste ‘%appdata%\VLC’, and press Enter. Select all files in the opened directory and press Delete on your keyboard to clear them.
- Update or reinstall the VLC media player: Open the Microsoft Store, search VLC, and tap Update (if available). Alternatively, uninstall the VLC media player from Windows Settings > Apps > Installed apps, and install it afresh from the Microsoft Store.
Fix 1: Enable Audio From VLC Settings
The VLC media player has an in-app option to enable audio. If you have unknowingly disabled it, you won’t hear any sound while playing videos. Head to VLC preferences to fix it:
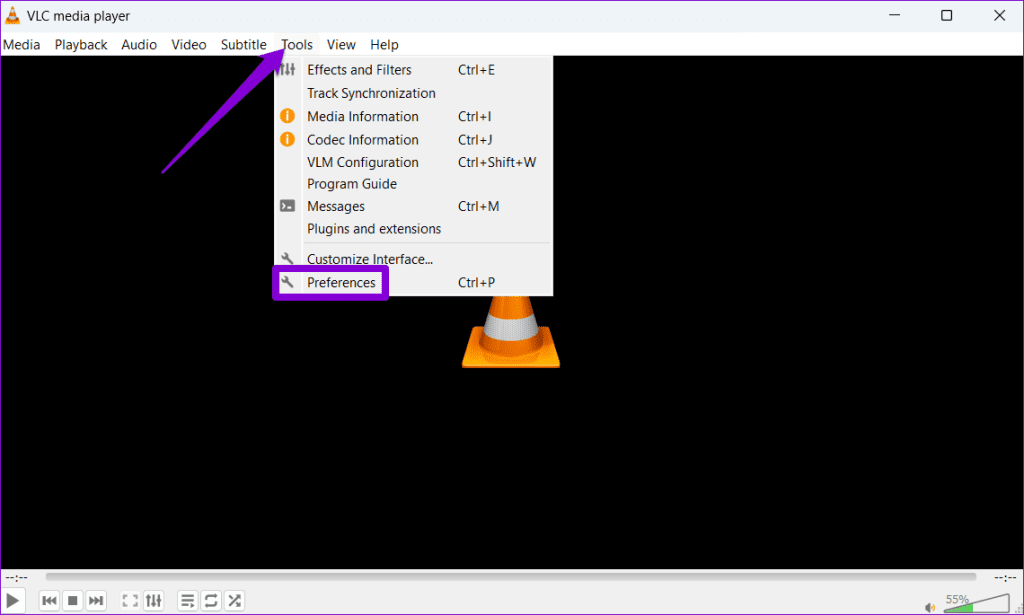
Step 1: Open the VLC media player, click Tools at the top, and select Preferences.
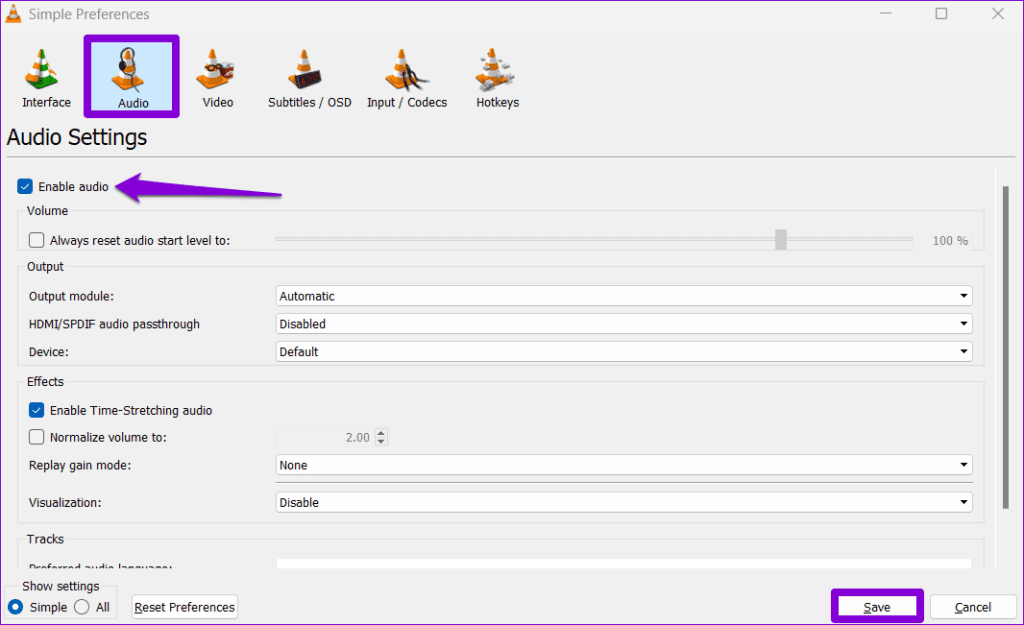
Step 2: Select Audio, turn on Enable audio, and click Save to apply changes.
Fix 2: Disable and Enable the Audio Track
The VLC media player audio may not work sometimes due to temporary app glitches. To fix it, disable and enable the audio track manually.
Step 1: Play your desired video in VLC, select Audio Track under Audio, and click Disable to turn off its audio.
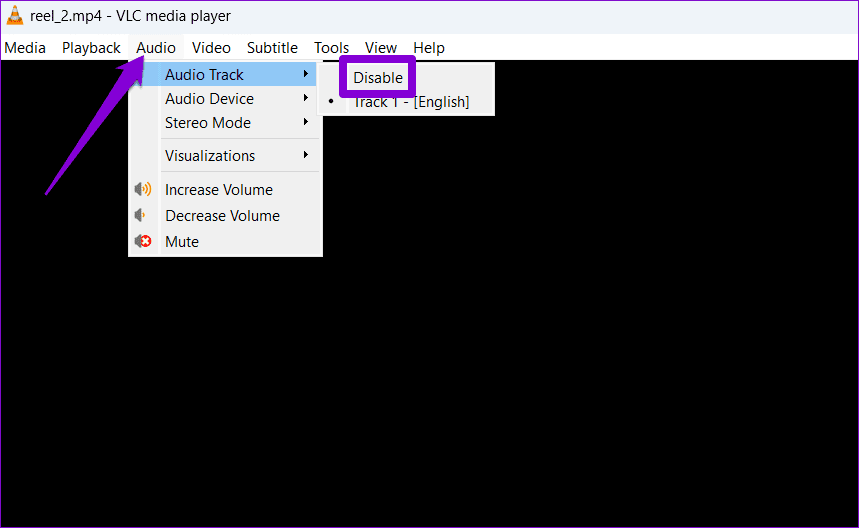
Step 2: Click the Audio menu again, select Audio Track, and enable the available track from the submenu.

Fix 3: Adjust VLC Output Settings
Windows lets you choose a specific audio output device – speaker or headphone. However, apps like the VLC media player allow customizing specific audio output. If you can’t hear sound from VLC, try changing its audio output module.
Step 1: Open the VLC media player, press the Ctrl + P shortcut to open its Preferences menu, and select All under ‘Show settings’.

Step 2: Select Output modules from the left sidebar, and assign Windows Multimedia Device output to the ‘Audio output module’. Click Save to apply changes.

Step 3: Finally, select WaveOut under Output modules, and choose your connected speaker or headphone in the ‘Select Audio Device’. Click Save to apply changes and retry playing media in the VLC.

Fix 4: Disable Hardware Acceleration
Hardware acceleration in VLC enhances its media playback performance. An issue with it, however, can halt its audio output. Head to VLC preferences to disable its Hardware-accelerated decoding.
Step 1: Open the VLC media player, click Tools at the top, and select Preferences.

Step 2: Select Input/Codecs from the top, set Hardware-accelerated decoding to Disable, and click Save to apply changes.

Fix 5: Reset VLC Preferences
VLC packs several features and customization options. If you’ve tinkered with those settings and forgot to enable or disable them, the audio may not play as expected. Reset VLC preferences to restore normalcy.
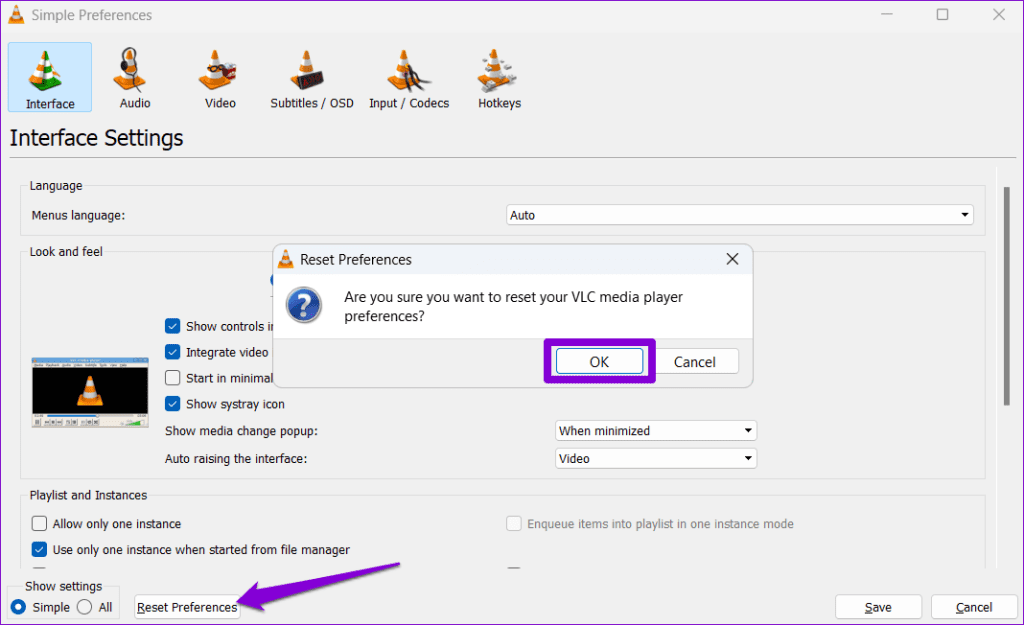
Step 1: Open VLC and press the Ctrl + P shortcut to open the Preferences menu.
Step 2: Select Interface from the top, and click Reset Preferences. Click OK when prompted to confirm.
Was this helpful?
Last updated on 23 July, 2024
Read Next
 2 Ways to Fix VLC Media Player Not Working on Mac
Basic Fixes: Restart Mac: Rebooting your Mac can fix frequent issues with the installed apps.
2 Ways to Fix VLC Media Player Not Working on Mac
Basic Fixes: Restart Mac: Rebooting your Mac can fix frequent issues with the installed apps.
 4 Ways to Fix VLC Not Playing MKV Files on Windows 11
Basic Fixes Shorten the file/directory name: VLC may fail to play an MKV file if its name or the directory name (where it's located) is unusually long.
4 Ways to Fix VLC Not Playing MKV Files on Windows 11
Basic Fixes Shorten the file/directory name: VLC may fail to play an MKV file if its name or the directory name (where it's located) is unusually long.
 3 Ways to Fix VLC Subtitle Delay on Desktop and Mobile
How to Adjust Subtitle Timing in VLC on Windows PC and Mac While your video is running, you can use the keyboard shortcuts to speed up (or down) the subtitles.
3 Ways to Fix VLC Subtitle Delay on Desktop and Mobile
How to Adjust Subtitle Timing in VLC on Windows PC and Mac While your video is running, you can use the keyboard shortcuts to speed up (or down) the subtitles.
 11 Easy Ways to Fix HDMI Audio Not Working in Windows 11
When watching a movie, series, show, etc., using HDMI audio seems to have become a staple.
11 Easy Ways to Fix HDMI Audio Not Working in Windows 11
When watching a movie, series, show, etc., using HDMI audio seems to have become a staple.
 How to Fix Audio Not Working on Windows 10
Audio problems can be annoying while watching your favorite movie or during a video call.
How to Fix Audio Not Working on Windows 10
Audio problems can be annoying while watching your favorite movie or during a video call.
 How to Use VLC Player on Amazon Fire TV Stick
VLC media player needs no introduction.
How to Use VLC Player on Amazon Fire TV Stick
VLC media player needs no introduction.
 How to Use VLC Media Player on Android TV
Here's how you can use and customize VLC Media Player on your Android TV.
How to Use VLC Media Player on Android TV
Here's how you can use and customize VLC Media Player on your Android TV.
The article above may contain affiliate links which help support Guiding Tech. The content remains unbiased and authentic and will never affect our editorial integrity.