Fix 1: Enable Inactive Accounts
If the other user accounts on your system are disabled, they won’t appear on the login screen. To enable it, follow the below steps.
Step 1: Launch PowerShell as an administrator option.
Step 2: Type the following command and press Enter:
Get-localuser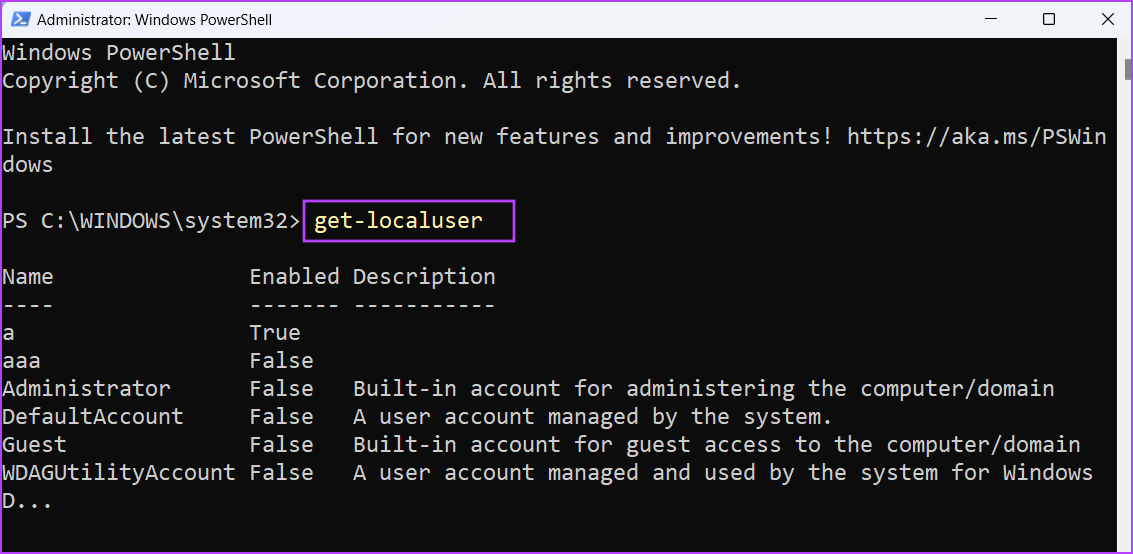
You will see a list of all user accounts on your system, along with their current state (enabled or disabled).
Step 3: To enable an inactive user account, type the below command:
Net user username /active:yesReplace the username in the above code with the name of the user account that is inactive on your PC. In our case, the command becomes:
Net user aaa /active:yes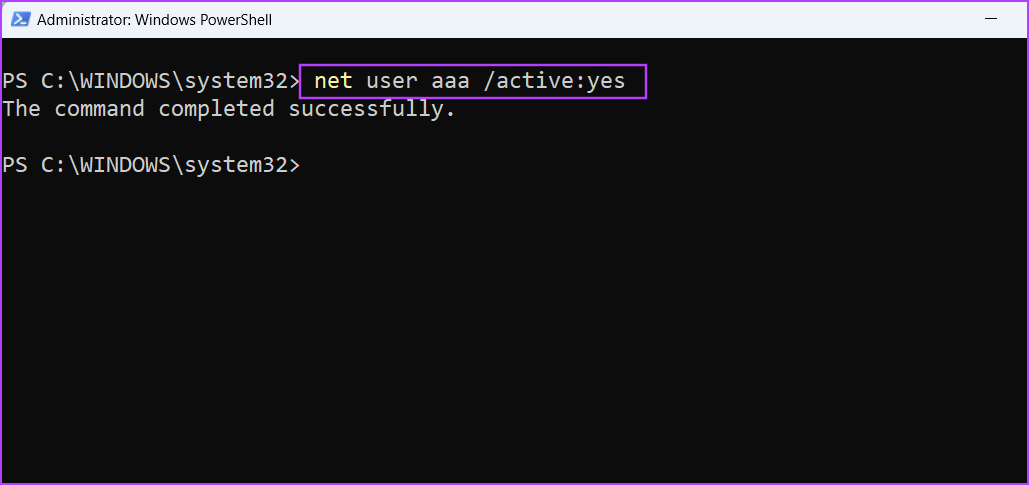
If there are multiple inactive accounts, use the above command to enable all other inactive accounts. Lastly, restart your PC to apply the changes.
Fix 2: Modify Windows Registry
Before starting with the below steps, create a registry backup and save it on a USB drive.
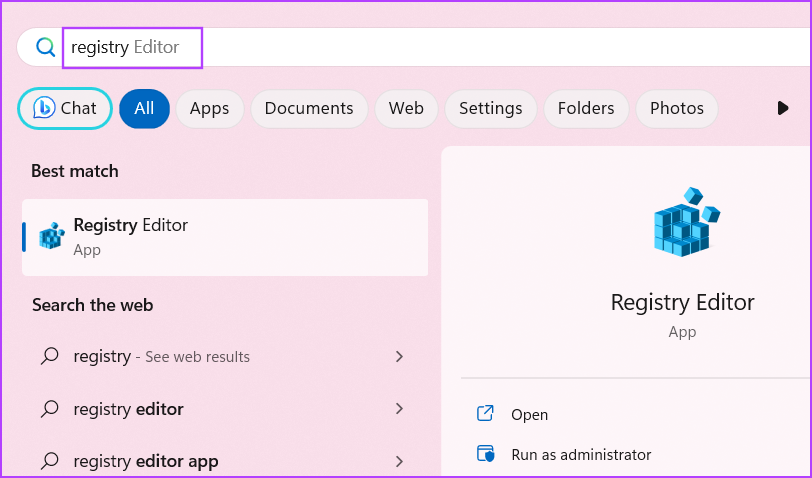
Step 1: Press the Windows key, type registry in the search bar, and press Enter.
Step 2: Go to the top address bar, paste the following path, and press Enter:
HKEY_LOCAL_MACHINE\SOFTWARE\Microsoft\Windows\CurrentVersion\Policies\System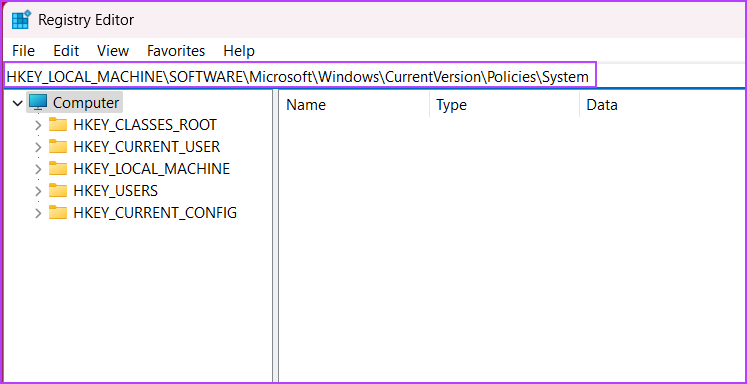
Step 3: Locate the HideFastUserSwitching registry value and move to Step 5.
If it doesn’t exist, right-click on the page and click on New. Then, click on DWORD (32-bit).

Step 4: Name the newly created DWORD (32-bit) value HideFastUserSwitching and double-click on it.
Step 5: Set the Value data to 0 and click on OK.
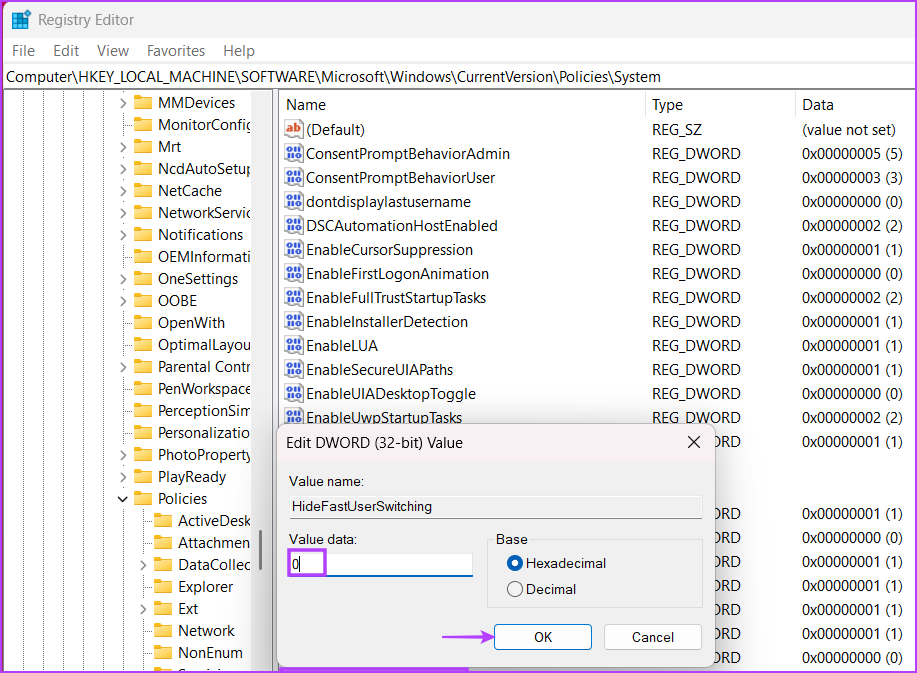
Finally, close the Registry Editor and restart your system to apply the changes.
Also Read: How to safely clean Registry on Windows 10 and 11
Fix 3: Enable User Accounts Using Local Users and Groups Option
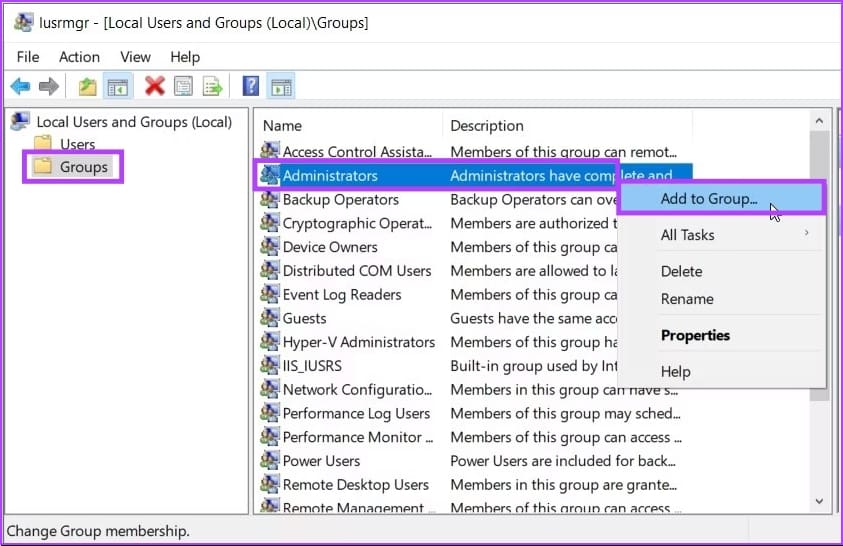
Step 1: Launch the Run command box and type lusrmgr.msc to open the Local Users and Groups tool.
Step 2: Go to the Groups folder.
Step 3: Right-click on the Administrators and select the Add to Group option.
Step 4: Click the Add button and press the Object Types button on the Select Users screen.
Step 5: Check the box next to the Users box and press OK.
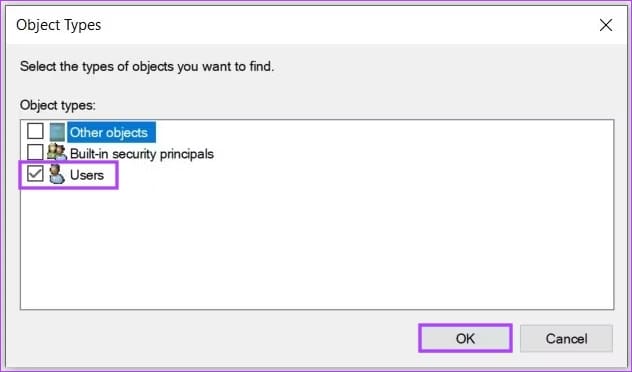
You will be taken back to the Select Users screen.
Step 6: Go to Advanced and click the Find Now button.
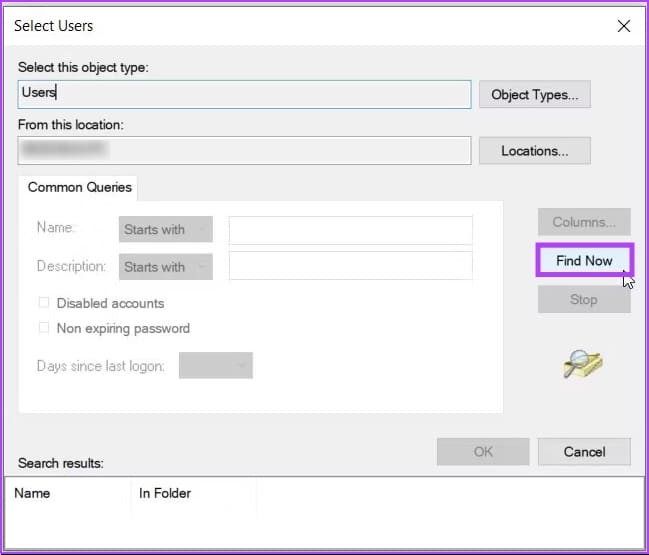
From the search results, select the username that isn’t appearing on the login screen and click OK. Once done, restart your computer to save the changes.
If you want to enable multiple accounts, you must repeat the above steps.
Fix 4: Remove a Recent Windows Update
Step 1: Launch the Settings app and go to Windows Update.
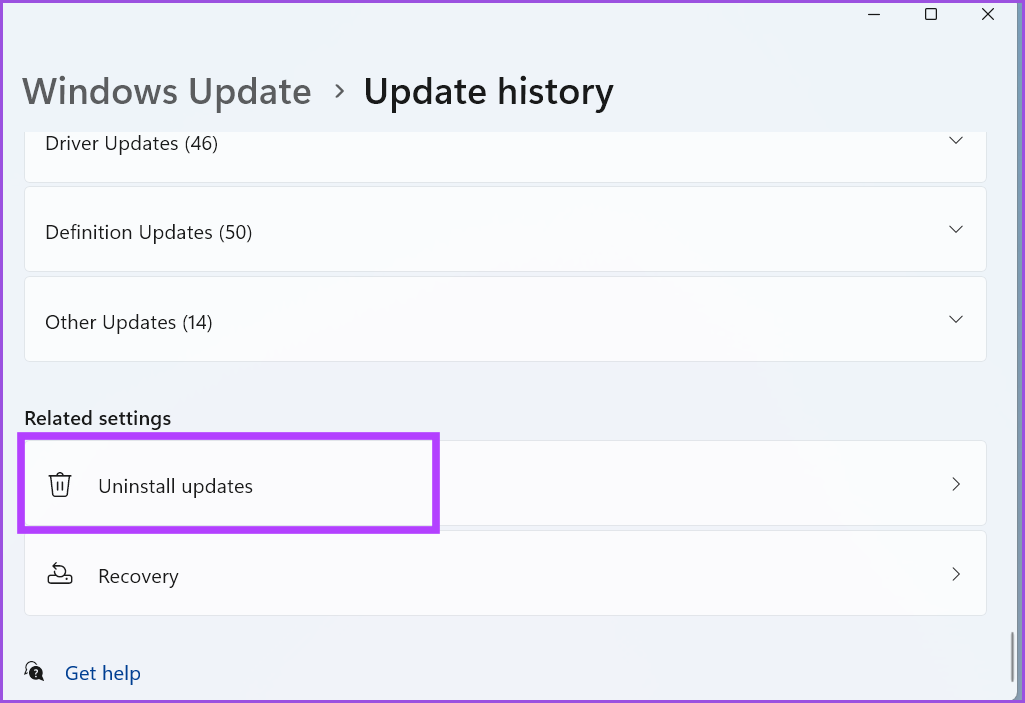
Step 2: Click on Update history.
Step 3: Scroll down to the Related settings section and click on Uninstall updates.
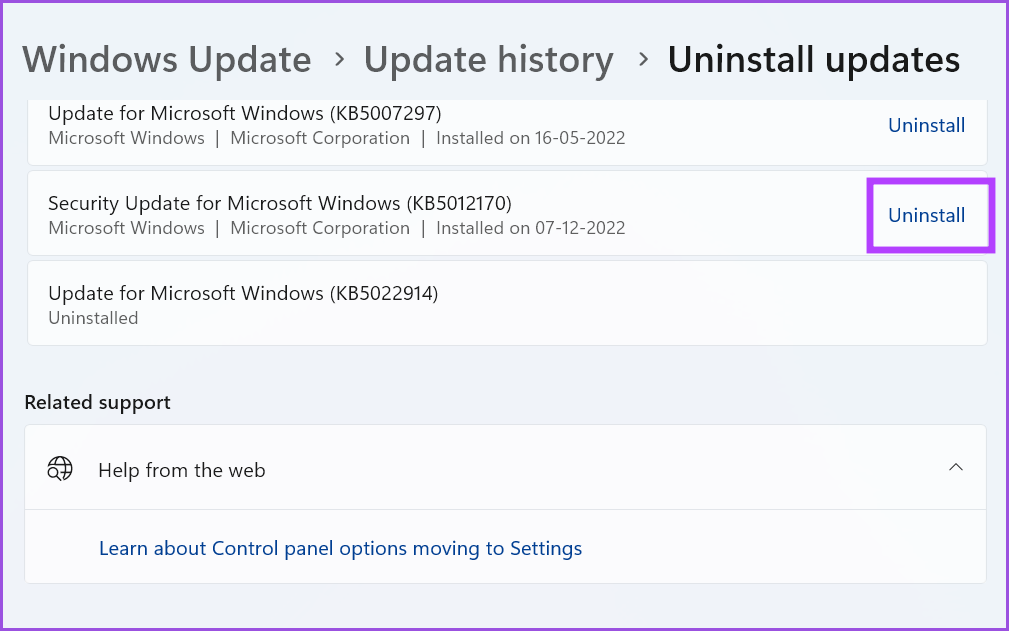
Step 4: Find the most recently installed update and click on Uninstall.
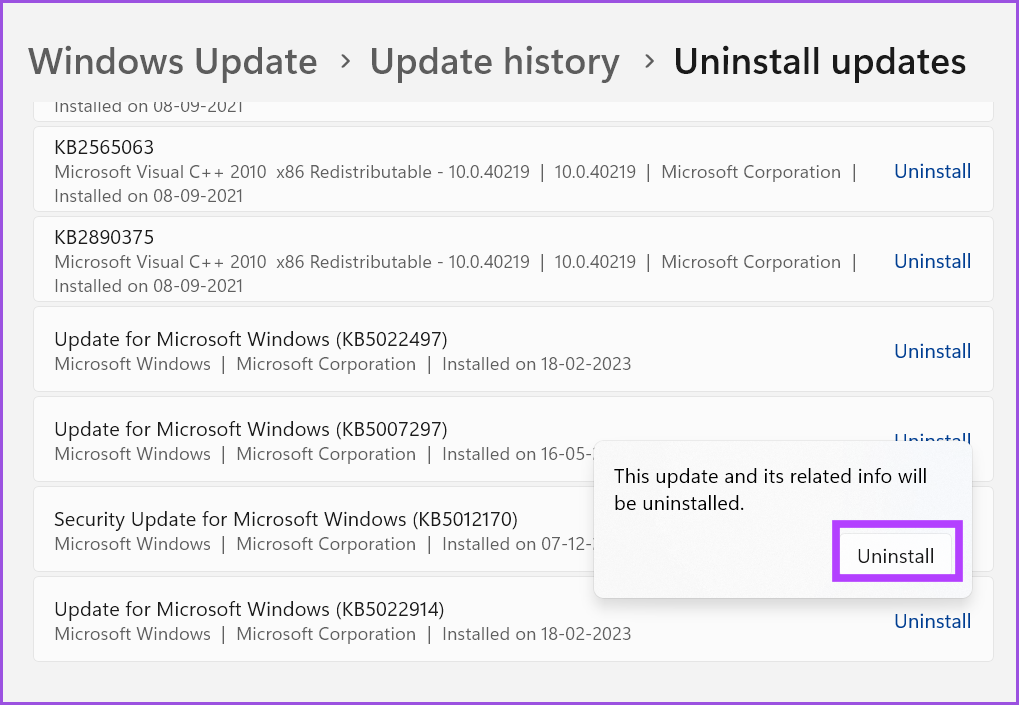
Step 5: Windows will reconfirm your decision to remove the update. Click on Uninstall.
Was this helpful?
Last updated on 24 April, 2024
Read Next
 6 Ways to Switch User Accounts in Windows 11
Method 1: Switch User Accounts From the Start Menu The most popular way to switch user accounts on a Windows computer is via the Start menu.
6 Ways to Switch User Accounts in Windows 11
Method 1: Switch User Accounts From the Start Menu The most popular way to switch user accounts on a Windows computer is via the Start menu.
 6 Ways to Fix Login Screen Not Showing in Windows 11
Common Fixes Press Ctrl + Alt + Delete - This shortcut refreshes the login interface to bring up the login screen.
6 Ways to Fix Login Screen Not Showing in Windows 11
Common Fixes Press Ctrl + Alt + Delete - This shortcut refreshes the login interface to bring up the login screen.
 How to Disable the Login Password Screen in Windows 10
Entering a password every time you log in to your Windows 10 computer can get tiring after a while.
How to Disable the Login Password Screen in Windows 10
Entering a password every time you log in to your Windows 10 computer can get tiring after a while.
 4 Ways to Disable Login Screen After Sleep on Windows 11
Method 1: Disable Login After Sleep From Settings The easiest way to skip the login screen after sleep mode is by modifying the sign-in options in the Settings app.
4 Ways to Disable Login Screen After Sleep on Windows 11
Method 1: Disable Login After Sleep From Settings The easiest way to skip the login screen after sleep mode is by modifying the sign-in options in the Settings app.
 4 Ways to Fix the Login Error Code E84 in Steam for Windows
Switch to a different network connection: A slow or intermittent internet connection can also cause login errors in Steam.
4 Ways to Fix the Login Error Code E84 in Steam for Windows
Switch to a different network connection: A slow or intermittent internet connection can also cause login errors in Steam.
 How to Remove Email or Accounts From Facebook Login Screen
Remove Remembered Info in Facebook Login on Desktop You can remove the login info from the Facebook webpage or by removing the autofill password for your Facebook account using browser
How to Remove Email or Accounts From Facebook Login Screen
Remove Remembered Info in Facebook Login on Desktop You can remove the login info from the Facebook webpage or by removing the autofill password for your Facebook account using browser
 What’s the Difference Between PIN and Password for Login in Windows 10
We carry almost our entire digital life in laptops, and if security is compromised, anyone can access our both professional and personal life.
What’s the Difference Between PIN and Password for Login in Windows 10
We carry almost our entire digital life in laptops, and if security is compromised, anyone can access our both professional and personal life.
 How to Remove PIN at Login in Windows 11
How to Remove PIN Login on Windows 11 Using a PIN to log into Windows is a quick and easy way to get a basic level of security for your
How to Remove PIN at Login in Windows 11
How to Remove PIN Login on Windows 11 Using a PIN to log into Windows is a quick and easy way to get a basic level of security for your
The article above may contain affiliate links which help support Guiding Tech. The content remains unbiased and authentic and will never affect our editorial integrity.