Basic Fixes
- Change old mouse pads: If a portion of your mousepad has faded and lost the coarseness needed to hold the mouse in place, it can make your mouse slide automatically, and you’ll see the mouse pointer moving on its own.
- Check your desk: Some of these desks feature drawers that tend to bend over time and disturb the overall alignment of the spot. So, check if your desk has an unexpected inclination on the surface.
- Restart PC: Restarting your Windows PC can help fix most operating system issues and bugs.
- Reconnect Mouse: If you use an external mouse and the cursor is moving on its own, try disconnecting and reconnecting.
- Disable other external devices: Try disconnecting other connected devices to eliminate any conflict causing problems with the cursor.
Also Read: How to change mouse sensitivity (DPI) and other settings in Windows 11
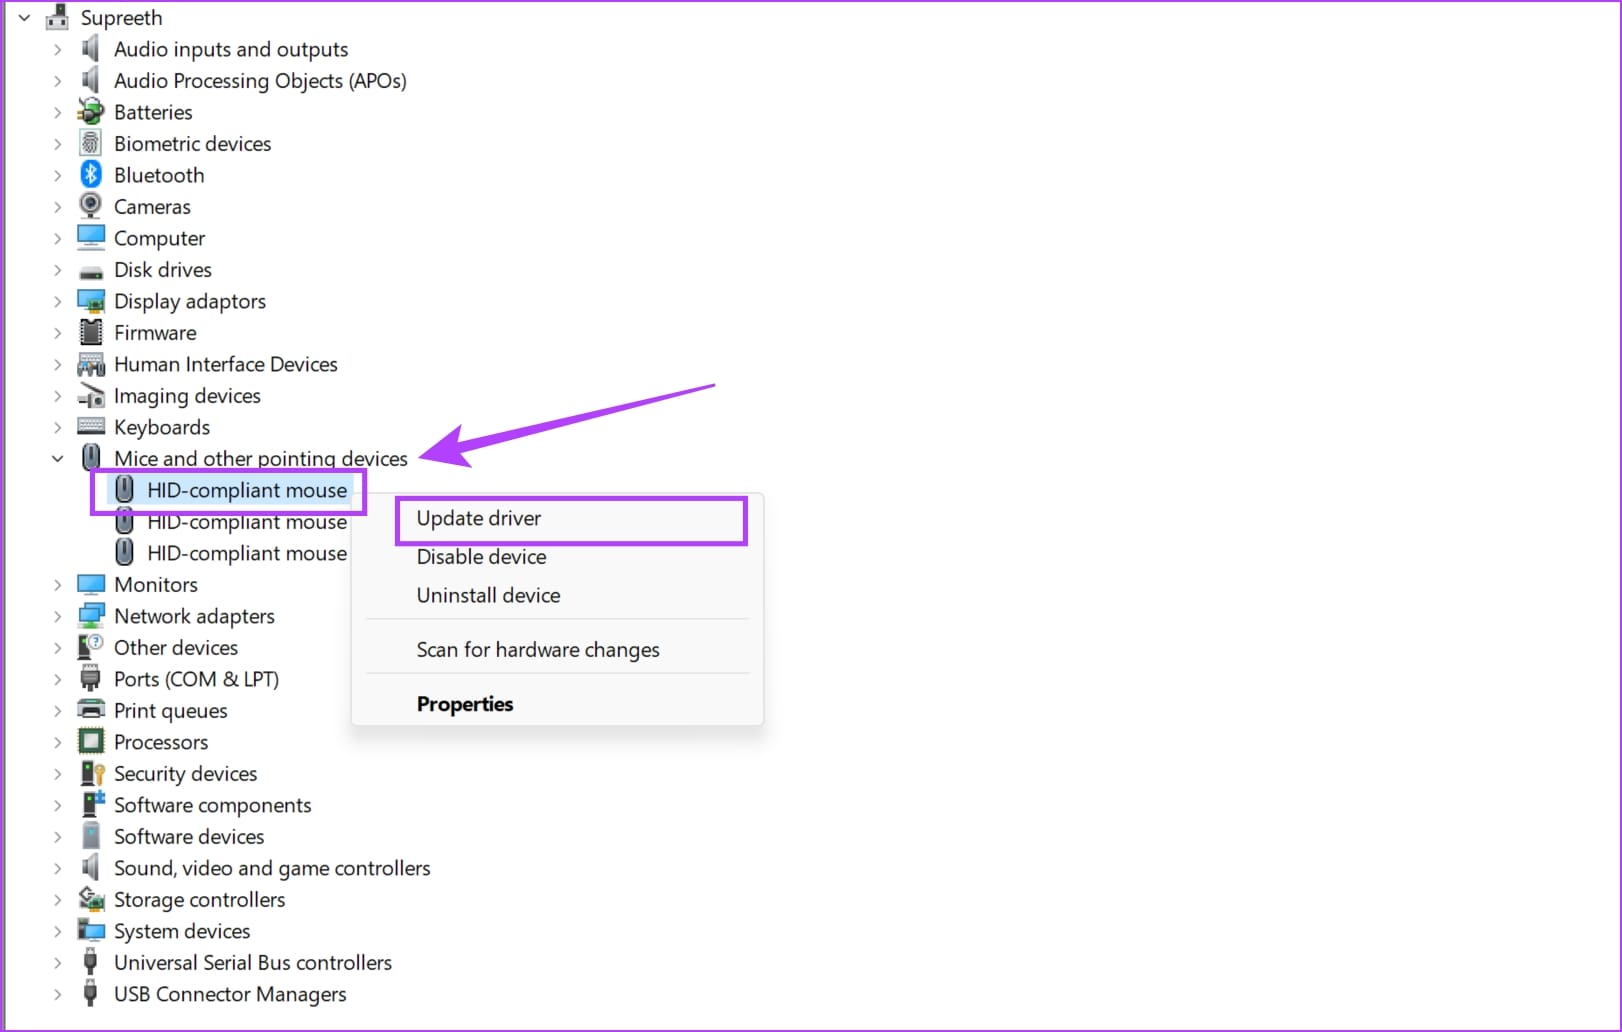
Fix 1: Manage Mouse Drivers
An outdated version of the mouse driver might be vulnerable to a few issues and bugs. This may cause the mouse to drift on its own in your Windows PC.
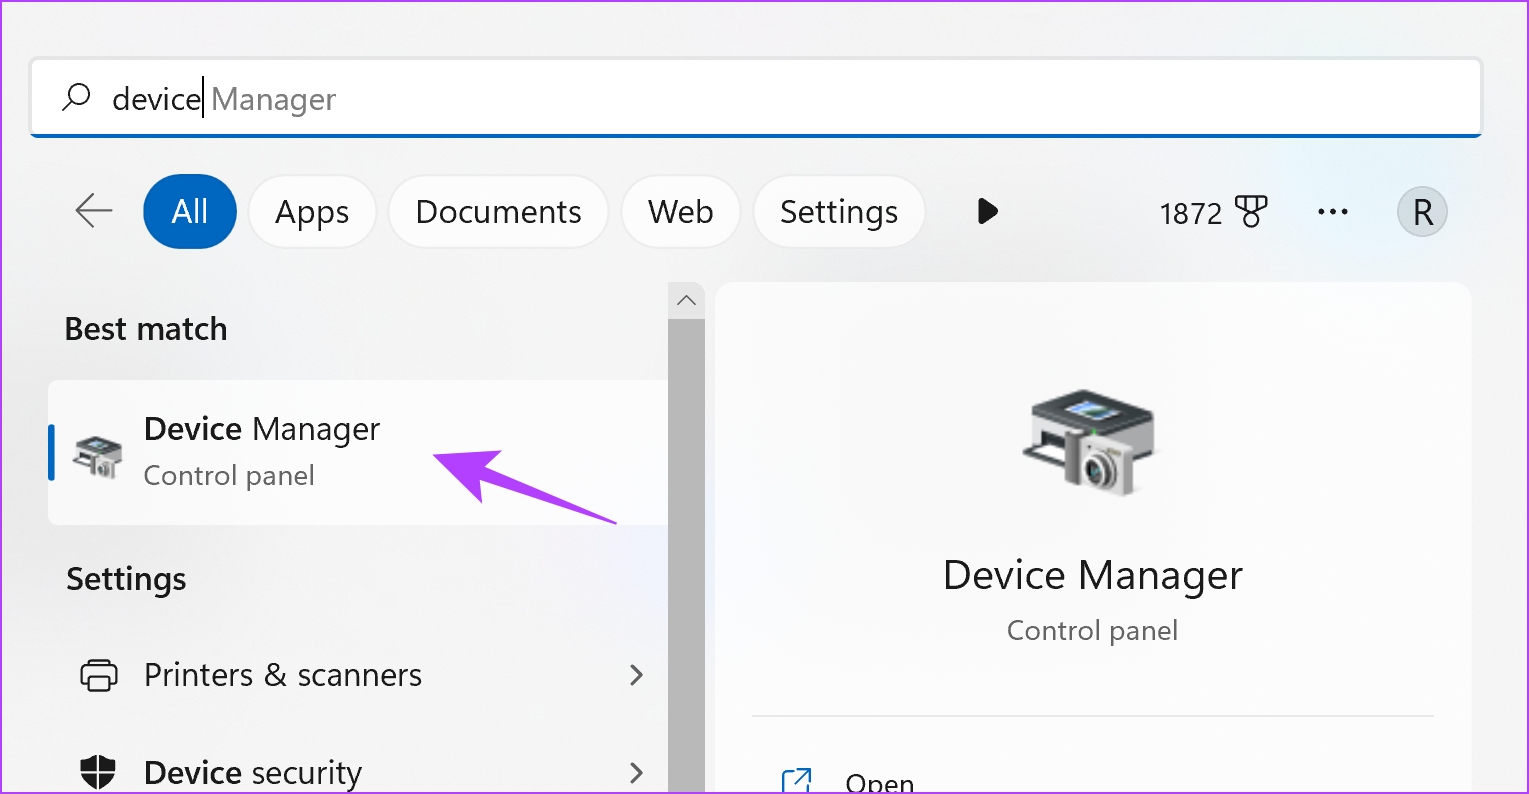
Step 1: Open the Device Manager app.
Step 2: Select Mice and other pointing devices and right-click on your mouse to update the driver.
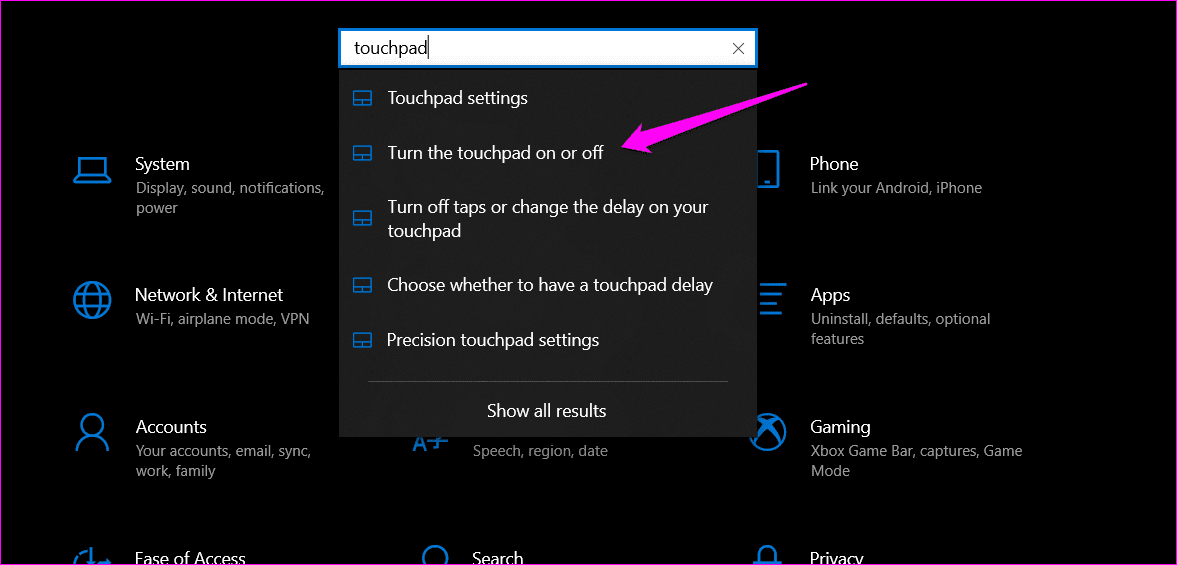
Fix 2: Disable the Touchpad if You Are Using an External Mouse
At times, the touchpad can accumulate dirt inside its surface and malfunction. If you prefer using a mouse with your laptop, disable the touchpad. This can help you fix the issue and prevent ghost actions through your touchpad.
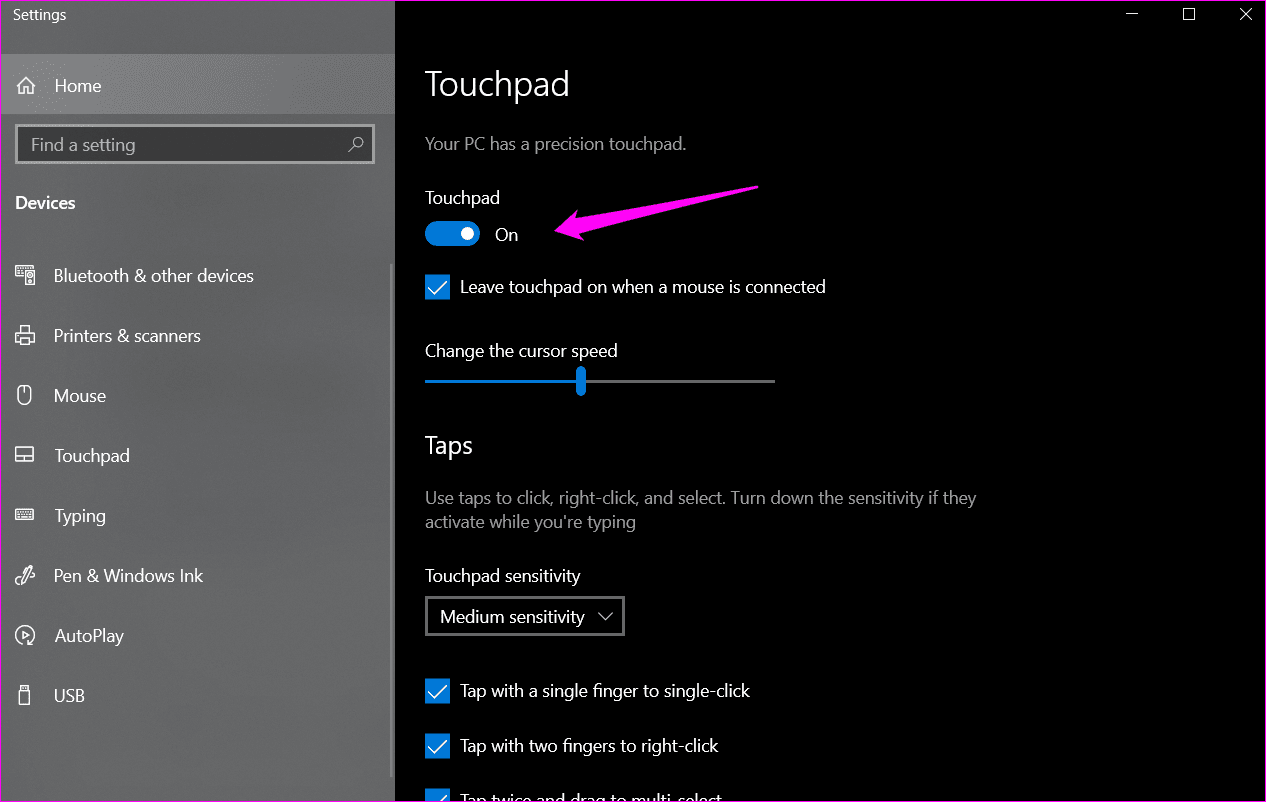
Step 1: Open Settings and search for the ‘Turn the touchpad on or off’ option. Click on the search result to open it.
Step 2: Click on the toggle button to turn it off. Some laptops also have a dedicated key on their keyboard to quickly turn on/off the touchpad.
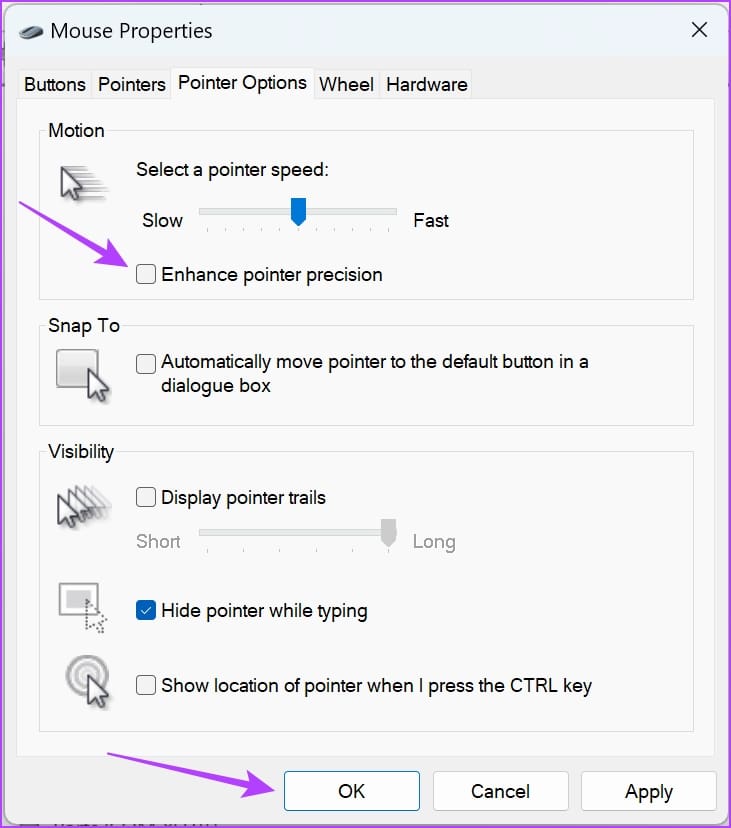
Fix 3: Disable Enhance Pointer Precision
Disabling “Enhance Pointer Precision” stops your PC from adjusting mouse sensitivity, preventing erratic cursor movements caused by the pointer acceleration.
Step 1: Open the Settings app on your Windows PC. Tap on Bluetooth & Devices and select Mouse.

Step 2: Select Additional Mouse Settings.

Step 3: Uncheck the box for Enhance pointer precision and click on OK.
Fix 4: Boot PC in Safe Mode
Restarting your PC in safe mode turns off all the third-party applications and runs your PC with the essentials. If the mouse cursor stops moving on its own in safe mode, a third-party app may be causing the problem. Therefore, uninstall a few apps and check if the issue is fixed.
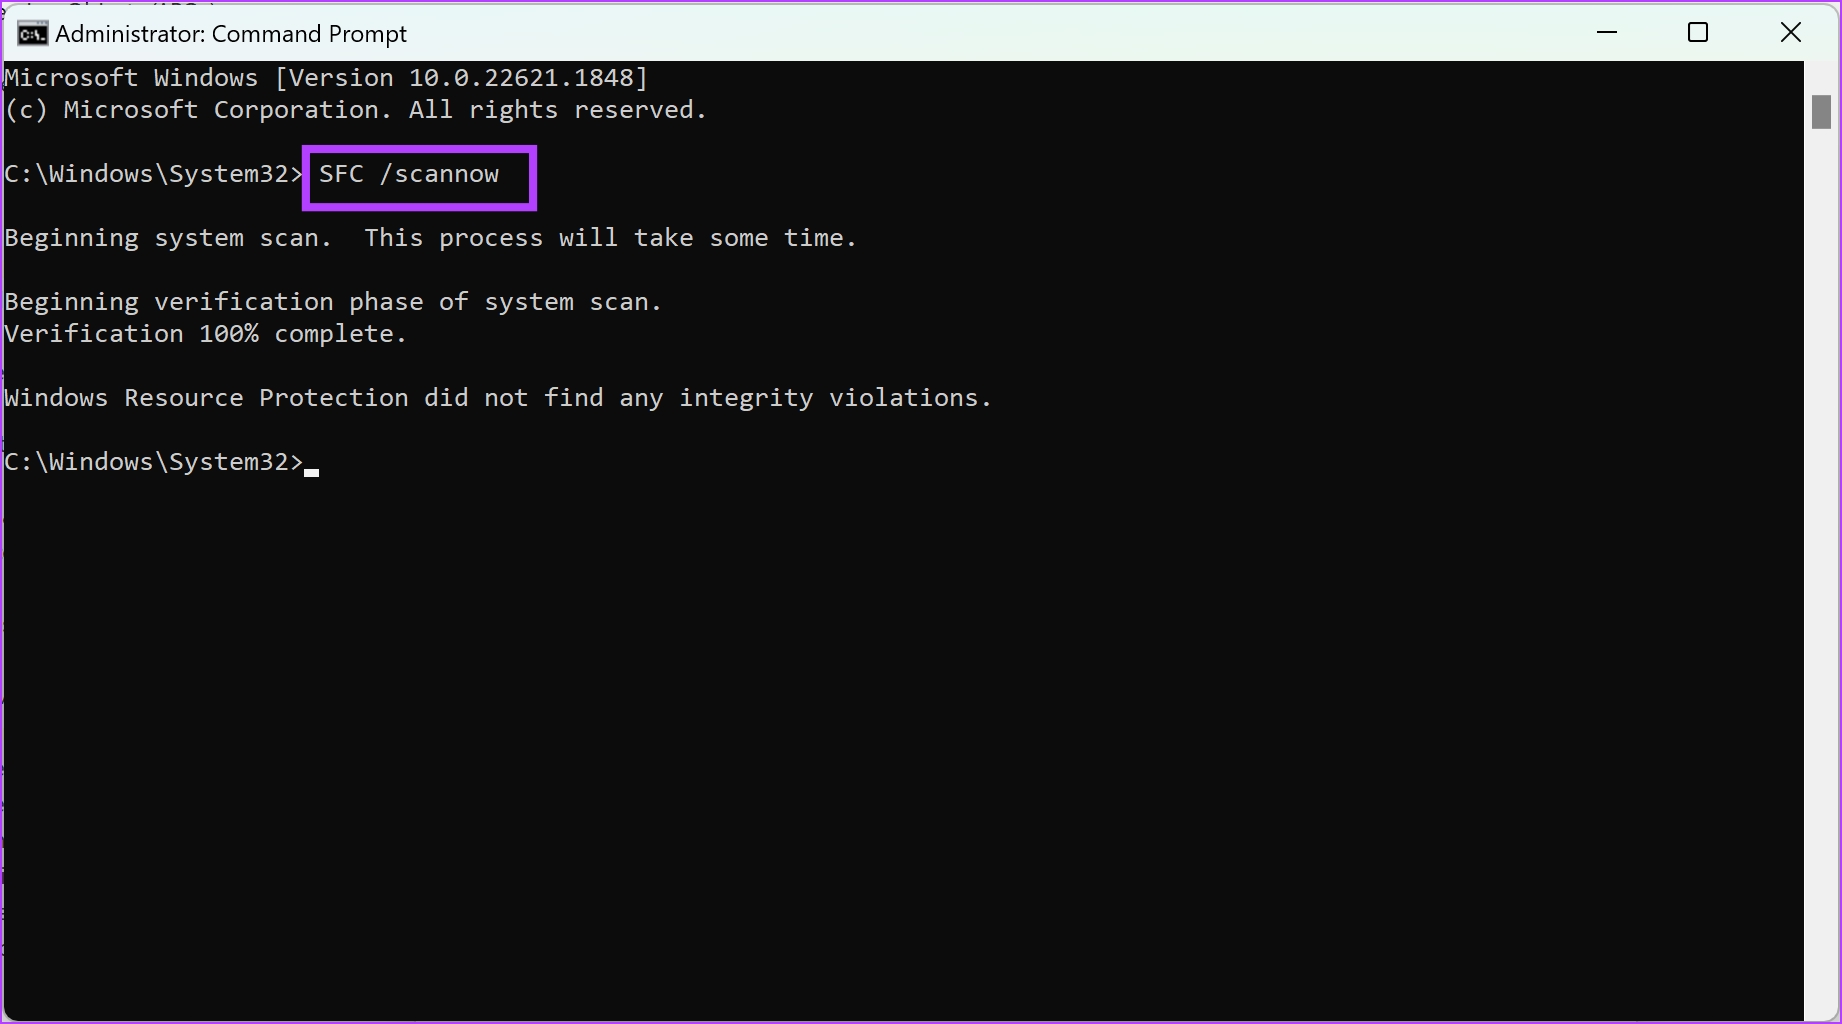
Fix 5: Run SFC Scan
You can run the System File Checker using Command Prompt to repair corrupted system files. This can potentially help you solve the issue of the erratic mouse cursor on Windows if any corrupted system file is the cause.
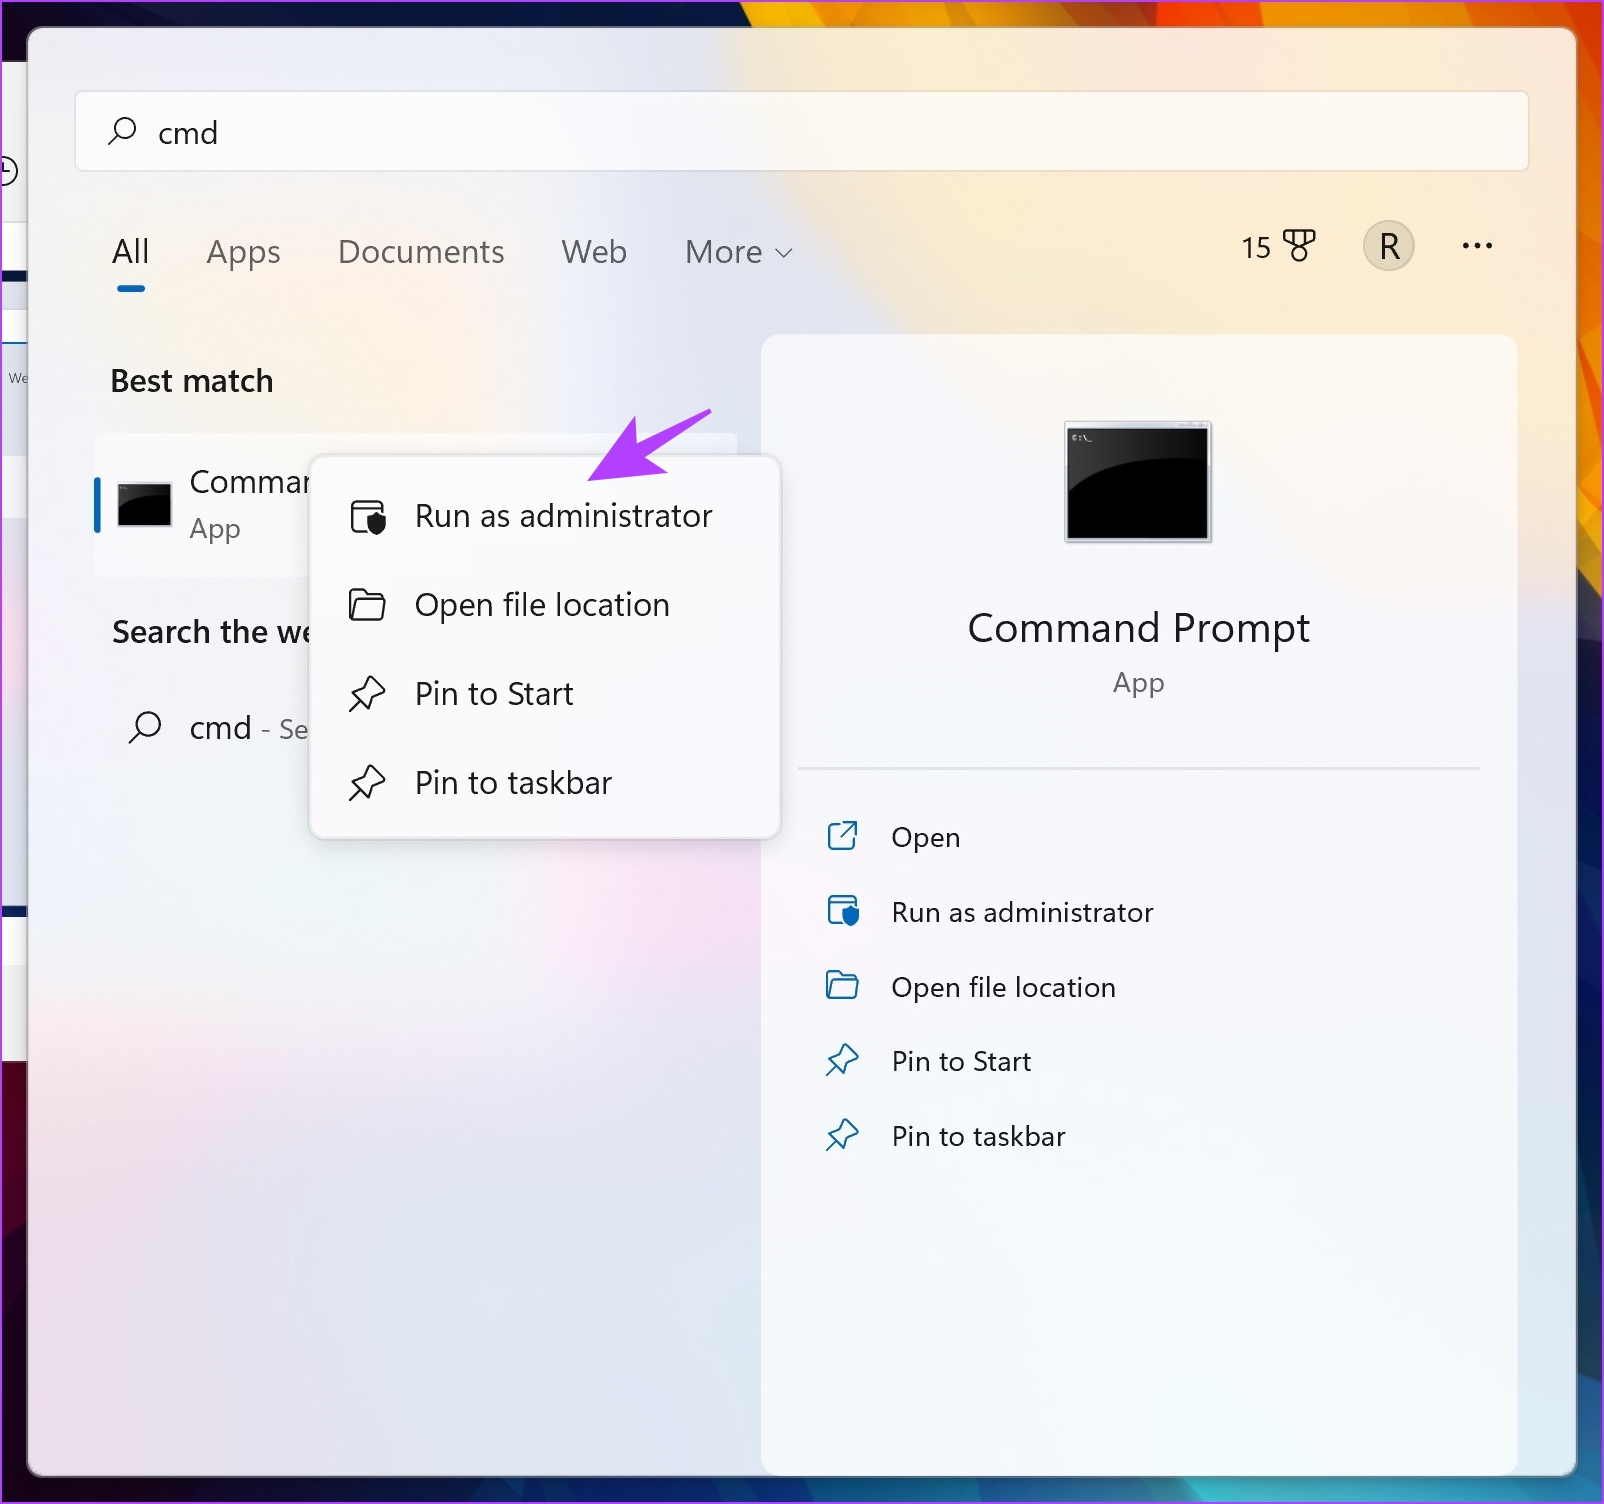
Step 1: Open Command Prompt from the start menu. Right-click and select Run as administrator.
Step 2: Type the following command:
SFC /scannow
You can see the progress of the system scan as it begins. Once it is complete, you will see whether it was successful.
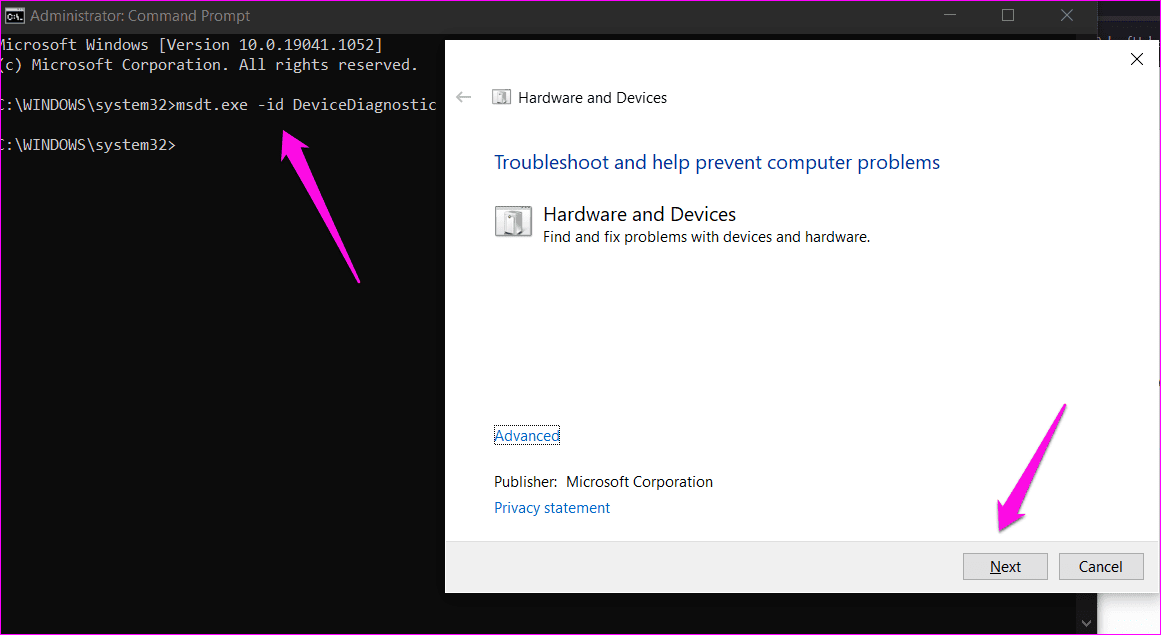
Fix 6: Run Hardware Troubleshooter
As the name suggests, Windows’ built-in troubleshooter will help you figure out the problem and suggest software fixes if you’ve accidentally changed the settings.
Step 1: Open Command Prompt from the start menu. Right-click and select Run as administrator.
Step 2: Type the below command and hit Enter.
msdt.exe -id DeviceDiagnostic
Step 3: That will launch a pop-up window. Click on Next to continue and let it run.
As a last resort, reset your Windows PC. This will remove any corrupted system files and fix misconfigurations within your system settings, which can help you fix the problem. However, it will remove all the installed applications, so proceed with relevant backups.
Was this helpful?
Last updated on 14 May, 2024
Read Next
 4 Fixes When Mouse Keeps Clicking on Its Own on Windows 11
Basic Fixes: Restart the computer: Restarting the computer will force all running processes and services to shut down, effectively resolving random clicking.
4 Fixes When Mouse Keeps Clicking on Its Own on Windows 11
Basic Fixes: Restart the computer: Restarting the computer will force all running processes and services to shut down, effectively resolving random clicking.
 4 Ways to Fix Safari Closing Tabs on Its Own
Basic Fixes Force quit and relaunch Safari: This helps give the app a fresh start if it has been running in the background for some time.
4 Ways to Fix Safari Closing Tabs on Its Own
Basic Fixes Force quit and relaunch Safari: This helps give the app a fresh start if it has been running in the background for some time.
 How to Fix iPhone Making Calls Randomly on Its Own
Basic Fixes Disconnect Bluetooth devices: If you accidentally press the dedicated call button on your Bluetooth accessory, your iPhone may place random calls.
How to Fix iPhone Making Calls Randomly on Its Own
Basic Fixes Disconnect Bluetooth devices: If you accidentally press the dedicated call button on your Bluetooth accessory, your iPhone may place random calls.
 5 Ways to Fix Mouse Cursor Not Showing on Windows 11
https://youtu.be/99YOYxqJPQ0 Fix 1: Clean the Trackpad or the Bottom Surface of the Mouse Sometimes, the dirt accumulated on your laptop’s trackpad may hinder the cursor’s movement.
5 Ways to Fix Mouse Cursor Not Showing on Windows 11
https://youtu.be/99YOYxqJPQ0 Fix 1: Clean the Trackpad or the Bottom Surface of the Mouse Sometimes, the dirt accumulated on your laptop’s trackpad may hinder the cursor’s movement.
 How to Customize the Mouse Cursor on Windows 11
How to Change the Color and Size of the Mouse Cursor There are a few default cursor options in Windows 11 if you want to change the way the mouse
How to Customize the Mouse Cursor on Windows 11
How to Change the Color and Size of the Mouse Cursor There are a few default cursor options in Windows 11 if you want to change the way the mouse
 5 Ways to Fix Mouse Cursor Stuck on Mac
Basic Troubleshoot Remove connected devices - To ensure that the culprit isn't a connected device, say a Bluetooth mouse or keyboard, remove all devices and try again.
5 Ways to Fix Mouse Cursor Stuck on Mac
Basic Troubleshoot Remove connected devices - To ensure that the culprit isn't a connected device, say a Bluetooth mouse or keyboard, remove all devices and try again.
 Top 8 Ways to Fix Mouse Cursor Lagging on Mac
A Mac is generally known for its friendly UI and smooth performance.
Top 8 Ways to Fix Mouse Cursor Lagging on Mac
A Mac is generally known for its friendly UI and smooth performance.
 Moving from Evernote to Google Keep Notes and Docs: My Experience
Last month, I wrote a detailed post explaining why I moved all my data and files from Dropbox to Google Drive.
Moving from Evernote to Google Keep Notes and Docs: My Experience
Last month, I wrote a detailed post explaining why I moved all my data and files from Dropbox to Google Drive.
The article above may contain affiliate links which help support Guiding Tech. The content remains unbiased and authentic and will never affect our editorial integrity.