Method 1: Increase or Decrease Mouse Sensitivity
Sensitivity in a mouse can be anything, from how fast it moves across the screen to how fast it reacts when double-clicking. For different users, different mouse sensitivity levels can be set according to their preferences. Here’s how to do it.
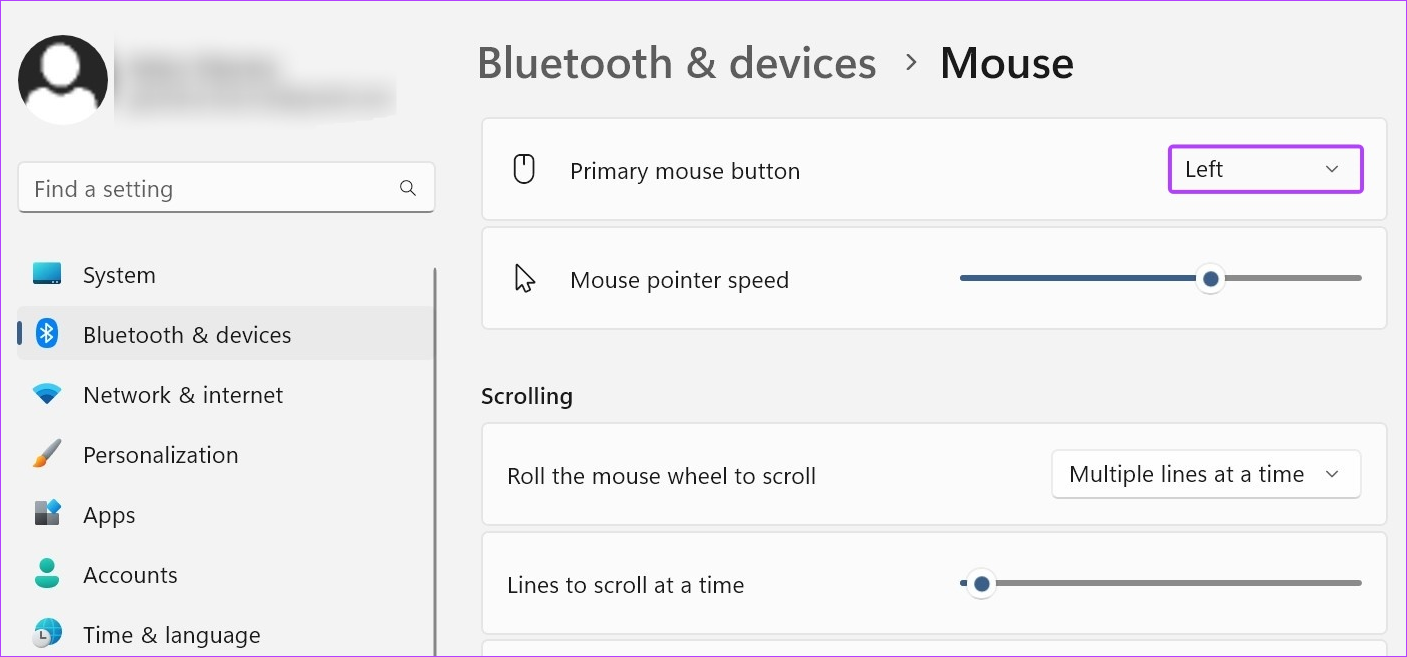
Step 1: Open Settings and click on Bluetooth & devices. Then, click on Mouse.
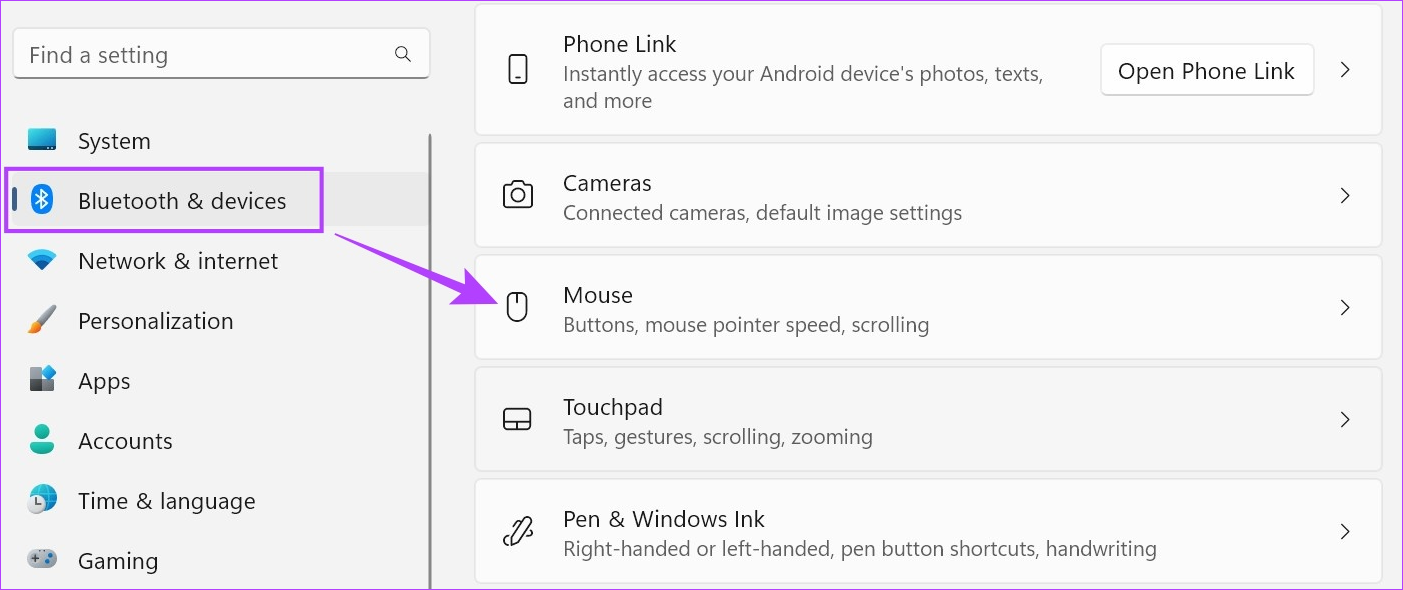
Step 2: Use the Mouse pointer speed bar to increase or decrease mouse sensitivity.
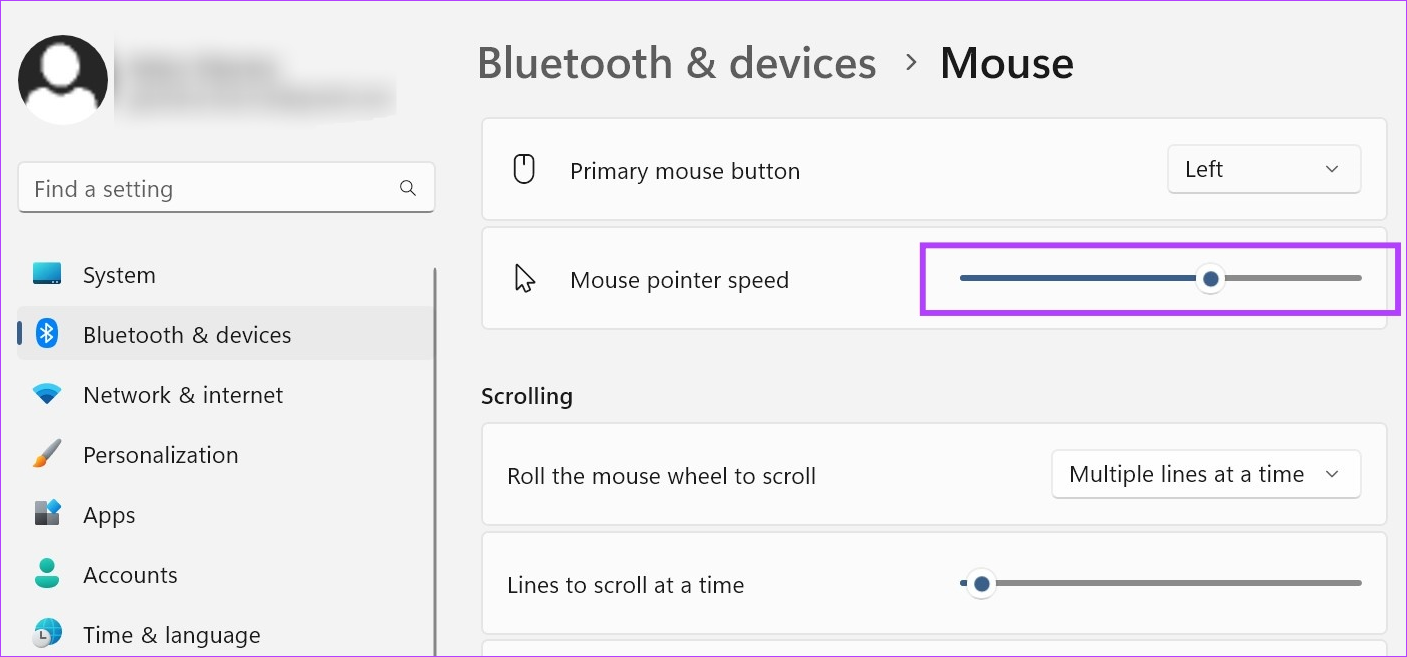
Step 3: Then, scroll down to the Related settings section and click on Additional mouse settings.

Step 4: Here, go to Double-click speed and use scale to increase or decrease the double-click speed.
Step 3: Once done, click on Apply and OK.
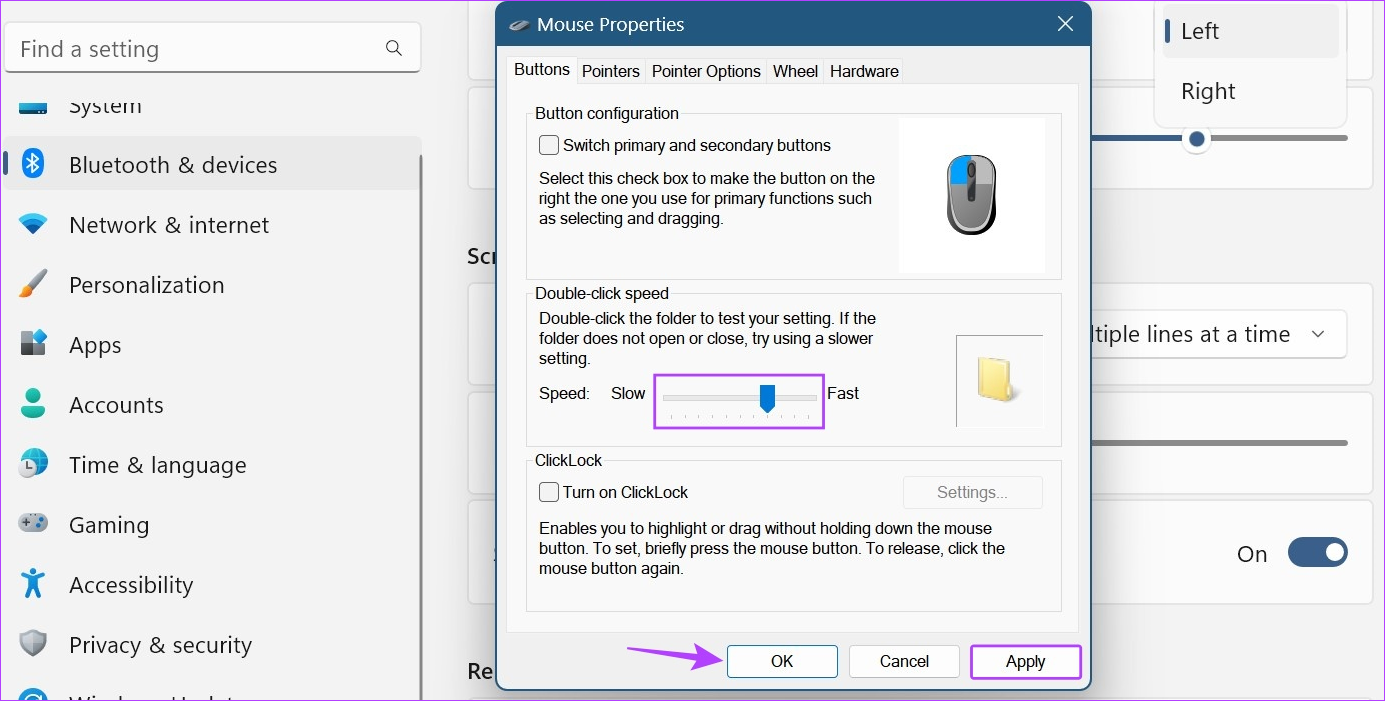
This will close the window and change the double-click response time for your mouse accordingly.
Method 2: Adjust Mouse Scroll Settings
While scrolling up and down on a page might not seem like a major thing, it becomes an important feature when you’re scrolling through pages and would like the scroll speed to be a little fast or slow. This can also be helpful if you’re using an external mouse. Here’s how to do it.
Step 1: Open Settings → Bluetooth & devices → Mouse.
Step 2: Click on the Roll the mouse wheel to scroll drop-down and select the relevant scrolling setting.
Note: Selecting the One screen at a time option will automatically disable the Lines to scroll at a time option.
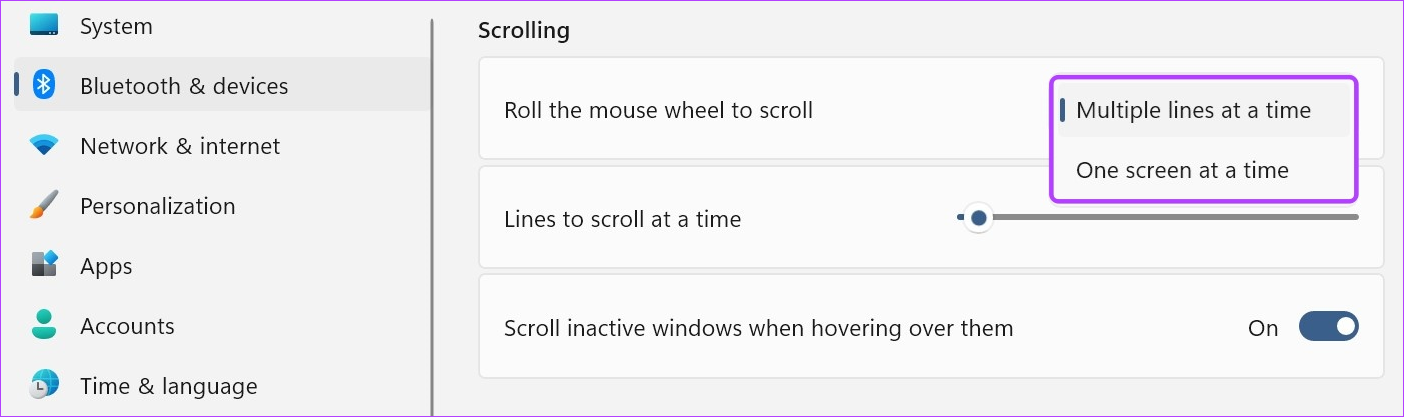
Step 3: Use the Lines to scroll at a time bar to select the relevant scrolling configuration.
Step 4: Turn on the Scroll inactive windows when hovering over them toggle.
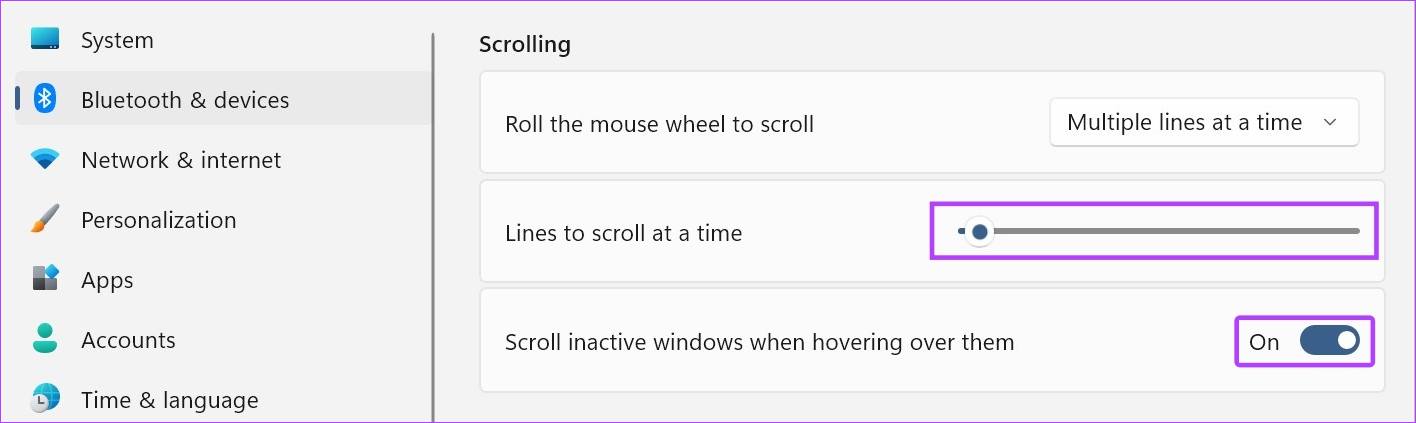
This will allow you to increase the mouse scrolling speed and to scroll through inactive windows just by hovering over them.
Method 3: Use a Different Cursor Scheme
The classic white mouse cursor with a black outline is a staple across most Windows devices. However, this can get a little monotonous after a while. So, to make your mouse’s cursor more fun, here’s how you can adjust mouse settings using pre-fed cursor schemes in Windows 11.
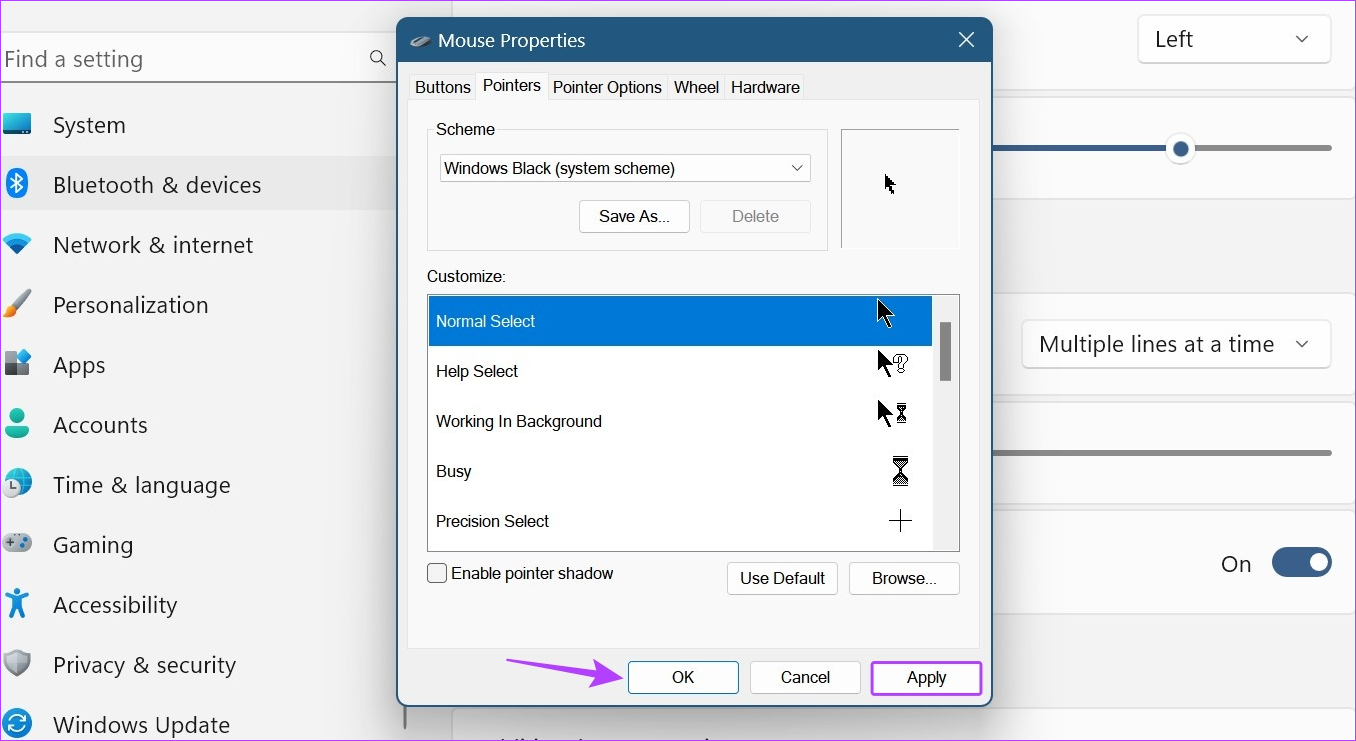
Step 1: Open Settings → Bluetooth & devices → Mouse. Click on Additional mouse settings.
Step 2: From the menu options, click on Pointers.
Step 3: Use the Scheme drop-down to select the relevant cursor scheme.

Step 4: Once done, click on Apply and OK.
Also Read: How to use mouse without borders using PowerToys on Windows
Method 4: Enable or Disable Cursor Trails
Once activated, a trail comprising your mouse’s icon will follow the icon around the screen. It is an excellent accessibility feature that can help you track where your mouse pointer is at any given time. Follow the below steps to enable mouse cursor trails on your Windows device.
Step 1: Open Settings → Bluetooth & devices → Mouse → Additional mouse settings.
Step 2: From the menu options, click on Pointer Options. Check the Display pointer trails option.
Step 3: Then, increase or decrease the pointer trail by dragging the slider to either end.

Step 4: Check the Hide pointer while typing option to hide the mouse cursor once you start typing.
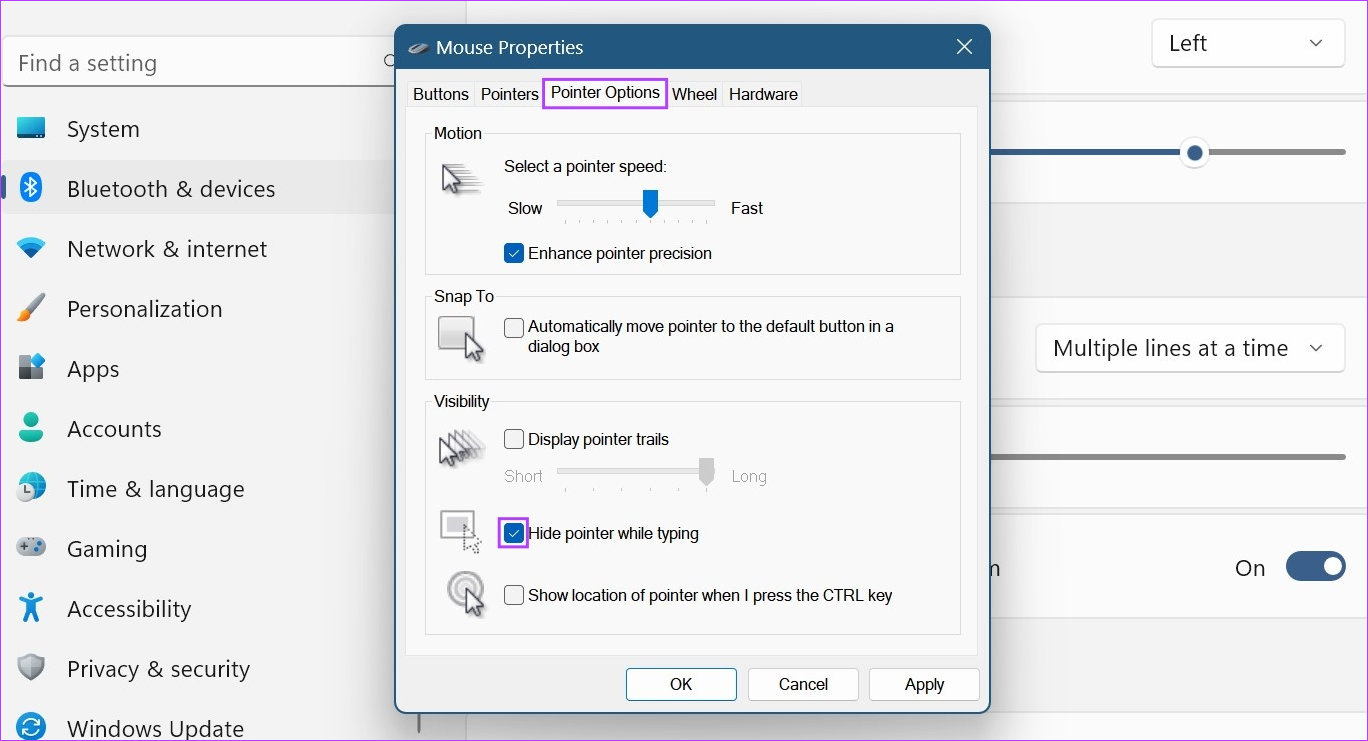
Step 5: Then, click on Apply and OK.
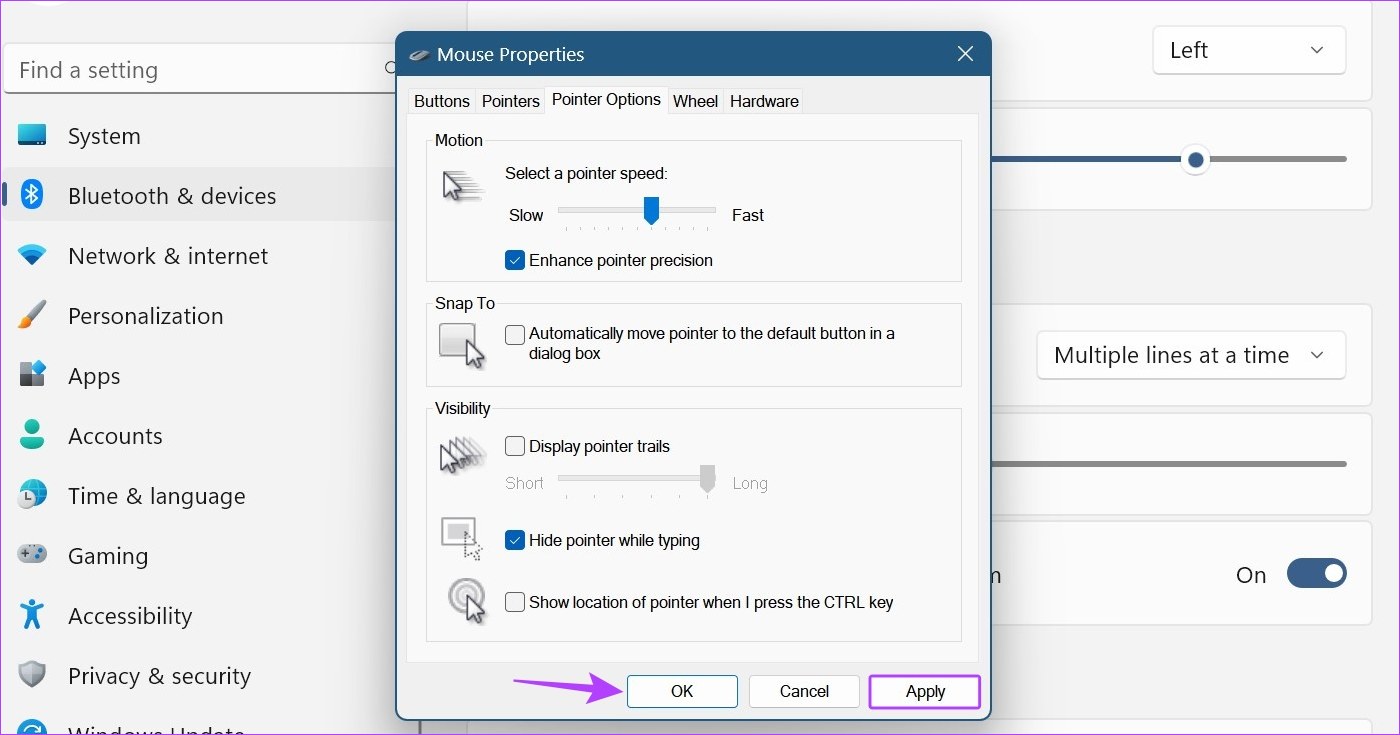
This will save the changes to your mouse cursor’s appearance and behavior accordingly. You can also uncheck the Display pointer trails option to disable pointer trails in Windows 11.
Tip: If you want to further change the appearance of your mouse cursor, you can also change the cursor size and text color on Windows 11.
Method 5: Change the Mouse Button Configuration
Certain users who are either ambidextrous or left-handed might experience difficulty when using the mouse configuration meant for right-handed individuals. You can consider changing the layout of the primary mouse button and see if it helps in making your browsing experience better. Here’s how.
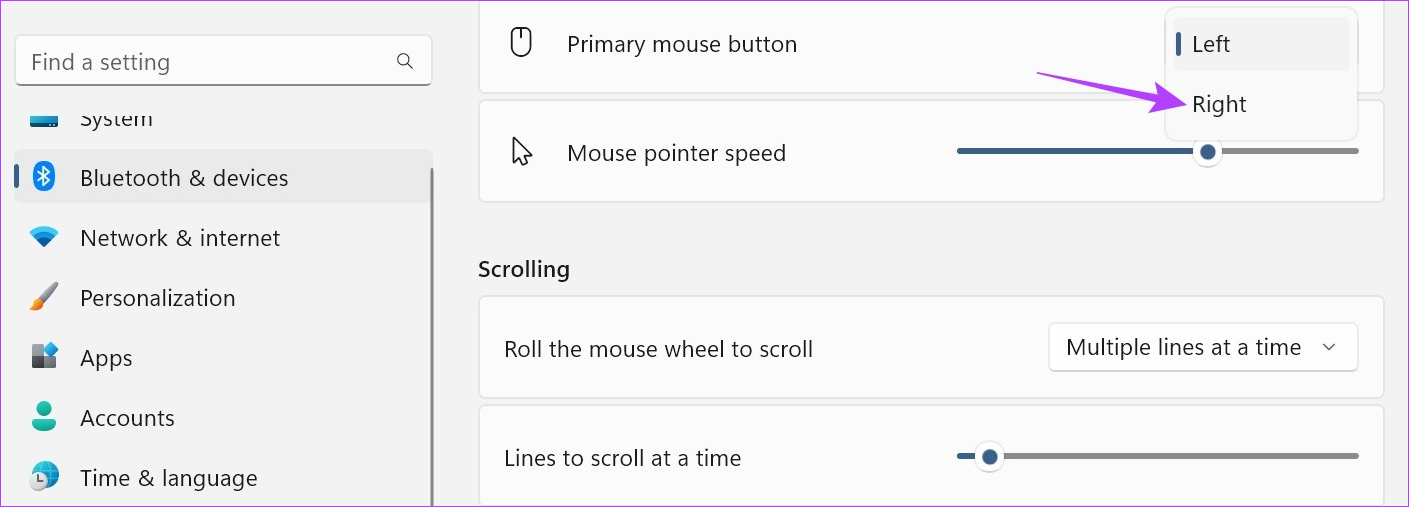
Step 1: Open Settings → Bluetooth & devices → Mouse. Click the Primary mouse button drop-down.
Step 2: Select the relevant side for your primary mouse button.
When mapping the mouse button to make other changes, like getting the scroll wheel to left-click or right-click, ensure an external mouse is connected. However, if you’re unable to map your mouse button using the above steps, use the Mouse Properties window for more settings options. Here’s how.
Step 3: Go down to the Related settings section and click on Additional mouse settings.
Step 4: Check the Switch primary and secondary buttons option.
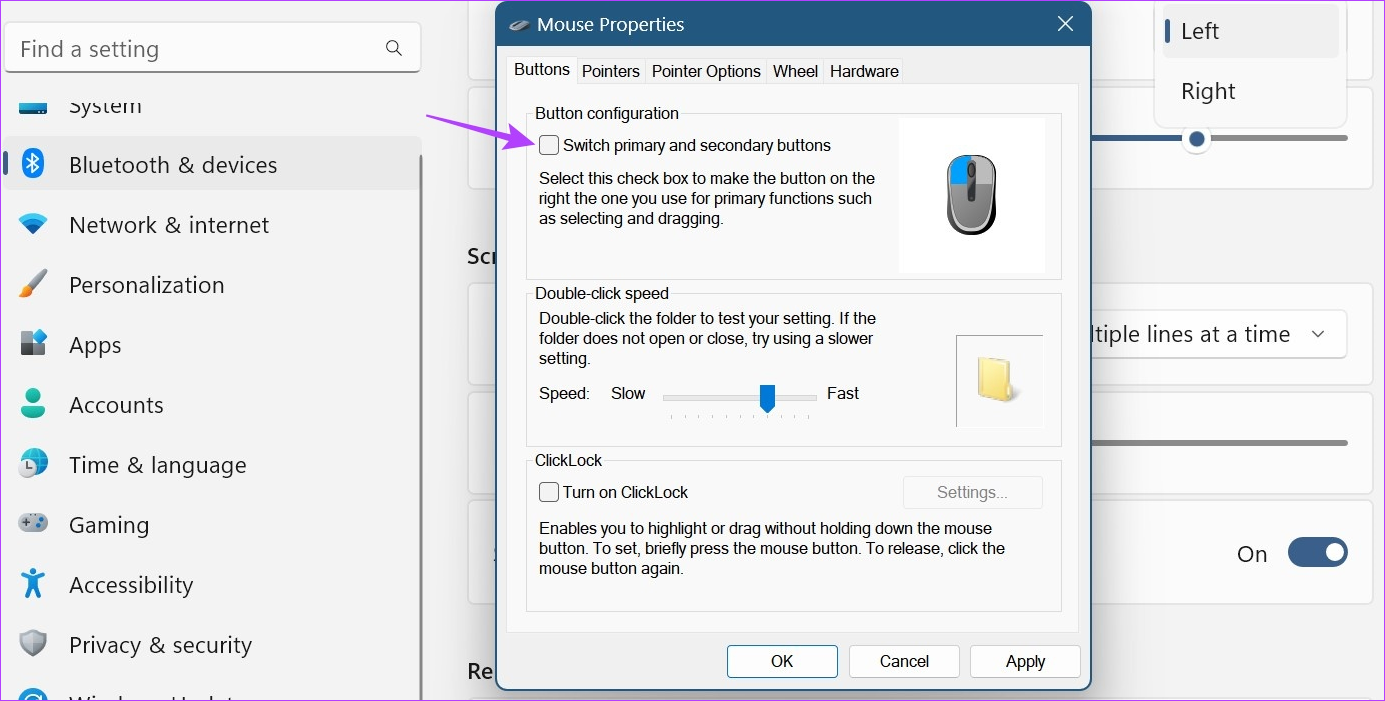
Step 5: Click on Apply and OK to save the changes.

This will switch the current primary button configuration on your mouse, allowing you to use it easily in a left-handed configuration.
FAQ
Open Settings → Bluetooth & devices → Mouse → Additional mouse settings. From the menu, select Pointers → click on Use Default → click on Apply and OK to save the changes. This will change the mouse cursor’s settings back to default. For any other setting change, follow the above steps and make the relevant changes.
Was this helpful?
Last updated on 09 July, 2024
Read Next
 8 Best Ways to Fix Mouse Sensitivity Changes Randomly on Windows 10
While mice and keyboards help while working with desktop or laptop, the mouse gets finicky sometimes.
8 Best Ways to Fix Mouse Sensitivity Changes Randomly on Windows 10
While mice and keyboards help while working with desktop or laptop, the mouse gets finicky sometimes.
 How to Change iPhone’s Touch Sensitivity Settings
How to Change Your iPhone’s Touch Sensitivity Settings If your iPhone feels too sensitive or responsive, adjust the settings.
How to Change iPhone’s Touch Sensitivity Settings
How to Change Your iPhone’s Touch Sensitivity Settings If your iPhone feels too sensitive or responsive, adjust the settings.
 3 Ways to Increase or Decrease Touchpad Sensitivity on Windows 11 Laptops
Method 1: Increase or Decrease Touchpad Sensitivity via the Settings App The Settings app in Windows makes it simple to adjust touchpad-related settings on your laptop.
3 Ways to Increase or Decrease Touchpad Sensitivity on Windows 11 Laptops
Method 1: Increase or Decrease Touchpad Sensitivity via the Settings App The Settings app in Windows makes it simple to adjust touchpad-related settings on your laptop.
 How to Find the Best Sensitivity for Valorant
In the world of competitive gaming, finding the perfect sensitivity for your mouse can be the difference between victory and defeat.
How to Find the Best Sensitivity for Valorant
In the world of competitive gaming, finding the perfect sensitivity for your mouse can be the difference between victory and defeat.
 Top 3 Touch Mouse Alternatives to Apple’s Magic Mouse
The Magic Mouse is useful for plenty of people, but some can get annoyed by its poor ergonomics.
Top 3 Touch Mouse Alternatives to Apple’s Magic Mouse
The Magic Mouse is useful for plenty of people, but some can get annoyed by its poor ergonomics.
 3 Ways to Fix Mouse Keeps Scrolling Automatically Windows 10 and Windows 11
https://youtu.be/1UZ3PWNr-lE Try Basic Fixes Disconnect and reconnect the mouse: Unplug your mouse cable or wireless adapter from your computer and reconnect it to a different port.
3 Ways to Fix Mouse Keeps Scrolling Automatically Windows 10 and Windows 11
https://youtu.be/1UZ3PWNr-lE Try Basic Fixes Disconnect and reconnect the mouse: Unplug your mouse cable or wireless adapter from your computer and reconnect it to a different port.
 4 Ways to Fix Bluetooth Mouse Not Working with Windows 11
Basic Fixes: Ensure Bluetooth is turned on for both devices: A Bluetooth mouse has a physical switch to turn on or off the device.
4 Ways to Fix Bluetooth Mouse Not Working with Windows 11
Basic Fixes: Ensure Bluetooth is turned on for both devices: A Bluetooth mouse has a physical switch to turn on or off the device.
 5 Ways to Fix Mouse Cursor Not Showing on Windows 11
https://youtu.be/99YOYxqJPQ0 Fix 1: Clean the Trackpad or the Bottom Surface of the Mouse Sometimes, the dirt accumulated on your laptop’s trackpad may hinder the cursor’s movement.
5 Ways to Fix Mouse Cursor Not Showing on Windows 11
https://youtu.be/99YOYxqJPQ0 Fix 1: Clean the Trackpad or the Bottom Surface of the Mouse Sometimes, the dirt accumulated on your laptop’s trackpad may hinder the cursor’s movement.
The article above may contain affiliate links which help support Guiding Tech. The content remains unbiased and authentic and will never affect our editorial integrity.

