How to Change the Color and Size of the Mouse Cursor
There are a few default cursor options in Windows 11 if you want to change the way the mouse pointer looks. You can choose from these default options and change the color and size of the cursor. Here’s how to do it.
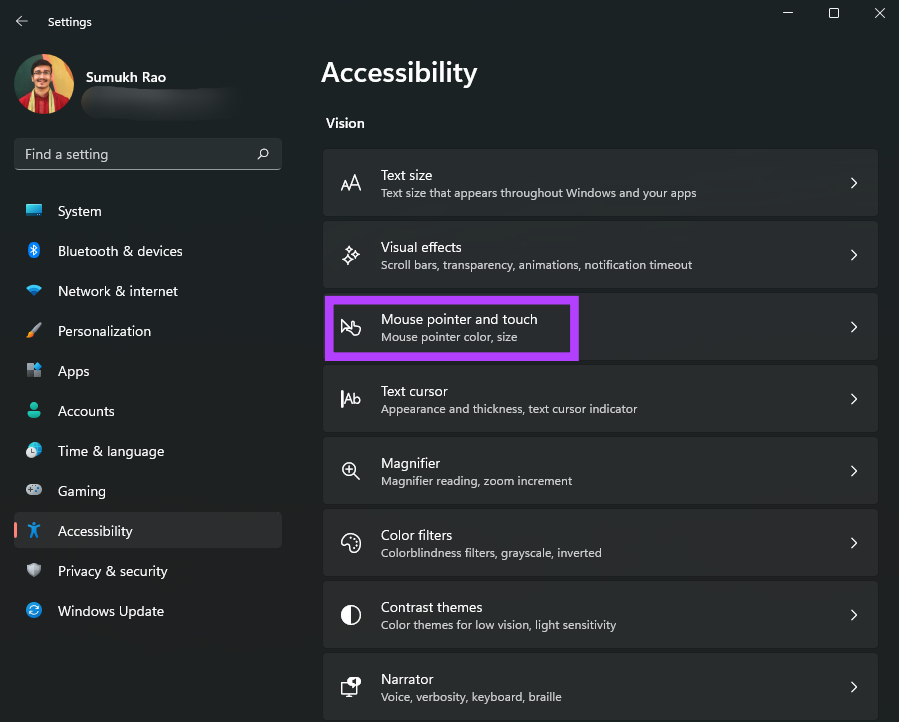
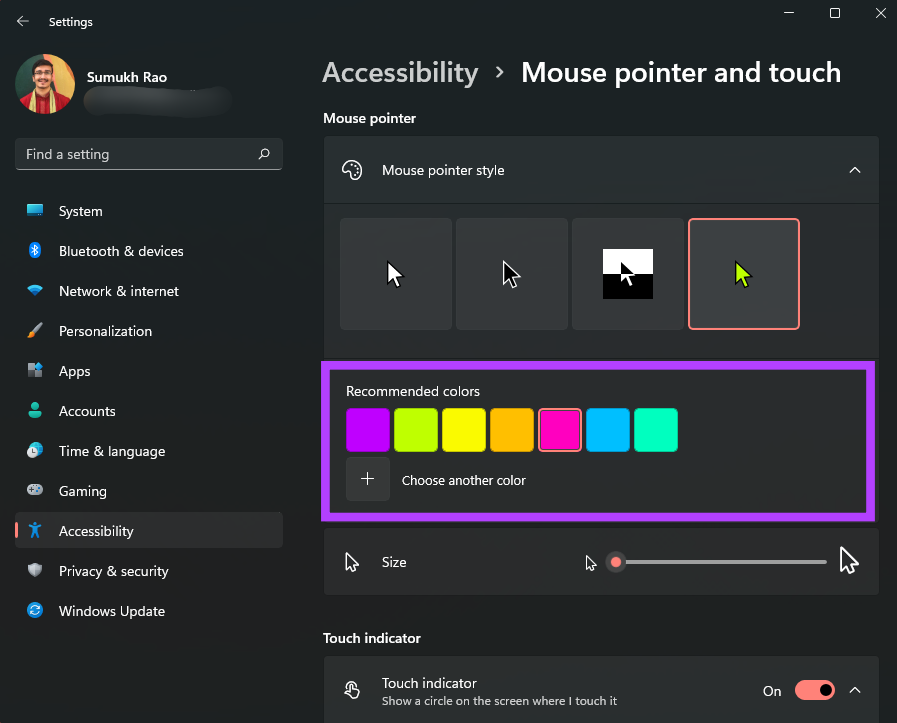
Step 1: Press the Windows key + I to launch the Settings app and navigate to Accessibility > Mouse pointer and touch.
Step 2: You can choose from different types of mouse pointers. Select the one you like.

Step 3: Use the slider under the cursor style options to adjust the size of the mouse pointer.
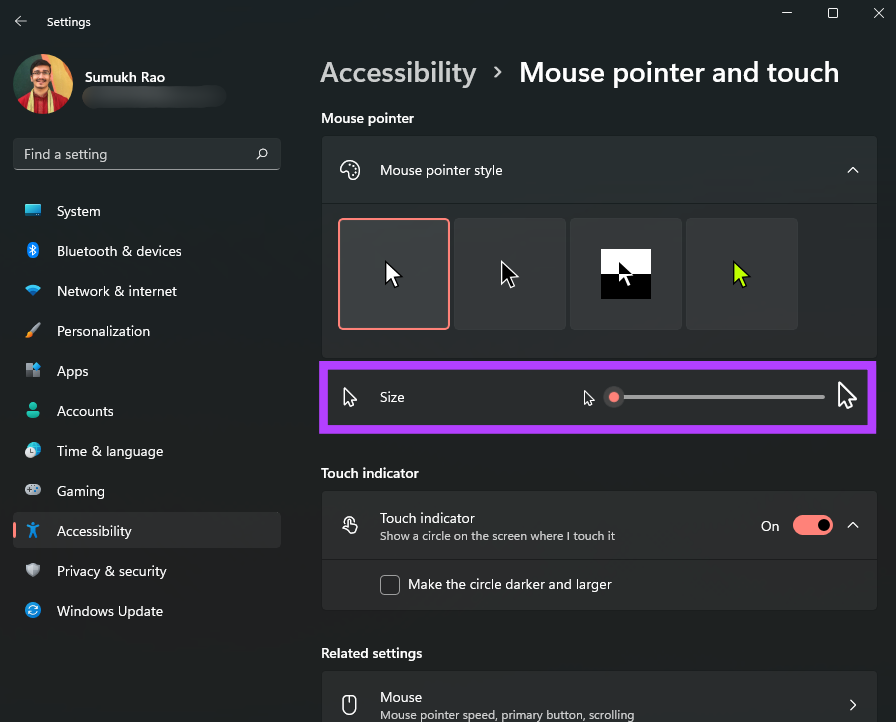
Step 4: The right-most mouse pointer style supports different colors. If the option is available, you will see a color palette to choose from.
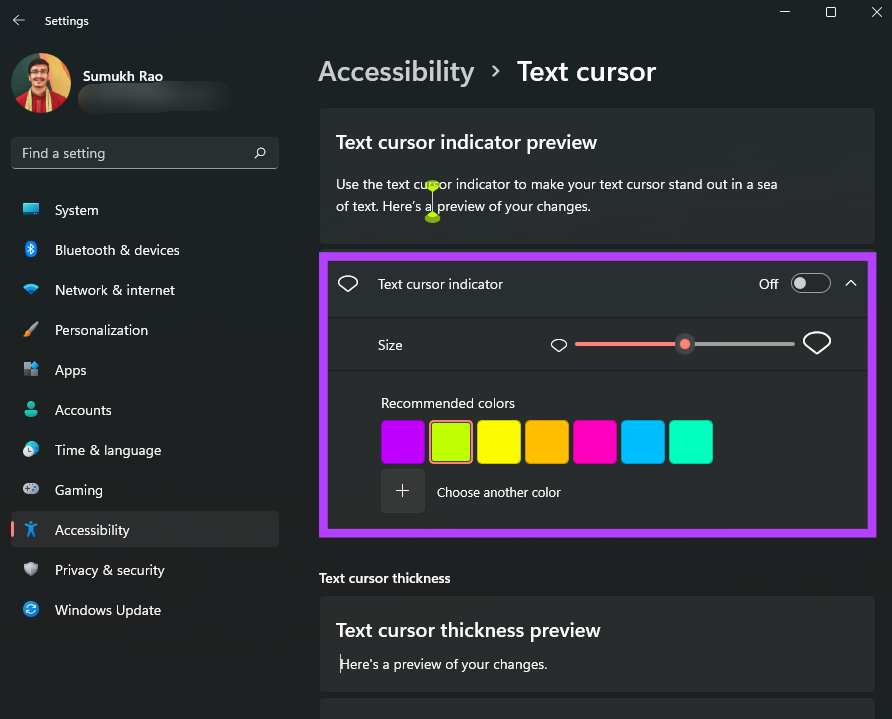
Step 5: Scroll down and click on Text cursor to modify it.

Step 6: You can enable or disable the text cursor indicator and change the color and size.
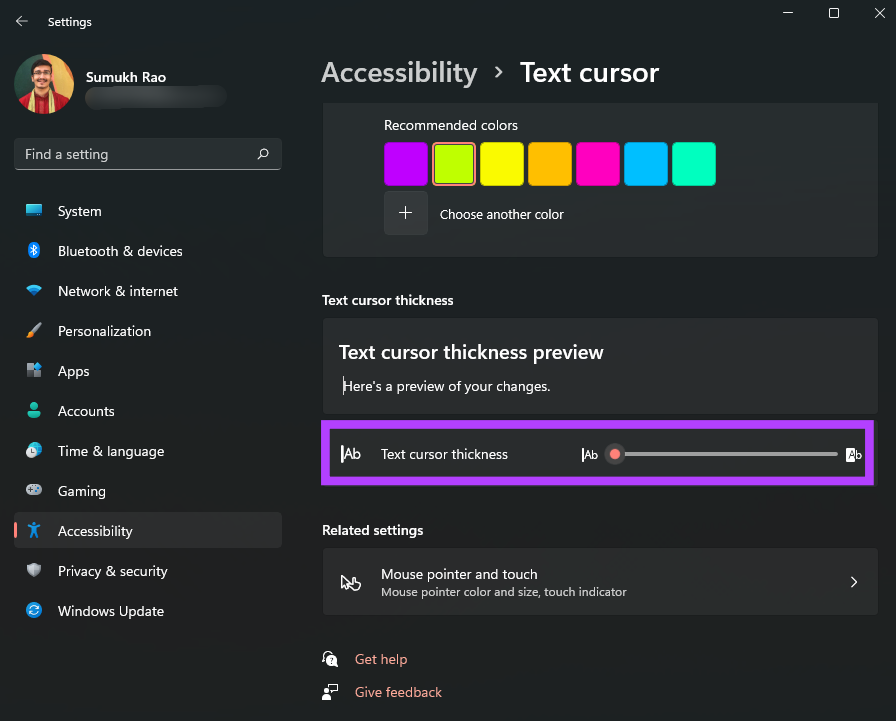
Step 7: There’s also a slider at the bottom to adjust the thickness of the text cursor.
How to Change the Mouse Cursor to a Custom Icon
If you love customizing the interface as per your choices, Windows 11 does let you completely change the mouse pointer’s look and shape as well. Here’s how to add a custom icon as your mouse pointer in Windows 11.
Step 1: Download a custom cursor pack or an icon that you wish to use as your cursor. There are plenty that you can find on the internet from various sources.
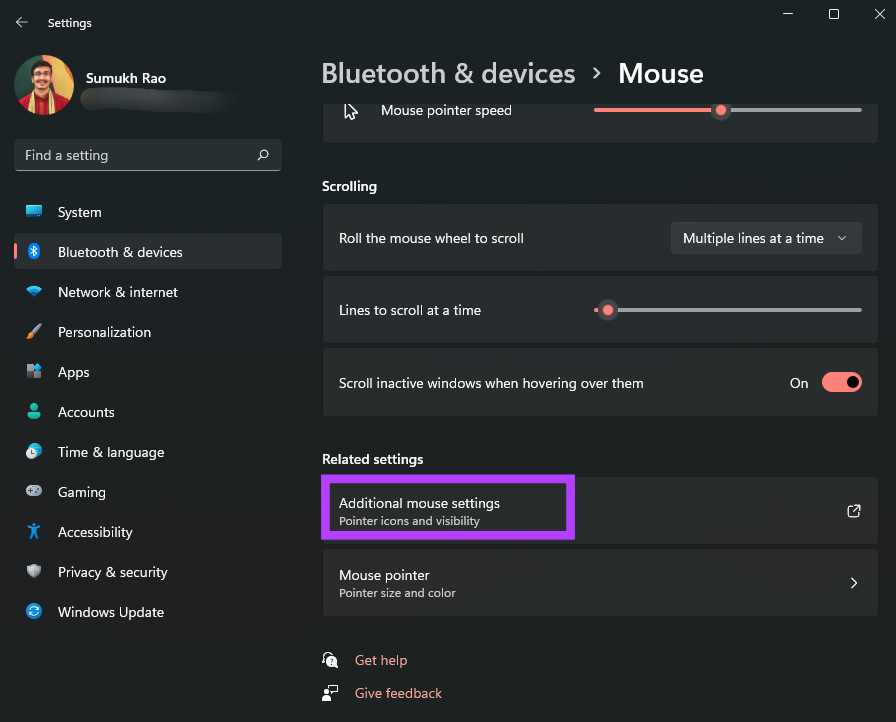
Step 2: Press the Windows key + I to launch the Settings app and navigate to Bluetooth & devices > Mouse.
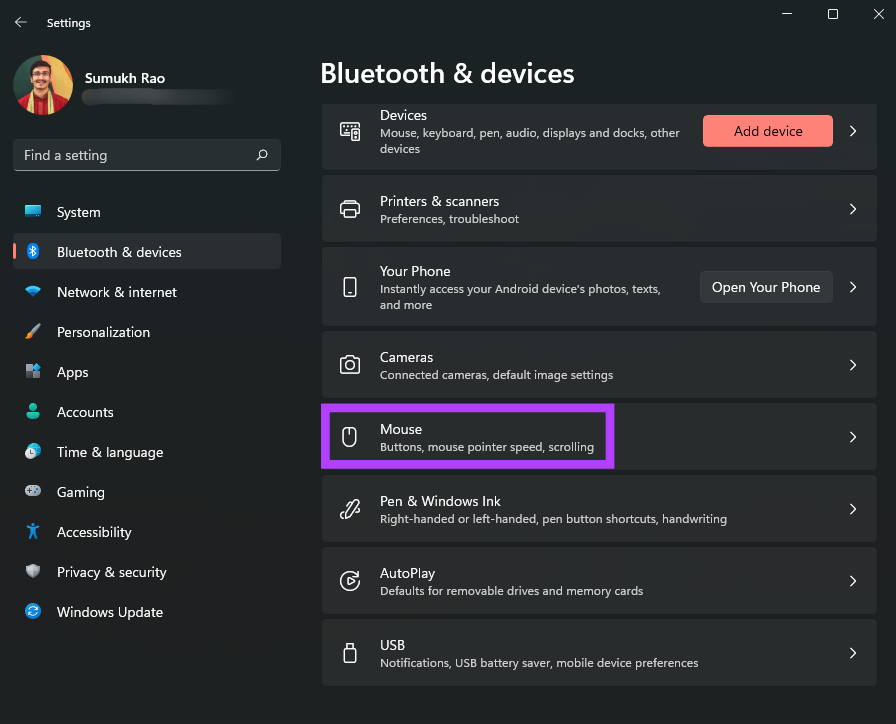
Step 3: Click on Additional mouse settings.
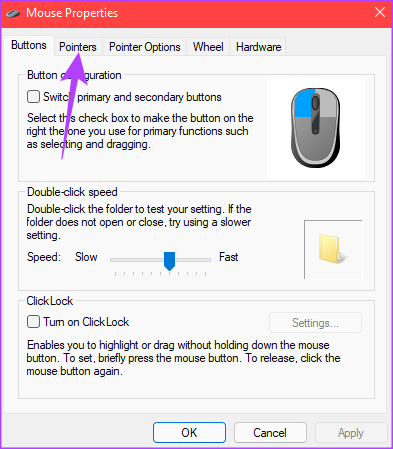
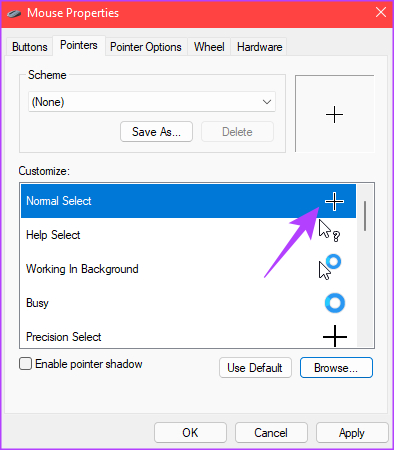
Step 4: Click on the Pointers tab at the top.
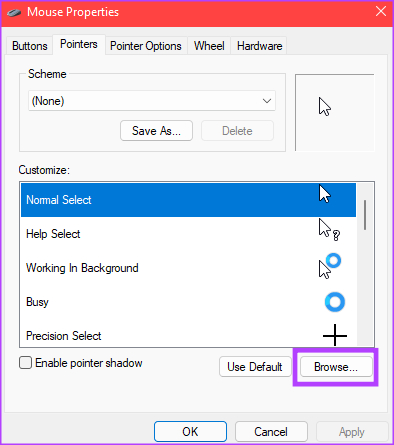
Step 5: In the Customize section, select the cursor type that you want to change. You can change all the cursor types listed here.
Step 6: Once you’ve selected the pointer to change, click on Browse.
Step 7: A file explorer window should pop up now. If you have downloaded a third-party cursor pack, you can navigate to the folder it is saved in.
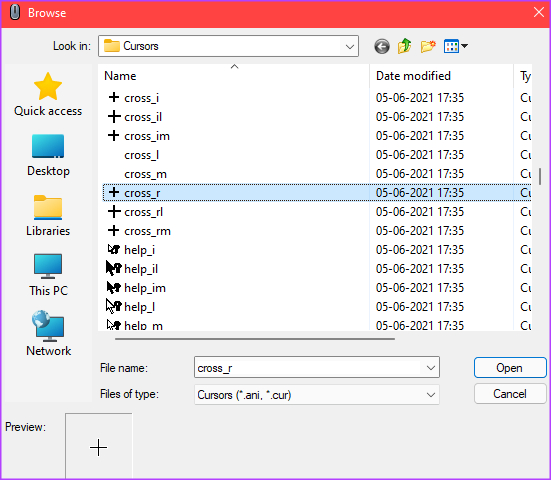
Step 8: Select the mouse pointer you want to use and then click on Open.

Step 9: Windows will change the mouse pointer to your pick. You may continue to select other options. Leave them as they are if you’re done making changes.
Step 10: After changing all the desired cursors, click on Apply and then on OK.
Windows will apply all the chosen changes to the mouse pointer. If you change your mind later, you can always follow the above steps and customize it to something else. To match your cursor customizations, check our guide on how to change icons on Windows 11 for an even more customized experience.
Was this helpful?
Last updated on 03 September, 2024
Read Next
 6 Ways to Fix Mouse Cursor Moving on Its Own in Windows
Basic Fixes Change old mouse pads: If a portion of your mousepad has faded and lost the coarseness needed to hold the mouse in place, it can make your mouse
6 Ways to Fix Mouse Cursor Moving on Its Own in Windows
Basic Fixes Change old mouse pads: If a portion of your mousepad has faded and lost the coarseness needed to hold the mouse in place, it can make your mouse
 5 Ways to Fix Mouse Cursor Not Showing on Windows 11
https://youtu.be/99YOYxqJPQ0 Fix 1: Clean the Trackpad or the Bottom Surface of the Mouse Sometimes, the dirt accumulated on your laptop’s trackpad may hinder the cursor’s movement.
5 Ways to Fix Mouse Cursor Not Showing on Windows 11
https://youtu.be/99YOYxqJPQ0 Fix 1: Clean the Trackpad or the Bottom Surface of the Mouse Sometimes, the dirt accumulated on your laptop’s trackpad may hinder the cursor’s movement.
 5 Ways to Fix Mouse Cursor Stuck on Mac
Basic Troubleshoot Remove connected devices - To ensure that the culprit isn't a connected device, say a Bluetooth mouse or keyboard, remove all devices and try again.
5 Ways to Fix Mouse Cursor Stuck on Mac
Basic Troubleshoot Remove connected devices - To ensure that the culprit isn't a connected device, say a Bluetooth mouse or keyboard, remove all devices and try again.
 Top 8 Ways to Fix Mouse Cursor Lagging on Mac
A Mac is generally known for its friendly UI and smooth performance.
Top 8 Ways to Fix Mouse Cursor Lagging on Mac
A Mac is generally known for its friendly UI and smooth performance.
 3 Fixes for Roblox Cursor Going Off Screen on Windows
Fix 1: Repair or Reset Roblox First, you should use the app repair feature on Windows to fix Roblox.
3 Fixes for Roblox Cursor Going Off Screen on Windows
Fix 1: Repair or Reset Roblox First, you should use the app repair feature on Windows to fix Roblox.
 8 Fixes When the Text Cursor Turns White on Windows 11
Basic Fixes: Uninstall recent Windows updates: If the cursor problem starts after an update, rolling back the update will fix it.
8 Fixes When the Text Cursor Turns White on Windows 11
Basic Fixes: Uninstall recent Windows updates: If the cursor problem starts after an update, rolling back the update will fix it.
 5 Ways to Fix Computer Boots to Blinking Cursor Error
What happens when you boot your computer?
5 Ways to Fix Computer Boots to Blinking Cursor Error
What happens when you boot your computer?
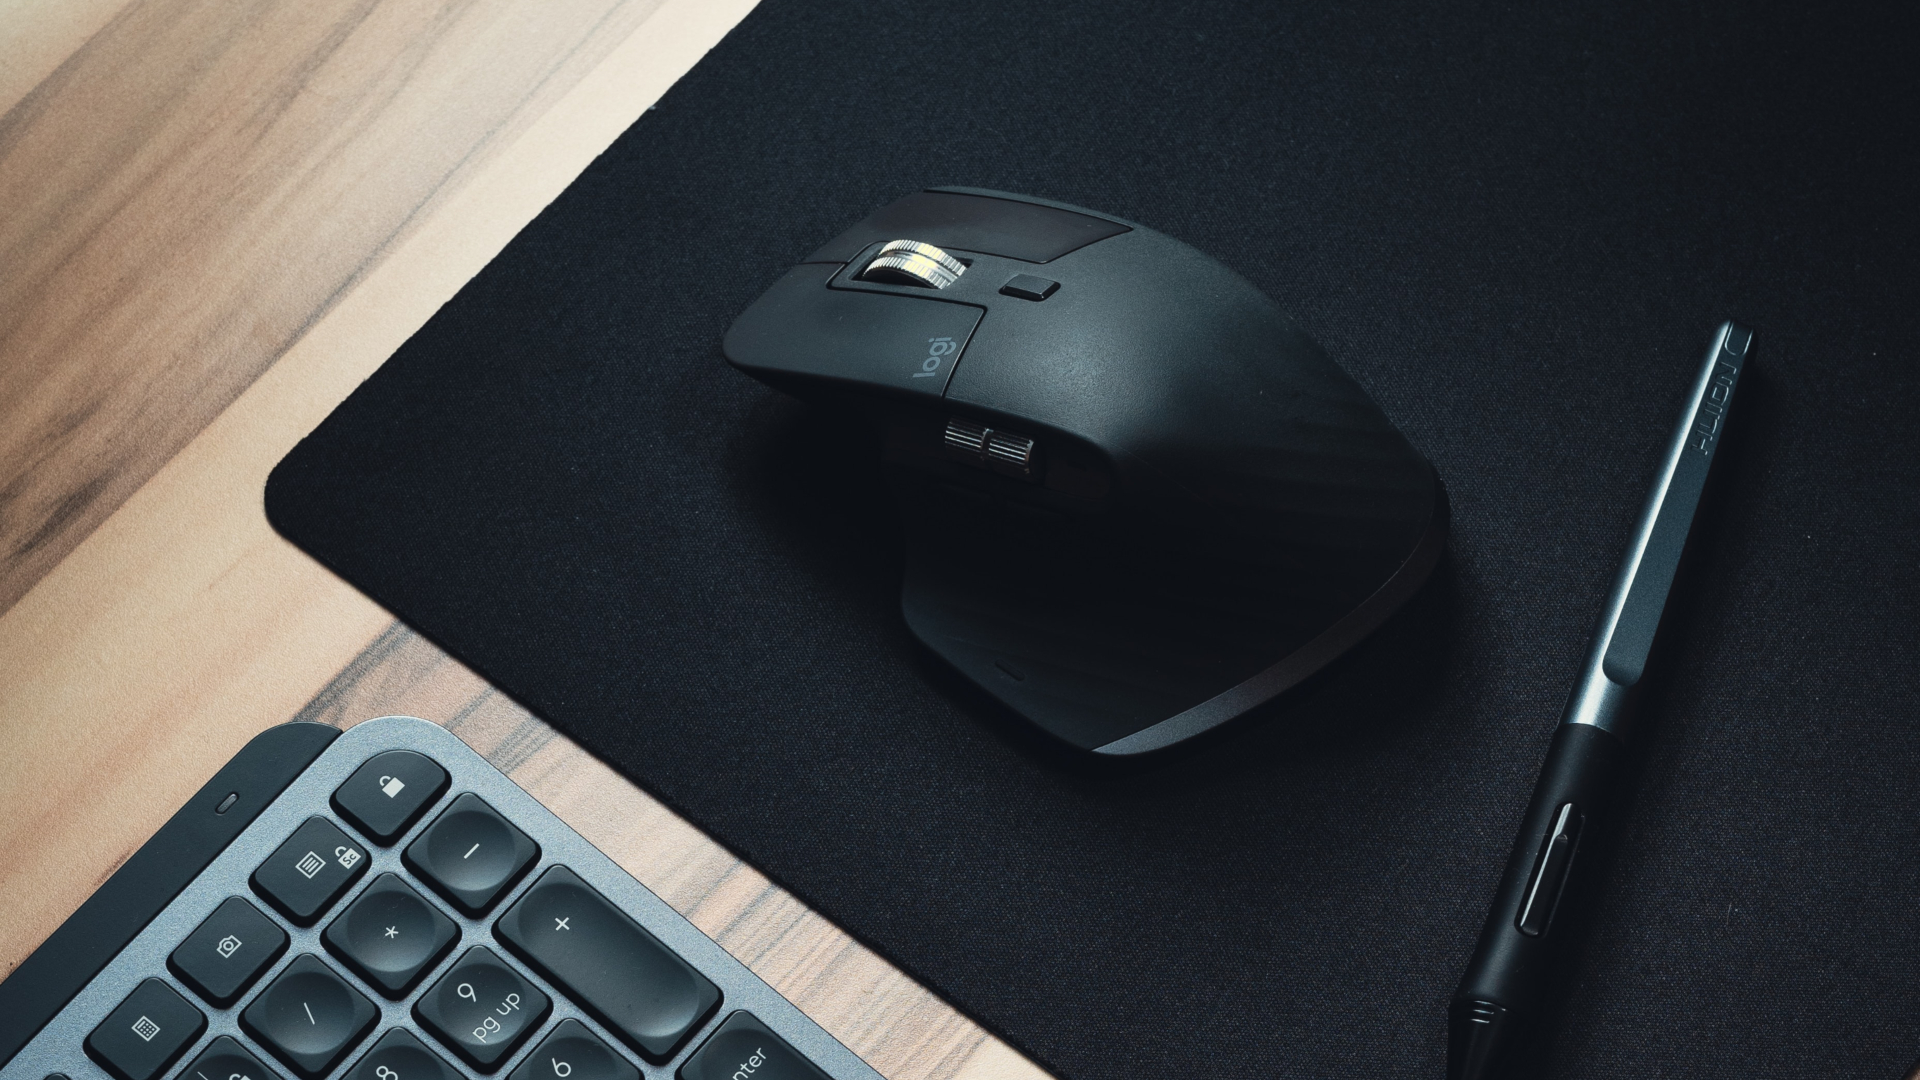
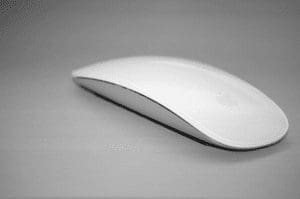 Top 3 Touch Mouse Alternatives to Apple’s Magic Mouse
The Magic Mouse is useful for plenty of people, but some can get annoyed by its poor ergonomics.
Top 3 Touch Mouse Alternatives to Apple’s Magic Mouse
The Magic Mouse is useful for plenty of people, but some can get annoyed by its poor ergonomics.
The article above may contain affiliate links which help support Guiding Tech. The content remains unbiased and authentic and will never affect our editorial integrity.