If you’ve ever found yourself juggling multiple computers, you know the struggle of managing different peripherals. Wouldn’t it be great to use the same mouse on two computers? Well, if you’re on Windows, you’re in luck. Microsoft PowerToys offers a built-in solution called Mouse Without Borders. This nifty tool lets you seamlessly control multiple computers with a single mouse and keyboard.

In this guide, we’ll walk you through installing Microsoft PowerToys and unlocking the potential of Mouse Without Borders on Windows. With Mouse Without Borders, you move your cursor to the edge of your PC screen, it seamlessly transitions to your laptop, and you’re good to go. Additionally, you can use the tool for added tasks which we shall highlight below. So, let’s get to it.
Install Microsoft PowerToys
The first thing we need to do is install Microsoft PowerToys on your PC. For those unaware, Microsoft PowerToys is essentially a testing ground for developers to experiment and work on new utility tools. One of these tools is Mouse Without Borders, which we’ll use later in this guide.
As for PowerToys, previously, you were required to download and install it from their GitHub page. However, the process is a lot easier now. So, let’s get to it.
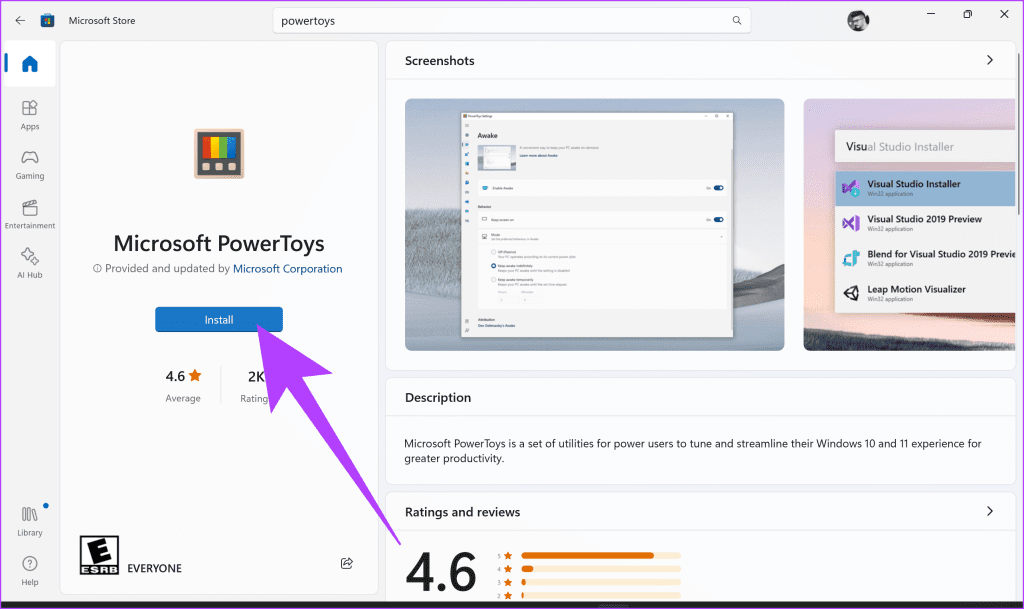
Step 1: Search for ‘Microsoft PowerToys’ in the Microsoft Store. Alternatively, you can use the link below to open the download page directly.
Step 2: Click on Install to download and install Microsoft PowerToys on your Windows PC. You might get a UAC window asking for permission. Ensure that the app has the necessary permissions.
And that’s it. Once Microsoft PowerToys has completed installation, it will automatically launch on your Windows PC.
Now, repeat this process on the other computer as well. Both devices that you wish to use the same mouse with need to have Microsoft PowerToys installed.
How to Use Mouse Without Borders on Windows
Now that PowerToys has been installed on your PC, we can use Mouse Without Borders to share the mouse between computers. Here’s how to do that.
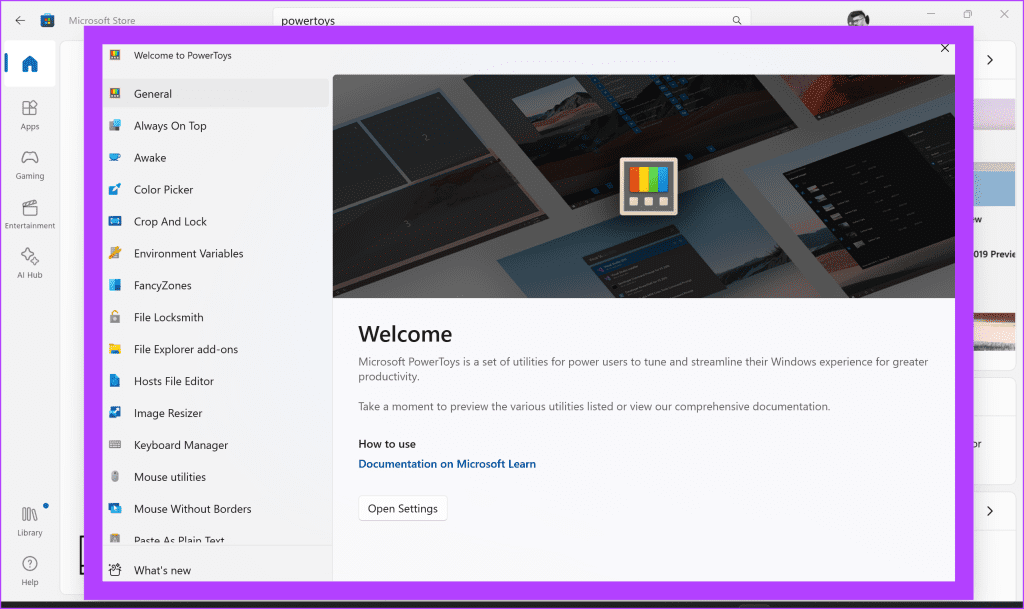
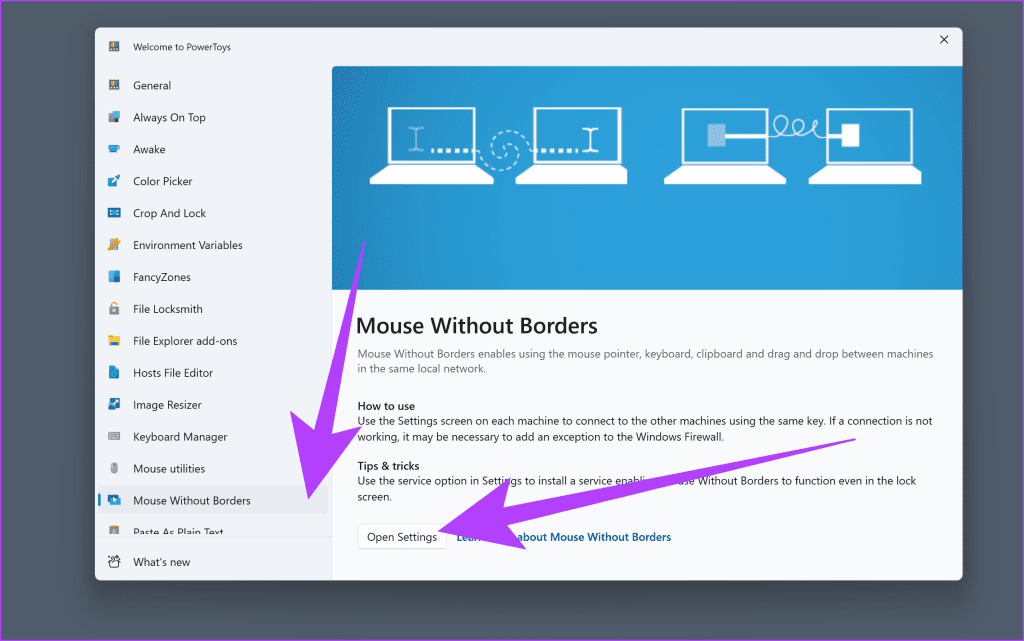
Step 1: First, ensure that both systems are connected to the same network. Then, start by setting up the first PC. On it, open Microsoft PowerToys and select ‘Mouse Without Borders’ from the left pane. Then, click on ‘Open Settings’.
Step 2: This should open the settings window. Inside, enable the toggle for ‘Enable Mouse Without Borders’.
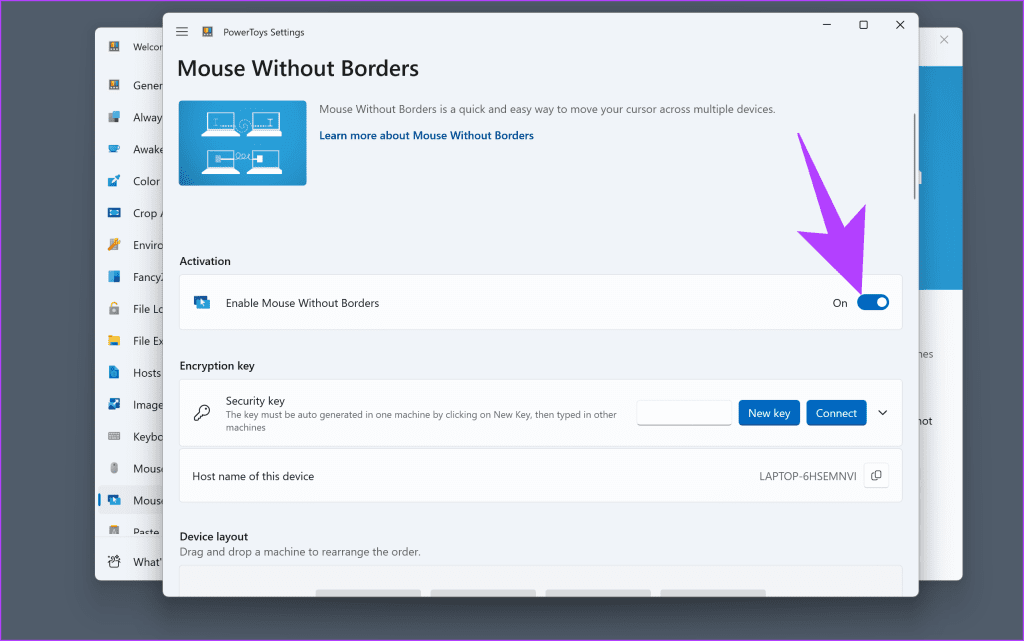
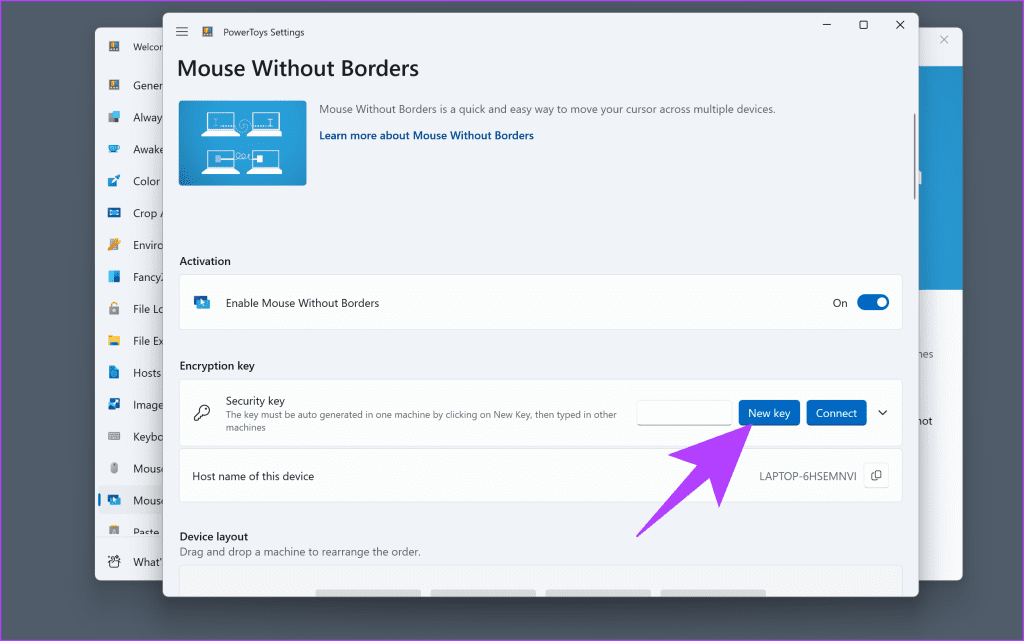
Step 3: Now, scroll down to the Encryption key section and click on New key.
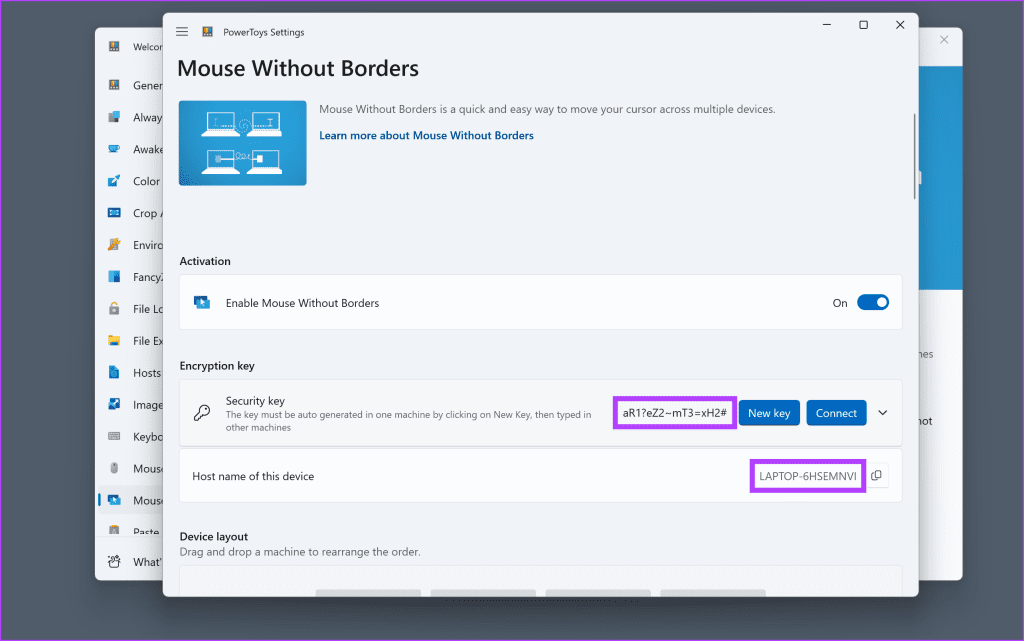
Step 4: This will generate a new key. Note it along with the Host Name of the primary PC shown below it since you will have to enter the same key on the secondary PC, too.
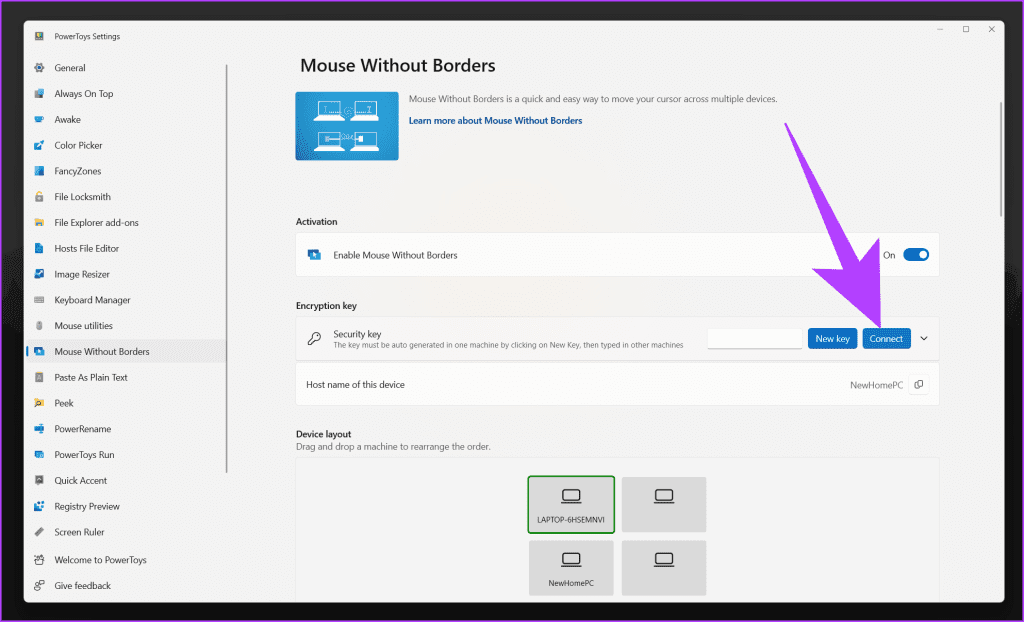
Step 5: Now, repeat the first two steps on your second PC. Then, click on Connect under the Encryption key section.
Step 6: Here, enter the Security key along with the Device name that you noted down in Step 4. Once done, hit Connect once again.
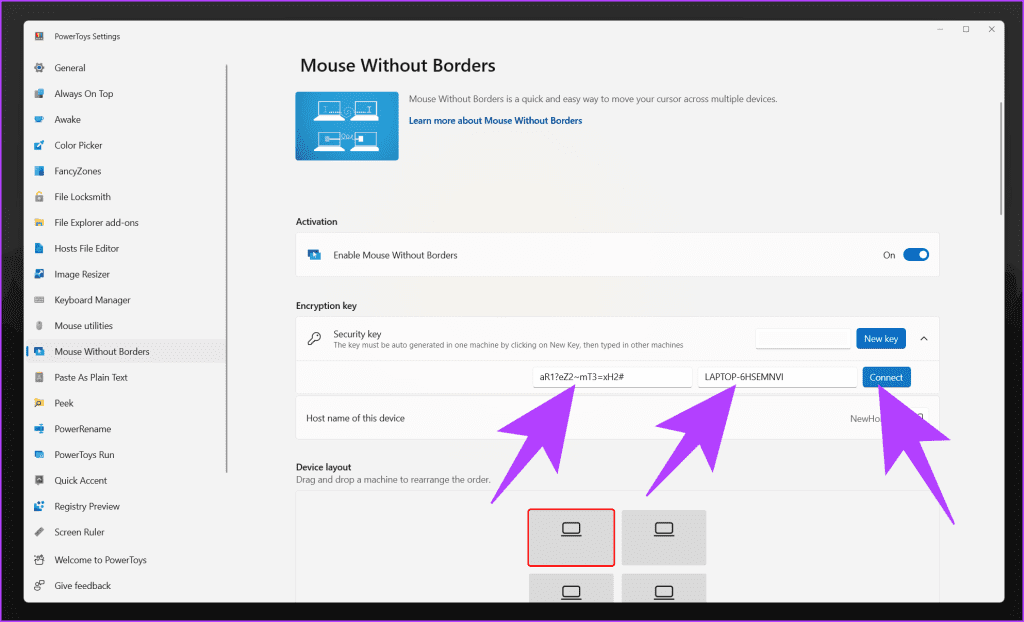
Step 7: And that’s it. Your devices should now be connected, and you can use the same mouse (and keyboard) across both Windows PCs.
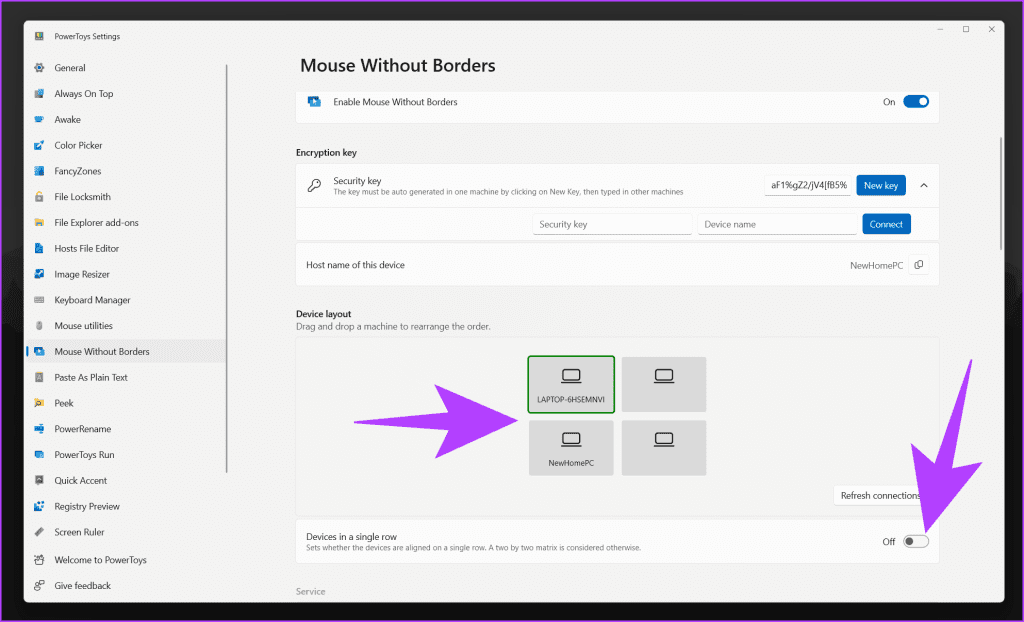
Additionally, under the Device layout section, you can arrange the placement of the devices virtually.

Step 8: If you prefer a top-down layout, disable the toggle for ‘Devices in a single row’. You can then move the devices around virtually to change their layout.
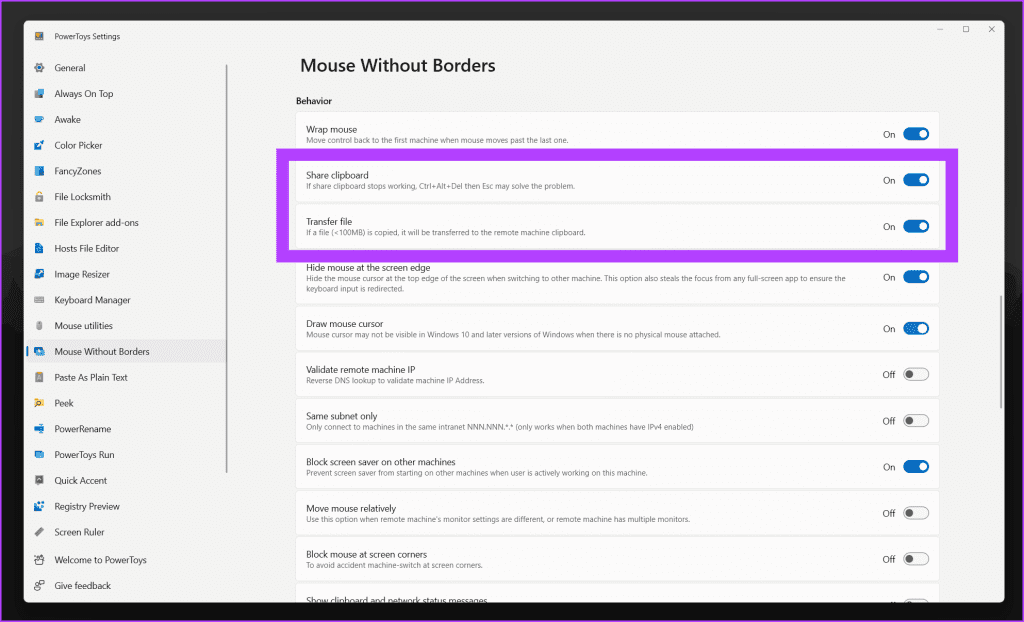
Step 9: That’s not all. Scroll down to the Behaviour section and enable the toggles for Share clipboard and Transfer file.
You can now easily copy-paste content from one device to another. You can also transfer files using copy-paste if the file is under 100MB.
And that’s it. You can use Mouse Without Borders on up to four Windows PCs and share your mouse and keyboard across all of them.
Bonus: How to Enable and Use the ‘Peek’ Feature
While we are on the topic of Microsoft PowerToys, here’s another bonus feature for you. Like macOS’s preview feature, PowerToys offers a quick and easy way to preview files on your system. This is via the Peek tool. Here’s how you can use it.
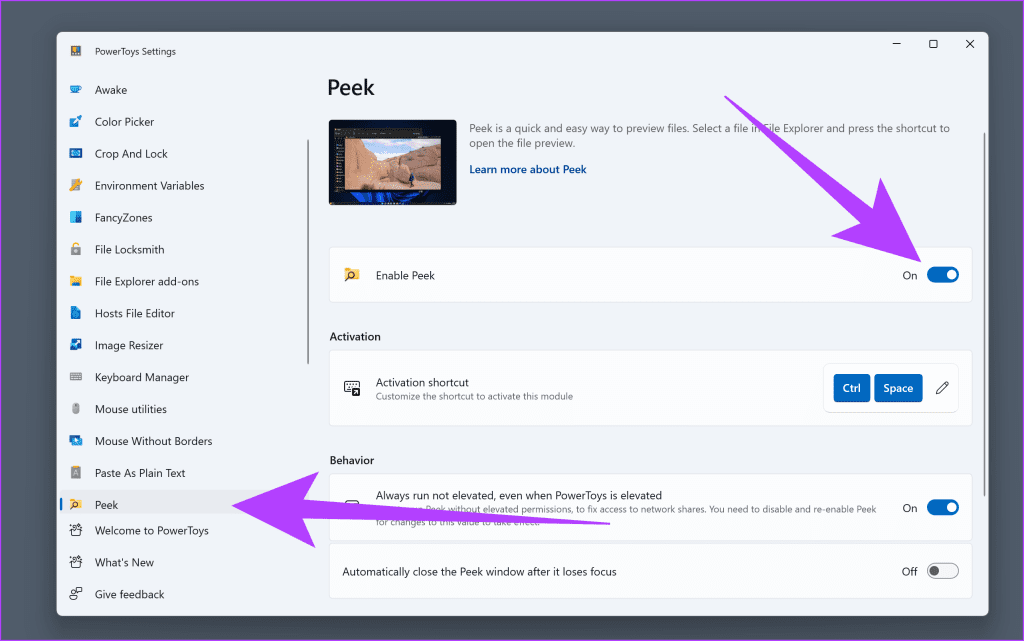
Step 1: From the left pane inside PowerToys settings, select Peek. Now, turn on the toggle for ‘Enable Peek’.
Step 2: Now, set up an activation shortcut for it. By default, it will be Ctrl + Space. However, if you want, you can change it to something else of your liking.
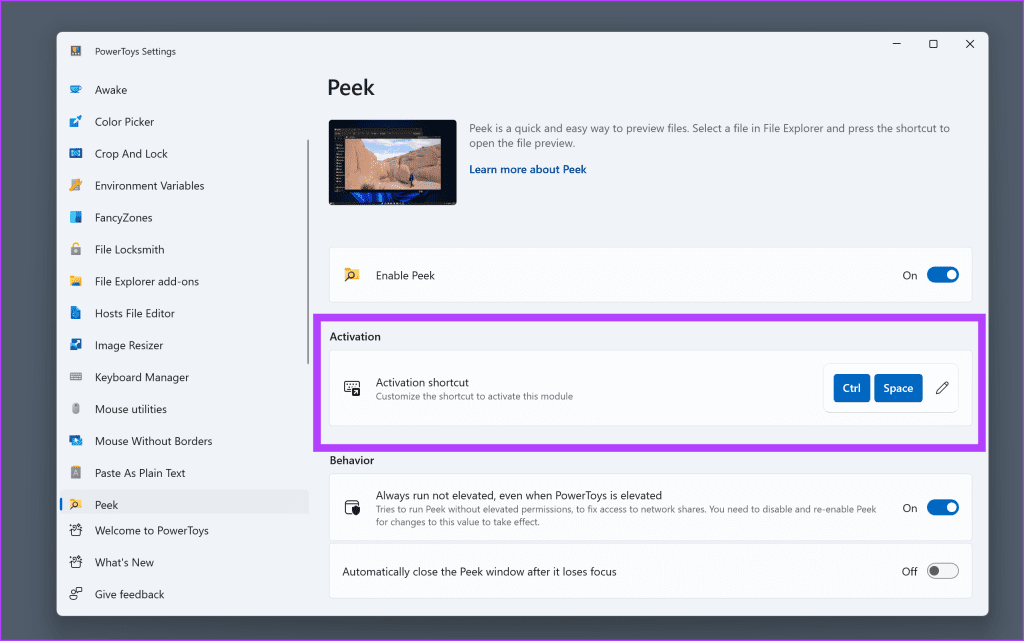
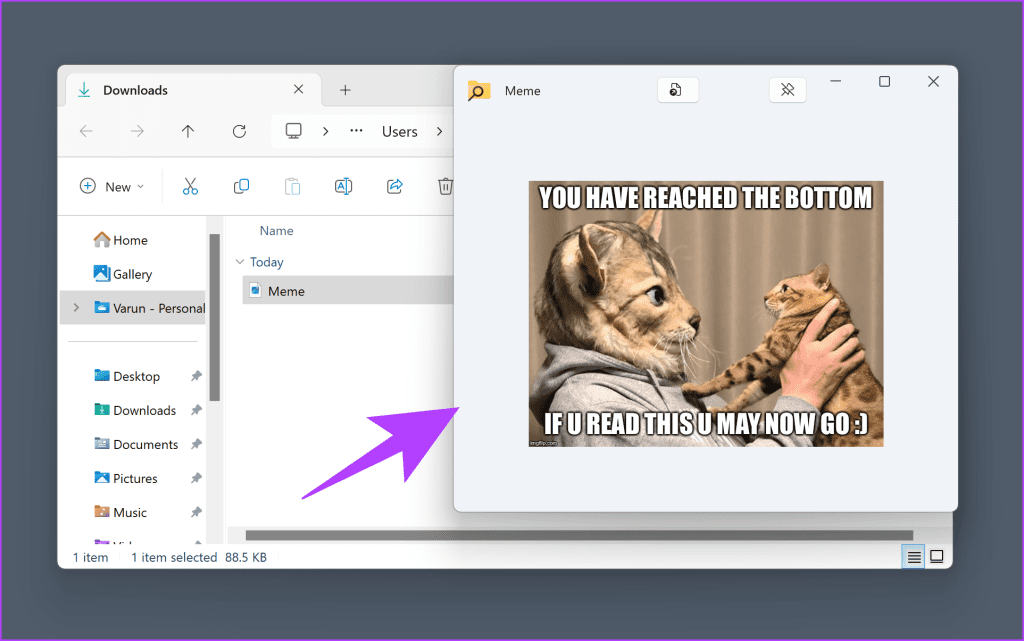
And that’s it. Open File Explorer, select the file you wish to preview, and press Ctrl + Space (or the shortcut you set). Windows will open it in a preview window.
Use the Same Mouse Across PCs
Mouse Without Borders is a game-changer for multi-PC users. It offers seamless and effortless control across your digital landscape. Whether you’re a productivity enthusiast or looking to simplify your setup, this tool is a must-have. Say goodbye to the hassles of switching peripherals and embrace a more fluid and connected computing experience.
Was this helpful?
Last updated on 28 December, 2023
Read Next
 Mouse Without Borders Not Working? 8 Ways to Solve It
The seamless flow between multiple computers with Mouse Without Borders is a productivity dream.
Mouse Without Borders Not Working? 8 Ways to Solve It
The seamless flow between multiple computers with Mouse Without Borders is a productivity dream.
 How to Add Borders to an Image Using Microsoft Paint
Method 1: Add Borders to an Image Using Shapes for Borders This method involves using the shapes within Microsoft Paint to draw borders around the image.
How to Add Borders to an Image Using Microsoft Paint
Method 1: Add Borders to an Image Using Shapes for Borders This method involves using the shapes within Microsoft Paint to draw borders around the image.
 Top 3 Touch Mouse Alternatives to Apple’s Magic Mouse
The Magic Mouse is useful for plenty of people, but some can get annoyed by its poor ergonomics.
Top 3 Touch Mouse Alternatives to Apple’s Magic Mouse
The Magic Mouse is useful for plenty of people, but some can get annoyed by its poor ergonomics.
 Top 6 Ways to Fix Mouse Keeps Scrolling Automatically Windows 10 and Windows 11
Does the mouse keep scrolling automatically on your Windows computer?
Top 6 Ways to Fix Mouse Keeps Scrolling Automatically Windows 10 and Windows 11
Does the mouse keep scrolling automatically on your Windows computer?
 How to Fix Mouse Drag Issues By Activating ClickLock in Windows
Have you ever come across a hardware problem where the left mouse of your laptop has stopped functioning properly and you realize that moving files and folders (using drag and
How to Fix Mouse Drag Issues By Activating ClickLock in Windows
Have you ever come across a hardware problem where the left mouse of your laptop has stopped functioning properly and you realize that moving files and folders (using drag and
 Top 7 Ways to Fix the Left Click Mouse Button Not Working on Windows 10
It's distracting to have a mouse that doesn't work properly.
Top 7 Ways to Fix the Left Click Mouse Button Not Working on Windows 10
It's distracting to have a mouse that doesn't work properly.
 How to Customize the Mouse Cursor on Windows 11
Windows 11 has been out for a while now, and if you haven't updated to it yet, you can look at how to install Windows 11 on your computer the
How to Customize the Mouse Cursor on Windows 11
Windows 11 has been out for a while now, and if you haven't updated to it yet, you can look at how to install Windows 11 on your computer the
 Top 9 Ways to Fix Mouse Delay in Games on Windows 11
You are up for a below-average gaming experience when you face mouse delay in selected titles on Windows 11.
Top 9 Ways to Fix Mouse Delay in Games on Windows 11
You are up for a below-average gaming experience when you face mouse delay in selected titles on Windows 11.
The article above may contain affiliate links which help support Guiding Tech. The content remains unbiased and authentic and will never affect our editorial integrity.