Method 1: Use Live Captions to Transcribe Voice Memos on iPhone
Why you should try this: There is no need for the internet or a third-party app.
Note: Live Captions is available on iPhone 11 and later provided the primary language is set to English (U.S.) or English (Canada). To do so, go to Settings > General > Language & Region > Add Language and set the language to English US.
You can use the Live Captions feature on your iPhone to get real-time transcription in any app, including FaceTime, Podcasts, and Voice Memos. The process is straightforward and free to use. Follow these steps.
Set Up Live Captions
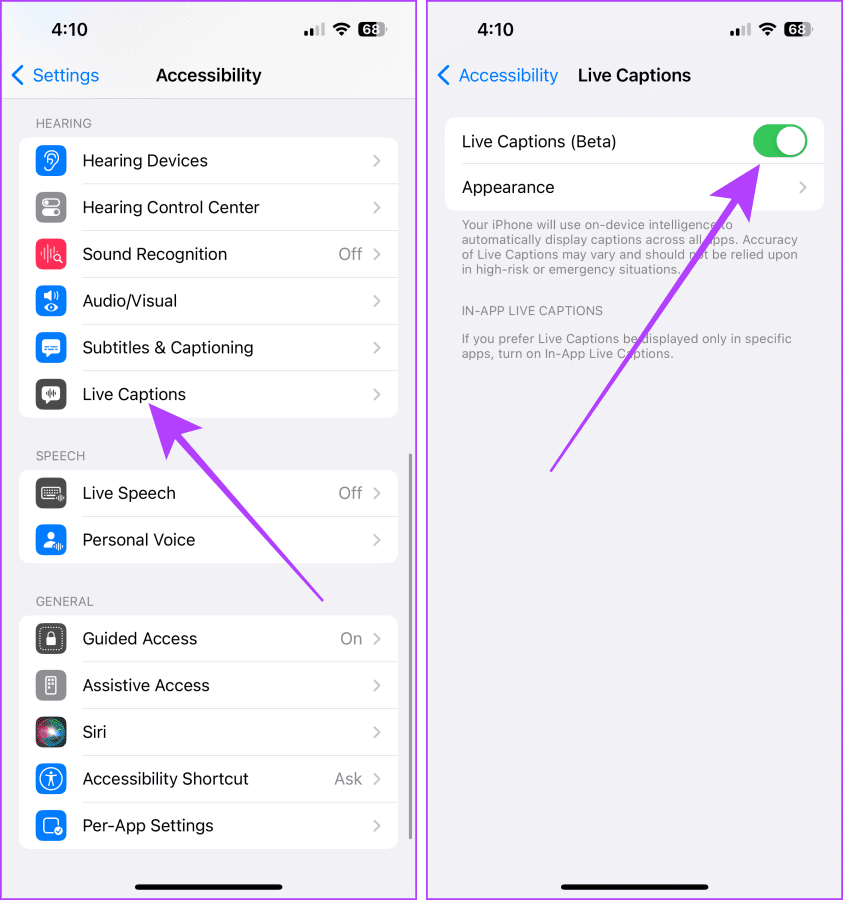
Step 1: Open the Settings > scroll down and tap on Accessibility.
Step 2: Tap Live Captions under the Hearing section.
Step 3: Toggle on Live Captions (Beta).
Note: To customize the text, size, and color of the captions, tap Appearance.
Transcribe Voice Memos
Step 1: Open the Voice Memos app. You can record a new memo or transcribe an existing one.
Step 2: Tap the voice memo you want to transcribe to expand it > hit the play button.
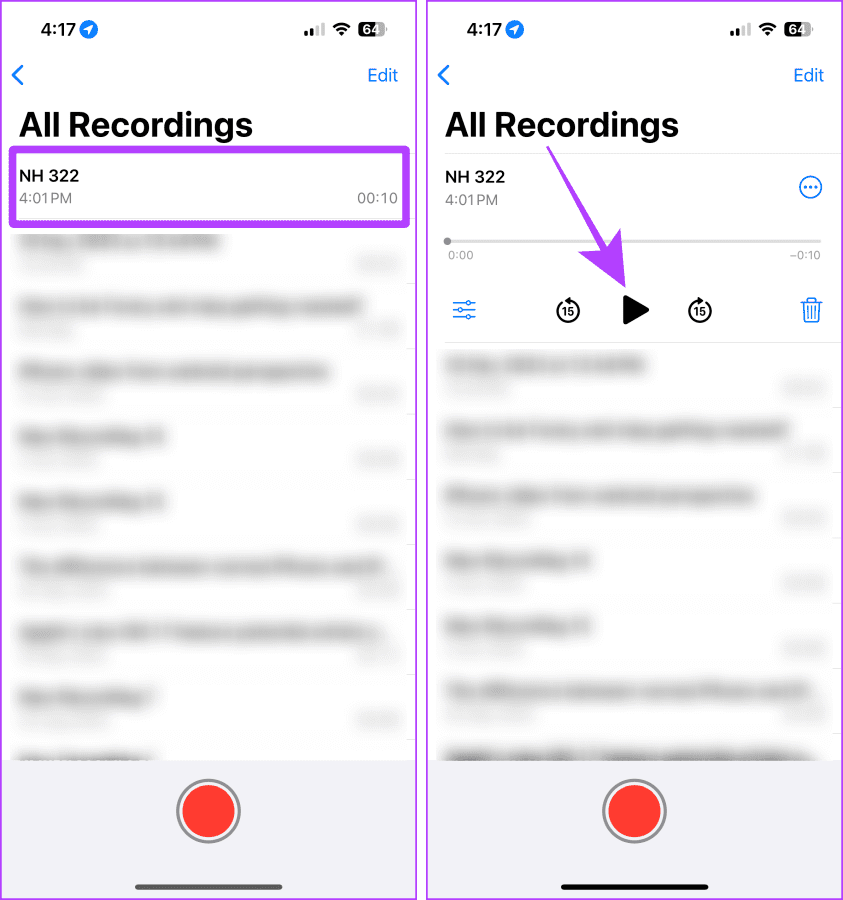
Step 3: That’s it. The transcription will appear on your screen in a floating window. Tap the expand button to view it in full screen.
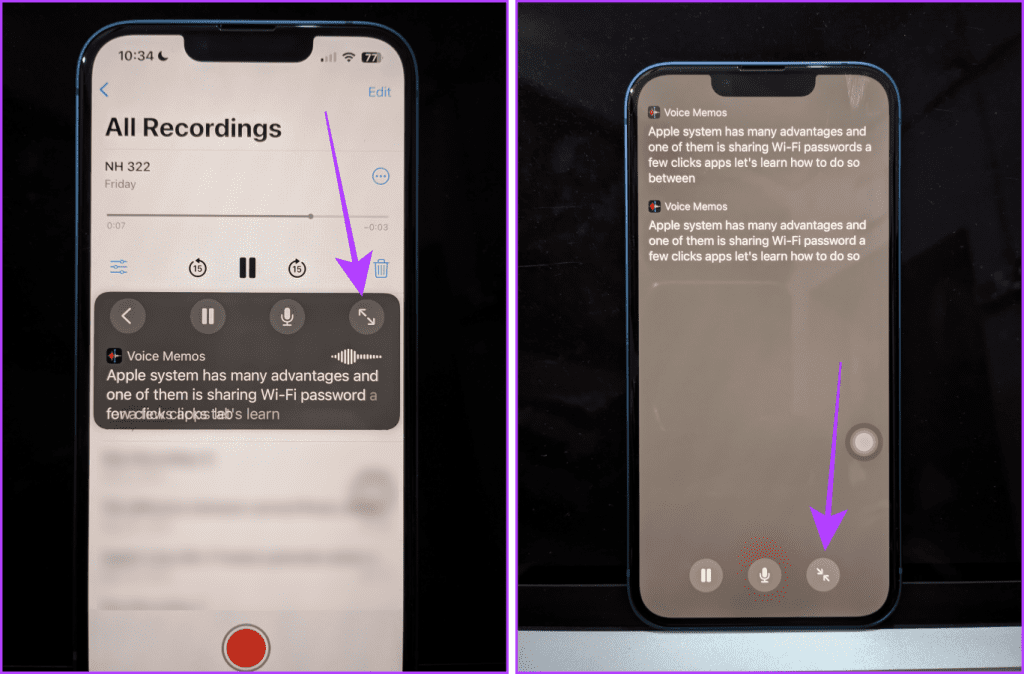
Note: Apple doesn’t allow screenshots or screen recording for the Live Captions.
Method 2: Send Yourself a Voice Message on iMessage
Why you should try this: No need for a third-party app.
Note: To use this feature on your iPhone, ensure that iMessage is enabled and your iPhone runs on iOS 17 and later.
There are many obscured features on your iPhone, and one of them is the live transcription of the sent/received voice messages in the iMessage. You can use this method to transcribe a quick voice memo by sending yourself a voice message.
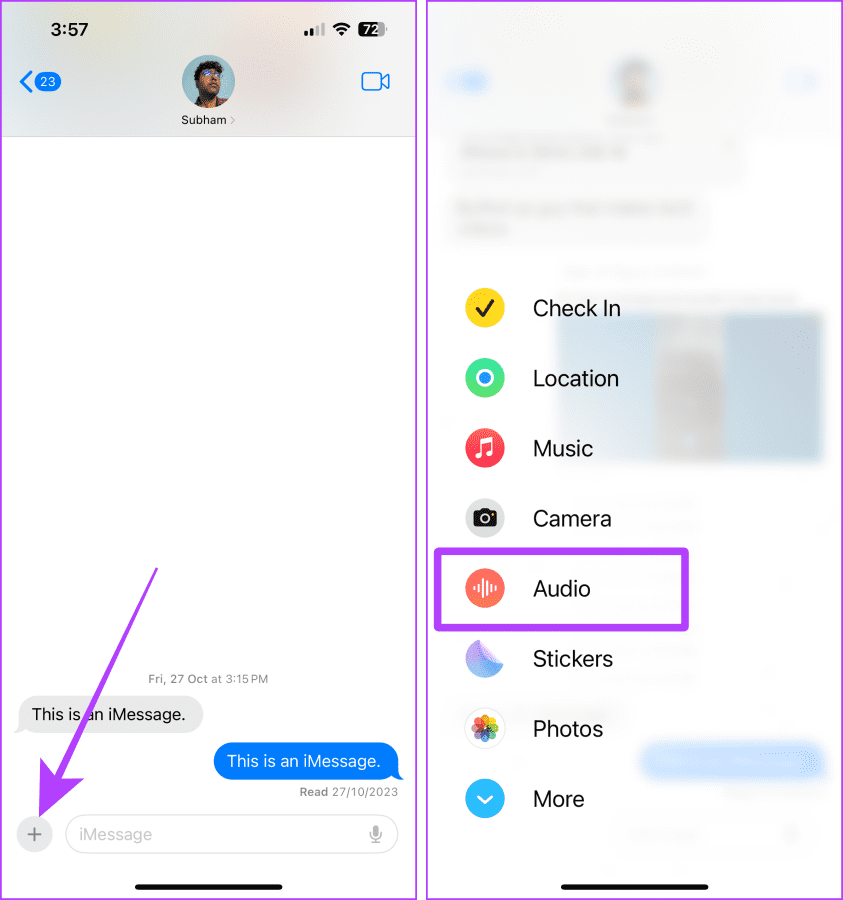
Step 1: Launch the Messages app > search your name > tap the result.
Step 2: Tap the + button > select Audio.
Tip: If Audio is not showing, swipe up in the list.
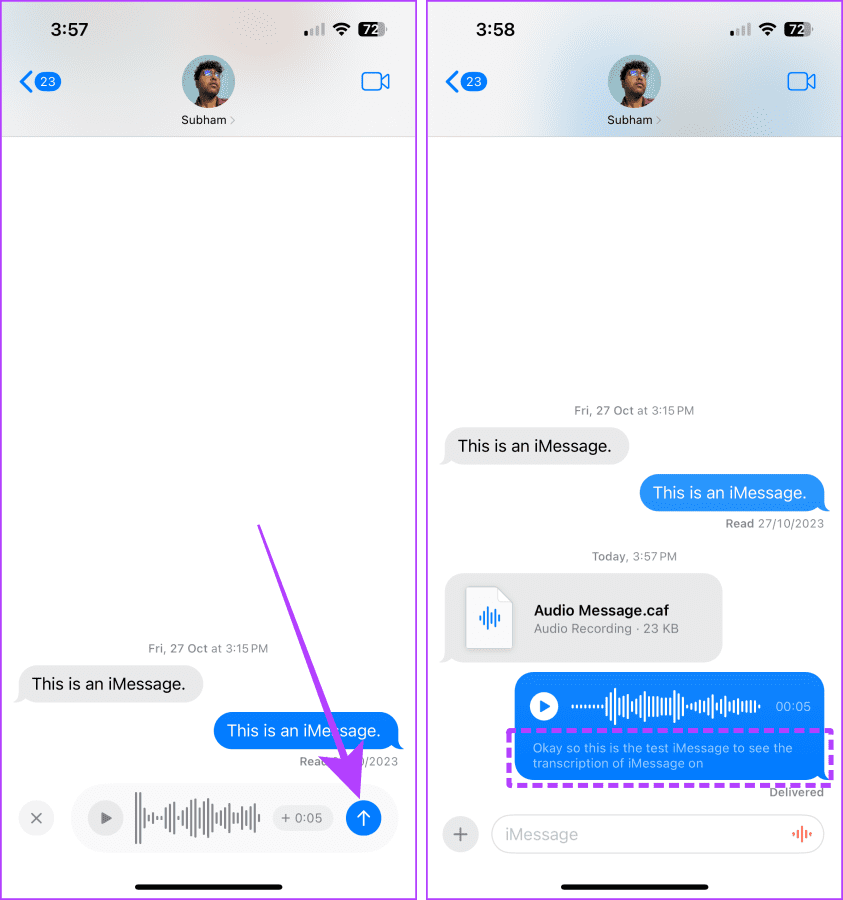
Step 3: The audio will start recording; tap the Send button to send the recording.
Now, you will see the transcription of the sent voice memo along with the audio.
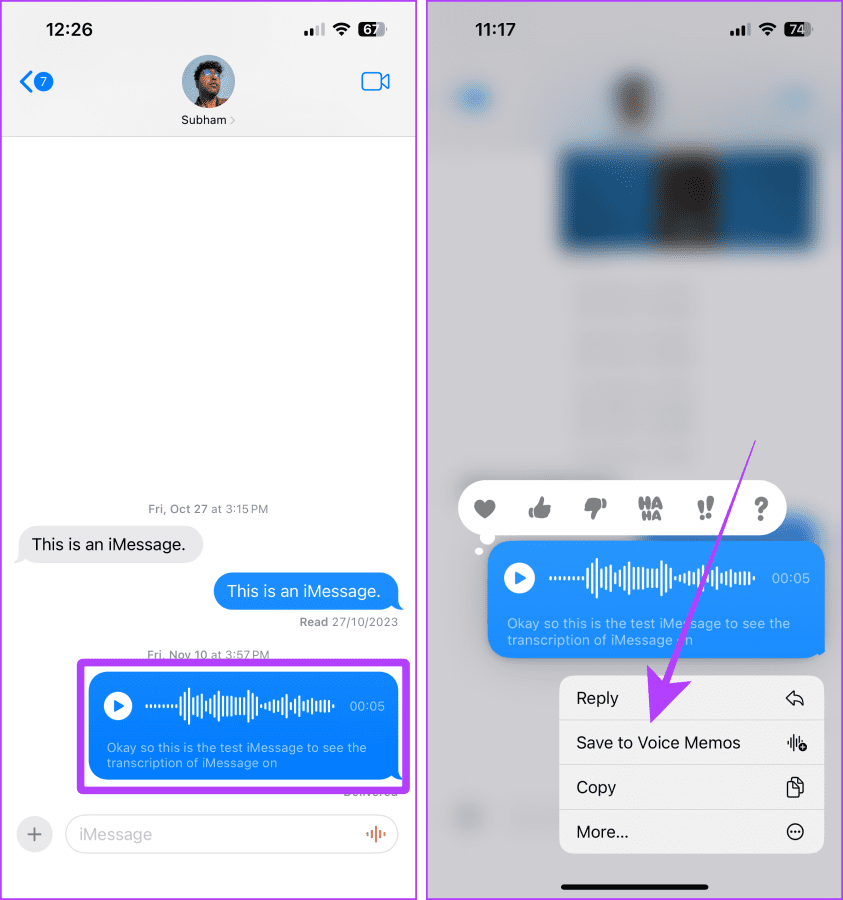
Furthermore, you can also save this voice message to the Voice Memo app on your iPhone. Tap and hold the voice message → Save to Voice Memos.
Method 3: Use Third-Party Apps to Transcribe Voice Memos
1. Use Rev to Transcribe Voice Memos
Why you should try this: Provides a more accurate transcription (as compared to others in this list).
Many apps on the App Store, like Rev, transcribe and record voice memos natively. Although Rev is free to download, you’ll need its paid version to use transcription.
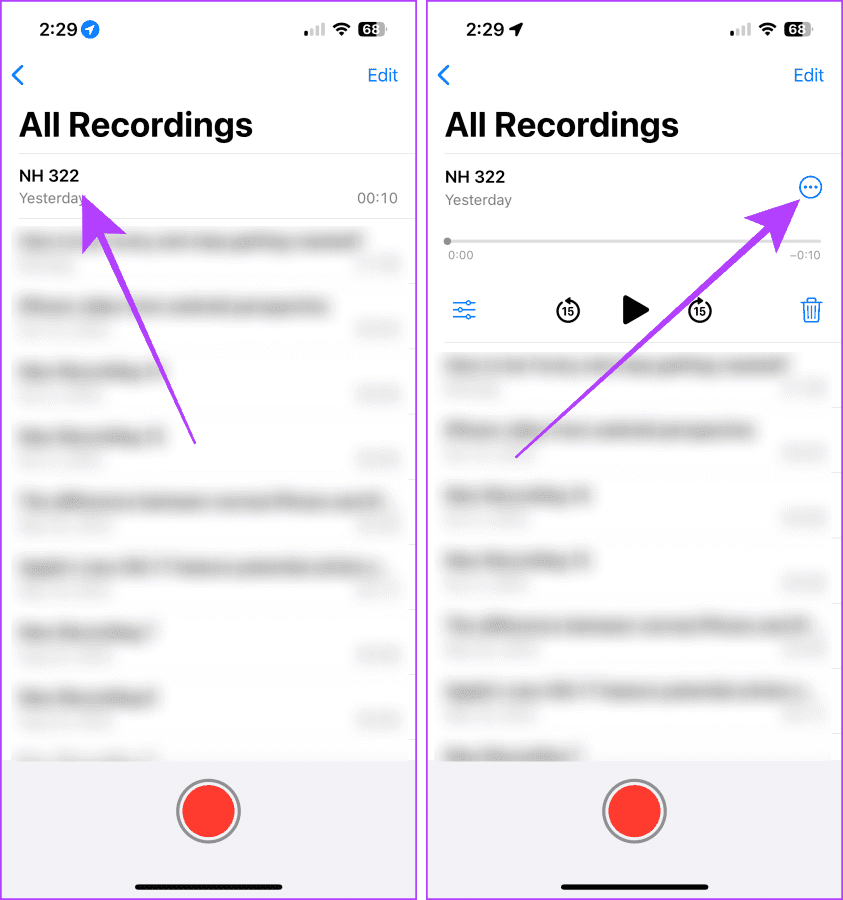
Step 1: Launch the Voice Memo app > tap the recording you want to transcribe.
Step 2: Tap the three dots icon.
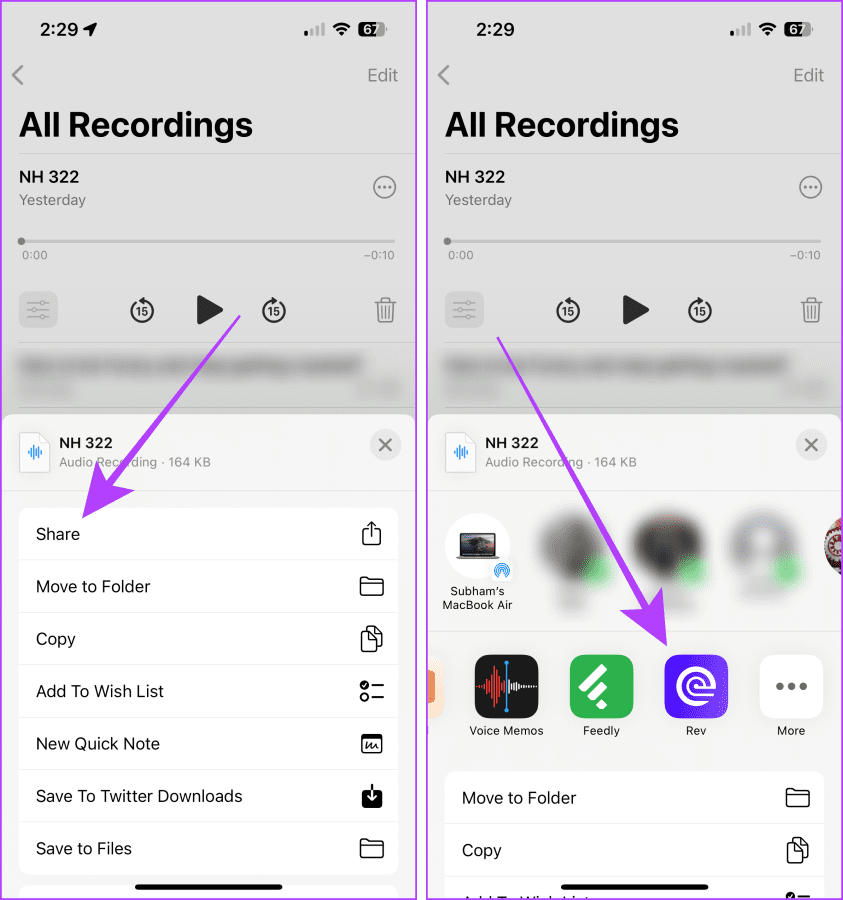
Step 3: Now, tap Share. Scroll and select Rev from the options.
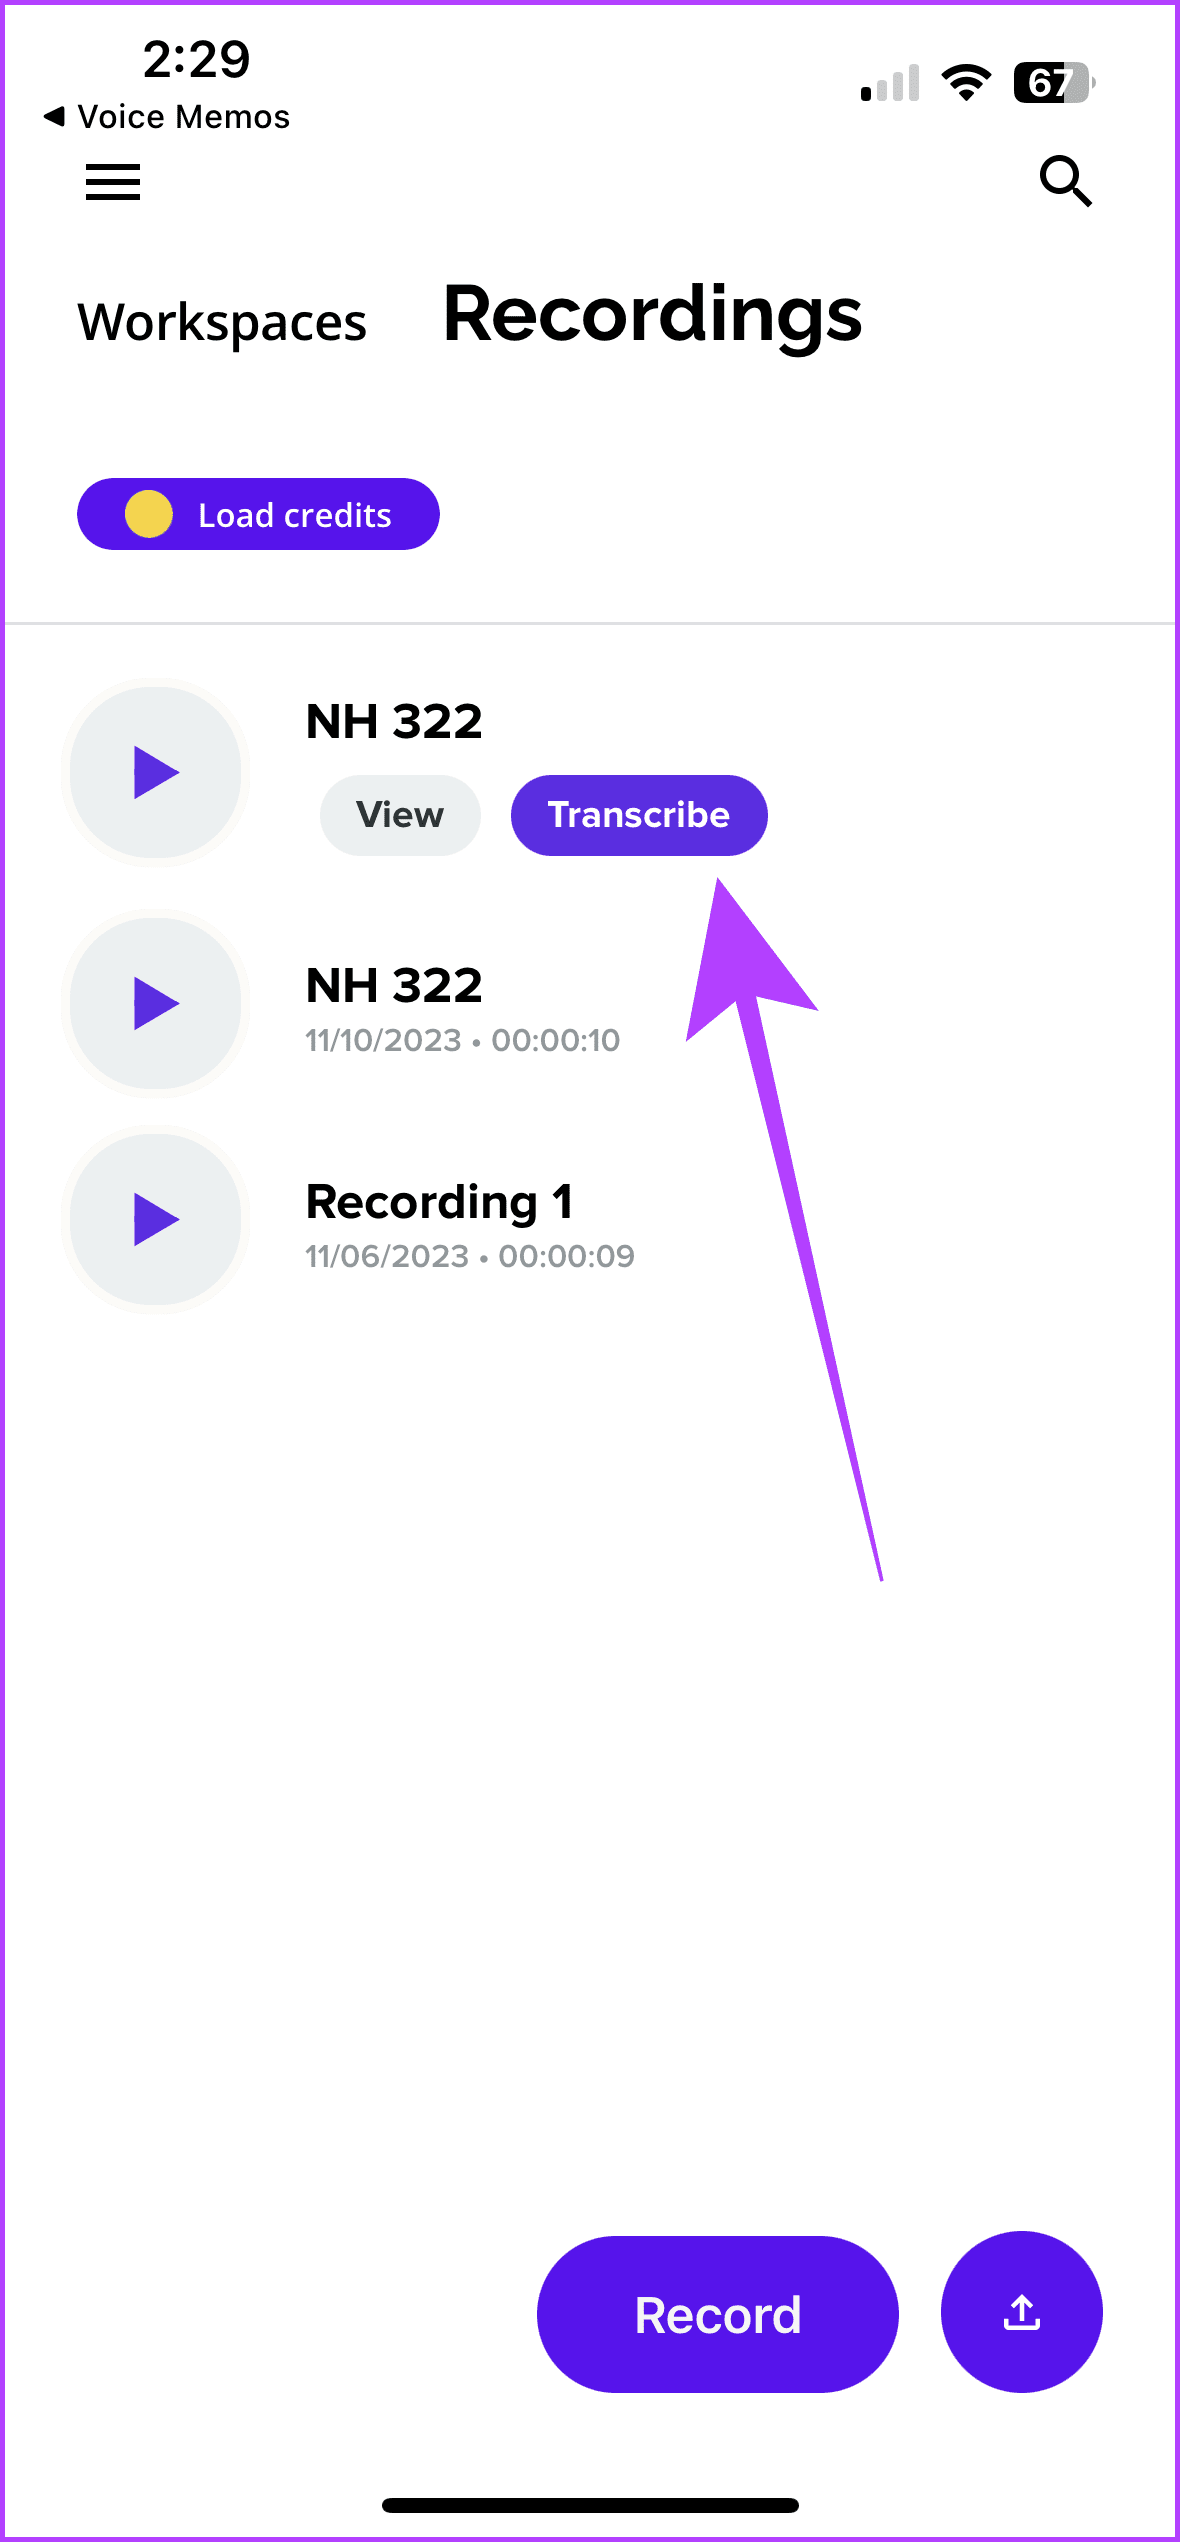
Step 4: In the Rev app, go to the Recordings section. Tap Transcribe next to the Voice Memo you imported. And that’s it.
2. Use YouTube’s Transcript Features
Why you should try this: It provides a time-synced transcription for the voice memos, and you can easily share a link for these voice memos and their time-synced transcription with anyone.
You must have seen YouTube videos with auto-generated transcripts. These transcripts can be generated for your voice memos as well, but you must convert them to video files before uploading them on YouTube.
For convenience, we’re breaking the steps into four parts, i.e.,
- Saving voice memo to Files
- Converting m4a (voice memo) to mp4 (video)
- Saving mp4 (video) to Photos
- Uploading converted mp4 to YouTube
Part 1: Save Voice Memo to Files
Step 1: Open the Voice Memo → select the recording > tap on the three dots menu.
Step 2: Tap Save to Files in the share sheet > select Save.

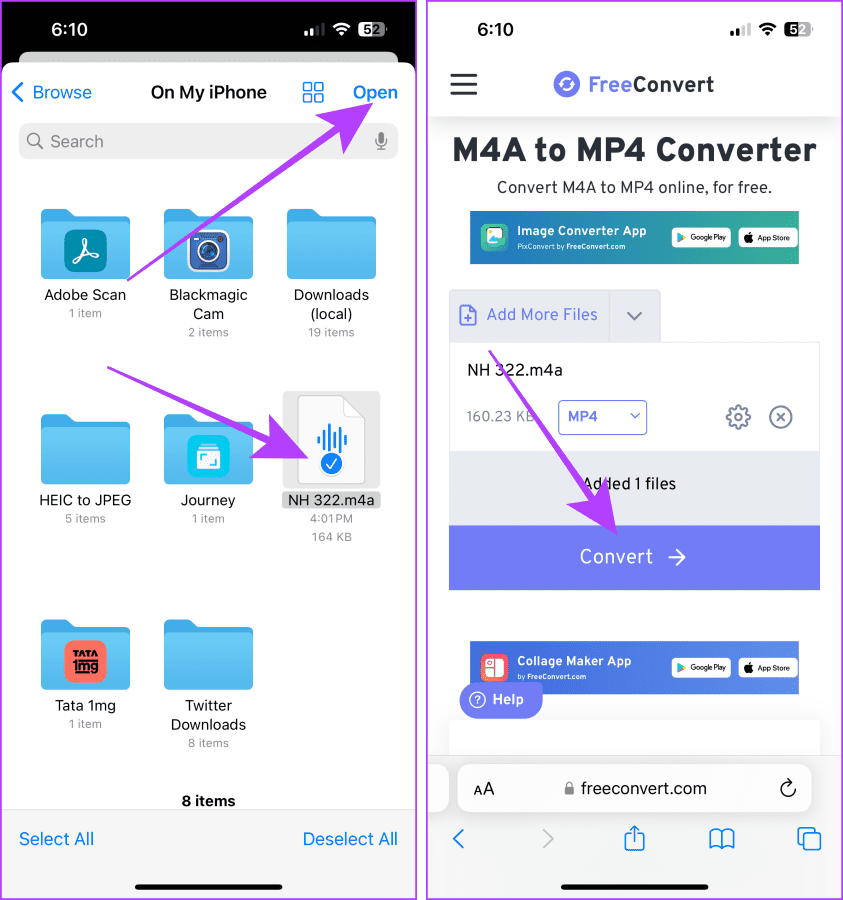
Part 2: Converting M4A (Voice Memo) to MP4 (Video)
Step 3: Now, go to the FreeConvert or any other website of your choice.
Step 4: Upload the saved voice memo. On the next page, tap Convert.
Step 5: Once the file is converted, tap Download.
Part 3: Saving MP4 (Video) to Photos
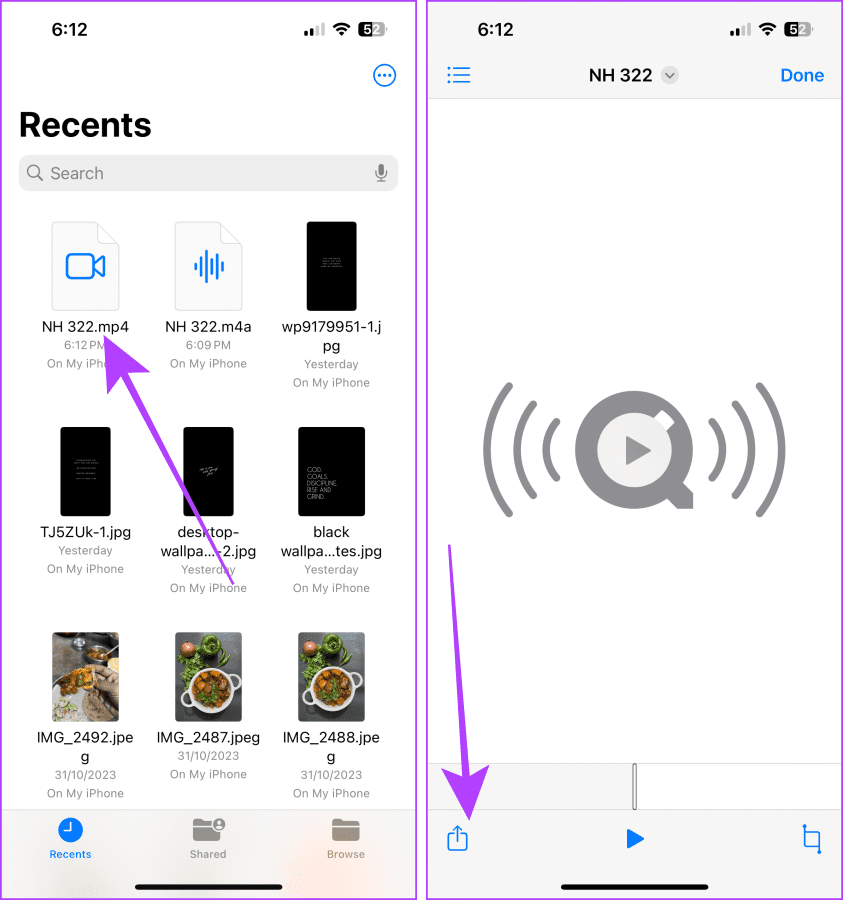
Step 6: Now, go to Recents in the Files app > open the recently downloaded video.
Step 7: Tap the share button > select Save Video from the options.
Part 4: Uploading converted mp4 to YouTube
Step 8: Open YouTube on your iPhone > tap the + button → select the video.
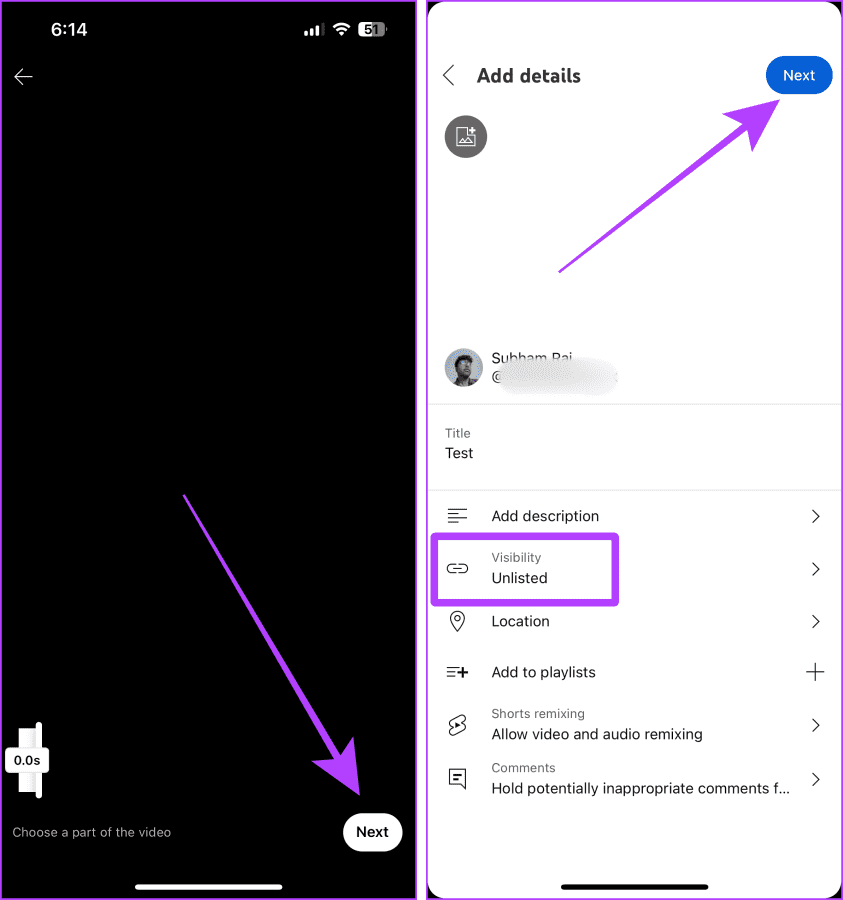
Step 9: Once the video uploads, tap Next.
Step 10: Title the video > ensure the Visibility is set to Unlisted > tap Next.
Note: If you don’t set the Visibility as Unlisted, the video will upload as a public video on YouTube.
Once your video finishes uploading, follow these steps to access your uploaded voice memo.
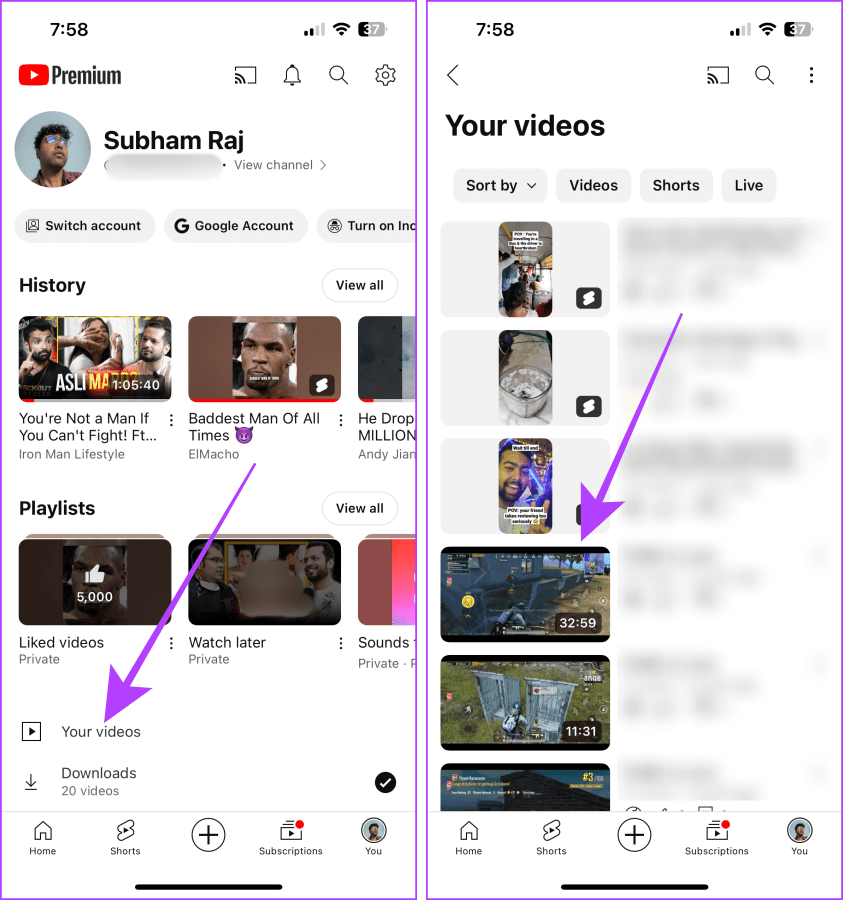
Step 11: Go to the You tab on YouTube > tap Your videos.
Step 12: Now, tap the video to open it on the full screen.
Step 13: Tap the video title to open the description. Scroll up in the description.
Step 14: Here, tap Show transcript.
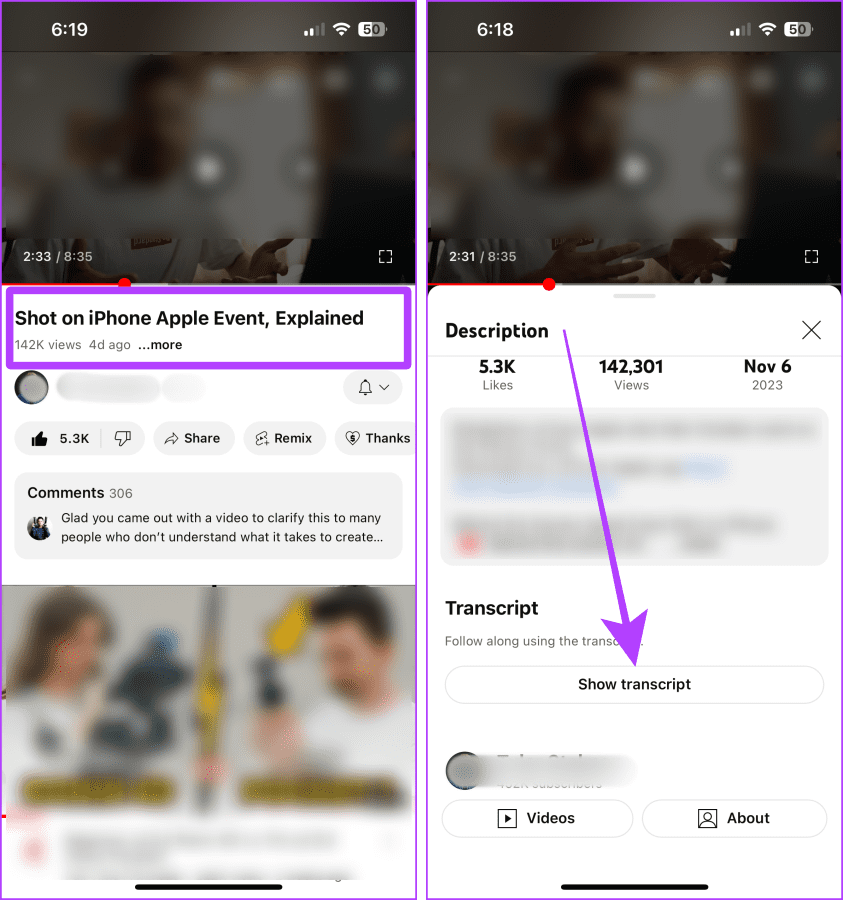
And YouTube will auto-transcribe the voice memo. The best part is that the transcripts are time-synced, and you can share this video with anyone. However, consider the extra efforts that go into this method.
Method 5: Transcribe Voice Memos Using Microsoft 365
Why you should try this: It will be handy if you use Microsoft Office 365 for academic, productivity, or business purposes.
Did you know that Microsoft 365 has an in-built transcribe feature? If you use Microsoft 365 for productivity, you can also transcribe any audio file you record in English. The process is simple. Import the voice memo from your iPhone to your Mac or PC and follow the below steps.
Note: Although most of Microsoft 365’s features are free to use, the Transcribe feature is paid.
Step 1: Open Microsoft 365 → Word → Create New (or existing document as per preference).
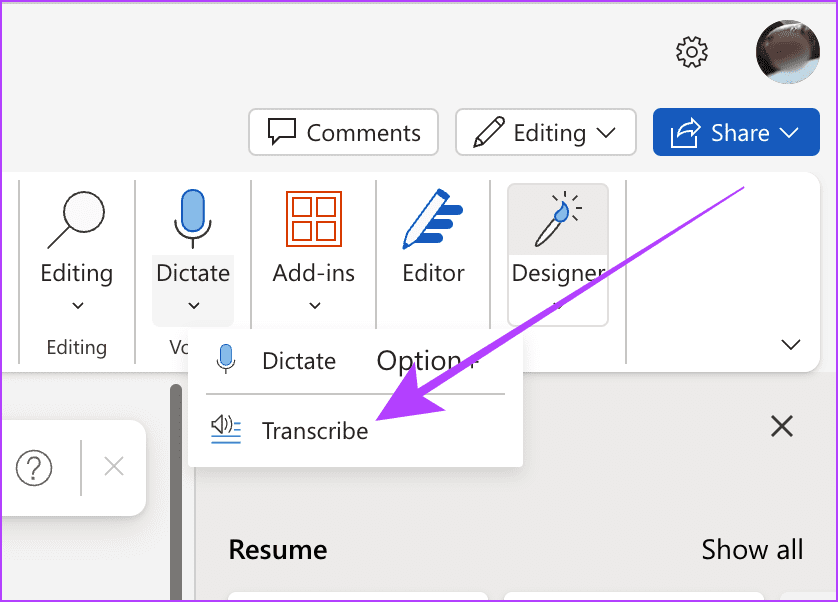
Step 2: Now, go to dictate from the Word toolbar. Click the down arrow and select Transcribe.
Step 3: Click on Upload audio and upload the Voice memo.

That’s it; once the audio is processed, it will be available with the transcripts.
Was this helpful?
Last updated on 26 July, 2024
Read Next
 3 Ways to Upload Voice Memos to Google Drive from iPhone
Method 1: Save iPhone Voice Memos by Sharing to Drive Step 1: Record a new voice memo or tap on the existing recording you want to export to Google Drive.
3 Ways to Upload Voice Memos to Google Drive from iPhone
Method 1: Save iPhone Voice Memos by Sharing to Drive Step 1: Record a new voice memo or tap on the existing recording you want to export to Google Drive.
 How to Use Voice Memos on iPhone: A Complete Guide
How to Record an Audio on iPhone Step 1: Click on the red button at the bottom to record the audio.
How to Use Voice Memos on iPhone: A Complete Guide
How to Record an Audio on iPhone Step 1: Click on the red button at the bottom to record the audio.
 3 Fixes for Voice Memos Not Recording Audio on iPhone
Basic Fixes Check Microphone permissions for the Voice Memos app: Open Settings > Voice Memos > enable Microphone access.
3 Fixes for Voice Memos Not Recording Audio on iPhone
Basic Fixes Check Microphone permissions for the Voice Memos app: Open Settings > Voice Memos > enable Microphone access.
 3 Fixes for Voice Memos Not Syncing Between iPhone and Mac
Basic Fixes Use the same Apple account: Apple devices will sync only when they are using the same Apple account.
3 Fixes for Voice Memos Not Syncing Between iPhone and Mac
Basic Fixes Use the same Apple account: Apple devices will sync only when they are using the same Apple account.
 4 Ways to Fix Facebook Messenger Voice Messages Not Working
Try Basic Fixes Check the volume level on phone: If the volume level on your phone is too low, you may have trouble hearing your Messenger voice messages.
4 Ways to Fix Facebook Messenger Voice Messages Not Working
Try Basic Fixes Check the volume level on phone: If the volume level on your phone is too low, you may have trouble hearing your Messenger voice messages.
 5 Ways to Fix Snapchat Voice Notes Not Working
Fix 1: Check App Permissions Snapchat requires access to your phone's microphone to record Voice Notes.
5 Ways to Fix Snapchat Voice Notes Not Working
Fix 1: Check App Permissions Snapchat requires access to your phone's microphone to record Voice Notes.
 How to Fix Echo on iPhone During Voice Calls or FaceTime
We make or receive numerous calls daily.
How to Fix Echo on iPhone During Voice Calls or FaceTime
We make or receive numerous calls daily.
The article above may contain affiliate links which help support Guiding Tech. The content remains unbiased and authentic and will never affect our editorial integrity.