Fix 1: Turn Off the Metered Connection
Setting your internet connection as metered on Windows can prevent apps from using the internet proficiently, leading to slow internet speeds. Hence, the first thing you should do is disable the metered connection option for your network.
Step 1: Press the Windows key + I to open the Settings app and navigate to Network & internet > Wi-Fi.

Step 2: Click on your Wi-Fi network to open its properties.

Step 3: Turn off the Metered connection option.

Fix 2: Turn Off Delivery Optimization
Delivery Optimization is a nifty feature that allows your PC to share parts of previously downloaded Windows updates and apps with other computers on your local network. However, this feature can sometimes consume too much bandwidth and slow down the internet speed on your Windows 11 PC. Hence, it’s best to turn it off.
Step 1: Press the Windows key + I to open the Settings app. Switch to the Windows Update tab and click on Advanced options.

Step 2: Under Additional options, click on Delivery Optimization.

Step 3: Turn off the toggle next to Allow downloads from other PCs.

Fix 3: Limit Bandwidth for System Updates
Windows 11 allows you to set a specific amount of bandwidth for system updates. If the allocated bandwidth is too high, you may experience slow internet speeds while browsing or streaming. Here’s how to change it.
Step 1: Press the Windows key + I to open Settings and go to Windows Update > Advanced options > Delivery optimization.
Step 2: Select Advanced options.

Step 3: Under Download settings, select the Absolute bandwidth option and tick both checkboxes. Then, specify how much bandwidth you want to allocate in the relevant fields.

Fix 4: Terminate Any Data Consuming Processes
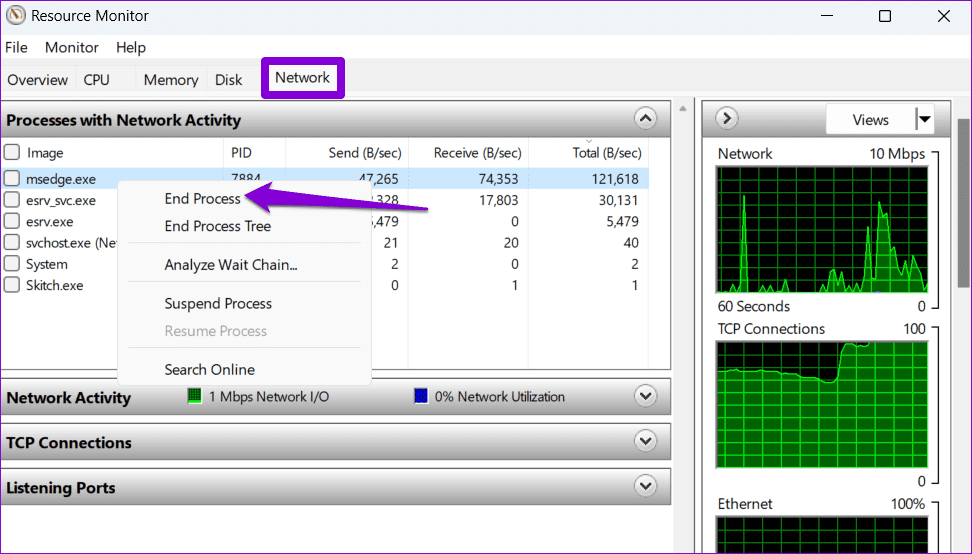
At times, background processes running on your PC could end up consuming a lot of bandwidth. In that case, you can use the Resource Monitor app to identify and terminate such processes to fix the slow internet issue in Windows 11.
Step 1: Press the Windows key + S to open the search menu. Type resource monitor in the box and press Enter.

Step 2: Under the Network tab, identify the process using a large amount of data. Right-click on it and select End process from the list.
Fix 5: Disable Background Apps
Another thing you can do to fix this particular issue is to prevent unwanted apps from running in the background. Here’s how you can go about it.
Step 1: Press the Windows key + I to open the Settings app. Switch to the Apps tab and click on Installed apps.
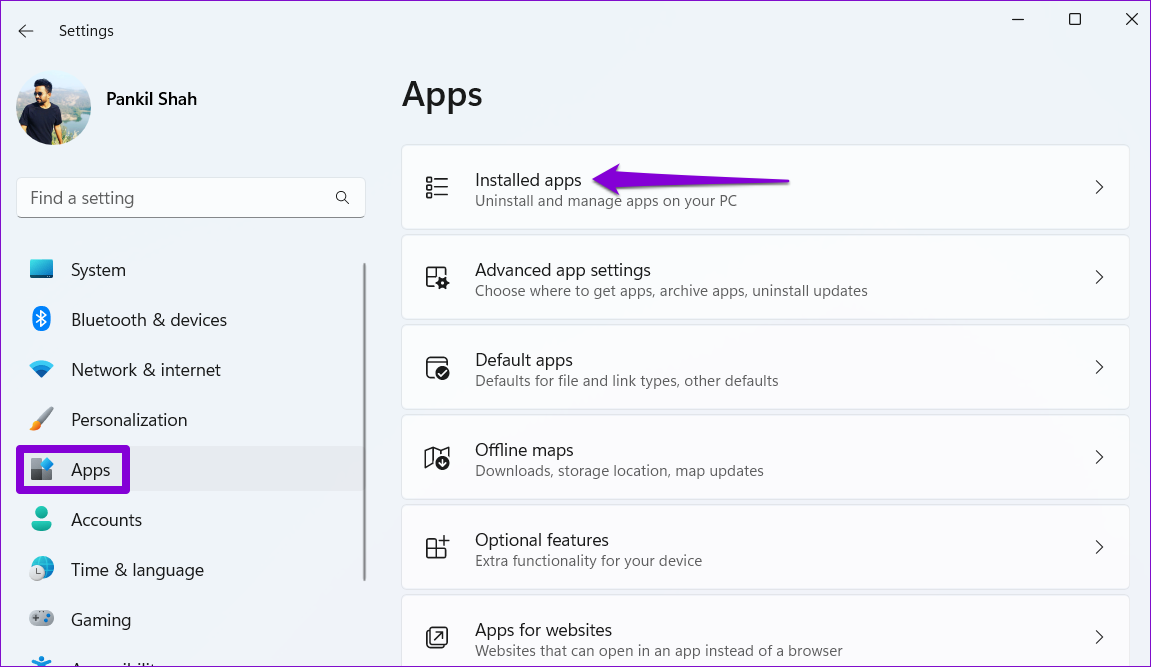
Step 2: Scroll down to locate the app you wish to prevent from running in the background. Click the three-dot icon next to it and select Advanced options.

Step 3: Under Background apps permissions, use the drop-down menu to select Never.

Fix 6: Update the Network Adapter Driver
Outdated network adapter drivers can also affect the internet speed of your Windows PC. To fix this, you can update the network adapter driver using Device Manager.
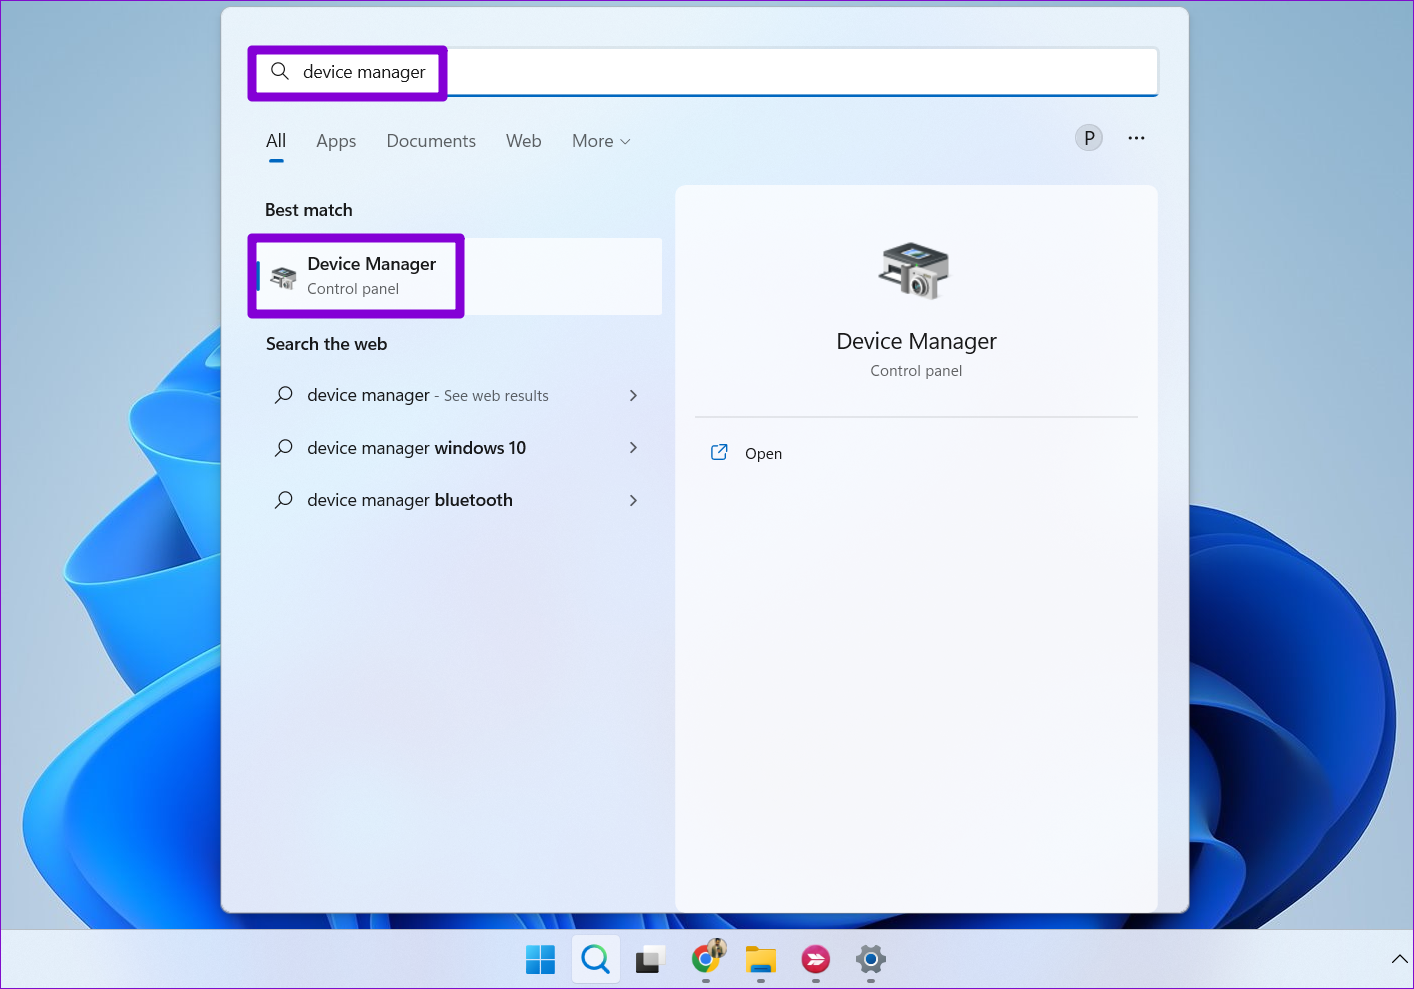
Step 1: Press the Windows key + S to open the search menu, type in device manager, and press Enter.
Step 2: Expand Network adapters, right-click on the network driver, and select Update driver.
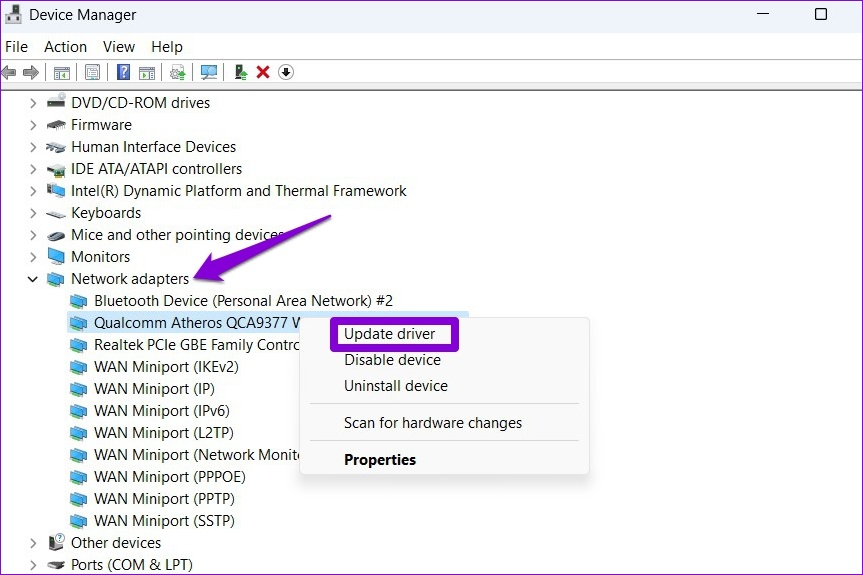
Now follow the on-screen instructions to update the driver and see if that solves the issue.
Fix 7: Change the DNS Server
Problems with your default DNS server can also cause slow internet speeds or connection issues on Windows 11. You can try switching to a different DNS server to see if that fixes the problem.
Step 1: Press the Windows key + R to launch the Run dialog, type in ncpa.cpl, and press Enter.
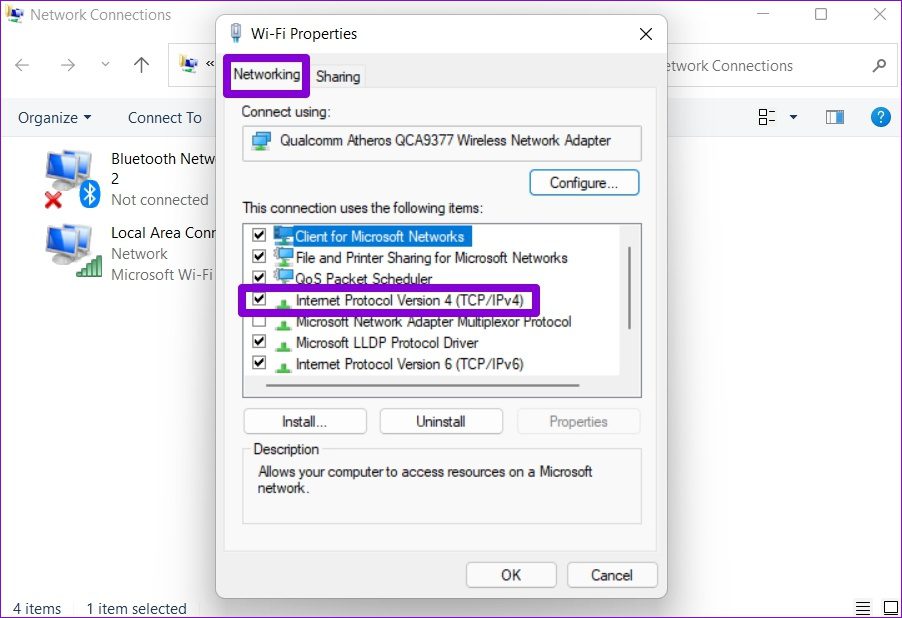
Step 2: In the Network Connections window, right-click on your internet connection and select Properties.

Step 3: Double-click on Internet Protocol Version 4 (TCP/IPV4).
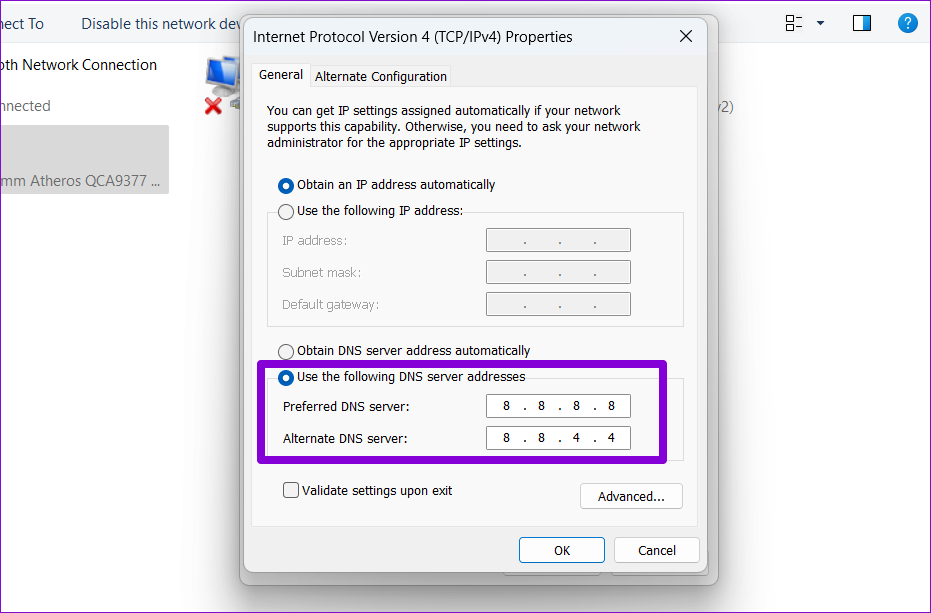
Step 4: Under the General tab, select Use the following DNS server addresses. In the Preferred DNS Server and Alternate DNS Server fields, enter 8.8.8.8 and 8.8.4.4, respectively.
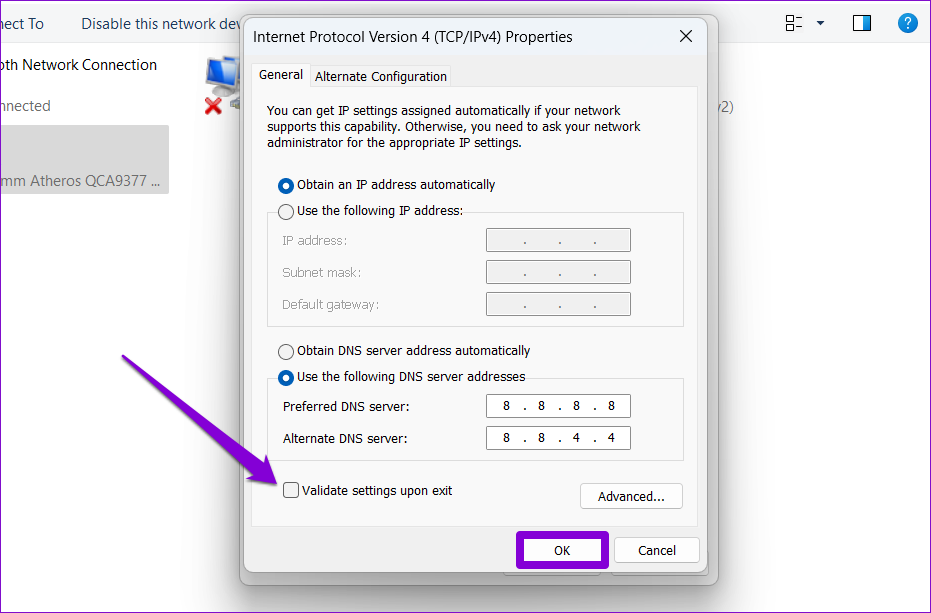
Step 5: Tick the Validate settings upon exit checkbox and click OK.
Fix 8: Reset Network Settings
If none of the above tips help, resetting your network settings on Windows may be your only option. Keep in mind that this will erase all of your saved Wi-Fi networks, paired Bluetooth devices, and other network settings.
Step 1: Press the Windows key + I to open the Settings app. Select the Network & internet tab on your left and click on Advanced network settings.

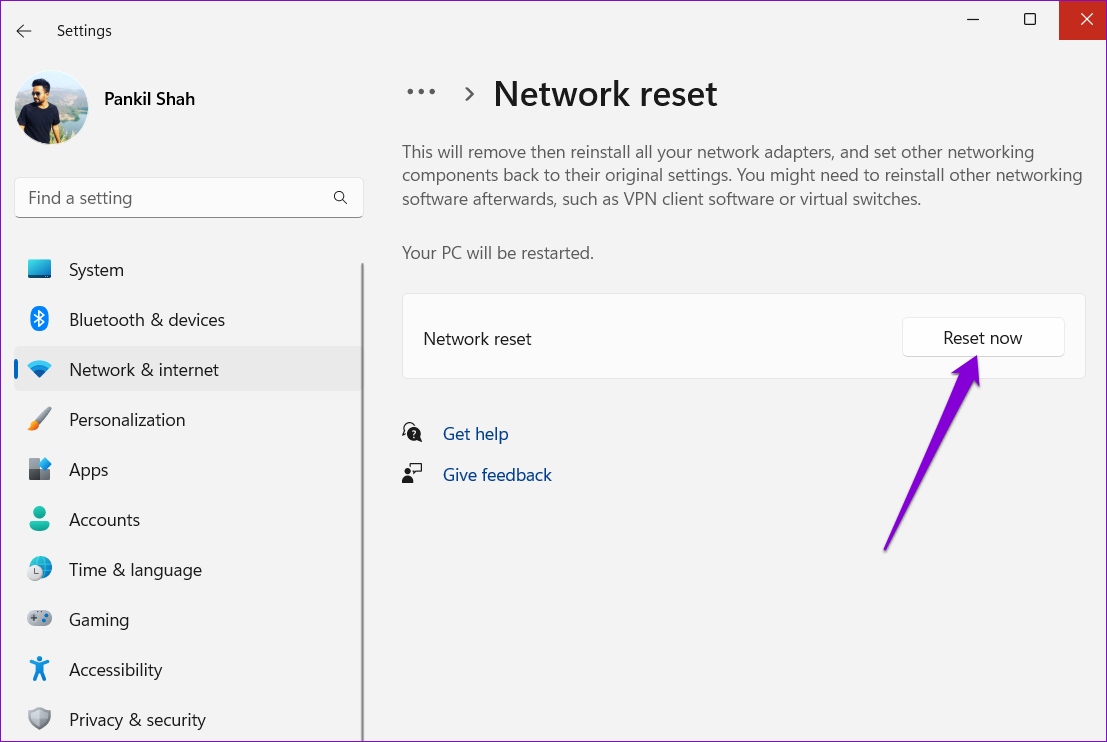
Step 2: Under More settings, click on Network reset.

Step 3: Click the Reset now button next to Network reset.
Restart your PC after resetting the network settings and see if the internet speed has improved.
Was this helpful?
Last updated on 13 July, 2024
1 Comment
Leave a Reply
Read Next
 4 Ways to Fix Slow Download Speed in Microsoft Edge for Windows
Basic Yet Essential Fixes Check internet speed: If your internet speed is slow or bandwidth is less, all downloads will get slow.
4 Ways to Fix Slow Download Speed in Microsoft Edge for Windows
Basic Yet Essential Fixes Check internet speed: If your internet speed is slow or bandwidth is less, all downloads will get slow.
 4 Ways to Fix Slow Download Speed in Epic Games Launcher on Windows 11
https://youtu.be/w8E4d-rCMUQ Basic Fixes: Check the Epic Server Status: Epic Games Launcher also relies on multiple servers to operate, and It’s possible that a server might be out of order or
4 Ways to Fix Slow Download Speed in Epic Games Launcher on Windows 11
https://youtu.be/w8E4d-rCMUQ Basic Fixes: Check the Epic Server Status: Epic Games Launcher also relies on multiple servers to operate, and It’s possible that a server might be out of order or
 5 Best Internet Speed Meter Apps for Windows 10 PC
Typically, when we want to check our internet speed, we do it using a speed test website.
5 Best Internet Speed Meter Apps for Windows 10 PC
Typically, when we want to check our internet speed, we do it using a speed test website.
 How to Display Internet Speed on Taskbar in Windows
https://youtu.be/m62gwMYvYVk Download Internet Speed Meter for Windows for Real-Time Monitoring To show internet speed in the taskbar on Windows, you will have to download a dedicated app known as NetSpeedMonitor.
How to Display Internet Speed on Taskbar in Windows
https://youtu.be/m62gwMYvYVk Download Internet Speed Meter for Windows for Real-Time Monitoring To show internet speed in the taskbar on Windows, you will have to download a dedicated app known as NetSpeedMonitor.
 How to Show Internet Speed on Status Bar in Samsung Phones
Show Internet Speed on Samsung Sadly, Samsung has failed to implement the speed meter feature on their phones.
How to Show Internet Speed on Status Bar in Samsung Phones
Show Internet Speed on Samsung Sadly, Samsung has failed to implement the speed meter feature on their phones.
 Speedtest vs Fast: In-Depth Comparison of Two Internet Speed Test Providers
The present decade has seen data rates going down, with increased penetration of the internet.
Speedtest vs Fast: In-Depth Comparison of Two Internet Speed Test Providers
The present decade has seen data rates going down, with increased penetration of the internet.
 5 Ways to Fix Slow Download Speeds on Windows 11
Basic Fixes Connect to a 5GHz network: When you work with a dual-band Wi-Fi router, it's a good idea to choose a faster 5GHz Wi-Fi frequency band for better internet
5 Ways to Fix Slow Download Speeds on Windows 11
Basic Fixes Connect to a 5GHz network: When you work with a dual-band Wi-Fi router, it's a good idea to choose a faster 5GHz Wi-Fi frequency band for better internet
The article above may contain affiliate links which help support Guiding Tech. The content remains unbiased and authentic and will never affect our editorial integrity.

Thank you for the tips on how to speed up internet in windows 11. Tried everything but reset. I think it has improved, and I want to thank you for your very clear explanations and directions. Easy to follow!