Fix 1: Open Outlook in Safe Mode
Opening Outlook in safe mode lets you run the app without add-ins or custom toolbar settings. This can help you determine whether one of your add-ins is responsible for Outlook’s connection issues.
Hold down the CTRL key and double-click the Outlook shortcut. Then, click Yes to open Outlook in safe mode.
If Outlook can connect to the server while in safe mode, one of the add-ins might be causing the issue. To identify the culprit, you must disable all the add-ins and then re-enable them individually.
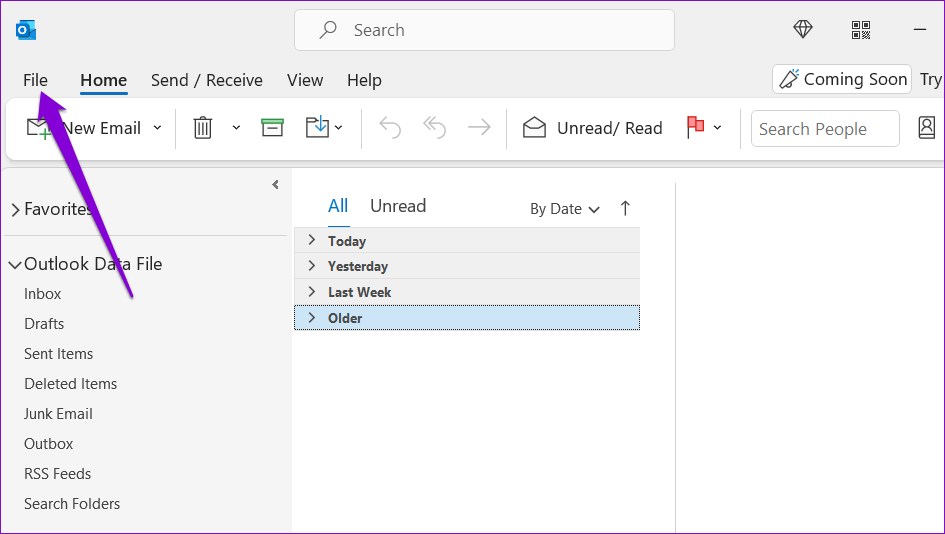
Step 1: In Outlook, click on the File menu at the top.
Step 2: Go to Options.

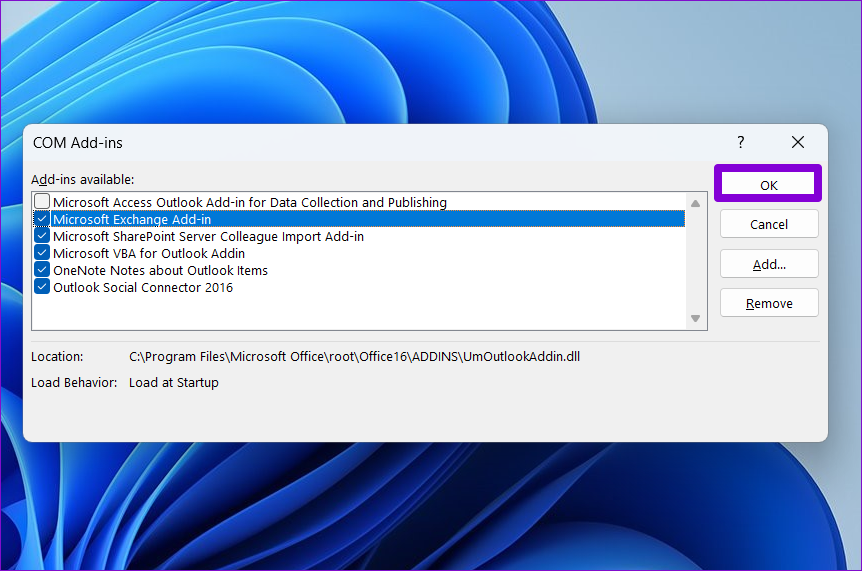
Step 3: In the Outlook Options window, switch to the Add-ins tab. Use the drop-down menu next to Manage and select COM Add-ins. Then, click on Go to proceed.

Step 4: Uncheck the boxes to disable add-ins and click OK.
Restart Outlook and re-enable your add-ins one at a time until the issue occurs again. Once you find the problematic add-in, consider removing it.
Fix 2: Use SSL Encrypted Connection
Another thing you can do to fix connection issues in Outlook is to set the encryption method to SSL and see if that helps. Here are the steps for the same.
Step 1: In the Outlook app, click the File menu at the top left.
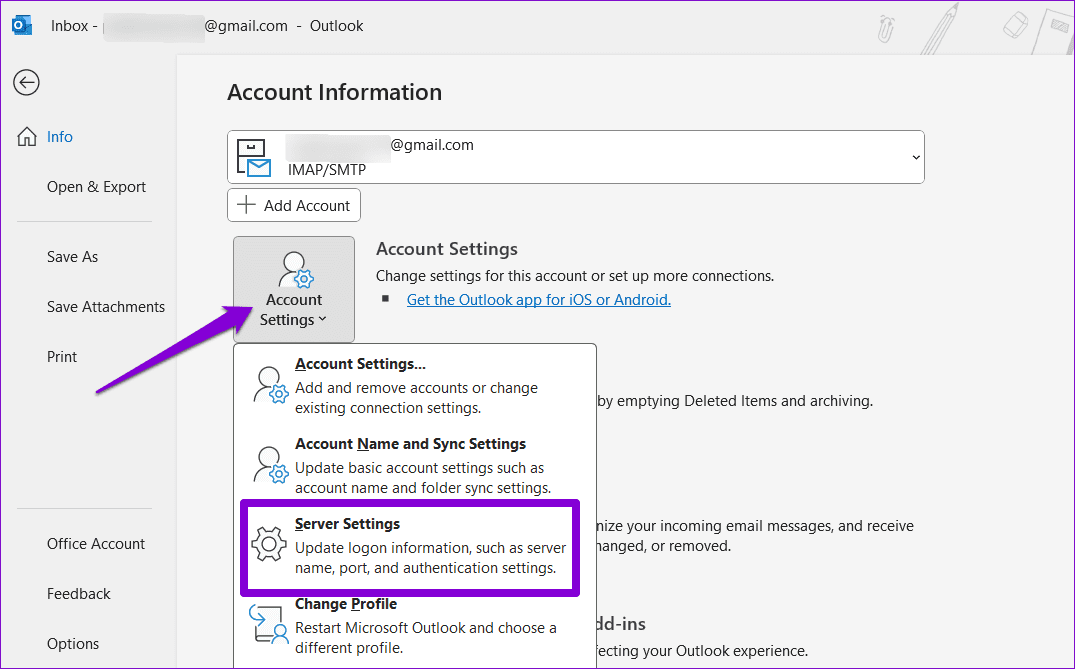
Step 2: In the Info tab, select Account Settings > Server Settings.
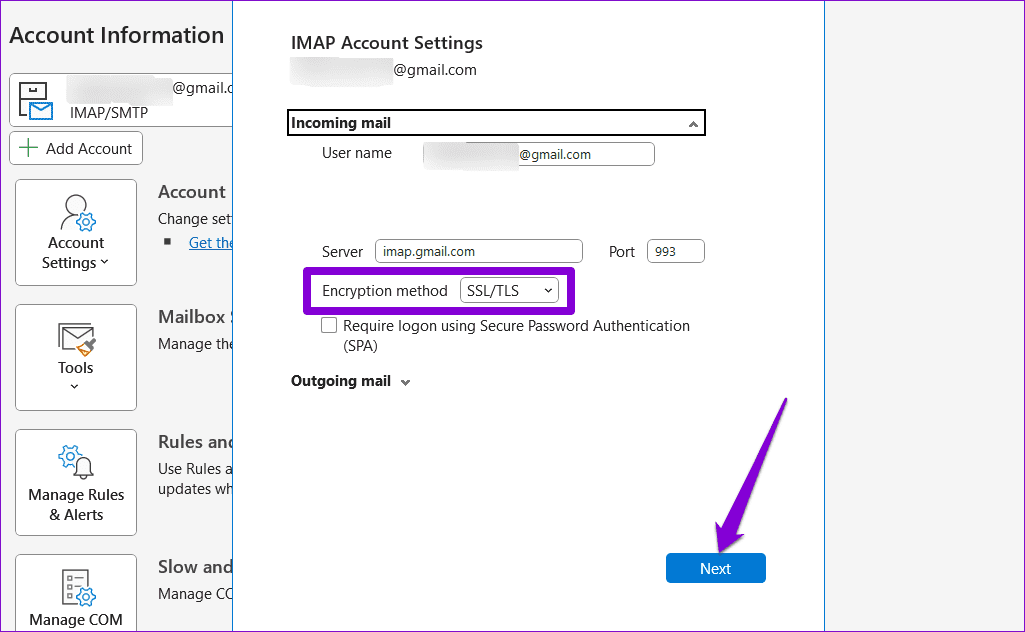
Step 3: Use the drop-down menu next to the Encryption method to select SSL/TLS. Then, click Next.
Fix 3: Repair Your Outlook Account
If Outlook is only having trouble connecting to one account, try repairing that account. Here’s how to do that.
Step 1: In the Outlook app, go to File > Info > Account Settings > Account Settings.
Step 2: Under Email, select the account you’re having issues with. Then, click Repair.

Fix 4: Run the Inbox Repair Tool
If repairing your Outlook account doesn’t work, the problem may be related to Outlook’s data files on your computer. You can try running Outlook’s Inbox Repair Tool to fix issues with those data files. Here’s how.
Step 1: Press the Windows key + E to open File Explorer and navigate to the following folder.
C:\Program Files\Microsoft Office\root\Office16
Step 2: Double-click the SCANPST.EXE file.

Step 3: Click Start to initiate the scan.
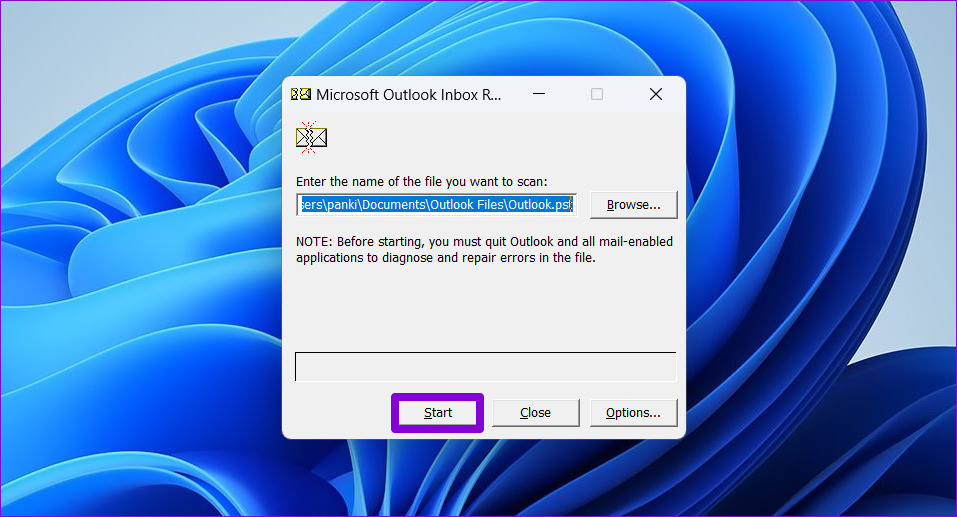
Step 4: If the tool finds any issues, click on Repair.

Fix 5: Create a New Outlook Profile
Your Outlook profile on Windows stores your Outlook settings. If that profile has become corrupted or inaccessible, you could experience problems. In that case, you must create and switch to a new Outlook profile using the steps below.
Step 1: Press the Windows key + R to open the Run dialog, type control, and press Enter.
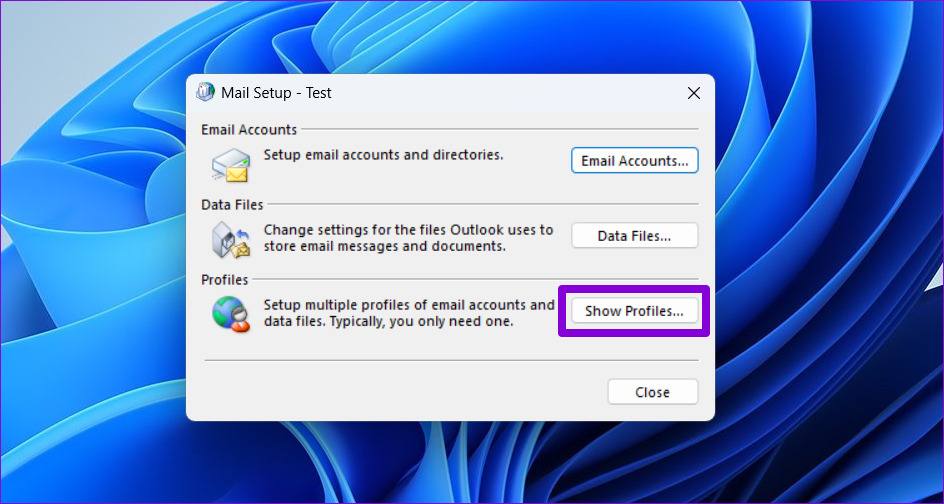
Step 2: Change the view type to Large icons and click Mail (Microsoft Outlook).

Step 3: Under Profiles, select Show Profiles.
Step 4: Click on the Add button, name the new profile, and click OK.

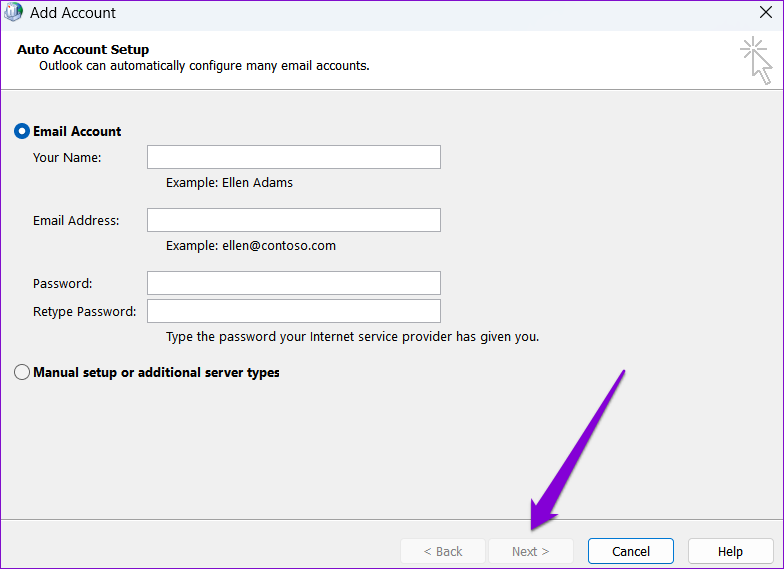
Step 5: In the Add Account window, enter your account details and hit Next.
Step 6: Once the profile is created, select your new profile under When starting Microsoft Outlook and hit Apply.

Fix 6: Run the Office Repair Tool
Microsoft offers a handy Office repair tool that can automatically fix issues with Office apps on Windows. You can try using it as a last resort to fix connection issues in Outlook.
Step 1: Press the Windows key + R to open the Run dialog box. In the Open field, type appwiz.cpl and press Enter.
Step 2: In the Programs and Features window, locate and right-click Microsoft Office Suite or Microsoft 365 > select Change.
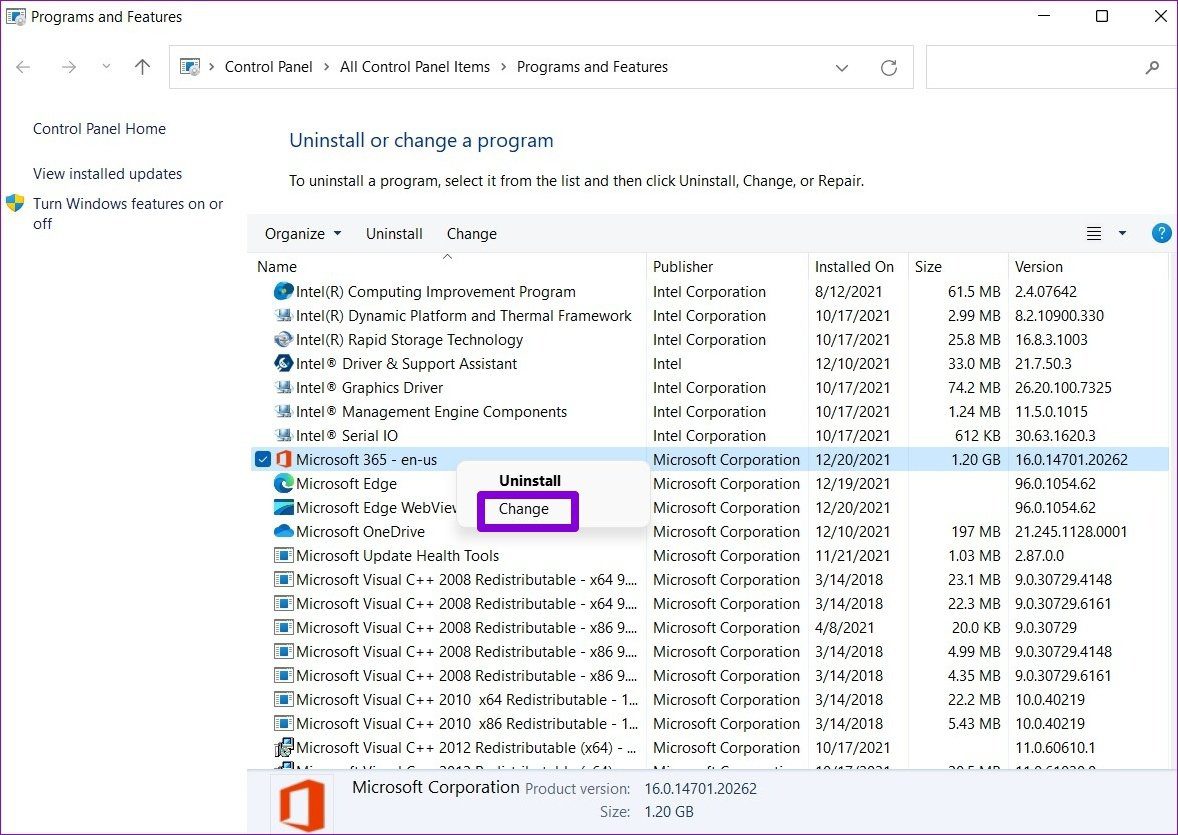
Step 3: Select Online Repair > click Repair to continue.

Was this helpful?
Last updated on 16 August, 2024
Read Next
 4 Ways to Fix Unable to Contact Your DHCP Server Error on Windows 11
Fix 1: Restart Your DHCP Client service The DHCP Client service registers and updates the PC's IP address and DNS record.
4 Ways to Fix Unable to Contact Your DHCP Server Error on Windows 11
Fix 1: Restart Your DHCP Client service The DHCP Client service registers and updates the PC's IP address and DNS record.
 11 Best Ways to Fix Dropbox Not Connecting or Syncing on Windows 10 Error
Dropbox is a popular cloud storage solution that, for the most part, works right out of the box.
11 Best Ways to Fix Dropbox Not Connecting or Syncing on Windows 10 Error
Dropbox is a popular cloud storage solution that, for the most part, works right out of the box.
 4 Ways to Fix Windows Laptop Not Connecting to Mobile Hotspot on Android
Try Basic Fixes Switch to Airplane Mode or Restart Devices: It will ensure the removal of temporary blocks that show up if the device is turned on for a long
4 Ways to Fix Windows Laptop Not Connecting to Mobile Hotspot on Android
Try Basic Fixes Switch to Airplane Mode or Restart Devices: It will ensure the removal of temporary blocks that show up if the device is turned on for a long
 7 Ways to Fix Windows 11 Not Connecting to Wi-Fi Automatically
Fix 1: Enable Connect to Wi-Fi Automatically Windows 11 may not connect to a known network automatically if you haven't configured it to do so.
7 Ways to Fix Windows 11 Not Connecting to Wi-Fi Automatically
Fix 1: Enable Connect to Wi-Fi Automatically Windows 11 may not connect to a known network automatically if you haven't configured it to do so.
 3 Ways to Fix iPhone or iPad Not Connecting to Windows PC
Basic Fixes Check or switch your data cable: Closely inspect the data cable you use to connect the iPhone/iPad to your PC.
3 Ways to Fix iPhone or iPad Not Connecting to Windows PC
Basic Fixes Check or switch your data cable: Closely inspect the data cable you use to connect the iPhone/iPad to your PC.
 Top 12 Ways to Fix Steam Not Connecting to the Internet on Windows
Steam is one of the popular gaming apps on Windows.
Top 12 Ways to Fix Steam Not Connecting to the Internet on Windows
Steam is one of the popular gaming apps on Windows.
 10 Ways to Fix Discord “RTC Connecting” and “No Route” Errors on Windows
Discord has evolved into one of the best chat platforms.
10 Ways to Fix Discord “RTC Connecting” and “No Route” Errors on Windows
Discord has evolved into one of the best chat platforms.
 4 Ways to Synchronize Windows 10 Time With Microsoft Server
The benefits of your Windows computer clock transcend way beyond just telling the time.
4 Ways to Synchronize Windows 10 Time With Microsoft Server
The benefits of your Windows computer clock transcend way beyond just telling the time.
The article above may contain affiliate links which help support Guiding Tech. The content remains unbiased and authentic and will never affect our editorial integrity.