Method 1: Revert to Old Context Menu Using Command Prompt
Command Prompt is a command-line interpreter that lets you perform various complicated tasks on your PC with a few text commands. You can use it to disable the “Show more options” menu and revert to the classic Windows 10 context menu.
Step 1: Click the search icon on the taskbar, type cmd in the box, and select Run as administrator.

Step 2: In the console, paste the following command and press Enter:
reg add "HKCU\Software\Classes\CLSID\{86ca1aa0-34aa-4e8b-a509-50c905bae2a2}\InprocServer32" /f /ve
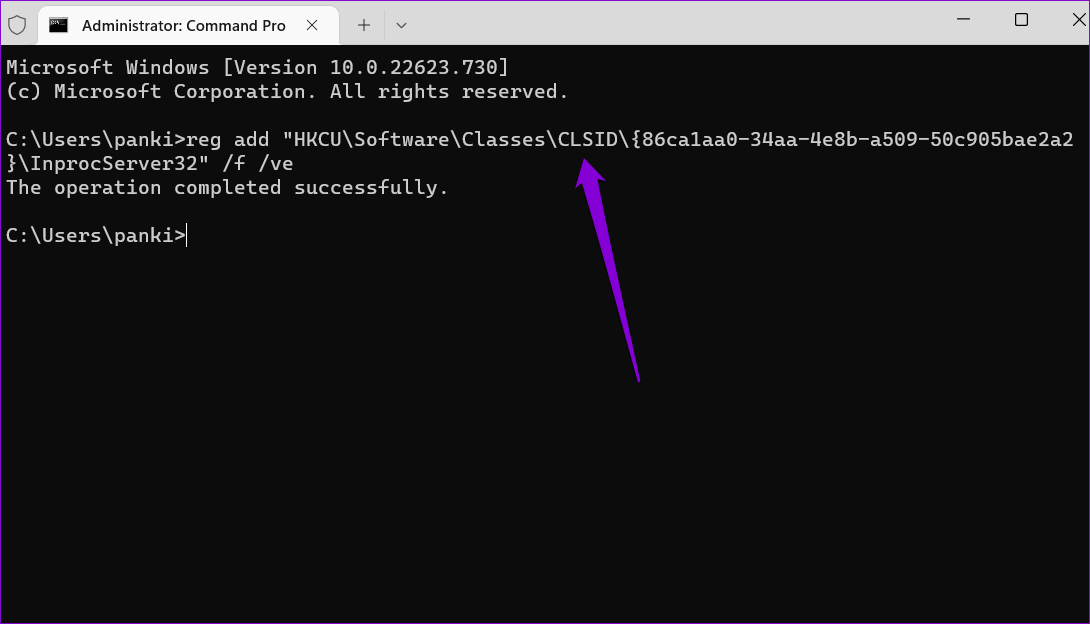
Once you run the above command, you should see a message that says, “The operation completed successfully.” You’ll have to restart your PC for the changes to take effect. Alternatively, you can also restart the Windows Explorer process to apply changes.
If you ever change your mind and want to return to the “Show more options” menu in Windows 11, run the following command in Command Prompt and restart your PC.
reg delete "HKEY_CURRENT_USER\Software\Classes\CLSID\{86ca1aa0-34aa-4e8b-a509-50c905bae2a2}" /f

Method 2: Revert to Old Context Menu With the Registry Editor
Another way to disable the “Show more options” menu in Windows 11 is to use the Registry Editor. For that, you must create a couple of registry keys.
Step 1: Press the Windows key + R to open the Run dialog box. Type regedit in the Open field and press Enter.
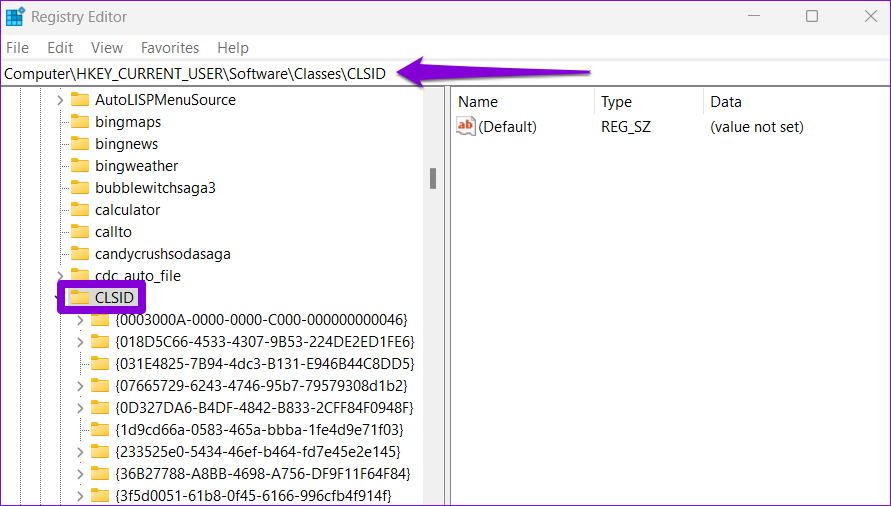
Step 2: In the Registry Editor window, paste the following path in the address bar at the top and press Enter. This will take you to the CLSID key.
HKEY_CURRENT_USER\Software\Classes\CLSID
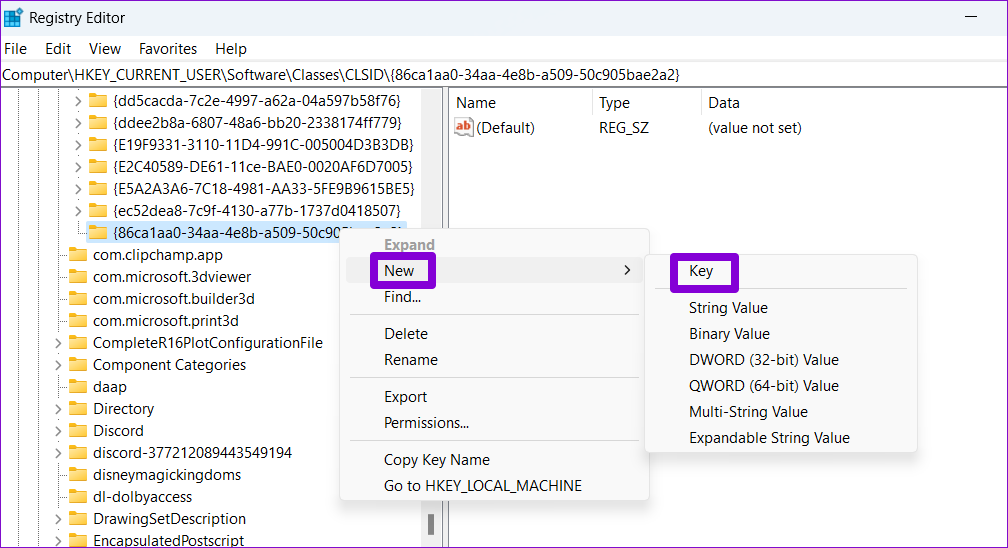
Step 3: Right-click on the CLSID key > go to New > select Key > give it the following name.
{86ca1aa0-34aa-4e8b-a509-50c905bae2a2}

Step 4: Right-click on the newly created key > go to New > select Key. Name it InprocServer32.
Step 5: Within the InprocServer32 key, double-click the Default value on your right. In the Edit String window, leave the value data field blank and click OK.

After you complete the above steps, restart your PC. Following that, you should see the old context menu when you right-click on a file or folder on Windows.
If you want to undo the above change at any point, repeat the same steps and expand the CLSID key. Then, right-click on the following key and select Delete.
{86ca1aa0-34aa-4e8b-a509-50c905bae2a2}

Was this helpful?
Last updated on 26 August, 2024
Read Next
 How to Fix a Slow Windows 10 Desktop Right-Click (Context) Menu
The desktop right-click menu, otherwise known as the desktop context menu, provides instant access to numerous useful options ranging from aligning desktop icons to customizing display settings.
How to Fix a Slow Windows 10 Desktop Right-Click (Context) Menu
The desktop right-click menu, otherwise known as the desktop context menu, provides instant access to numerous useful options ranging from aligning desktop icons to customizing display settings.
 How to Make Echo Show Only Show the Clock
I have my Echo Show on my desk in front of me, and it’s distracting when the display keeps changing every few seconds.
How to Make Echo Show Only Show the Clock
I have my Echo Show on my desk in front of me, and it’s distracting when the display keeps changing every few seconds.
 Top 3 Ways to Show Folder Size in Windows 11
Method 1: Hover the Mouse Pointer over the Folder By far, the easiest way to show the folder size on Windows is to hover the mouse pointer over the folder in the
Top 3 Ways to Show Folder Size in Windows 11
Method 1: Hover the Mouse Pointer over the Folder By far, the easiest way to show the folder size on Windows is to hover the mouse pointer over the folder in the
 5 Quick Ways to Show FPS Counter in Windows 11
Method 1: Using the Xbox Game Bar Xbox Game Bar is baked into Windows 10 and Windows 11.
5 Quick Ways to Show FPS Counter in Windows 11
Method 1: Using the Xbox Game Bar Xbox Game Bar is baked into Windows 10 and Windows 11.
 How to Show Missing Date and Time in Taskbar on Windows
A few days back, I was playing with the Taskbar settings on my Windows laptop.
How to Show Missing Date and Time in Taskbar on Windows
A few days back, I was playing with the Taskbar settings on my Windows laptop.
 How to Show Hidden Files and Folders in Windows 11
Have you ever been in a situation where you hid some files on your Windows device while sharing them with friends or family and couldn't find them later?
How to Show Hidden Files and Folders in Windows 11
Have you ever been in a situation where you hid some files on your Windows device while sharing them with friends or family and couldn't find them later?
 How to Show Seconds on Windows 11 Clock
Ever find yourself glancing at your computer clock, craving that extra level of precision?
How to Show Seconds on Windows 11 Clock
Ever find yourself glancing at your computer clock, craving that extra level of precision?
 7 Ways to Open Internet Options on Windows 11
Method 1: Using the Start Menu The quickest way to search and open settings, programs, or files on Windows is through the Start Menu.
7 Ways to Open Internet Options on Windows 11
Method 1: Using the Start Menu The quickest way to search and open settings, programs, or files on Windows is through the Start Menu.
The article above may contain affiliate links which help support Guiding Tech. The content remains unbiased and authentic and will never affect our editorial integrity.