Method 1: Using the Start Menu
The quickest way to search and open settings, programs, or files on Windows is through the Start Menu. It opens when you press the Windows key on your keyboard or click on the Start icon on the Taskbar.
Step 1: Press the Windows key to open the Start Menu.
Step 2: Click on the search bar > type Internet Options > press Enter to open the Internet Options.

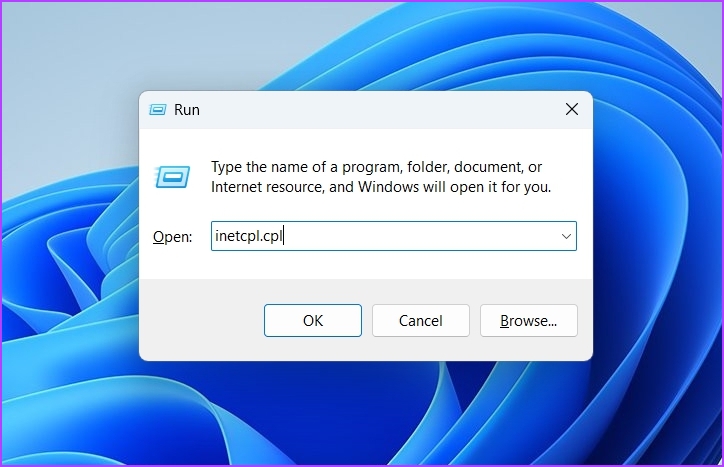
Method 2: Using the Run Dialog Box
Step 1: Press the Windows + R shortcut to open the Run Dialog Box.
Step 2: In the Run dialog box search bar, type inetcpl.cpl and press Enter.
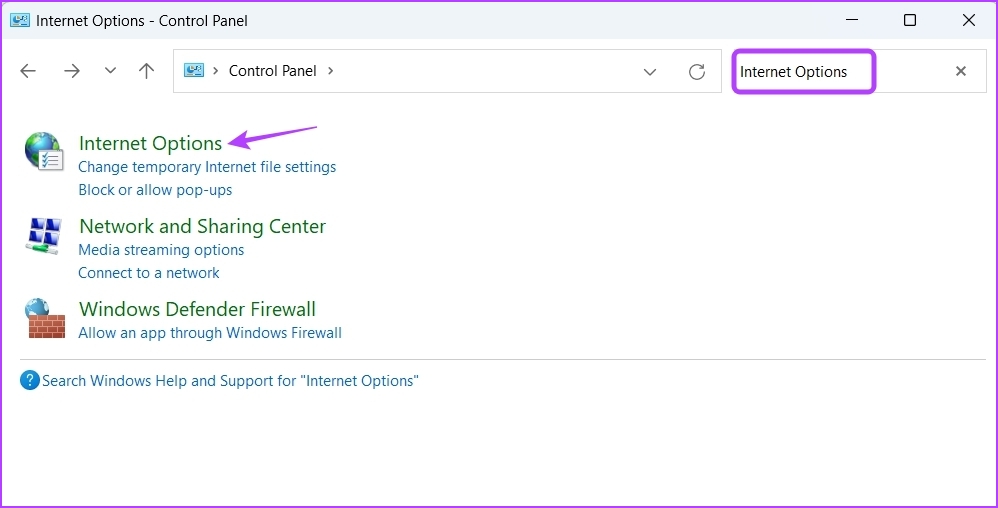
Method 3: Using the Control Panel
Step 1: In the Start Menu search bar, type Control Panel, and press Enter.

Step 2: Click on the search bar at the top right, type Internet Options, and select the same from the result.
Also Read: How to fix Control Panel not opening on Windows 11
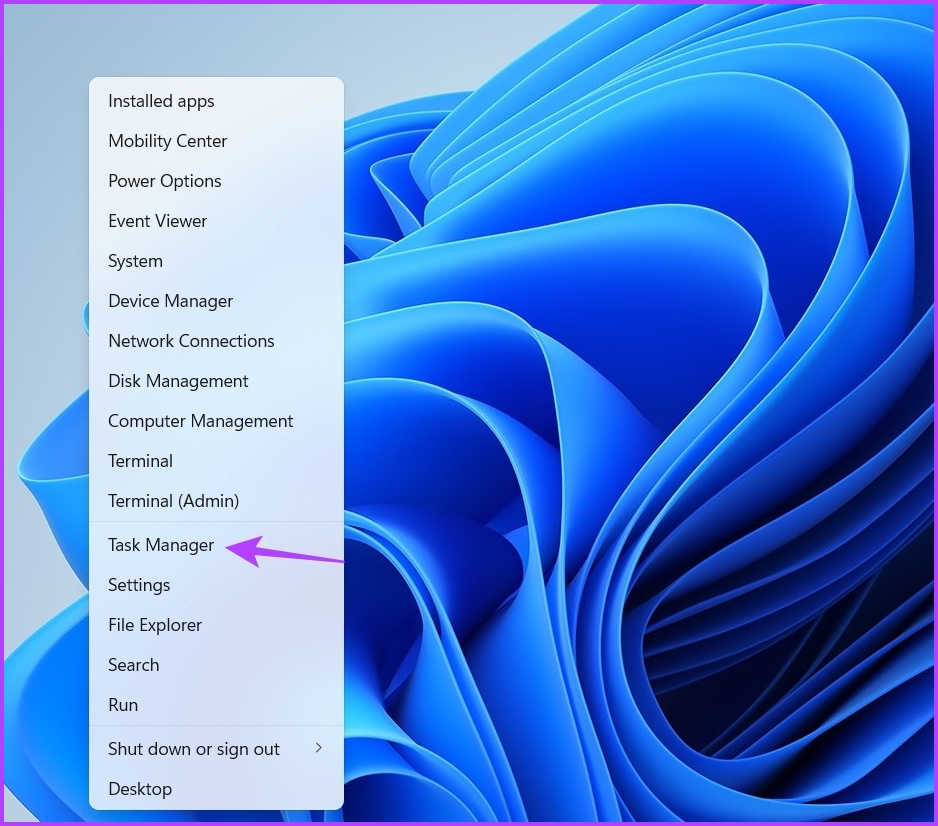
Method 4: Using Task Manager
Step 1: Right-click on the Windows icon in the search bar and choose Task Manager from the Power User Menu.
Step 2: In the Task Manager window, click on Run new task at the top.

Step 3: Type inetcpl.cpl in the search bar of the Create new task prompt and press Enter.

Also Read: How to open Task Manager on Windows
Method 5: Using File Explorer
In the File Explorer, type inetcpl.cpl in the address bar at the top, and press Enter.

Method 6: Using Command Line Tools
Are you an advanced Windows user comfortable with command-line tools? If yes, you can use command-line tools like Windows PowerShell and Command Prompt to quickly open Internet Options.
Step 1: Open the Start Menu > type Command Prompt in the search bar > press Enter.
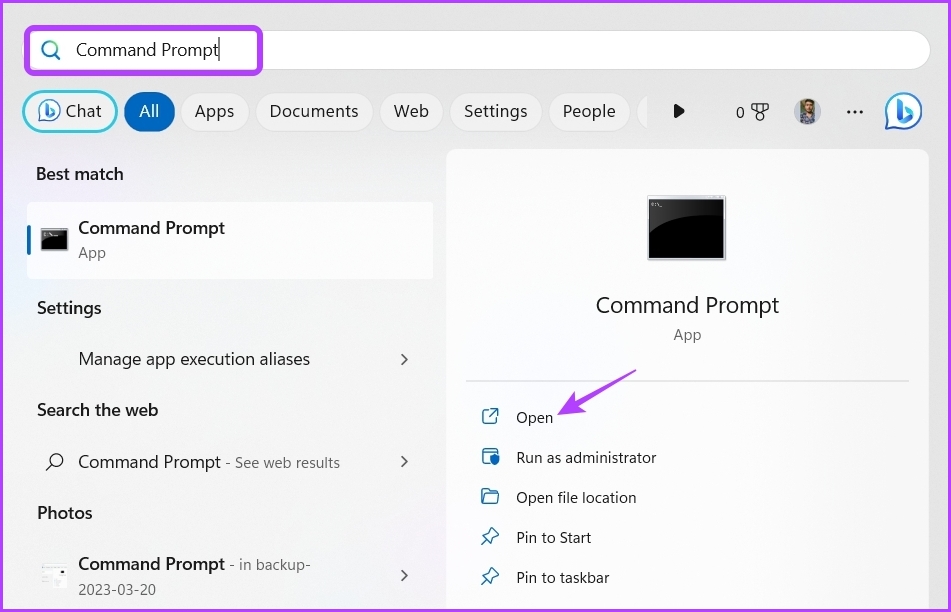
Step 2: In the Command Prompt window, type inetcpl.cpl and press Enter.

If you want to open Internet Options using Windows PowerShell, here are the steps to follow:
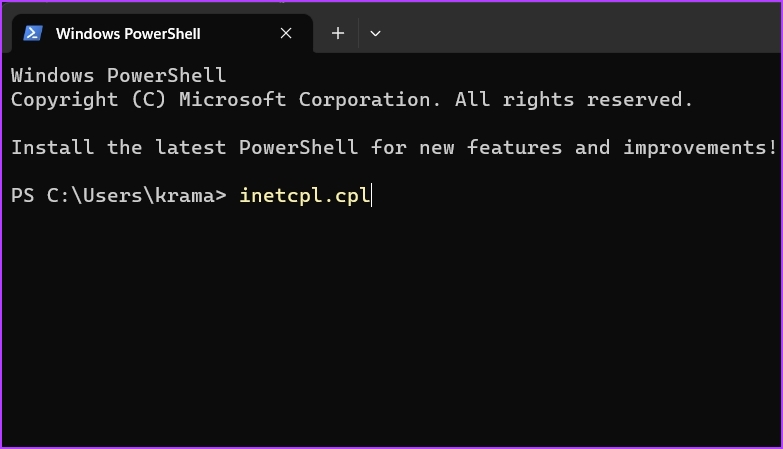
Step 1: Type Windows PowerShell in the Start Menu search bar and press Enter.
Step 2: In the PowerShell window, type inetcpl.cpl and press Enter to open Internet Options.
Method 7: Using a Shortcut
Step 1: Right-click on the black space on your Windows desktop > select New > and choose Shortcut.
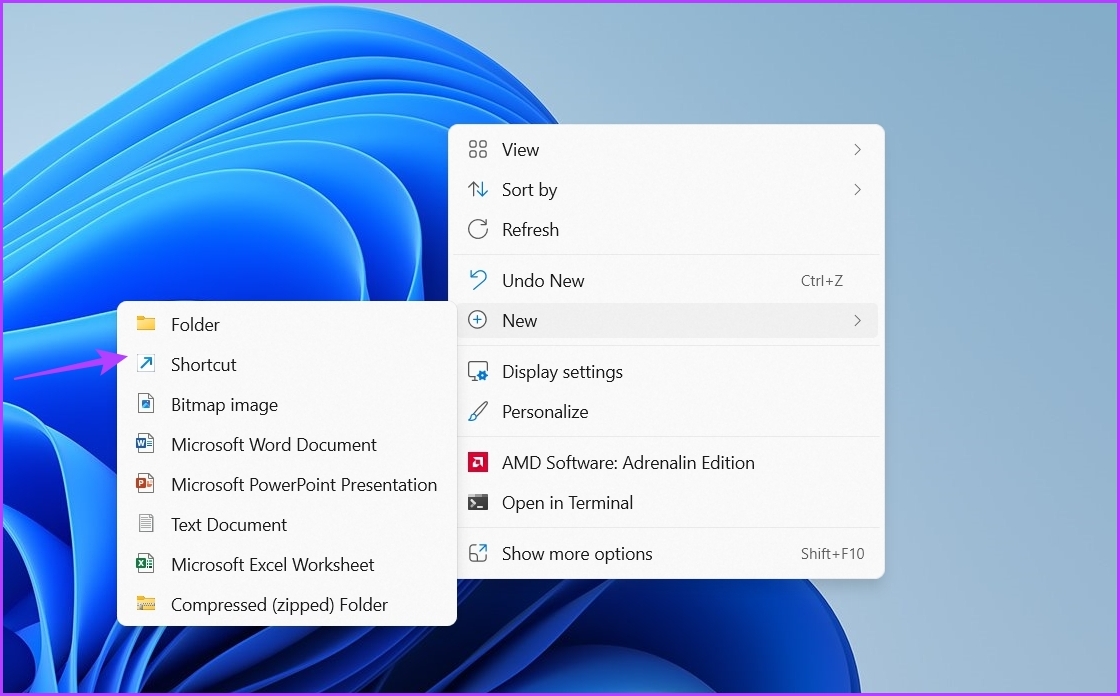
Step 2: Paste the following text box under ‘Type the location of the item’ option, and click Next.
%windir%\system32\inetcpl.cpl

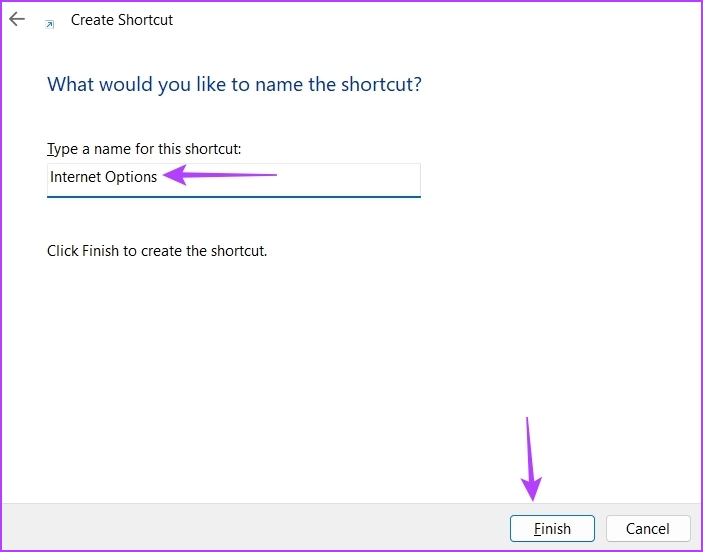
Step 3: Give an appropriate name to the shortcut and click Finish.
Was this helpful?
Last updated on 12 August, 2024
Read Next
 6 Best Ways to Fix Windows 11 Apps Won’t Connect to the Internet
Computers have a myriad of apps that enhance the performance of certain features.
6 Best Ways to Fix Windows 11 Apps Won’t Connect to the Internet
Computers have a myriad of apps that enhance the performance of certain features.
 8 Ways to Fix Slow Internet Speed on Windows 11
https://youtu.be/JSqfxm-5XZI Fix 1: Turn Off the Metered Connection Setting your internet connection as metered on Windows can prevent apps from using the internet proficiently, leading to slow internet speeds.
8 Ways to Fix Slow Internet Speed on Windows 11
https://youtu.be/JSqfxm-5XZI Fix 1: Turn Off the Metered Connection Setting your internet connection as metered on Windows can prevent apps from using the internet proficiently, leading to slow internet speeds.
 4 Ways to Fix Wi-Fi Connected but No Internet on Windows 11
Common Fixes Let's begin with some basic solutions to fix the Wi-Fi connected but no internet issue on your Windows machine: Check your internet plan - If you have exceeded
4 Ways to Fix Wi-Fi Connected but No Internet on Windows 11
Common Fixes Let's begin with some basic solutions to fix the Wi-Fi connected but no internet issue on your Windows machine: Check your internet plan - If you have exceeded
 Top 12 Ways to Fix Steam Not Connecting to the Internet on Windows
Steam is one of the popular gaming apps on Windows.
Top 12 Ways to Fix Steam Not Connecting to the Internet on Windows
Steam is one of the popular gaming apps on Windows.
 5 Ways to Fix No Internet, Secured Error on Windows
Basic Fixes Check with your ISP: A server-side outage at your local ISP (Internet Service Provider) leads to issues like ‘No Internet, Secured’ on Windows.
5 Ways to Fix No Internet, Secured Error on Windows
Basic Fixes Check with your ISP: A server-side outage at your local ISP (Internet Service Provider) leads to issues like ‘No Internet, Secured’ on Windows.
 2 Ways to Disable the Show More Options Context Menu in Windows 11
Method 1: Revert to Old Context Menu Using Command Prompt Command Prompt is a command-line interpreter that lets you perform various complicated tasks on your PC with a few text
2 Ways to Disable the Show More Options Context Menu in Windows 11
Method 1: Revert to Old Context Menu Using Command Prompt Command Prompt is a command-line interpreter that lets you perform various complicated tasks on your PC with a few text
 4 Ways to Stop Internet Explorer From Opening Edge
Method 1: Rename the BHO Folder Internet Explorer (IE) uses the Browser Helper Object (BHO) policy stored on your Windows PC to redirect you to Microsoft Edge.
4 Ways to Stop Internet Explorer From Opening Edge
Method 1: Rename the BHO Folder Internet Explorer (IE) uses the Browser Helper Object (BHO) policy stored on your Windows PC to redirect you to Microsoft Edge.
 How to Display Internet Speed on Taskbar in Windows
https://youtu.be/m62gwMYvYVk Download Internet Speed Meter for Windows for Real-Time Monitoring To show internet speed in the taskbar on Windows, you will have to download a dedicated app known as NetSpeedMonitor.
How to Display Internet Speed on Taskbar in Windows
https://youtu.be/m62gwMYvYVk Download Internet Speed Meter for Windows for Real-Time Monitoring To show internet speed in the taskbar on Windows, you will have to download a dedicated app known as NetSpeedMonitor.
The article above may contain affiliate links which help support Guiding Tech. The content remains unbiased and authentic and will never affect our editorial integrity.