Many people love to install several apps and programs on the Windows 11 PC. That often leads to the abnormal behavior of some apps on your PC. While you may try downloading and reinstalling the app, the problem may persist. Usually, the apps tend to act up because of corrupt files, missing application components, and other incompatibility issues.
While it may not occur with all programs and apps, some apps may not open while a few may not function as expected. Are you experiencing the same on your Windows 11 computer? Here are the best ways to repair or fix broken apps and programs on your Windows 11.
1. Repairing Apps Using Windows Settings
The first place to start for the native or third-party app is to use the Settings app. However, this works mostly with the UWP (Universal Windows Platform) apps from the Microsoft Store. Whether its the pre-loaded apps or the other ones, here’s how you can quickly repair them:
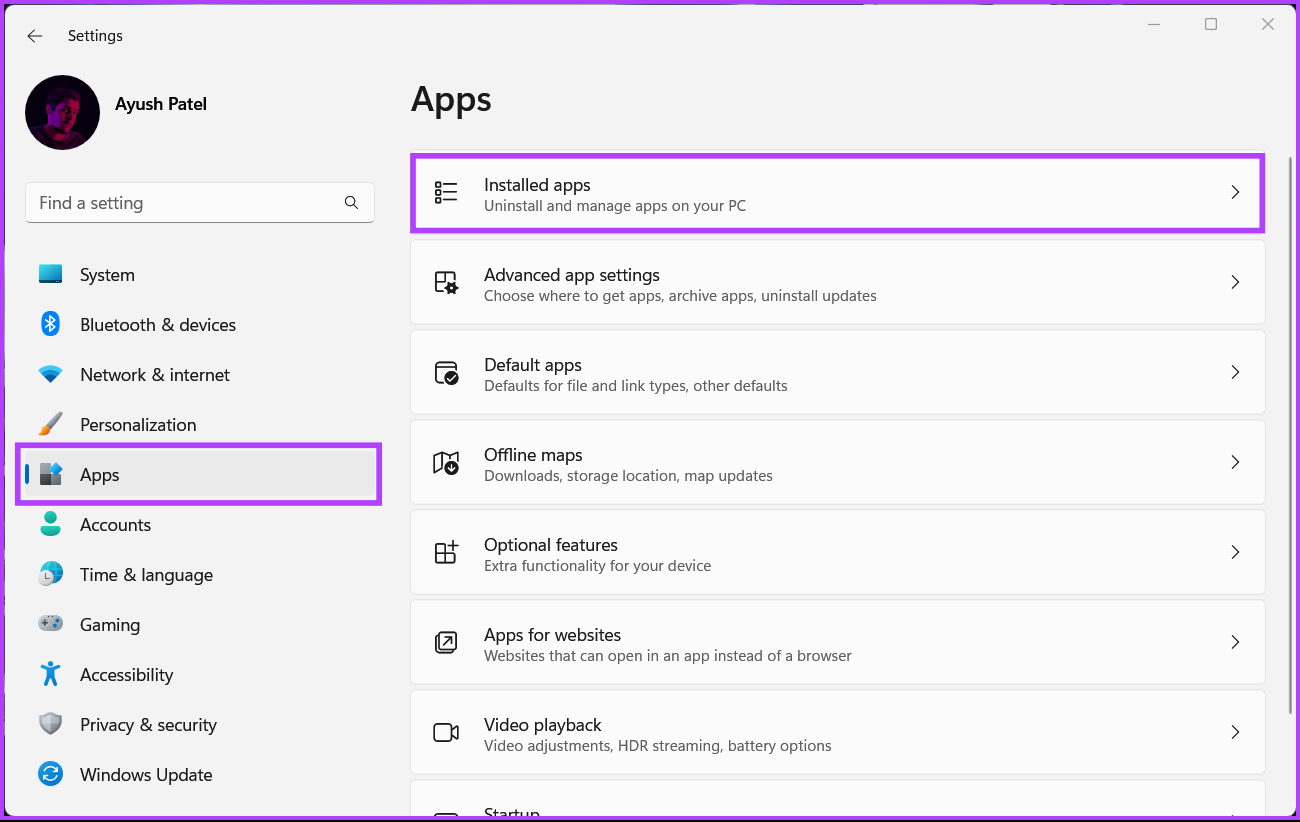
Step 1: Press the Window + I keys shortcut to open the Settings app.
Step 2: Click on Apps from the left column and select Installed apps from the right pane.
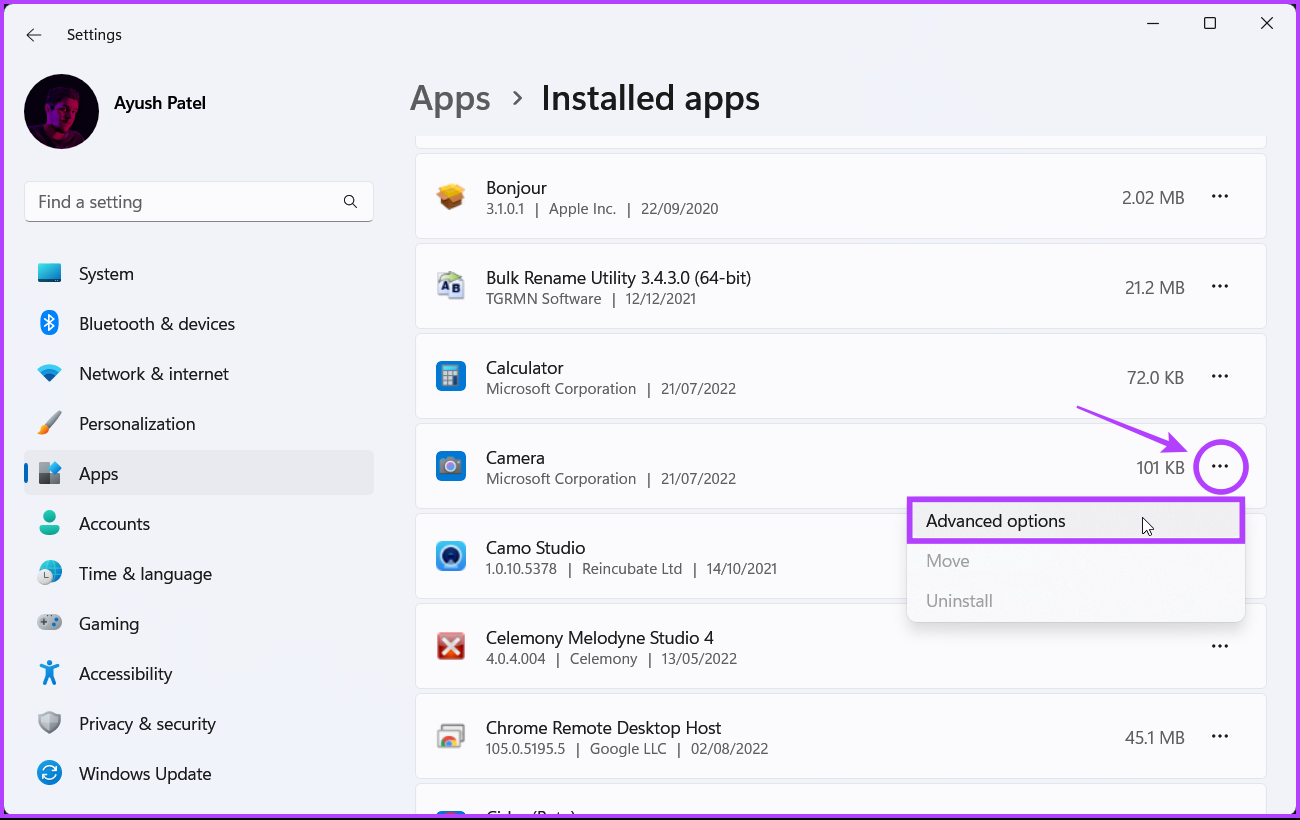
Step 3: Scroll to the app that requires fixing and click the horizontal three dots menu next to its name.
Step 4: Next, select Advanced options from the menu. We’ll attempt to repair the Camera app on Windows for this guide.
Step 5: When the Camera app’s Advanced options option, scroll down to the Reset section and click on the Repair button.

Windows will then attempt to repair the app, and you’ll see a checkmark next to the Repair button when the process completes. Refer to our guide when the Settings app is not opening or working on your Windows 11 PC.
2. Repairing Apps Using Control Panel
For the apps and programs you download outside the Microsoft Store and install it directly, you’ll need to use the Control Panel to manage them. Here’s how to use Control Panel to repair apps or programs on your Windows 11 PC:
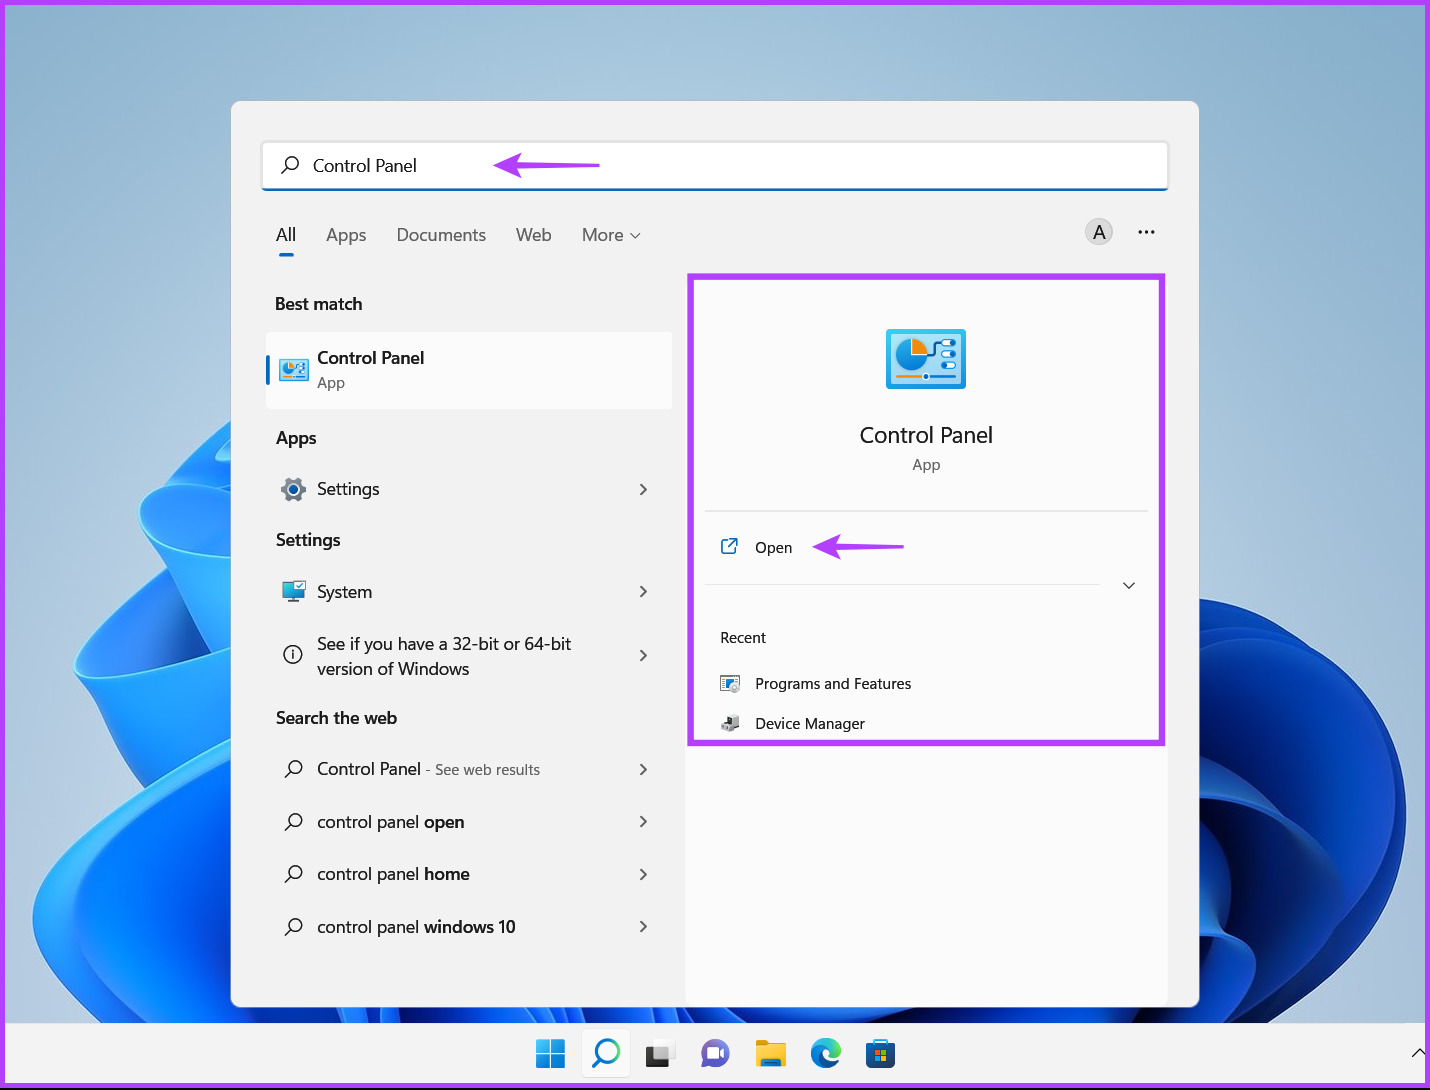
Step 1: Click on the Start button, type Control Panel, and click on the Open option for the Control Panel result.
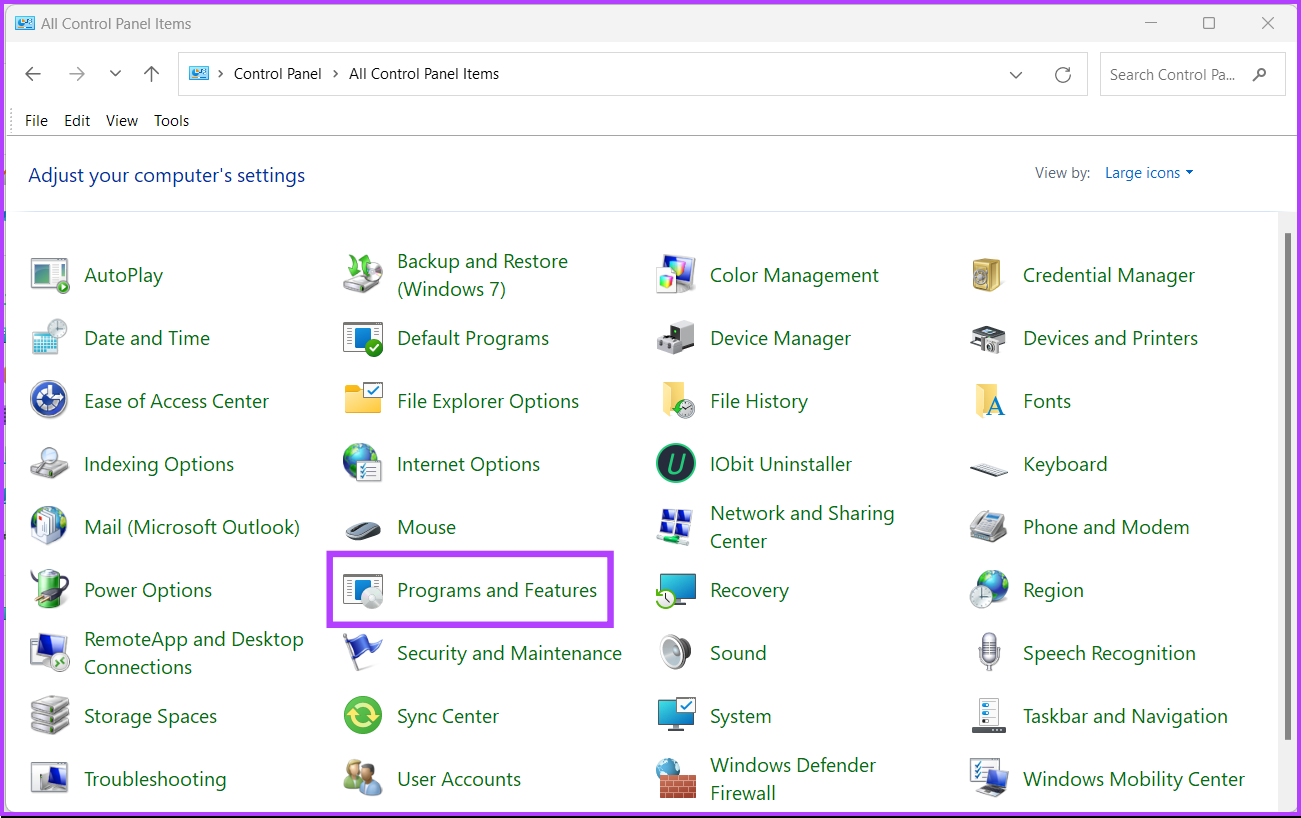
Step 2: When the Control Panel options, click on the ‘View by’ button in the top-right corner and select ‘Large icons’ from the drop-down.
![]()
Step 3: Click ‘Programs and Features’ option.
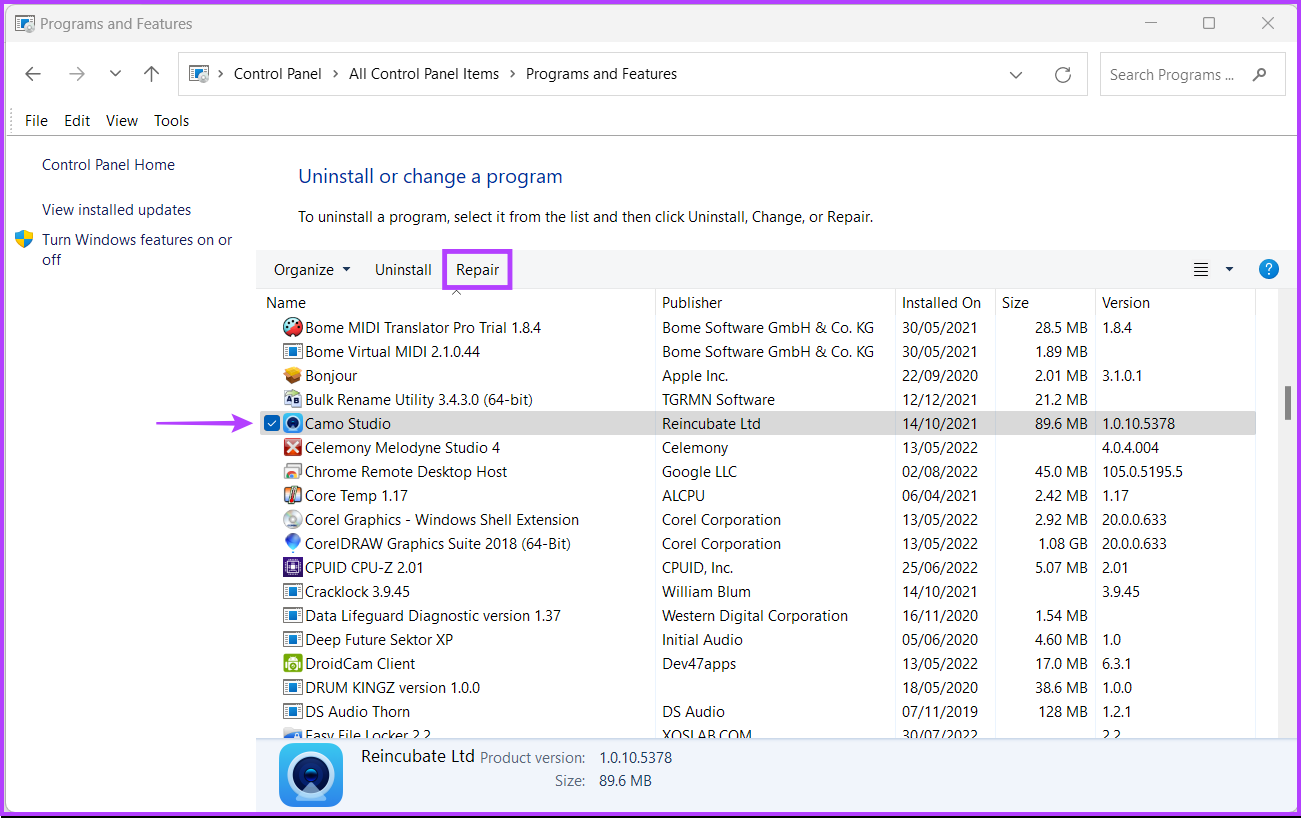
Step 4: From the list of programs, select the one you want to repair. Next, click on Repair option.
Note: Not all apps and programs give you a repair button. So if you don’t see the option, you might have to reinstall it.
Step 5: Next, follow the on-screen instructions to repair the app or program.
After that, try using the relevant app. Refer our guide if you can’t open the Control Panel on your Windows PC.
3. Repairing Apps Using the Command Prompt
You may proceed with this solution only if you’re comfortable using the PowerShell and Command Prompt. This method involves noting the broken app’s GUID (Globally Unique Identifier) and then using Windows Installer (MSIExec) to fix it. Also, the Windows Installer will reinstall all the files of the broken app or program and reset everything. That means you may lose your customizations or settings in the process.
Since this involves a certain risk, we recommend you create a System Restore Point before you proceed. To begin, you’ll need to figure out the broken app’s GUID first. Here’s how you can find a specific app’s GUID using Windows PowerShell on your Windows 11 PC.
Step 1: Click on Search on the Windows 11 taskbar, type Windows PowerShell, and select the Open button below the first search result.

Step 2: Copy and paste the command mentioned below into Windows PowerShell:
get-wmiobject Win32_Product | Format-Table IdentifyingNumber, Name, LocalPackage -AutoSize
Step 3: Hit Enter to run the command.
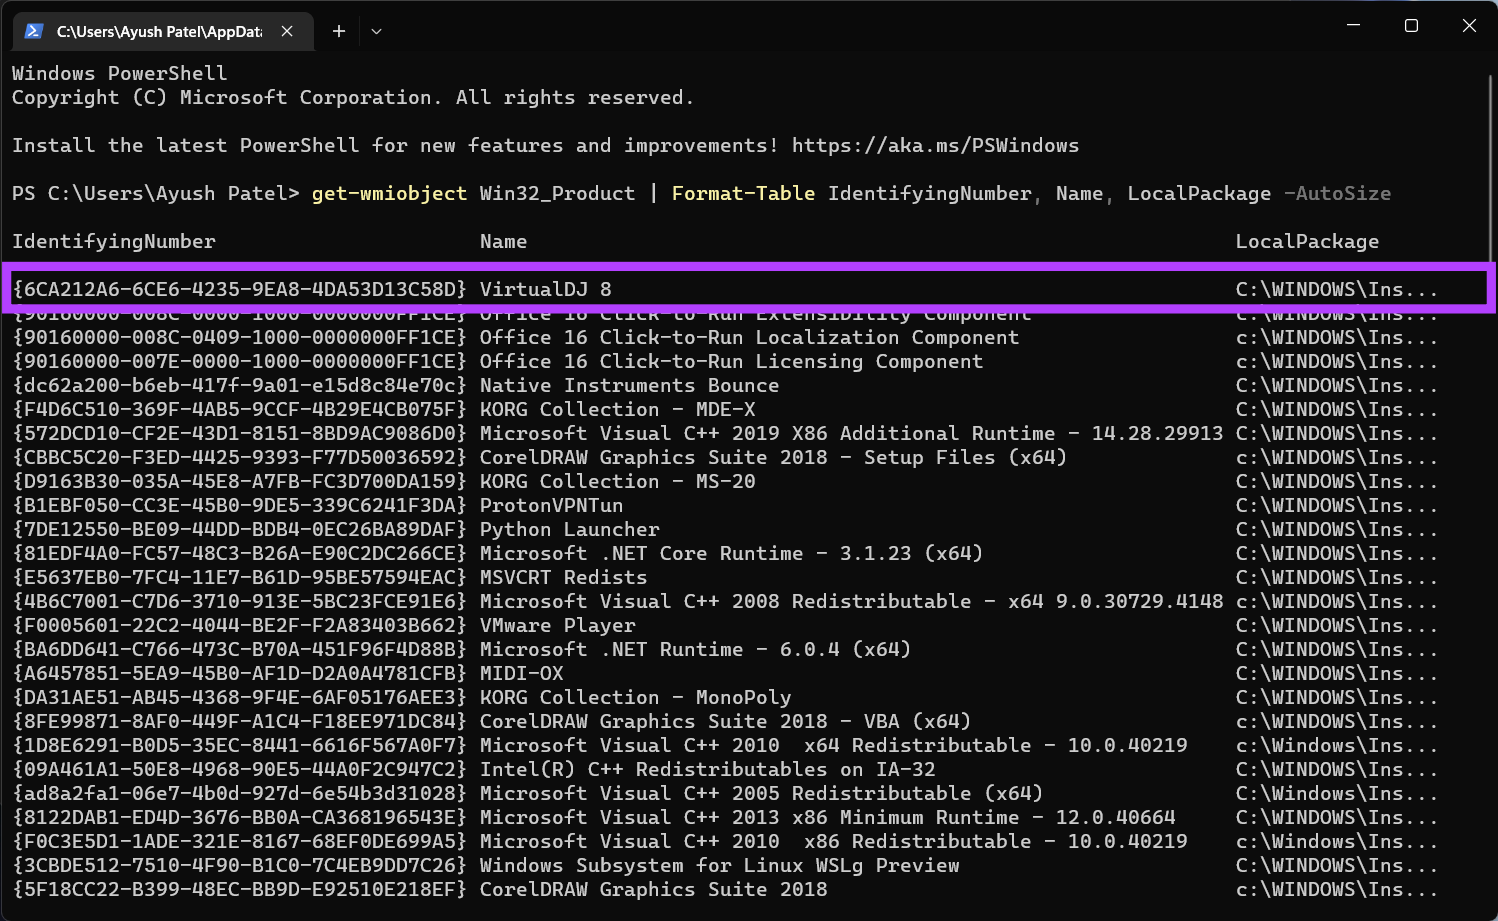
This command reveals the GUID of all the apps installed on your computer. You’ll need to find the GUID of the broken app(s) that needs fixing. The GUIDs will appear under ‘IdentifyingNumber’ column on the left side. Select the entire line of the app’s GUID (the values in curly brackets) you want to use and copy it into a Notepad document.
Here’s how you can use Windows Installer (MSIExec) inside Command Prompt:
Step 1: Click on Search on the Windows 11 taskbar, type Command Prompt, and select the Open button below the first search result.
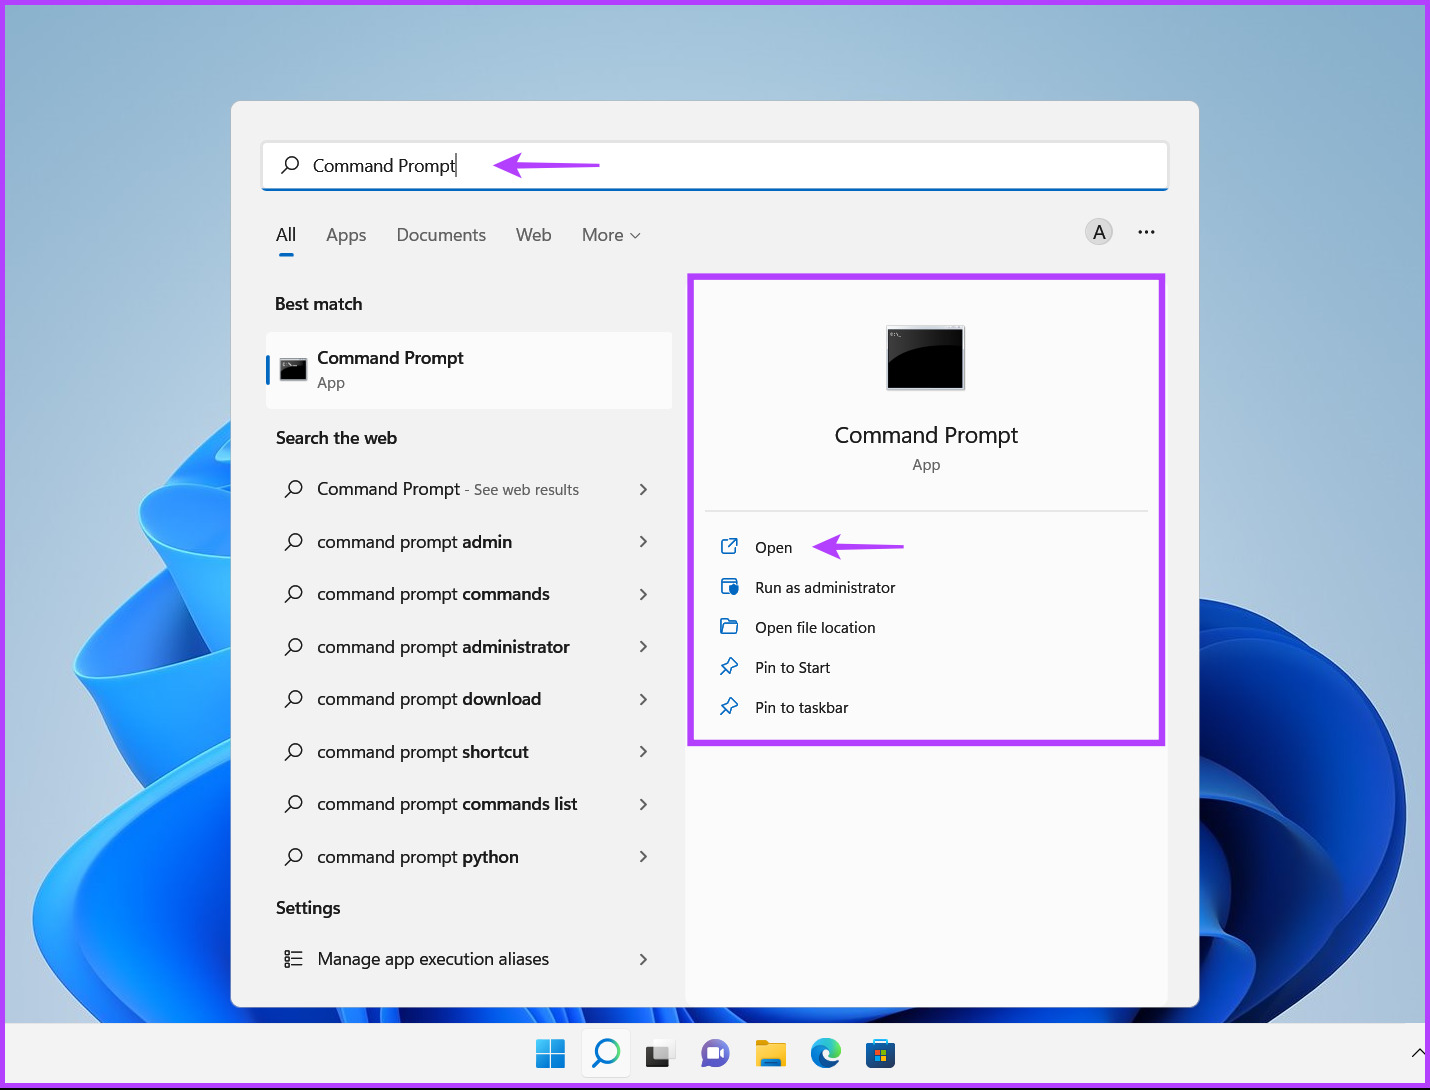
Step 2: In the Command Prompt window, type the following command and press Enter:
MSIExec.exe /fa {GUID}
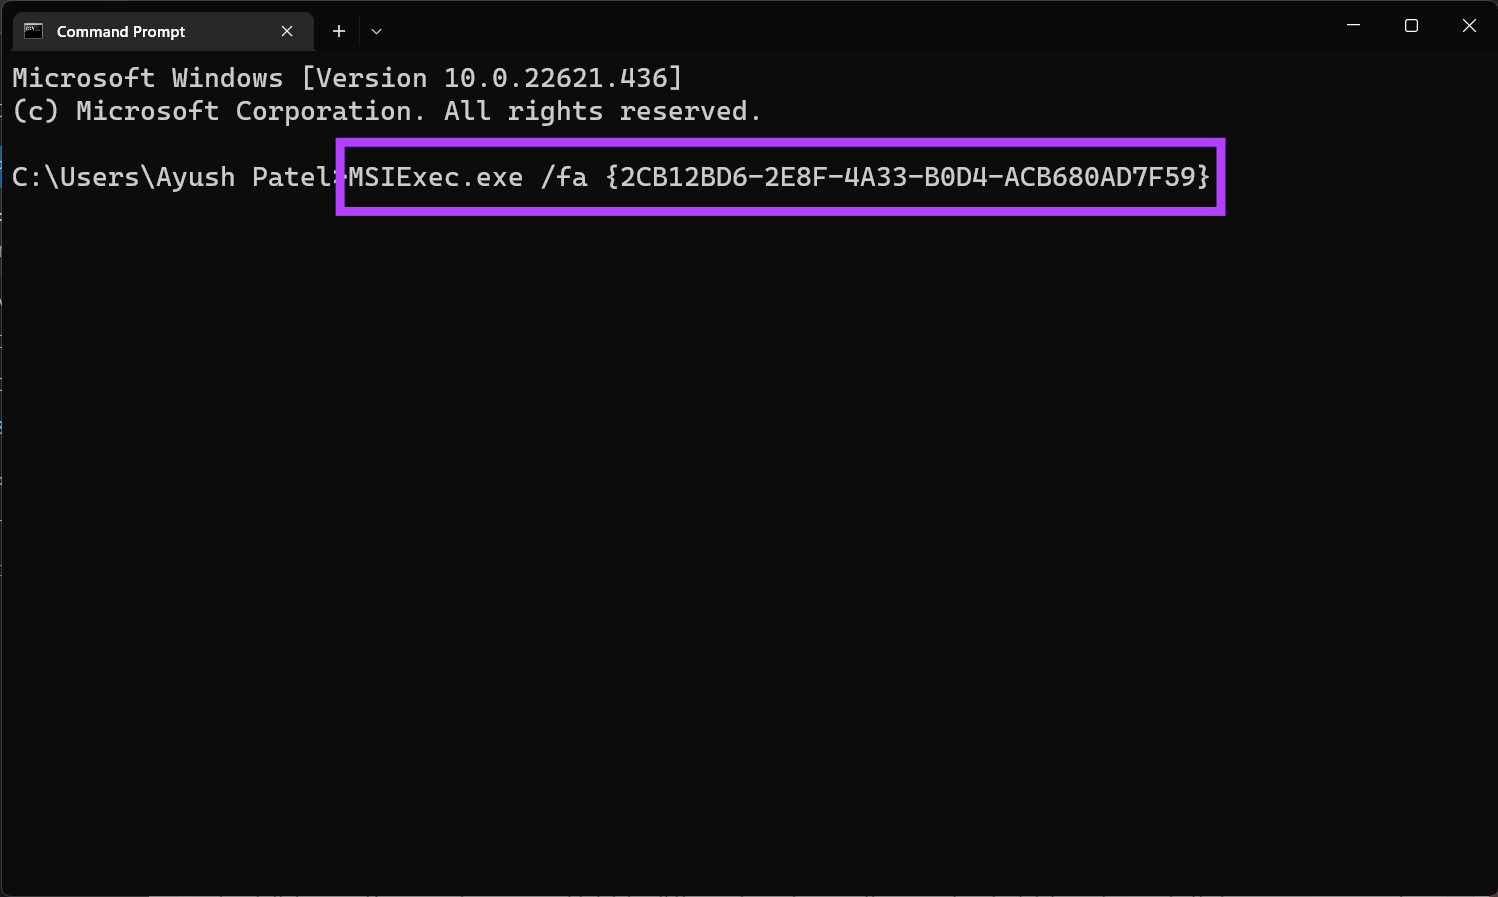
Step 3: When a window for the app appears, select the ‘Automatically close applications and attempt to restart them after setup is complete’ option and click OK.
When the repair procedure finishes, you will be asked to reboot the computer. Restart your PC and try to use the previously broken app to check if it works normally.
No More Broken Apps
If you can’t fix a broken app or program using any of the methods listed above, your best bet is to uninstall and reinstall it. However, that’ll erase the app’s configurations, settings, and cached data. And you’ll need to set it up again.
The solutions mentioned above will help you fix all the broken apps or programs on your Windows 11 PC. Let us know in the comment section which method helped you fix the borked apps and also share if you’ve found another way for that.
Was this helpful?
Last updated on 17 August, 2022
Read Next
 9 Ways to Fix YouTube Dark Theme Broken or Not Working
Dark Mode is not only a savior for the eyes but also for your device's battery life.
9 Ways to Fix YouTube Dark Theme Broken or Not Working
Dark Mode is not only a savior for the eyes but also for your device's battery life.
 Top 5 Ways to Change Priority Level for Programs on Windows 10 and Windows 11
Windows splits your PC’s resources among all running programs based on the priority levels.
Top 5 Ways to Change Priority Level for Programs on Windows 10 and Windows 11
Windows splits your PC’s resources among all running programs based on the priority levels.
 10 Best Broken Screen Wallpapers for iPhone
Customizing your phone is something we all love to do.
10 Best Broken Screen Wallpapers for iPhone
Customizing your phone is something we all love to do.
 Top 9 Ways to Fix Unable to Change Default Programs in Windows 10
The apps offered by Microsoft are great.
Top 9 Ways to Fix Unable to Change Default Programs in Windows 10
The apps offered by Microsoft are great.
 Top 7 Ways to Force Uninstall Programs on Windows 10
It's a good idea to uninstall an app or a program that you no longer need.
Top 7 Ways to Force Uninstall Programs on Windows 10
It's a good idea to uninstall an app or a program that you no longer need.
 Top 6 Ways to Fix Unable to Install Programs or Software on Windows 11
While Microsoft Store will give you a version of the most popular apps, it does not carry every program or software.
Top 6 Ways to Fix Unable to Install Programs or Software on Windows 11
While Microsoft Store will give you a version of the most popular apps, it does not carry every program or software.
 Top 3 Ways to Run Old Programs in Compatibility Mode on Windows 11
Windows 11, like previous versions, includes a compatibility mode that lets you run old programs and games designed for an earlier version of Windows.
Top 3 Ways to Run Old Programs in Compatibility Mode on Windows 11
Windows 11, like previous versions, includes a compatibility mode that lets you run old programs and games designed for an earlier version of Windows.
 7 Quick Ways to Force Uninstall Programs on Windows 11
Have you ever found yourself stuck with a stubborn program that refuses to get uninstalled from your PC?
7 Quick Ways to Force Uninstall Programs on Windows 11
Have you ever found yourself stuck with a stubborn program that refuses to get uninstalled from your PC?
The article above may contain affiliate links which help support Guiding Tech. The content remains unbiased and authentic and will never affect our editorial integrity.