Method 1. Automatically Transfer Photos From iPhone to Google Photos
For that, enable the Backup and sync feature on the Google Photos app on iPhone. By doing so, all the pictures and videos on your iPhone will automatically back up to Google Photos.
This method works in both situations, i.e., whether iCloud Photos is enabled or not. Here’s how to do it.
Step 1: Launch the Google Photos app. Log in with your Google if prompted.
Step 2: Tap your Profile picture or Initials at the top-right corner.
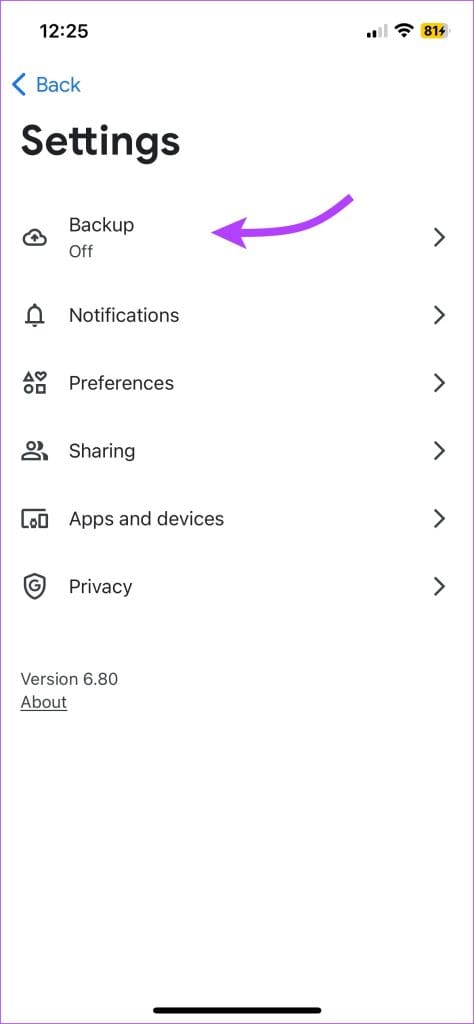
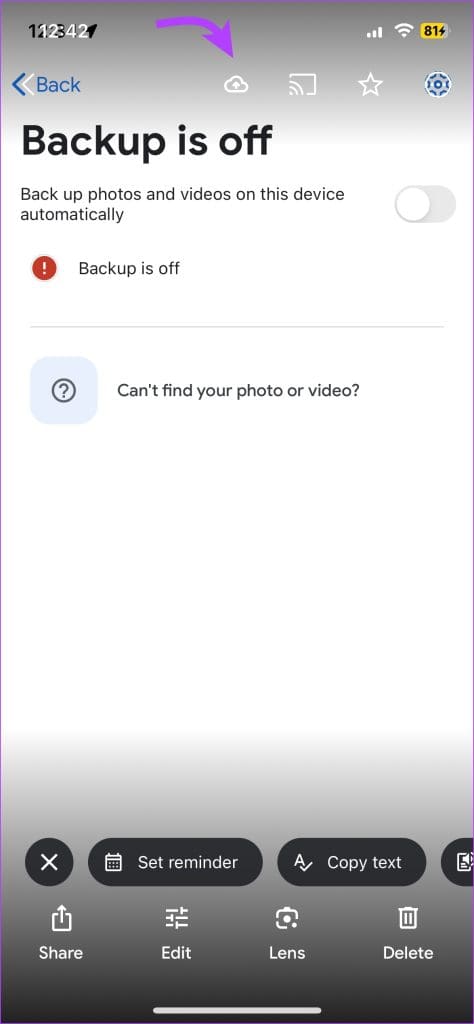
Step 3: Select Google Photos settings > tap Backup.
Step 4: Toggle on Backup.


The automatic backup will continue depending on the storage available in Google Photos and photos or videos on your iPhone or iPad.
Note: Before starting the backup process, you must give Google Photos access to all your photos and videos. To do so, go to Privacy & Security > Photos > Google Photos > Full Access.
Manage the Backup Quality of Photos and Videos on Google Photos
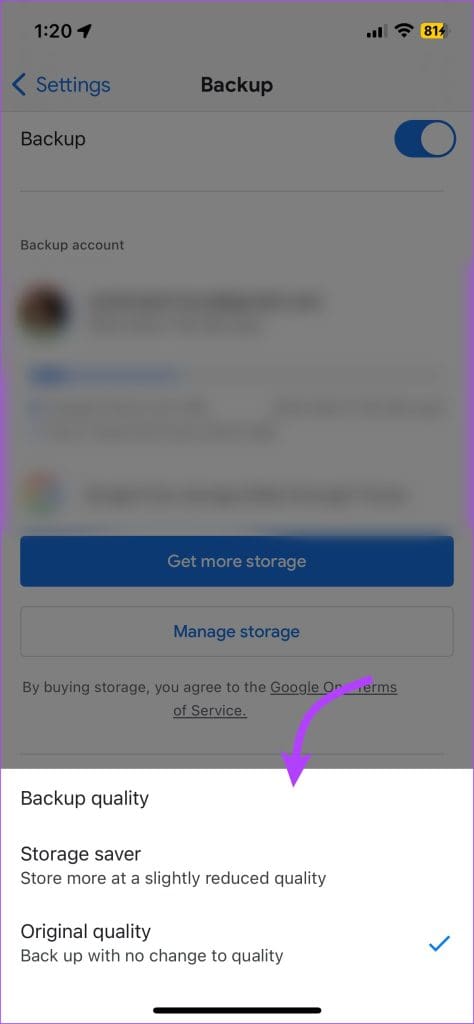
Unless you have Google One, you will have limited storage on Google Photos. To avoid storage issues, choose between three categories – Original quality (same resolution), Storage saver (slightly reduced quality), and Express (compressed).
Step 1: Open Google Photos > tap on Profile icon/Initial. Select Google Photos settings > Backup.
Step 2: Select Backup Quality. Choose a preferred option.

Method 2: Manually Back Up iPhone Photos and Videos to Google Photos
If you don’t want to opt for automatic backup or transfer only selected photos, follow the below steps.
Step 1: Open the Google Photos app. Log in with your Google account.
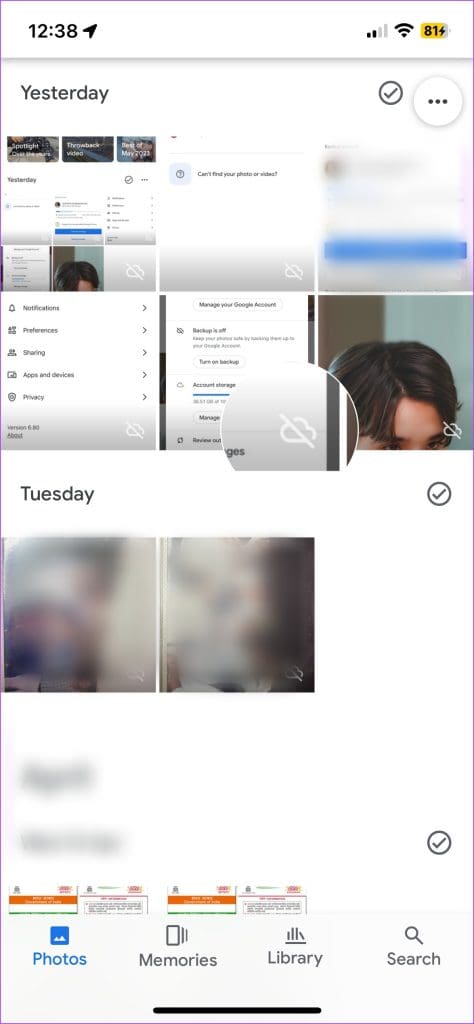
Step 2: Here, you’ll see all the photos from the iPhone’s camera roll. The images/videos with a canceled cloud icon over them are not backed up to the account.
Step 3: For,
- An individual image: Tap the image > select the Backup icon in the top bar.
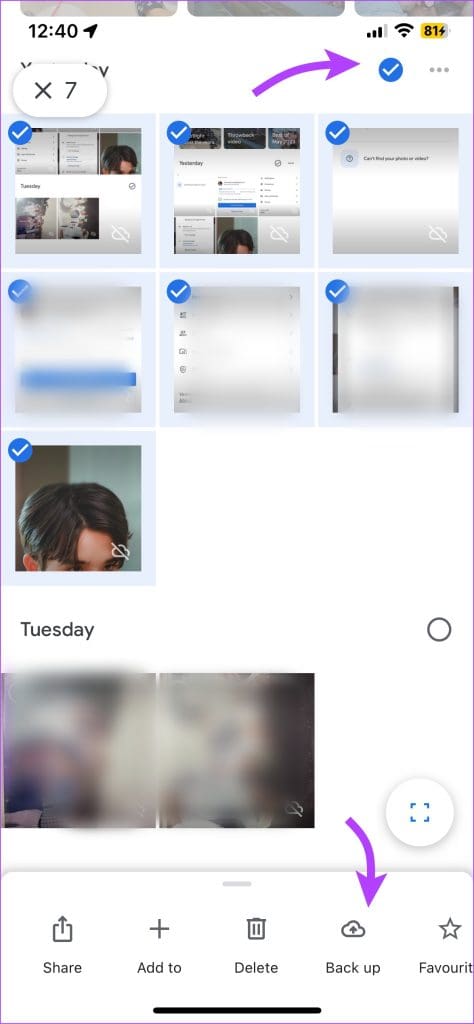
- Multiple images: Tap the check box above the photos > select the images > select the Backup icon at the bottom bar.
Alternatively, you can tap the + icon from the Google Photos home page. Select Album > Select Photos > choose the images or videos > tap Add.


Method 3: Move Photos From iPhone to Google Photos on a Computer
There are two ways to do that. The first one is for offline photos, and the second one is for pictures stored in iCloud.
Move Offline Photos
Note: Before proceeding, ensure to move all the photos from your iPhone to your computer.
Step 1: Open photos.google.com on your PC via any web browser. Log in with your Google account.
Step 2: Click Upload at the top > select Computer.

Step 3: Navigate to the photos or videos. Select the files and click Open.

Move iCloud Pictures to Google Photos
If you want to transfer pictures saved in iCloud to Google Photos on your PC, download them first. Later, you can upload the photos as mentioned in the steps above.
Step 1: Open icloud.com/photos and log in with your Apple ID.
Step 2: Click Select > select the photos and videos you want to move to Google Photos.
Note: Press CTRL + A (Windows) and CMD + A (macOS) to select all files.
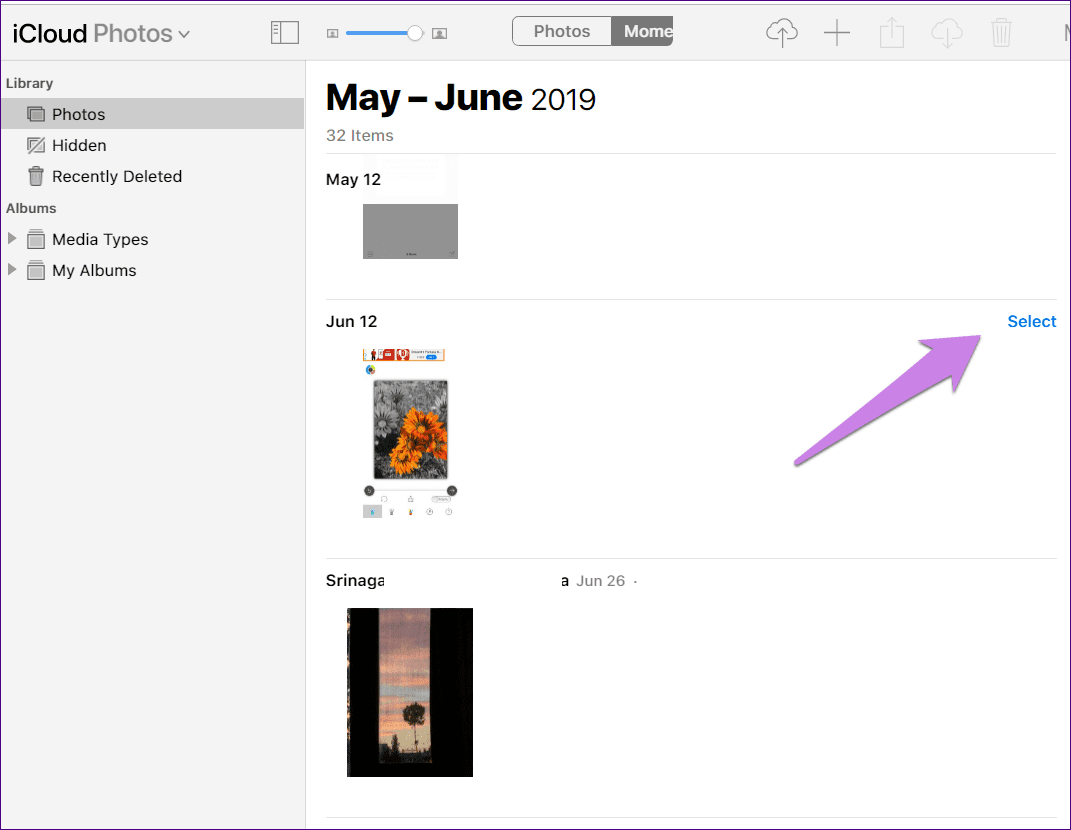
Step 3: Next, click the Download icon at the top to save them on your PC.

A ZIP file will be created. Download and extract the photos. After extracting, open the Google Photos website. Click the Upload icon → Computer → add the images and videos to Google Photos.
What Happens When You Add Images to Google Photos on a Computer
In both cases, the uploaded files will automatically show up on the Google Photos app on your iPhone, provided you are using the same Google account. You don’t have to enable any setting.
Even if Backup and sync are disabled, the photos will still sync as it is automatic. They will not occupy any storage on your iPhone as the photos technically reside in the cloud only.
Was this helpful?
Last updated on 05 June, 2024
Read Next
 How to Move Photos from Email to Google Photos
Earlier, when you received photos on Gmail, it was easy to move them to Google Photos.
How to Move Photos from Email to Google Photos
Earlier, when you received photos on Gmail, it was easy to move them to Google Photos.
 How to Move or Rearrange Apps on iPhone
Move App Icons and Folders Tap and hold an app icon or a folder, and select Edit Home Screen.
How to Move or Rearrange Apps on iPhone
Move App Icons and Folders Tap and hold an app icon or a folder, and select Edit Home Screen.
 Top 3 Ways to Move Contacts From Samsung Account to Google
Most http://Samsung smartphone users tend to save their contacts in http://Samsung Cloud.
Top 3 Ways to Move Contacts From Samsung Account to Google
Most http://Samsung smartphone users tend to save their contacts in http://Samsung Cloud.
 Google Drive: How to Copy and Move Your Files and Folders
How to Make a Copy of Your Files or Folder Google Drive has a Make a Copy feature that duplicates your document or files.
Google Drive: How to Copy and Move Your Files and Folders
How to Make a Copy of Your Files or Folder Google Drive has a Make a Copy feature that duplicates your document or files.
 Google Drive vs Google Photos: Which Is Best for Storing Photos
Google Drive vs Google Photos Comparison Key Differences Feature Google Drive Google PhotosFile Types All types Photos, Videos, GIFsOrganization Folders & Subfolders AlbumsPhoto Quality Original Original, High (compressed), Express (compressed)Storage
Google Drive vs Google Photos: Which Is Best for Storing Photos
Google Drive vs Google Photos Comparison Key Differences Feature Google Drive Google PhotosFile Types All types Photos, Videos, GIFsOrganization Folders & Subfolders AlbumsPhoto Quality Original Original, High (compressed), Express (compressed)Storage
 How to Remove Photos from Google Drive but Not Google Photos
Google Drive and Photos are two similar yet distinct products for storing photos and videos.
How to Remove Photos from Google Drive but Not Google Photos
Google Drive and Photos are two similar yet distinct products for storing photos and videos.
The article above may contain affiliate links which help support Guiding Tech. The content remains unbiased and authentic and will never affect our editorial integrity.