Getting an HP Support Assistant install error usually shows a message such as “installation code -2” with no additional (helpful) information. The issue is usually due to conflicts with other files or previous software versions. Here’s what to do if HP Support Assistant won’t install.
Fix 1 – Remove the Previous Version of HP Support Assistant
If the Support Assistant can’t copy over previous files, you might need to completely remove them first, essentially removing the existing installation.
Step 1. Hit “Win + I” to open Settings, then go to “Apps” and “Installed apps.”
Step 2. Scroll down to or search for “HP Support Assistant,” click on the three dots for its entry, and hit “Uninstall.”
Step 3. Restart the PC.
Step 4. Remove anything related to Support Assistant from the following subfolders:
C:\Program Files (x86)\HP\
C:\ProgramData\HP\
C:\Users\[Username]\AppData\Local\HP\ (check for all accounts)
These folders also contain other HP software like printer drivers and audio components, so you need to specifically locate Support Assistant subfolders and delete them. A third-party uninstaller software can help in removing all traces of a program, but make sure you’ve reviewed it to make sure it actually works.
Fix 2 – Use a Manual Download to Avoid the HP Support Assistant Install Error
If the HP Support Assistant won’t install automatically, it may be because your account doesn’t have administrator permissions. You can install it manually.
Step 1. Go to HP’s official Support Assistant page and download the current version.
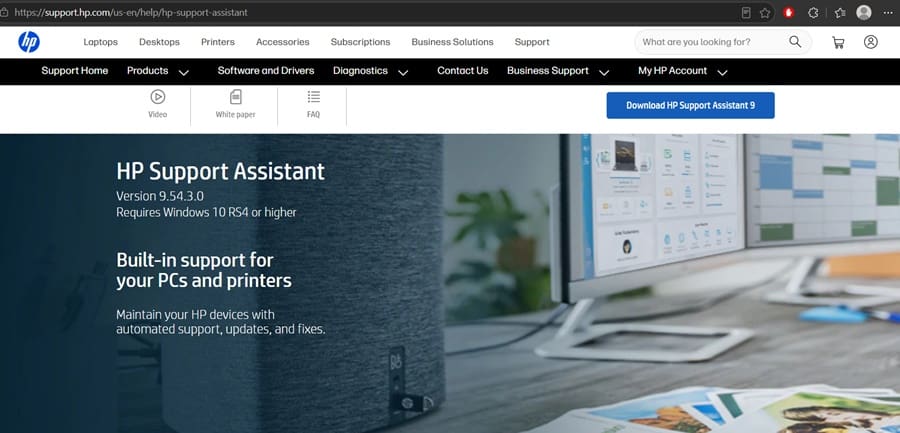
Step 2. Right-click on the downloaded file and choose “Run as administrator.”
Step 3. Confirm the User Account Control.
Step 4. Follow the instructions in the Setup Wizard.
If this still produces an install error, create a new local administrator account and try to install the software from there.
Fix 3 – Temporarily Disable Your Antivirus
While it’s not malicious, HP Support Assistant can trigger antivirus software. You can temporarily disable it to see if you get past setup.
Step 1. Open your antivirus and turn off real-time protection, usually from the system tray icon or the settings page. For the stock Windows option, this is in Windows Security settings under “Virus & threat protection.”
Step 2. Re-run the installer as administrator.
Step 3. Re-enable protection as soon as the Setup Wizard closes regardless of whether it installed successfully.
If this worked, you should add HP Support Assistant to your antivirus exclusion list to allow updates.
Fix 4 – Repair Corrupted System Files
Damaged system components can stop installers from writing where they need to or accessing the right directories. These commands will first download the correct files and fix broken file connections.
Step 1. Right-click the Start button and select “Terminal (Admin).”
Step 2. Type in “sfc /scannow” and hit “Enter,” then wait for the process to finish. This might take a while.
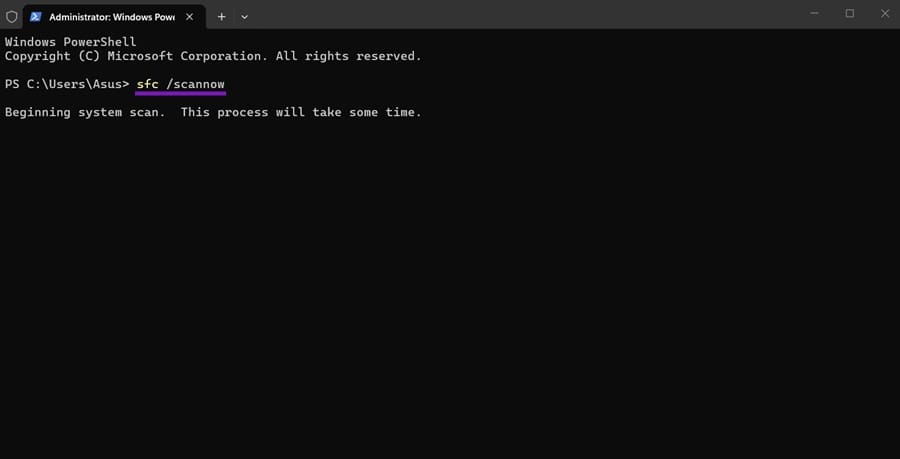
Step 3. Run “DISM /Online /Cleanup-Image /RestoreHealth” and let the command complete.
Step 4. Restart, then run “sfc /scannow” again just in case.
Step 5. Reinstall HP Support Assistant Manually (see Fix 2).
Fix 5 – HP Support Assistant Install Error After a System Reinstall
If you recovered the OS to an earlier version or restored point, or installed a fresh system on a new partition, Windows or HP components might not be fully configured yet. This can prevent the Support Assistant from being installed correctly.
Step 1. Plug the laptop in and keep it charging.
Step 2. Run Windows Update, download all updates, then restart and recheck until you have no more updates remaining.
Step 3. Find HP Support Assistant in “Apps” and remove it, then reinstall a fresh version.
Was this helpful?
Last updated on 09 August, 2026
Read Next
 Game Icons Won’t Display on Desktop – Fixes to Try for Steam
If your Steam desktop icons blank, this is usually a graphics-only issue.
Game Icons Won’t Display on Desktop – Fixes to Try for Steam
If your Steam desktop icons blank, this is usually a graphics-only issue.
 4 Fixes for Windows 11 Won’t Install on Your PC
We’ve seen many versions of Microsoft’s Windows operating system over the years, from the likes of Windows 95 and 98 through to the more recent releases of Windows 10 and
4 Fixes for Windows 11 Won’t Install on Your PC
We’ve seen many versions of Microsoft’s Windows operating system over the years, from the likes of Windows 95 and 98 through to the more recent releases of Windows 10 and
 Windows 11 25H2 Won’t Install – Common Fixes
Just when it seems you’re over the hurdle of installing Windows 11 24H2, along comes its successor a year later to make your life difficult all over again.
Windows 11 25H2 Won’t Install – Common Fixes
Just when it seems you’re over the hurdle of installing Windows 11 24H2, along comes its successor a year later to make your life difficult all over again.
 Microsoft Support and Recovery Assistant (SaRA) Removed From Windows 11 – What Does This Mean?
With Microsoft’s steady march into the future, some products and services will invariably get left behind.
Microsoft Support and Recovery Assistant (SaRA) Removed From Windows 11 – What Does This Mean?
With Microsoft’s steady march into the future, some products and services will invariably get left behind.
 Wi-Fi Driver Keeps Uninstalling Automatically – 7 Fixes to Try
If your Wi-Fi driver uninstalled itself, you might not be able to see the corresponding adapter in Device Manager or the network icon on your toolbar.
Wi-Fi Driver Keeps Uninstalling Automatically – 7 Fixes to Try
If your Wi-Fi driver uninstalled itself, you might not be able to see the corresponding adapter in Device Manager or the network icon on your toolbar.
 Task View Not Opening in Windows 11? Try These Fixes
The Task View not showing Windows 11 users their open apps can be a bit difficult to troubleshoot.
Task View Not Opening in Windows 11? Try These Fixes
The Task View not showing Windows 11 users their open apps can be a bit difficult to troubleshoot.
 12 Best Fixes for Windows 10 Laptop Won’t Connect to iPhone Hotspot
I usually travel light with my Windows laptop and iPhone.
12 Best Fixes for Windows 10 Laptop Won’t Connect to iPhone Hotspot
I usually travel light with my Windows laptop and iPhone.
 4 Fixes for Microsoft Teams Notification Won’t Go Away on Windows
Fix 1: Open the Chat App and Clear Notifications (Windows 11 Only) Your Windows 11 PC includes a dedicated Chat app that can help you access and respond to your
4 Fixes for Microsoft Teams Notification Won’t Go Away on Windows
Fix 1: Open the Chat App and Clear Notifications (Windows 11 Only) Your Windows 11 PC includes a dedicated Chat app that can help you access and respond to your
The article above may contain affiliate links which help support Guiding Tech. The content remains unbiased and authentic and will never affect our editorial integrity.