There are a lot of tasks and processes on a Windows 11 PC that constantly seem to be vying for attention and resources, and it’s only natural to want to keep as much memory and processing power free as possible.
So, if you’re experiencing a problem with Microsoft Cross Device Service high CPU usage, then we’ve got some fixes and troubleshooters to help you out.
What Is the Windows Cross Device Service?
You may have seen the name “Windows Cross Device Service” in your Task Manager, but don’t know what exactly it is. Quite simply, it’s a process that helps your smartphone interface with your PC. Apps like Phone Link will use this process.
Normally, it runs in the background, syncing quietly, but occasionally, wires get crossed, the syncing loops, and suddenly the process is using way more processing power than it should.
How to Fix Microsoft Cross Device Service High CPU Usage
If you’re experiencing high processing loads from this process, we’ve got some tips and fixes below to help:
Restart Your PC
It may sound obvious, but restarting your machine is the first step in troubleshooting for many reasons. Apps and processes can possibly develop memory or resource-management problems that result in erratic behavior or abnormally high resource usage.
Disable Phone Link on Startup
Many apps vie for resources on startup and can slow the system with their demands. If you don’t need Phone Link with every session, you can always disable it on startup. Here’s how:
Step 1. Open “Task Manager” (Ctrl + Shift + Esc).
Step 2. Click “Startup apps” in the sidebar.
Step 3. Navigate to “Phone Link” and right-click it.
Step 4. Select “Disable” and the app should no longer boot on startup.

You can also disable “Mobile devices” in the same way in “Startup Apps,” which also uses resources.
Stop Sharing App Experiences
Another way to keep Cross Device Service in check is by reducing the number of tasks it does. One of these is sharing apps across devices. Here’s how to disable it:
Step 1. Open “Settings” (Win + I) and click “Apps” in the sidebar.
Step 2. Choose “Advanced app settings.”
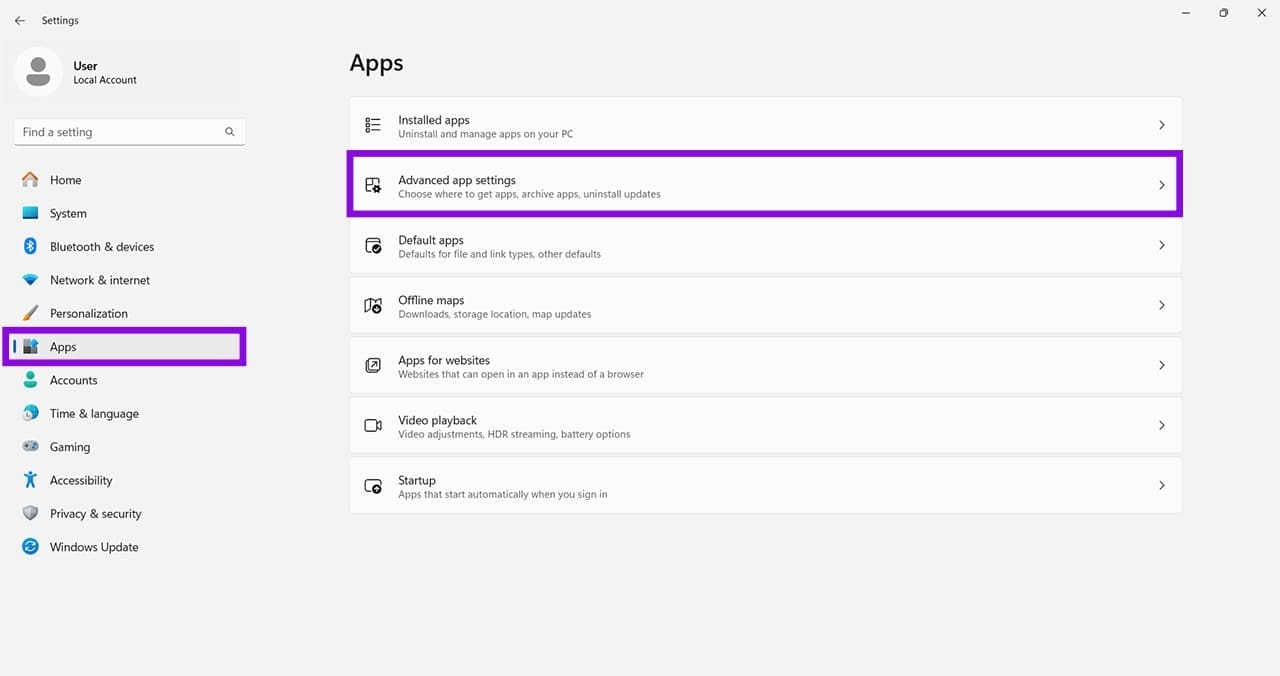
Step 3. Click “Share across devices” and then toggle the option to “Off” underneath.
Stop Phone Link Running in the Background
Phone Link can be stopped from using resources while not directly in use. This ensures you’re updated only when you switch back. Here’s what to do:
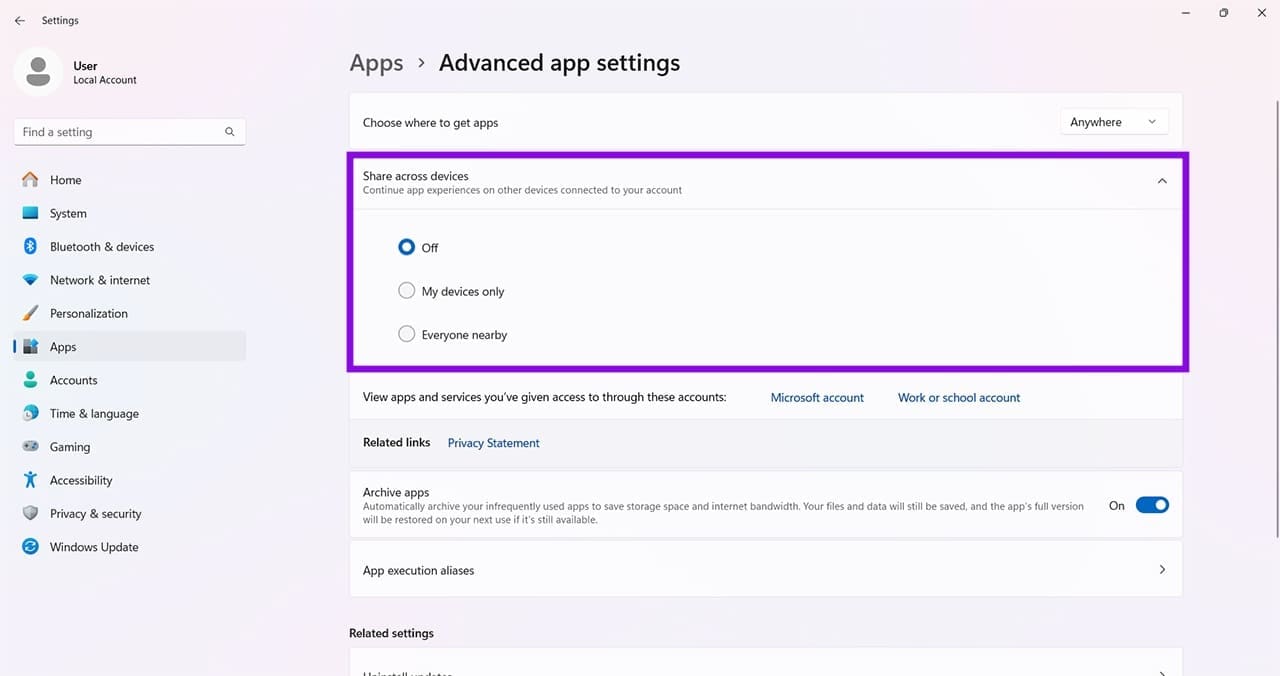
Step 1. Head to “Settings” and “Apps.”
Step 2. Click on “Installed apps.”
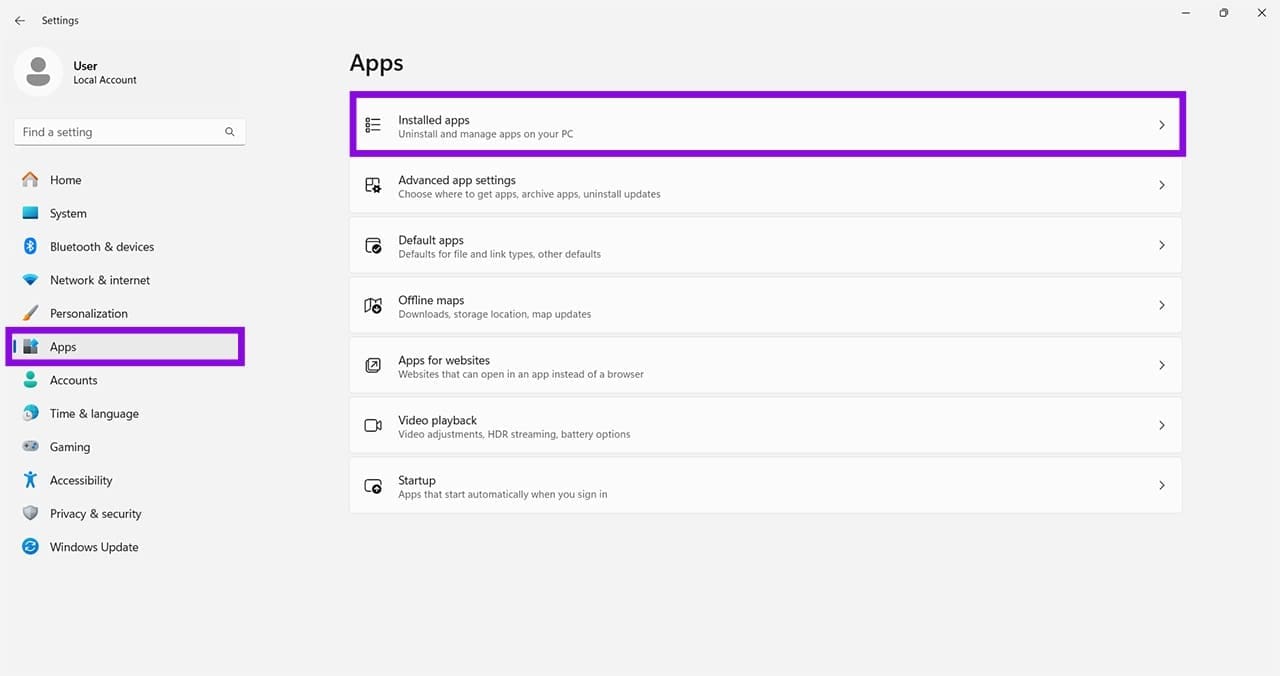
Step 3. From the list of apps, click on the three dots next to “Phone Link.”
Step 4. Click “Advanced options.”
Step 5. Under “Background apps permissions,” click the dropdown and choose “Never.”

Reinstall Cross Service Device
If all else fails, you can try reinstalling the Cross Service Device, which you’ll need to do in Command Prompt:
Step 1. Open the Run dialog (Win + R) and type “powershell” before hitting (Ctrl + Shift + Enter) to run it as an administrator.
Step 2. In PowerShell, type “Get-AppxPackage *CrossDevice* -AllUsers | Remove-AppxPackage -AllUsers” and press “Enter.”
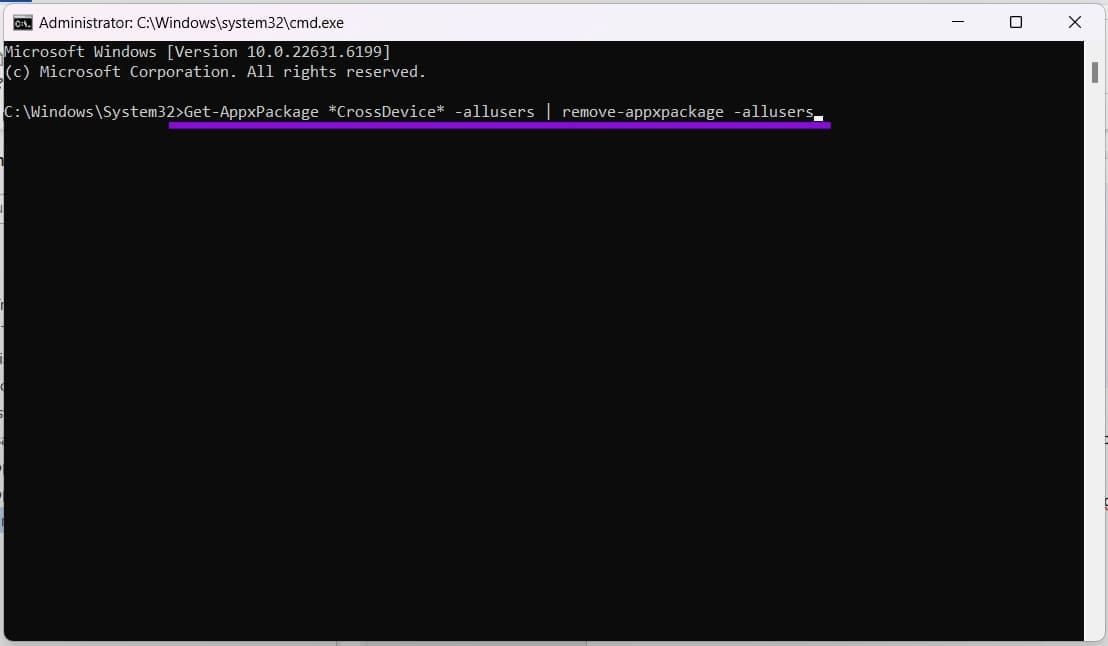
Step 3. Restart your machine, restart Command Prompt, then type “winget install 9NTXGKQ8P7N0” and hit Enter.
Step 4. The Service will install. See if this fixes the CPU usage.
Was this helpful?
Last updated on 14 August, 2026
Read Next
 Windows Audio Device Graph Isolation: Fix High CPU Usage
What is Windows Audio Device Graph Isolation Windows Audio Device Graph Isolation, also known as audiodg.exe, is a process that handles digital signal processing, including advanced sound enhancement effects, on
Windows Audio Device Graph Isolation: Fix High CPU Usage
What is Windows Audio Device Graph Isolation Windows Audio Device Graph Isolation, also known as audiodg.exe, is a process that handles digital signal processing, including advanced sound enhancement effects, on
 5 Ways to Fix Windows Explorer High CPU Usage on Windows 11
Try Basic Fixes Restart the Windows Explorer process: There's a chance that Windows Explorer's high CPU usage is a one-time glitch.
5 Ways to Fix Windows Explorer High CPU Usage on Windows 11
Try Basic Fixes Restart the Windows Explorer process: There's a chance that Windows Explorer's high CPU usage is a one-time glitch.
 5 Ways to Fix High CPU Usage on Windows 11
Try Basic Fixes Wait for Windows to finish updates: If Windows is in the process of checking, downloading, or installing any updates in the background, CPU usage may increase during
5 Ways to Fix High CPU Usage on Windows 11
Try Basic Fixes Wait for Windows to finish updates: If Windows is in the process of checking, downloading, or installing any updates in the background, CPU usage may increase during
 6 Fixes for Discord’s High CPU Usage on Windows
Fix 1: Turn Off Hardware Acceleration The Hardware Acceleration in Discord allows the app to use your GPU instead of your CPU for graphics-intensive tasks.
6 Fixes for Discord’s High CPU Usage on Windows
Fix 1: Turn Off Hardware Acceleration The Hardware Acceleration in Discord allows the app to use your GPU instead of your CPU for graphics-intensive tasks.
 6 Ways to Fix Windows Modules Installer Worker High CPU Usage
If you've ever found your computer's fan working overtime and the CPU usage going sky-high, you're not alone.
6 Ways to Fix Windows Modules Installer Worker High CPU Usage
If you've ever found your computer's fan working overtime and the CPU usage going sky-high, you're not alone.
 Windows Camera Frame Server High RAM and CPU Usage
Windows 11 doesn’t have the best track record when it comes to keeping RAM and CPU usage low while running background tasks and services like Zoom or other video conferencing
Windows Camera Frame Server High RAM and CPU Usage
Windows 11 doesn’t have the best track record when it comes to keeping RAM and CPU usage low while running background tasks and services like Zoom or other video conferencing
 4 Ways to Fix Microsoft Edge High Memory and CPU Usage
Basic Fixes Restart the Microsoft Edge browser - You should restart the browser as it may fix minor bugs and glitches that trigger the problem.
4 Ways to Fix Microsoft Edge High Memory and CPU Usage
Basic Fixes Restart the Microsoft Edge browser - You should restart the browser as it may fix minor bugs and glitches that trigger the problem.
 How to Prevent Cross-Site Tracking in Safari on iPhone
What Is Cross-Site Tracking on iPhone?
How to Prevent Cross-Site Tracking in Safari on iPhone
What Is Cross-Site Tracking on iPhone?
The article above may contain affiliate links which help support Guiding Tech. The content remains unbiased and authentic and will never affect our editorial integrity.