How to Enable the Microsoft Word Ruler
The ruler in the Microsoft Word app may be hidden, preventing you from seeing it and accessing its features. Here’s how to enable your Word ruler:
Step 1: Launch the Microsoft Word app.
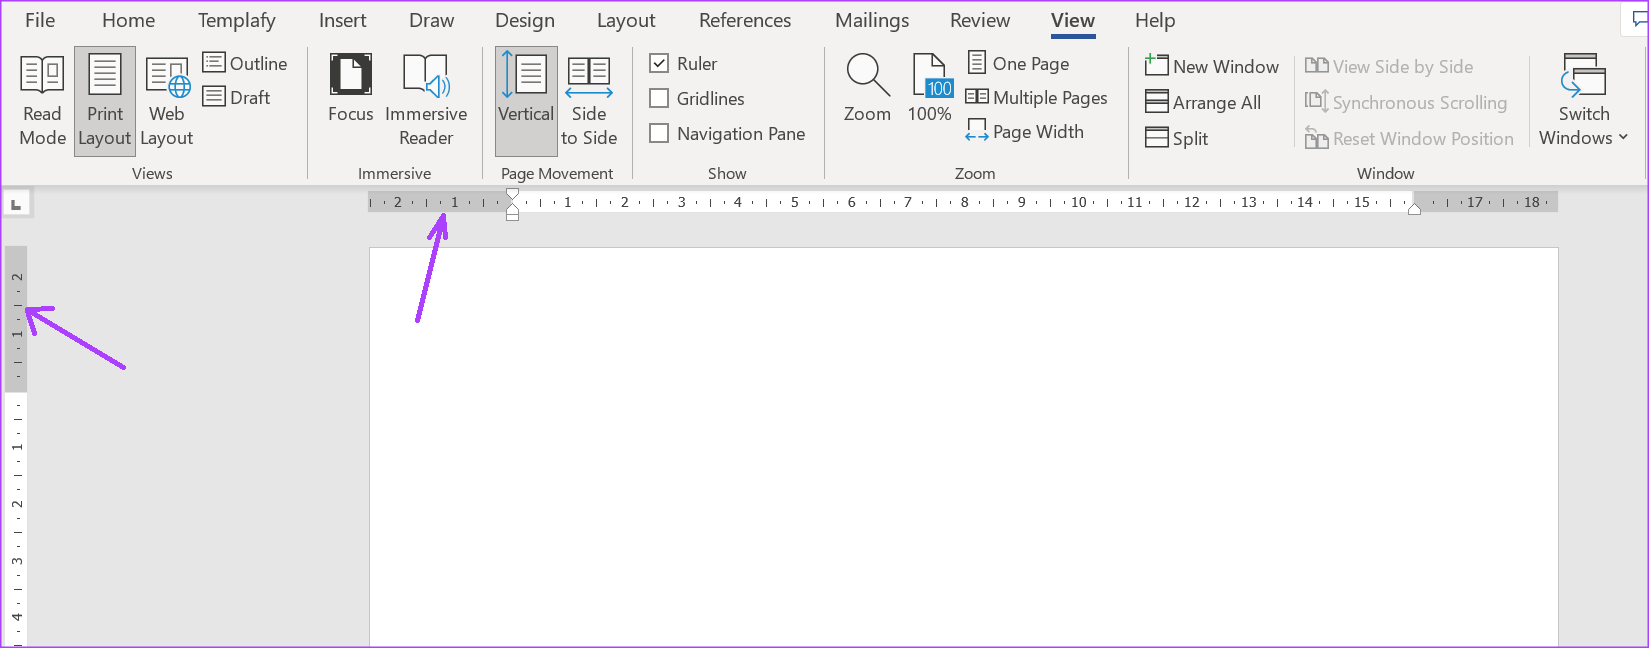
Step 2: Click the View tab in the right corner of the Word Ribbon.

Step 4: In the Show group, tick the box for Ruler to launch the Microsoft Word ruler.

Note that after ticking the box beside Ruler, the ruler that becomes visible depends on the page layout chosen in the Views section. The vertical and horizontal rulers will be visible on Microsoft Word if your document is in Print Layout. However, only the horizontal ruler will be visible if you select Web Layout or Draft Views.
How to Open the Page Setup Window With the Microsoft Word Ruler
The page setup window in Microsoft Word contains settings for document margins, paper size, and document layout. The page setup window is useful when formatting your Word document. One way to access the page setup Window is through the Microsoft Word ruler. Here’s how to do so:
Step 1: Ensure the vertical or horizontal rulers are visible on your Microsoft Word document.
Step 2: Place your mouse pointer on any part of the vertical or horizontal ruler and double-click to launch the Page Setup window.
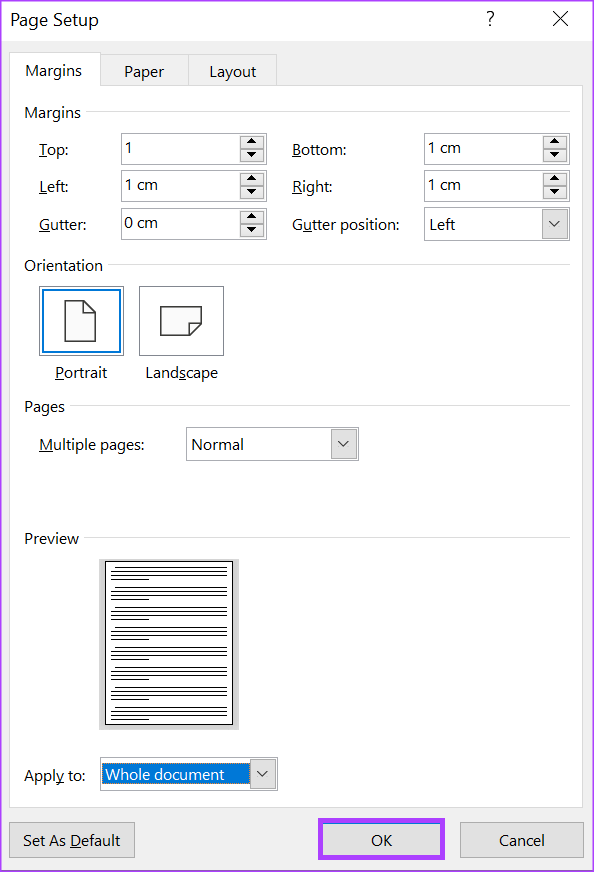
As mentioned above, the page setup window lets you edit your Word document’s page margins, size, and layout. However, you can also perform these actions directly with the Word ruler.
How to Adjust the Page Margins Using the Microsoft Word Ruler
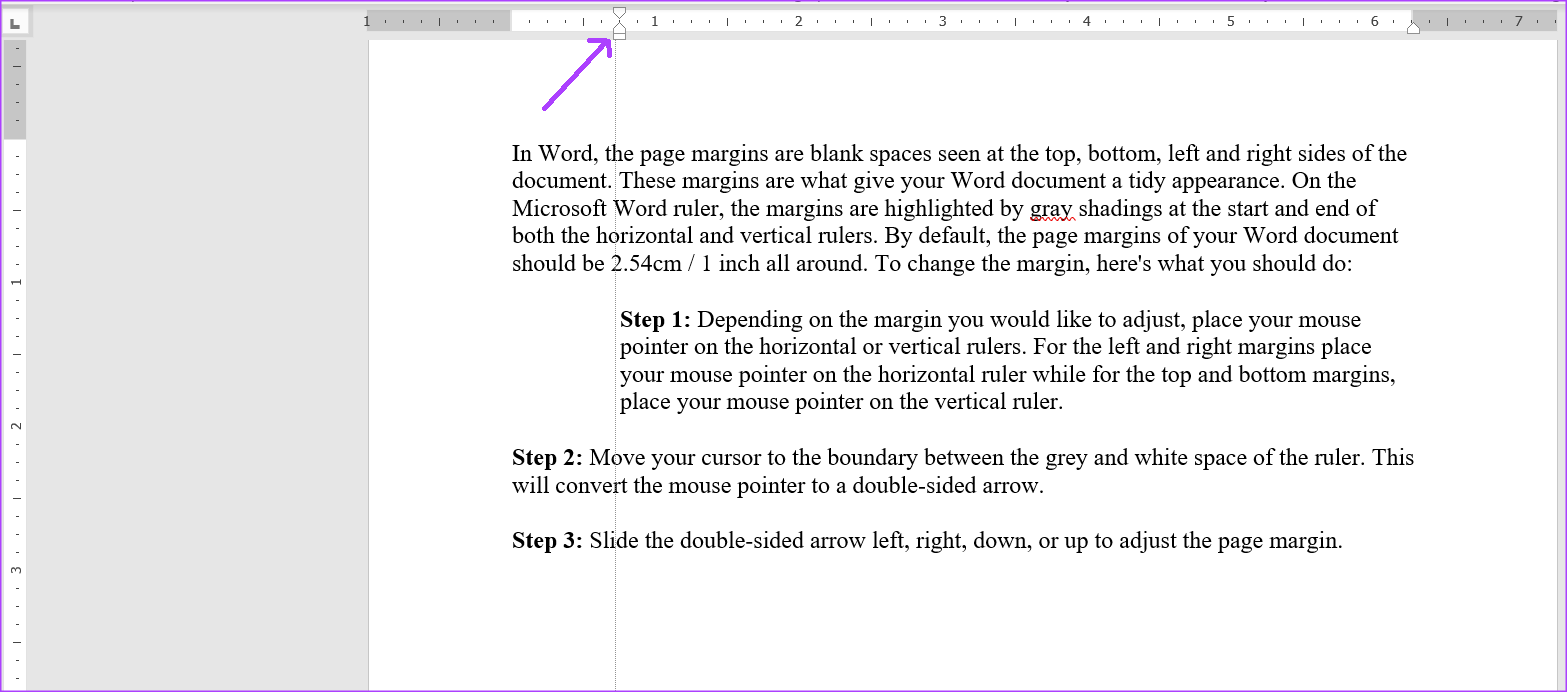
In Word, the page margins are blank spaces at the document’s top, bottom, left, and right sides. On the Microsoft Word ruler, gray shadings highlight the margins at the start and end of both the horizontal and vertical rulers. By default, the page margins should be 2.54cm/1-inch. To adjust the page margin, here’s what you must do:
Step 1: Place your mouse pointer on the horizontal or vertical rulers, depending on the margin you want to adjust. On the horizontal ruler, place your mouse pointer on the left and right margins, while on the vertical ruler, place your mouse pointer on the top and bottom margins.

Step 2: Move your cursor to the boundary between the grey and white space of the ruler. This will convert the mouse pointer to a double-sided arrow.
Step 3: Slide the double-sided arrow left, right, down, or up to adjust the page margin.

How to Adjust Page Indents Using the Microsoft Word Ruler
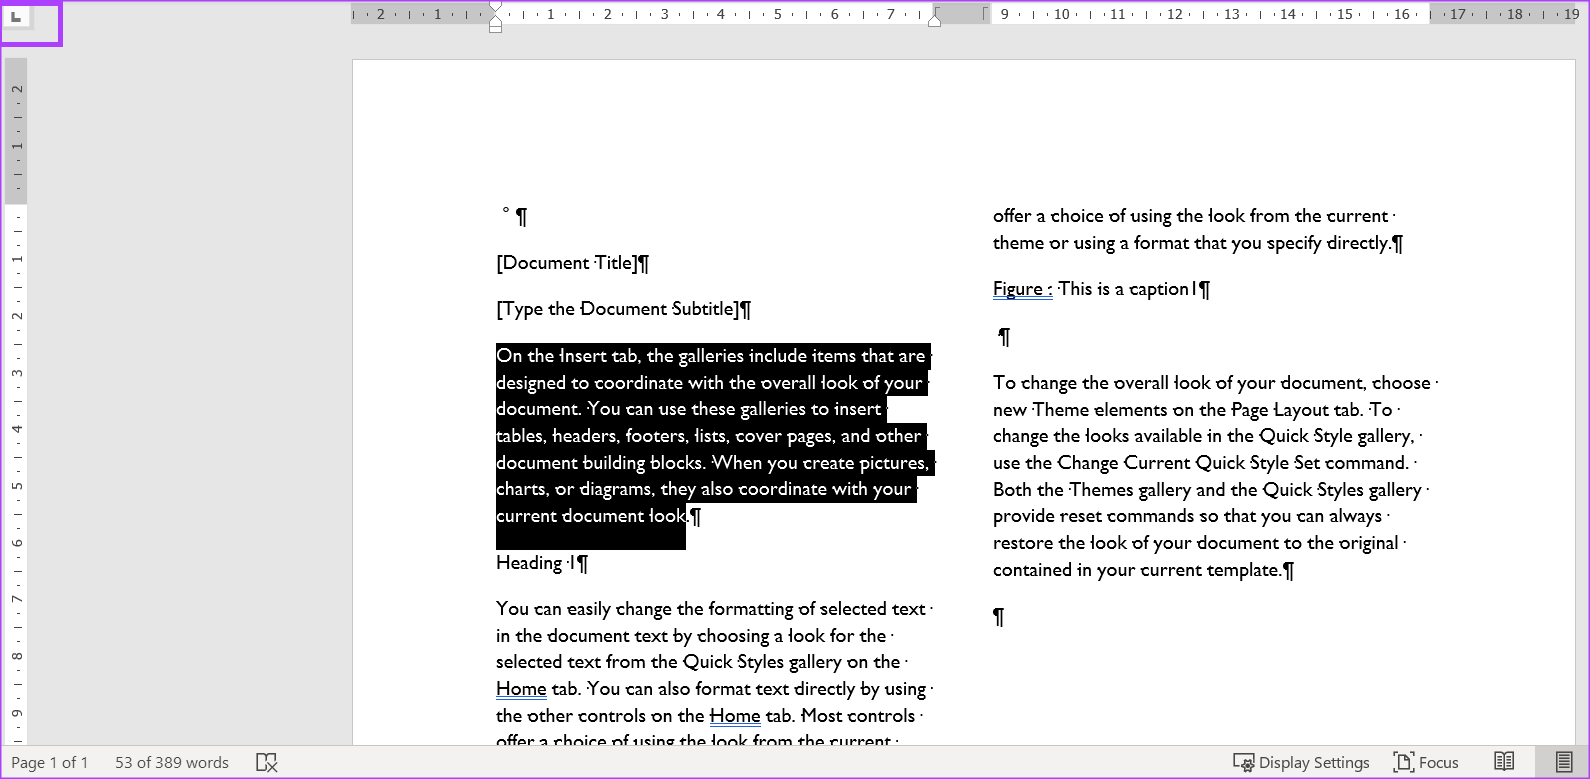
After activating the Microsoft Word ruler, you should see triangular- and rectangular-like markers. These markers adjust the indent of paragraphs, bullets, and numberings on your Word document. The Word ruler has three markers – the first line, left, hanging, and right indent. Here’s what happens when you move any markers.
Step 1: Place your mouse cursor in the paragraph of the Word document you want to adjust.

Step 2: Click on the first line indent marker at the top and drag it to your right. This will change the indentation of the first lines of a paragraph.

Step 3: Click on the second indent marker under the first one and drag it to your right to change the indentation for all paragraph lines. Note that dragging the left indent marker will also move the first line and hanging indent markers.
Step 4: Click on the hanging indent marker and drag it to your right to change the indentation of all other lines in a paragraph except the first line.

Step 5: Click on the right indent marker and drag it to your left to re-adjust the right side of the paragraph.

How to Add Tab Stops Using the Microsoft Word Ruler
Pressing the tab key on your keyboard moves your cursor ahead by about eight characters. This is possible because you have set the tab stop option. In Word, tab stops help create evenly-spaced text. You must see an icon resembling block L on the Microsoft Word vertical ruler. Here’s how to add tab stops to your Microsoft Word document:
Step 1: Select the text you want to align on the Word document.

Step 2: At the left of the Microsoft Word document, click the icon (which looks like a block L) at the start of the ruler to select the type of tab stop you want.
Step 3: After selecting your preferred tab stop, click on the ruler at the top of your Word canvas and place the tab stop.

The block L represents one of the tab stops options, which includes:
 – Aligns text to the left side of the tab stop.
 – Aligns text such that it is centered under the tab stop.
 – Aligns text to the right side of the tab stop.
 – Aligns text with decimal points such that text before the decimal point extends to the left while text after the decimal point extends to the right.
 – A vertical line is shown on the tab.
 – Indents the first line of a paragraph.
 – Indents all lines of the paragraph except the first.
How to Rotate Ruler in Word
While we have explored the ruler connected with page setup on Word, another ruler is associated with drawing on Word. By default, it has a 46-degree inclination. You may rotate it to change the angle or slope of lines.
Step 1: Open your Word document and click the Draw menu.

Step 2: Click the Ruler icon.
Step 3: Move two fingers on the touchpad to get the exact angle you want.
Was this helpful?
Last updated on 23 August, 2024
Read Next
 Google Docs vs. Microsoft Word Online: Which Word Processor Is Better
Google Docs vs.
Google Docs vs. Microsoft Word Online: Which Word Processor Is Better
Google Docs vs.
 Apple Pages vs Microsoft Word: Which Word Processing Software Is Better
Every major tech company out there is offering their version of the productivity suite.
Apple Pages vs Microsoft Word: Which Word Processing Software Is Better
Every major tech company out there is offering their version of the productivity suite.
 3 Ways to Adjust the Page Margin in Microsoft Word
Method 1: Adjust the Page Margin of a Word Document Using the Ruler Step 1: Open the Word document to adjust the page margin.
3 Ways to Adjust the Page Margin in Microsoft Word
Method 1: Adjust the Page Margin of a Word Document Using the Ruler Step 1: Open the Word document to adjust the page margin.
 How to Add, Customize and Delete a Text Box in Microsoft Word
Like in Microsoft PowerPoint, you can add a text box to a Microsoft Word document.
How to Add, Customize and Delete a Text Box in Microsoft Word
Like in Microsoft PowerPoint, you can add a text box to a Microsoft Word document.
 How to Enable and Disable Hyphenation in Microsoft Word
How to Turn on Hyphenation in Microsoft Word There are two types of hyphenation - automatic and manual.
How to Enable and Disable Hyphenation in Microsoft Word
How to Turn on Hyphenation in Microsoft Word There are two types of hyphenation - automatic and manual.
 How to Draw, Add and Edit Shapes in Microsoft Word
How to Add a Shape in Microsoft Word To insert a shape in Word, you can choose between two options.
How to Draw, Add and Edit Shapes in Microsoft Word
How to Add a Shape in Microsoft Word To insert a shape in Word, you can choose between two options.
 How to Insert and Edit a Page Border in Microsoft Word
How to Insert a Page Border in Microsoft Word There are different border settings and styles in Microsoft Word.
How to Insert and Edit a Page Border in Microsoft Word
How to Insert a Page Border in Microsoft Word There are different border settings and styles in Microsoft Word.
 4 Ways to Clear All Text Formatting in Microsoft Word
Method 1: Using Keyboard Shortcuts With keyboard shortcuts, you can clear the text formatting within a Microsoft Word document.
4 Ways to Clear All Text Formatting in Microsoft Word
Method 1: Using Keyboard Shortcuts With keyboard shortcuts, you can clear the text formatting within a Microsoft Word document.
The article above may contain affiliate links which help support Guiding Tech. The content remains unbiased and authentic and will never affect our editorial integrity.