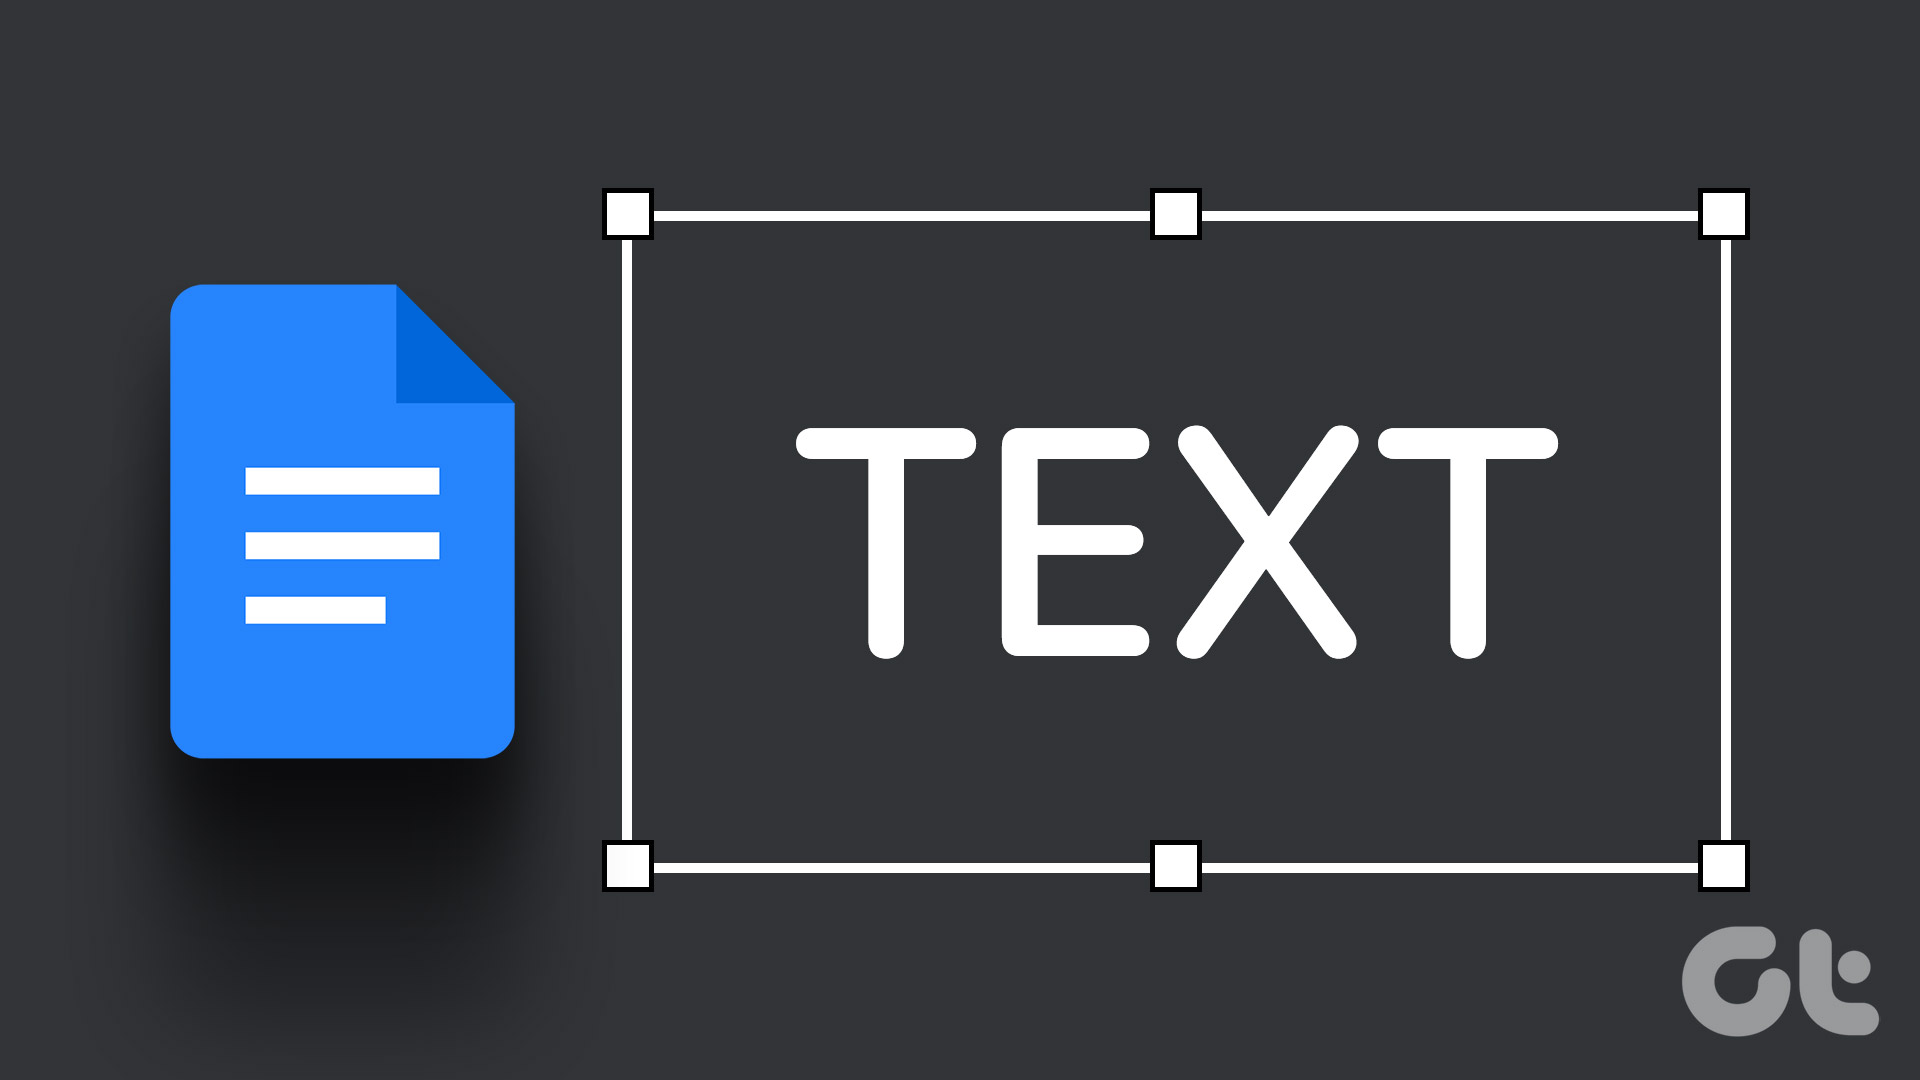
Because of its simple yet powerful interface, Google Docs has become the preferred option for many. So, if you’re working on a shared doc and want your text to be the highlight of the show, adding it in a text box is the way to go. We have 3 easy ways to help you insert a text box in Google Docs.
Working with a team, there can be instances when important information got lost in a long doc file. To prevent this from happening, you can add text boxes or shapes to your Google Docs. They can also help give the document a decluttered and professional look. So, read on as we have a look at how to add a text box in Google Docs.
Note: Before starting with the steps, make sure you sign in to your Google account.
Method 1: Create a Basic Google Docs Text Box Using Drawing Tool
The easiest way to add a text box in Google Docs is by using the Drawing Tool. It allows you to create a box and add text to it as well. Here’s how:
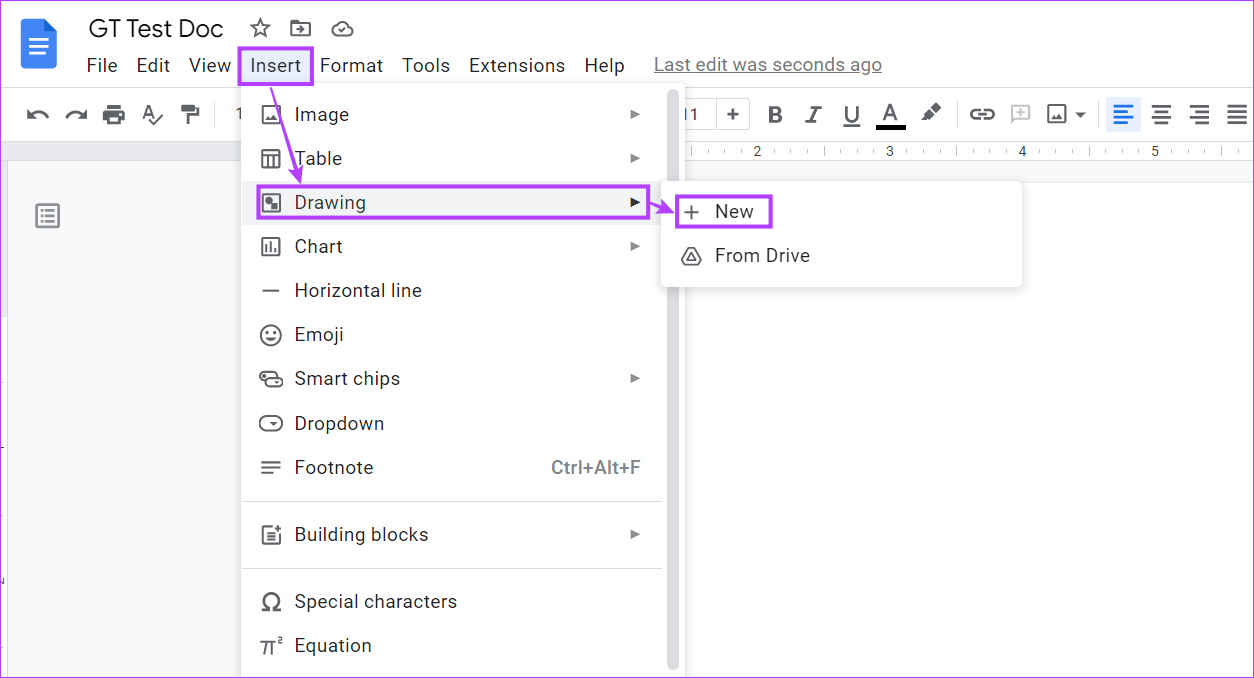
Step 1: Open the relevant Google Doc. Then, go to the menu bar and click on Insert.
Step 2: Click on Drawing and select New from the options.
Step 3: In the drawing window, click on the text box button.
Step 4: Now, click and drag your cursor to create a text box. Then, enter the text you wish to add in the text box.
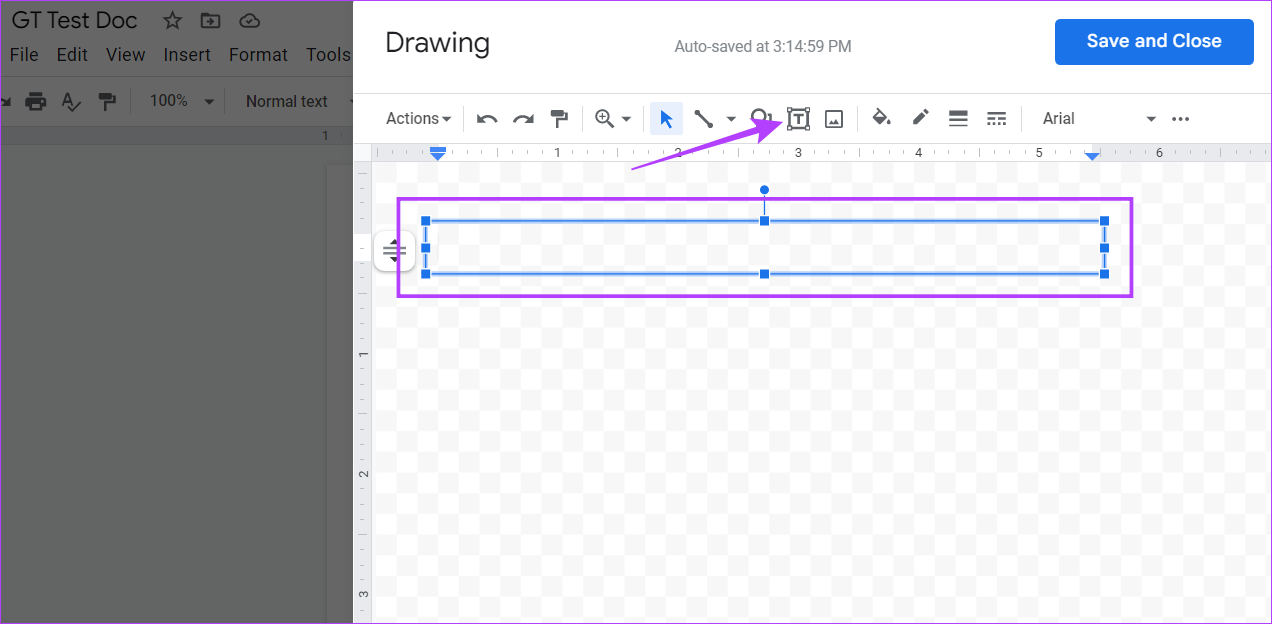
Step 5: Click on ‘Save and Close’ to close the drawing window.

Your Google Docs text box has now been created.
Method 2: Add a Text Box In Google Docs Using Table Cells
A single-celled table can also double as a text box in Google Docs. Additionally, this is the only way to add a text box using the Google Docs mobile app. To do this, open the table tool and select a single table cell. Here’s a step-by-step procedure for the same.
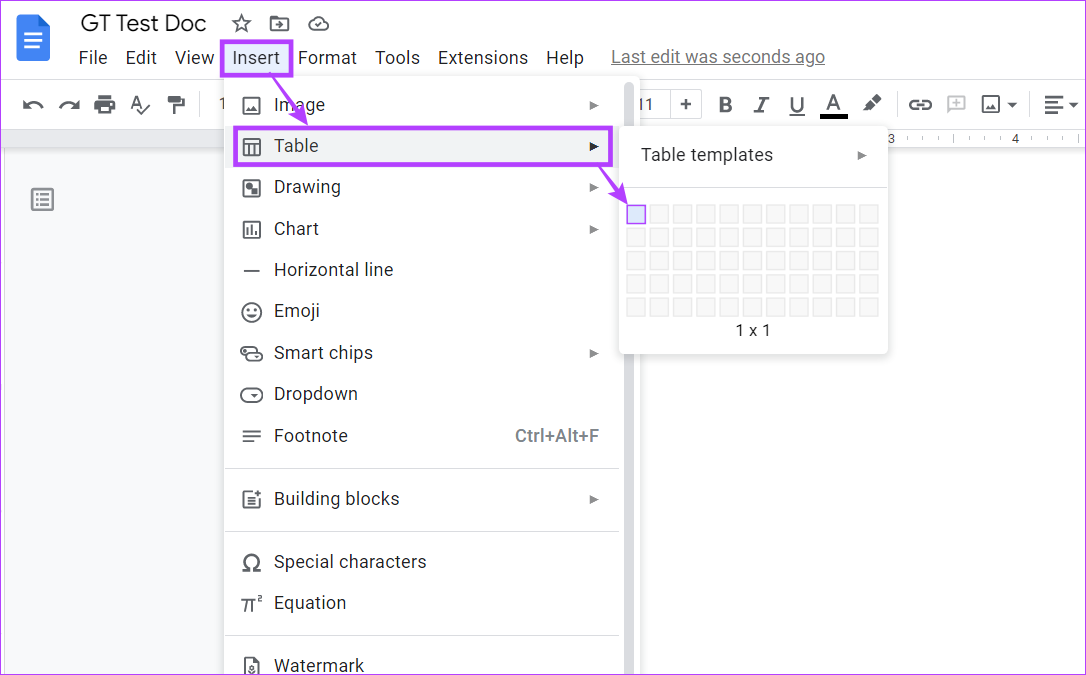
Step 1: In your document, go to the menu bar and click on Insert.
Note: If you’re using an Android or iOS device, tap on the + icon.
Step 2: Click on Table and select a 1×1 single-cell table.
Step 3: Once the table cell appears in the document, use your mouse to adjust the height and width of the box.

Step 4: Then, click anywhere inside the box to start typing.
Tip: Using the options, you can also set the fill color and border color, and change the text color.

A text box has now been added to your Google Docs document.
Method 3: Make a Text Box Using Shapes in Google Docs
Apart from using the Drawing Tool to add text boxes in Google Docs, you can also jazz up your document by adding different shapes in lieu of the traditional text boxes. Just like a text box, you can add text, images, and more to the shapes as well.
Follow these steps to create a Google Docs text box using shapes.
Step 1: Open your document and click on Insert in the menu bar.
Step 2: Here, click on Drawing and select New.
Step 3: From the menu options, click on Shapes.
Step 4: Select the desired shape.

Step 5: After selecting the shape, drag your mouse across the drawing area and release it once the correct size appears on the screen.
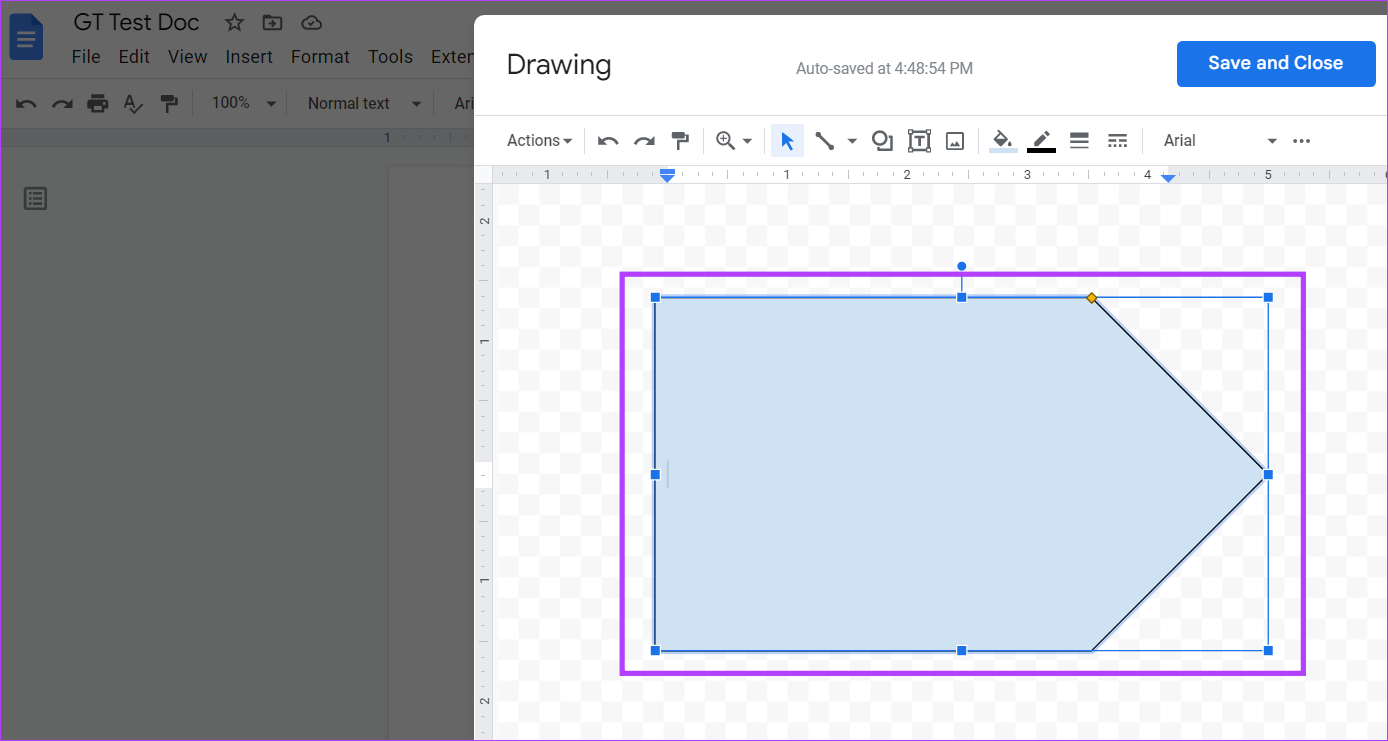
Step 6: Next, double-click anywhere within the shape and add the relevant text.
Step 7: Add as many shapes as you want to the drawing area and once you’re done, click on ‘Save and Close’ to insert the shapes into your document.

Your customized text box will now be added to your document.
How to Insert Images Into a Google Docs Text Box
After adding a text box in Google Docs, you can also insert images into it. Simply click on your text box or shape and add the relevant image using the drawing window. Here’s how to do it.
Step 1: Click anywhere on your Google Docs text box and click on Edit.

Step 2: From the menu options, click on the Image icon.
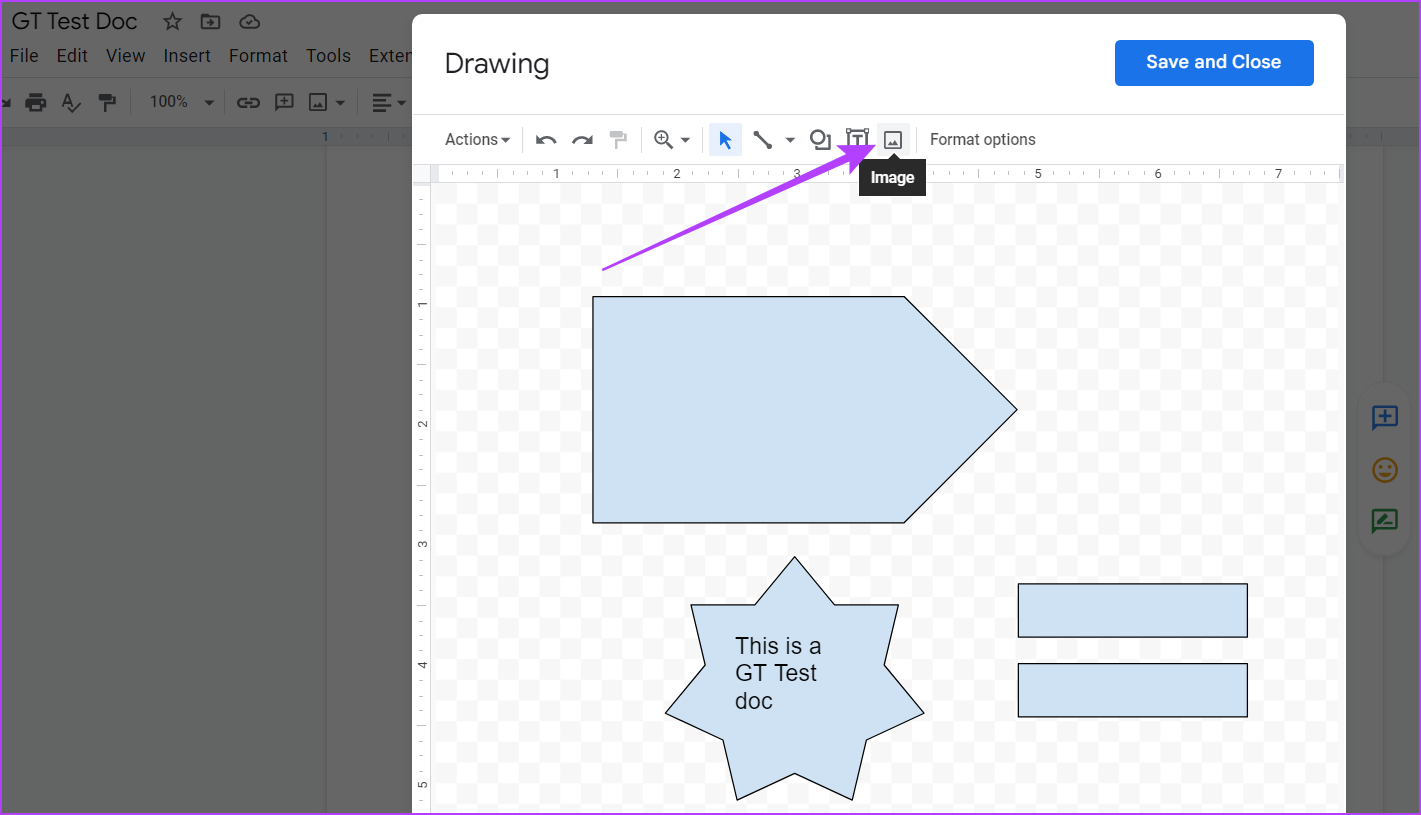
Step 3: Using the relevant options, select the image you want to add to your text box. Then, click on Select.

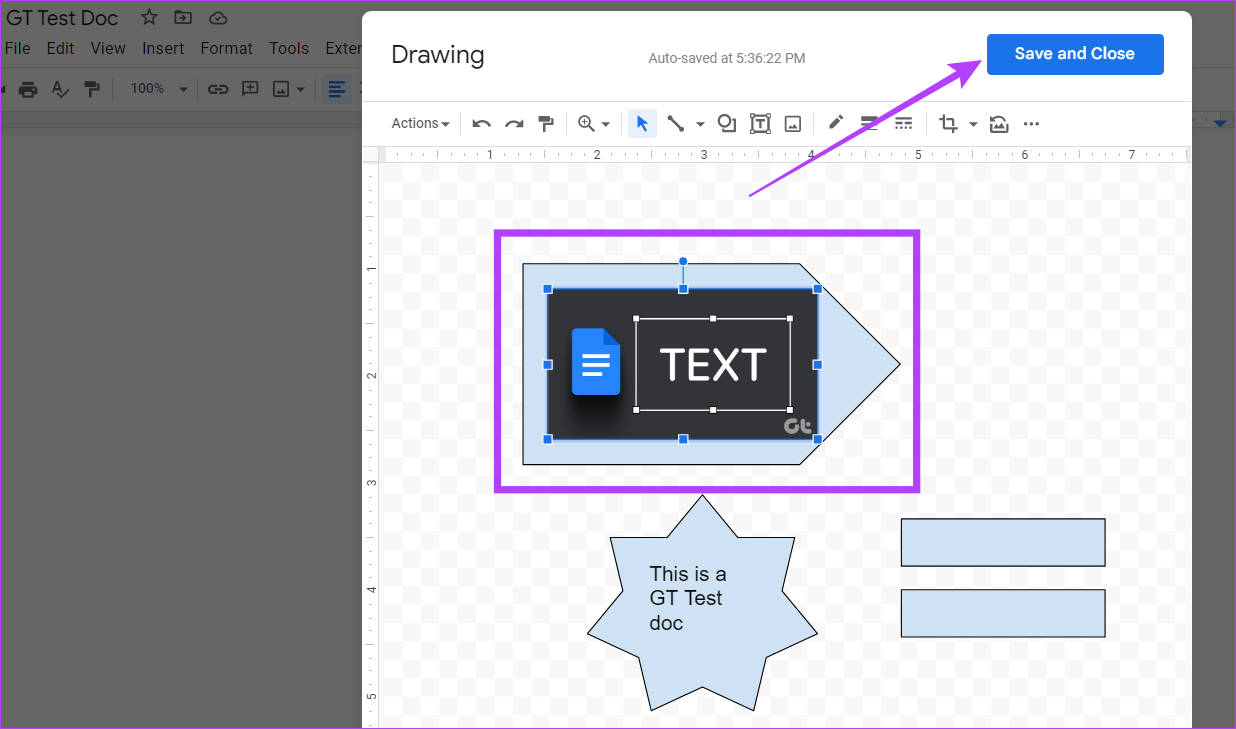
Step 4: Using your mouse, resize and set the image according to your preferences.
Step 5: Once done, click on ‘Save and Close’ to save your changes and exit the drawing window.
Your image has now been added to the Google Docs text box.
How to Customize and Edit a Text Box In Google Docs
After adding your shape or text box to the Google Docs file, you can edit and customize it according to your preferences. Follow the steps below to change the size of the box or shape, delete what you don’t want, and add an additional box or shape, if required.
Step 1: Click on the text box or shape and select Edit.
Tip: You can also use the text menu options to wrap your text box or shape around any other document text.
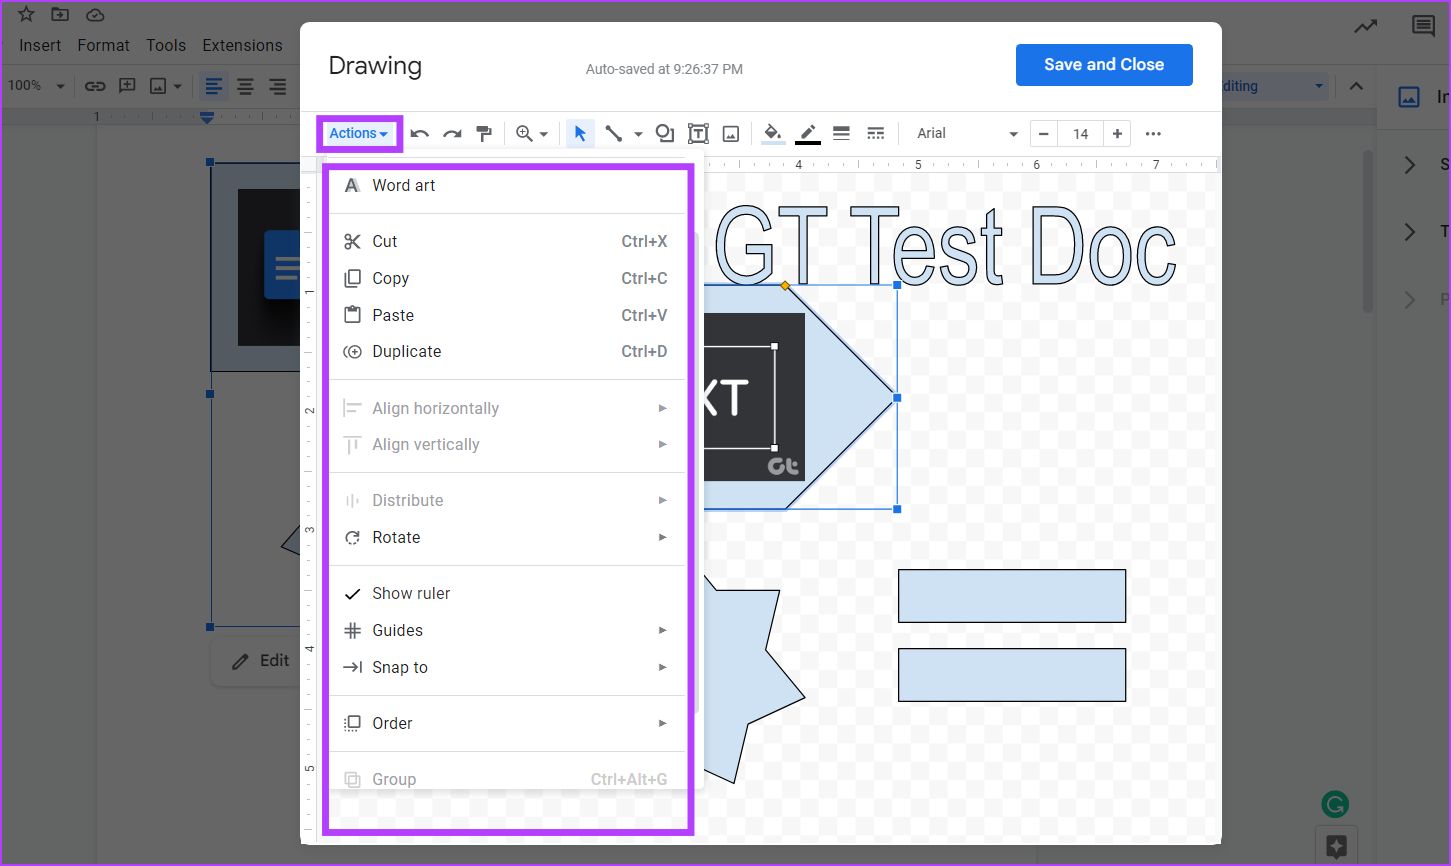
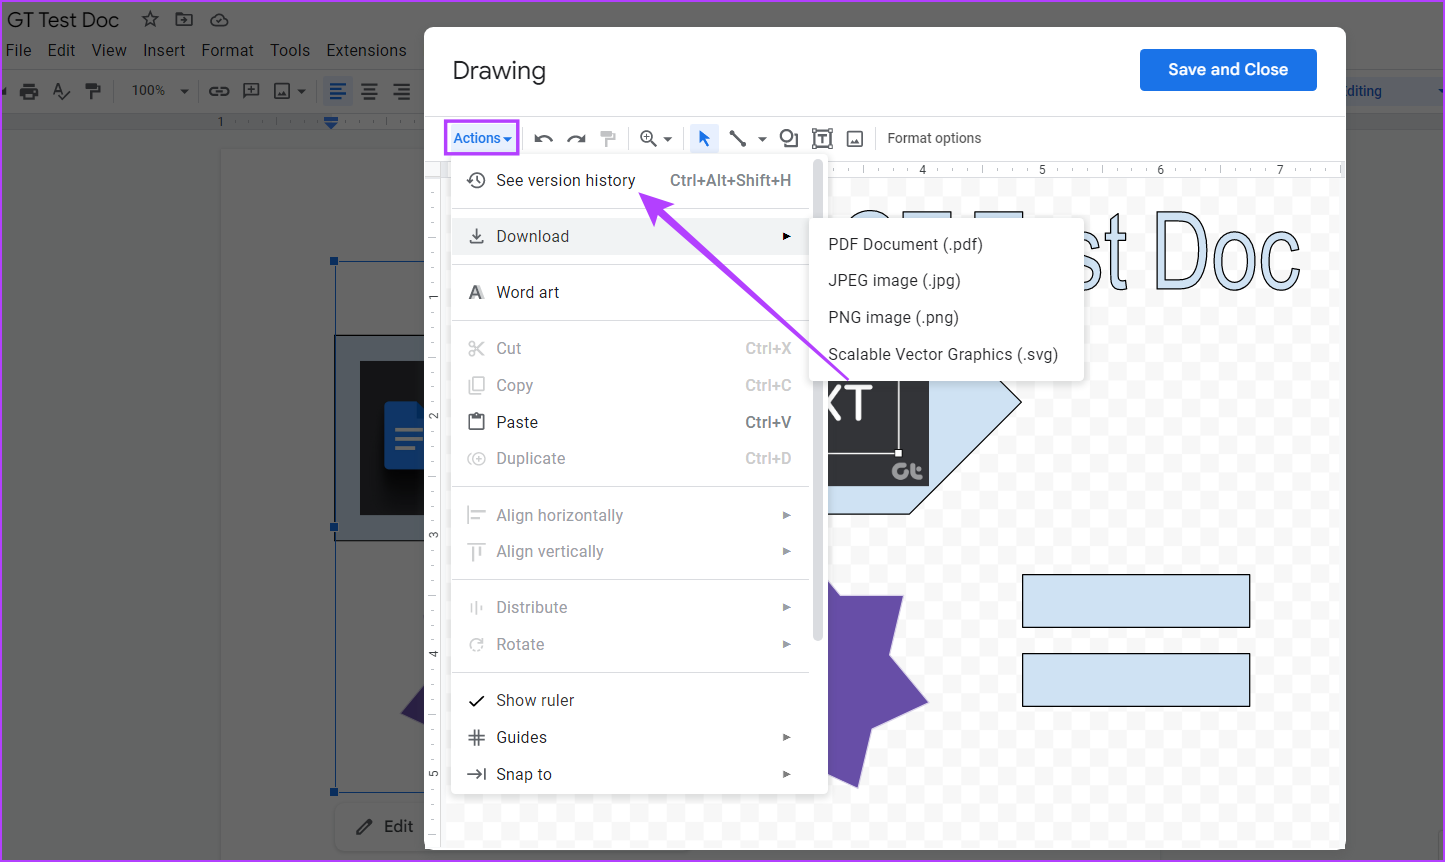
Step 2: Once the drawing window opens, click on the box or shape you want to edit and click on Actions.
Step 3: From the Actions menu, you can choose to add word art, guides, change the order of the text box, and more.
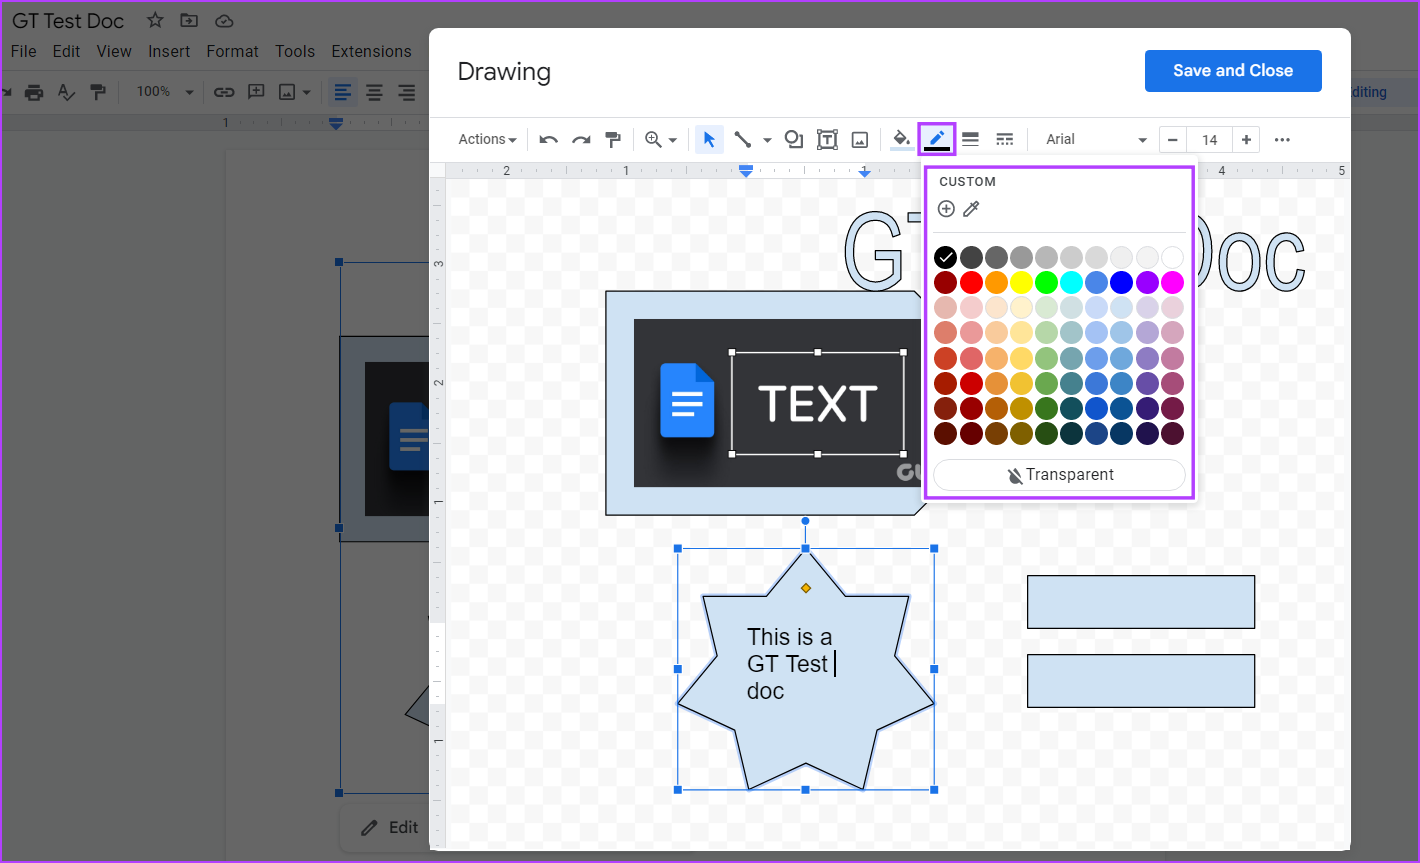
Step 4: As text boxes usually come without a border or background color, click on the pen icon in the menu bar to define the text box border.
Step 5: Now, select the color you want as your text box border color.
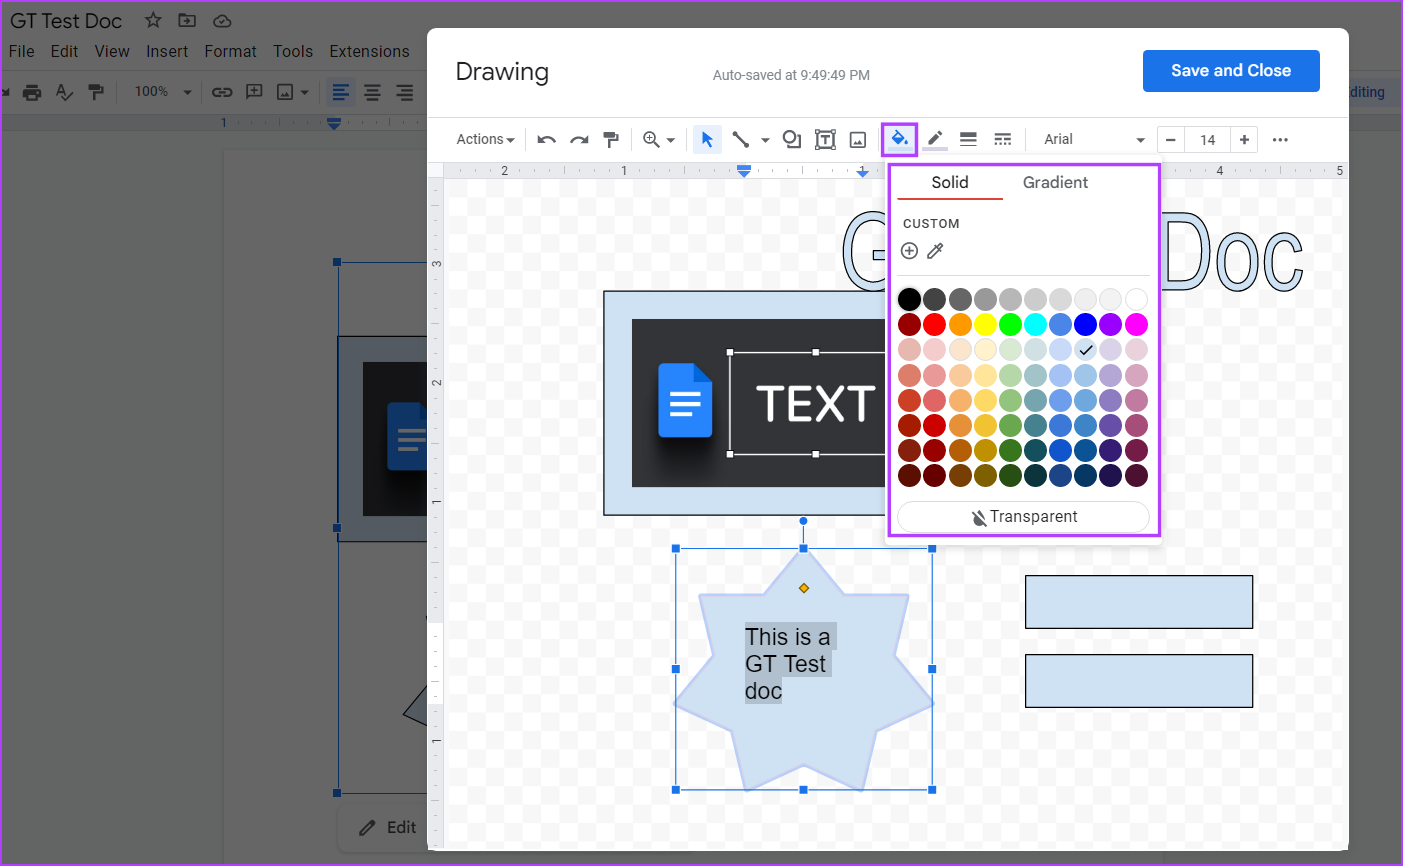
Step 6: To add background color to the text box, click on the paint bucket icon and select your desired background color.
Tip: You can also click on your image and, once the menu options appear, edit it accordingly.
Step 7: Click on More and edit your text font and colors using the menu options.

Step 8: If you’ve deleted any element and wish to restore it, click on Actions and select ‘See version history.’
Step 9: Click on the version you want to restore.

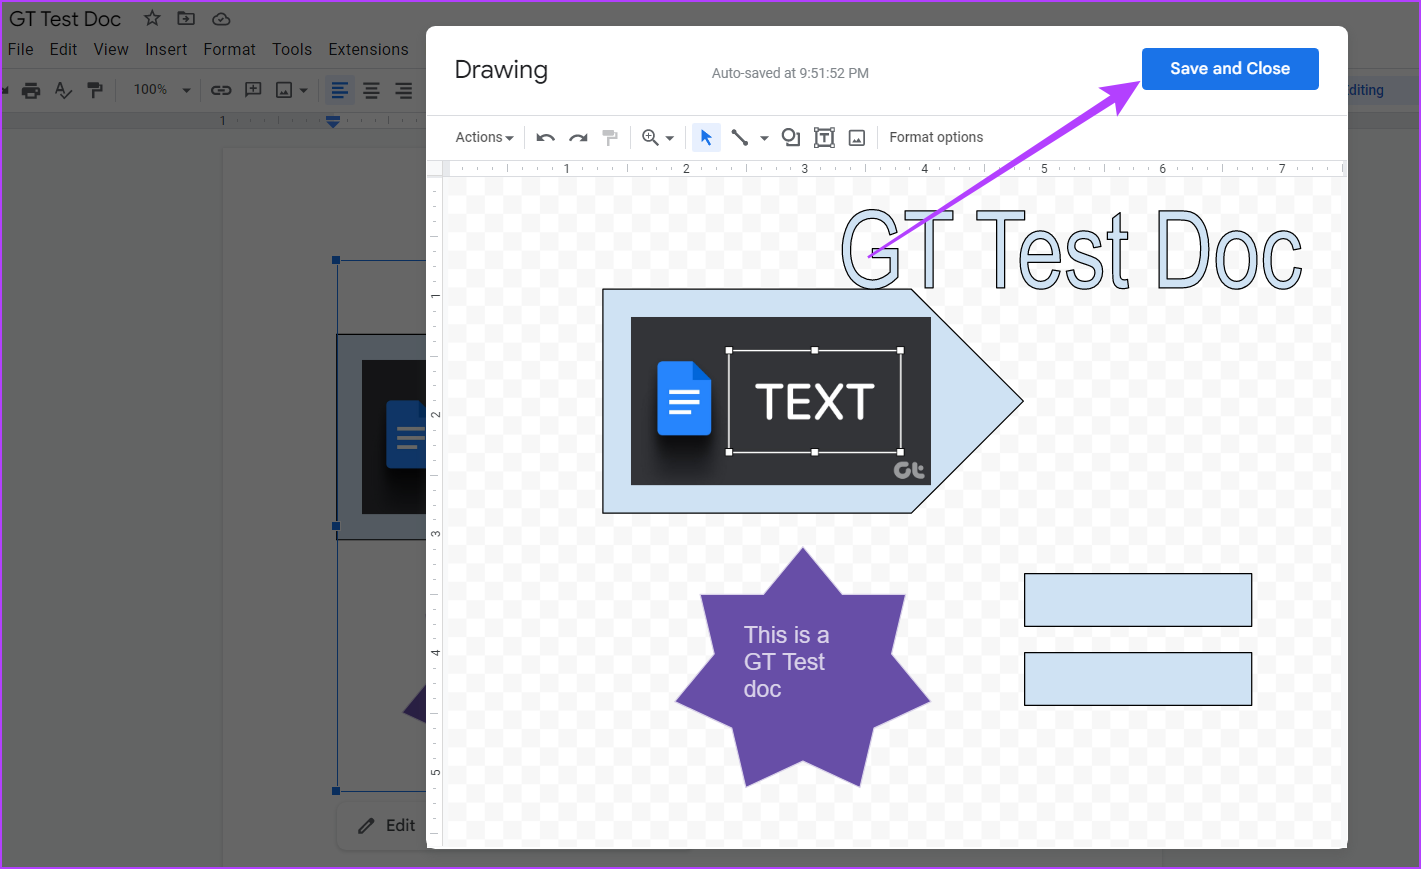
Step 10: Once done, click on ‘Save and Close’.
Once the drawing window closes, the edited version of your Google Docs text box will be visible.
FAQs for Adding a Text Box In Google Docs
Yes, you can add more than one text box in Google Docs.
To recover a deleted text box in Google Docs, go to the menu bar and click on ‘Open version history’. Then, select the document version that has the previously deleted text box and click on ‘Restore this version’. This will recover your deleted text box. However, any changes that have been made after the document version will also be deleted in the process. You can also have a look at our detailed guide on how to check Google Docs version history for more information.
Add That Text Box
Text boxes help you in separating important information in a document. So, we hope that this article was able to help you to customize and add a text box in Google Docs. To clean up your document and get rid of any extra spaces, you can check out our guide on deleting a blank page in Google Docs.
Was this helpful?
Last updated on 06 March, 2023
Read Next
 How to Insert a Date Picker in Google Sheets and Google Docs
Google Sheets and Google Docs provide a free, online alternative to Microsoft Office, along with unique features.
How to Insert a Date Picker in Google Sheets and Google Docs
Google Sheets and Google Docs provide a free, online alternative to Microsoft Office, along with unique features.
 8 Ways to Insert Emojis in Google Docs
Method 1: Using the Menus Search Feature You can add an emoji to your Google Docs file with a simple keyboard shortcut.
8 Ways to Insert Emojis in Google Docs
Method 1: Using the Menus Search Feature You can add an emoji to your Google Docs file with a simple keyboard shortcut.
 4 Ways to Insert Images in Google Docs
Method 1: Add Photos From Camera Roll to Google Docs You can add photos in Google Docs from the Camera Roll of your iPhone or Android phone.
4 Ways to Insert Images in Google Docs
Method 1: Add Photos From Camera Roll to Google Docs You can add photos in Google Docs from the Camera Roll of your iPhone or Android phone.
 How to Add, Customize and Delete a Text Box in Microsoft Word
Like in Microsoft PowerPoint, you can add a text box to a Microsoft Word document.
How to Add, Customize and Delete a Text Box in Microsoft Word
Like in Microsoft PowerPoint, you can add a text box to a Microsoft Word document.
 How to Insert and Edit Pictures in Google Docs on Mobile and PC
How to Insert a Picture in Google Docs on PC Drag and drop: Open the Google Docs document and place your cursor where you want to insert the image.
How to Insert and Edit Pictures in Google Docs on Mobile and PC
How to Insert a Picture in Google Docs on PC Drag and drop: Open the Google Docs document and place your cursor where you want to insert the image.
 5 Tips to Insert Special Characters in Google Docs
Tip 1: Open Special Characters Library Faster To access the Insert Special Characters box in Google Docs, you usually need to follow two steps: selecting the Insert menu and clicking
5 Tips to Insert Special Characters in Google Docs
Tip 1: Open Special Characters Library Faster To access the Insert Special Characters box in Google Docs, you usually need to follow two steps: selecting the Insert menu and clicking
 How to Insert Endnotes and Footnotes in Google Docs
How to Insert a Footnote in Google Docs On Web Step 1: Go to Google Docs and open the file where you want to add the endnotes or footnotes.
How to Insert Endnotes and Footnotes in Google Docs
How to Insert a Footnote in Google Docs On Web Step 1: Go to Google Docs and open the file where you want to add the endnotes or footnotes.
The article above may contain affiliate links which help support Guiding Tech. The content remains unbiased and authentic and will never affect our editorial integrity.