Method 1: How to Add Arrows in Word Using Shapes
On PC or Mac
Step 1: Open the Word document where you want to add an arrow.
Step 2: Insert the image or text in the document.
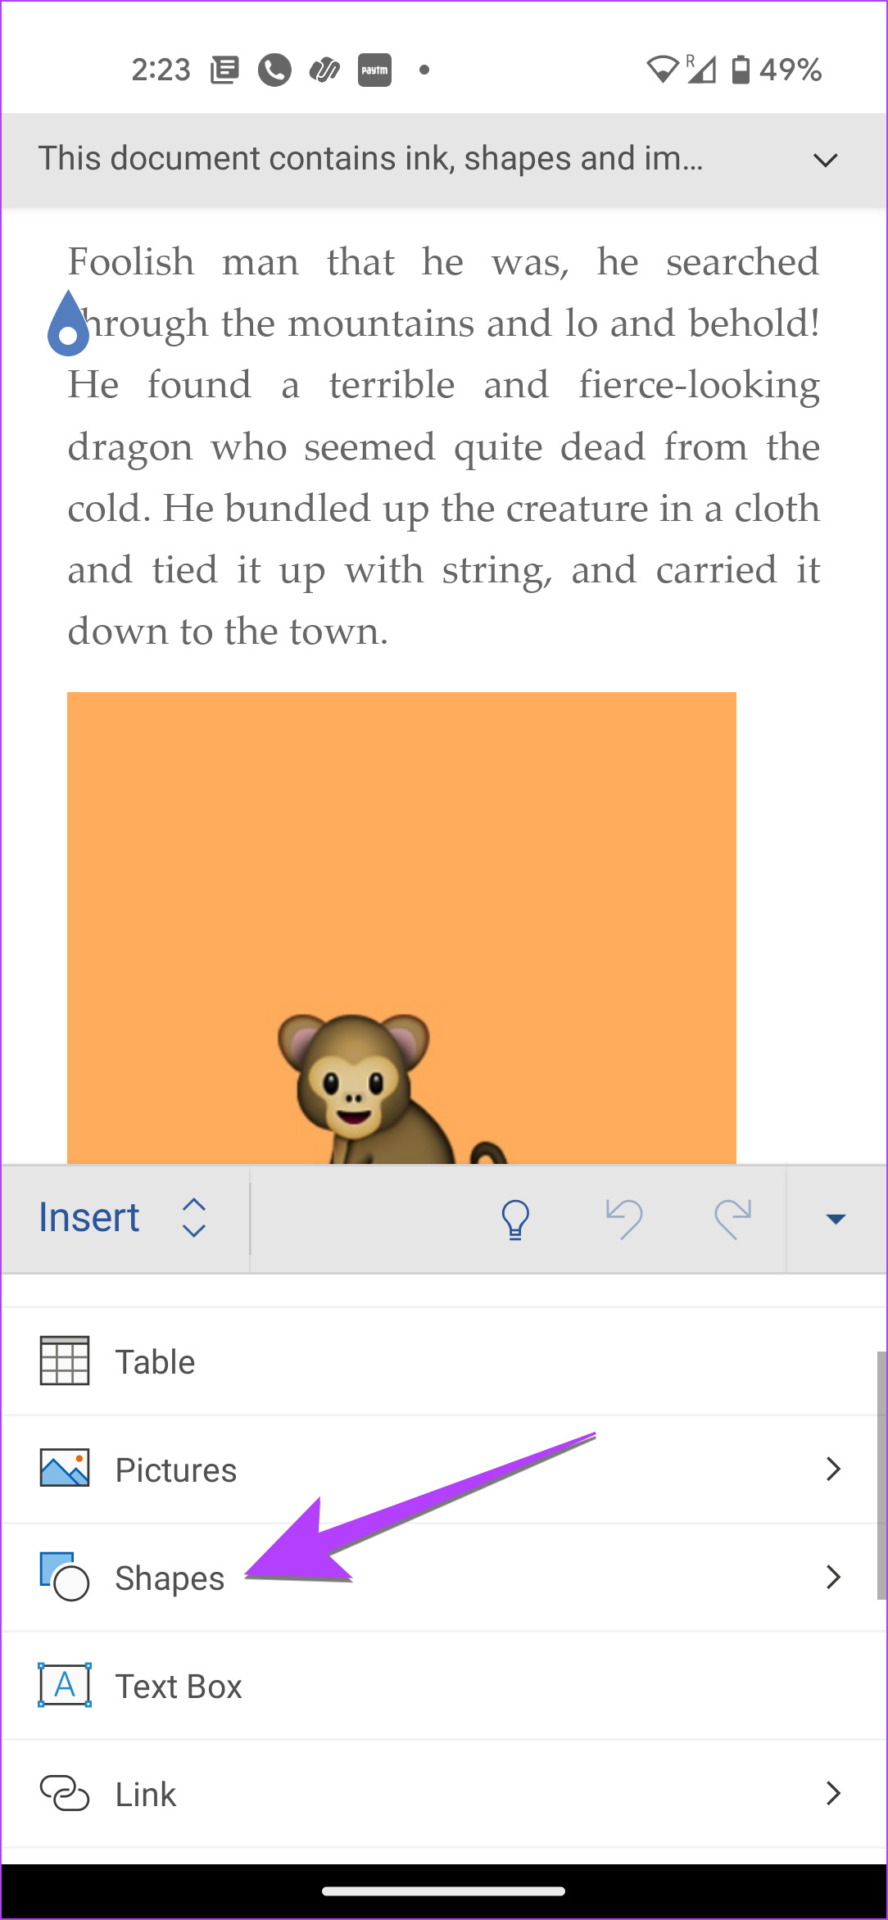
Step 3: Now, click on the Insert option in the top menu and go to Shapes.

Step 4: Select the simple arrow from the Line section. If you want a solid arrow, select the preferred arrow style from Block Arrows.
Once you select the desired arrow style, a pointer icon will replace your mouse pointer.
Step 5: Now, hold the mouse button and draw an arrow on the desired area or picture in the document. Release the mouse button to finish the arrow.
Pro Tip: To draw straight arrows or at a certain angle, hold the Shift button while drawing the arrow.
On Mobile
Step 1: Launch the Word app and open the document where you want to add an arrow.
Step 2: Tap on the Pencil (Edit) icon at the top to edit the Word document.


Step 3: Tap on the small up arrow at the bottom-right corner.
Step 4: Tap on Home and select Insert.

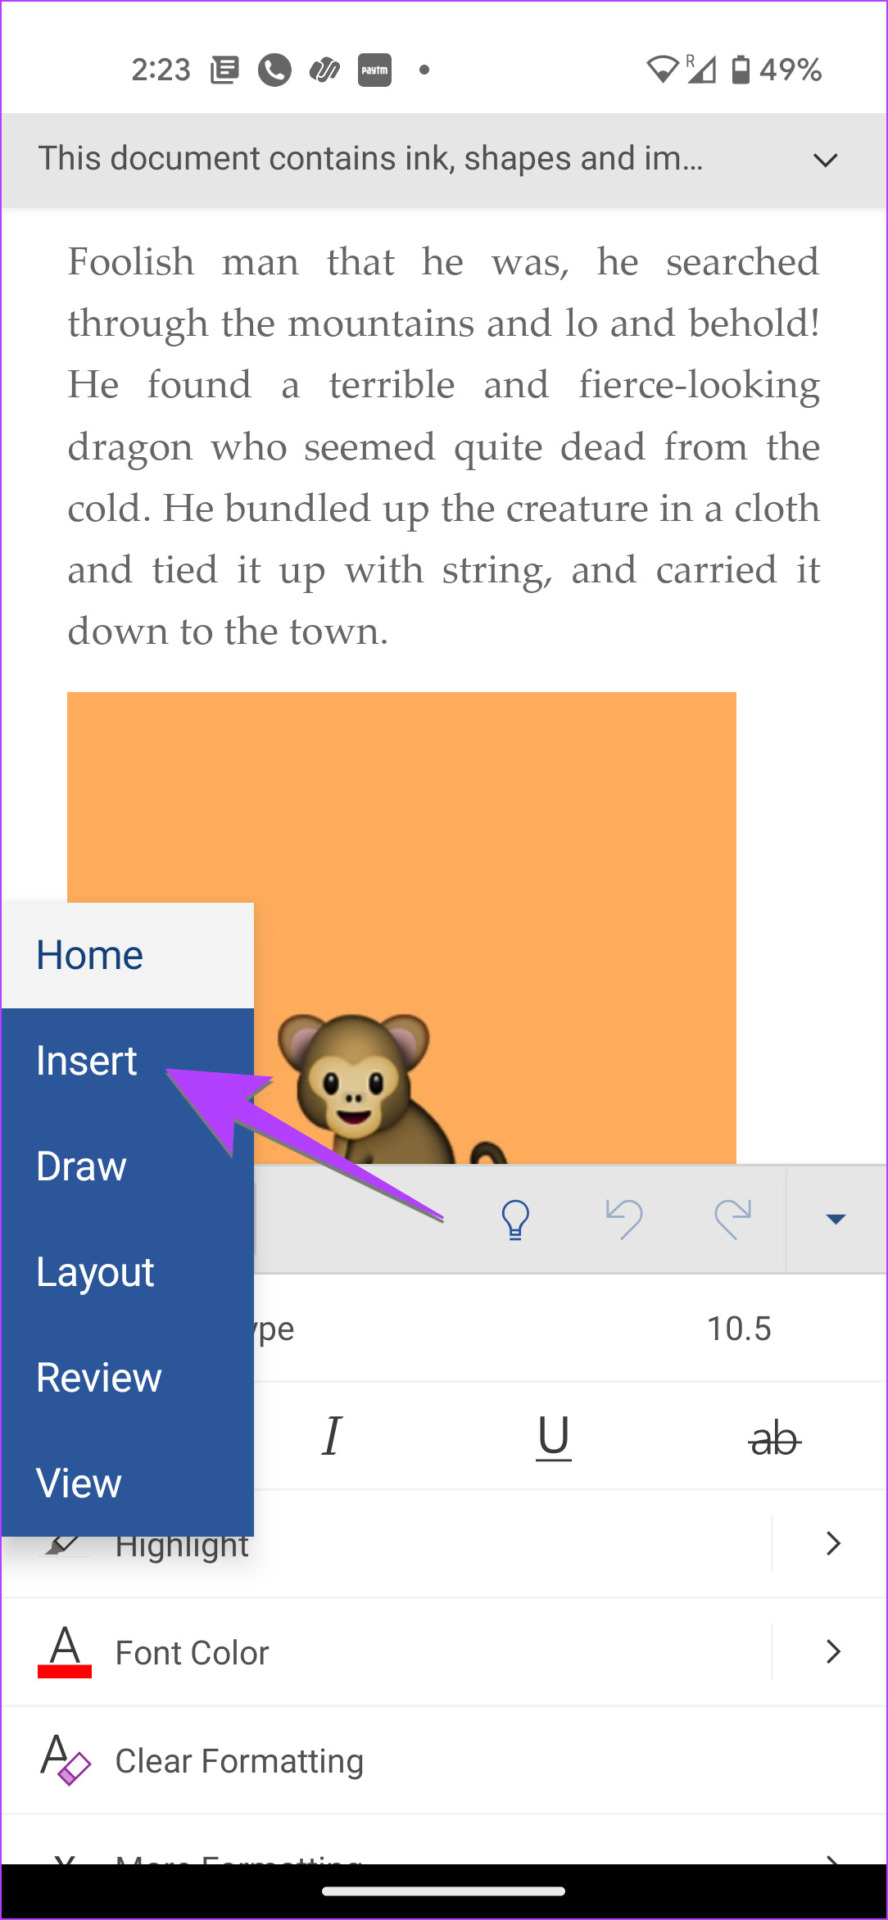
Step 5: Go to Shapes and select the preferred arrow to add it to your document.
Once done, if you want, you can use the tools at the bottom to customize the arrow color and style. Or, touch and hold the arrow and drag it to change its position.
Method 2: How to Insert an Arrow Symbol in Word
Step 1: In your Word document, click on the Insert tab in the top bar.
Step 2: Click on the Symbol present on the right side, followed by More symbols.

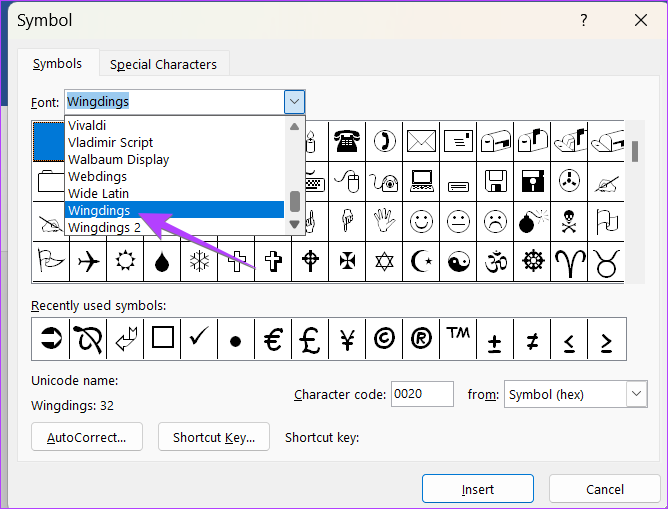
Step 3: The Symbol window will show up. Select Wingdings from the Font drop-down box.
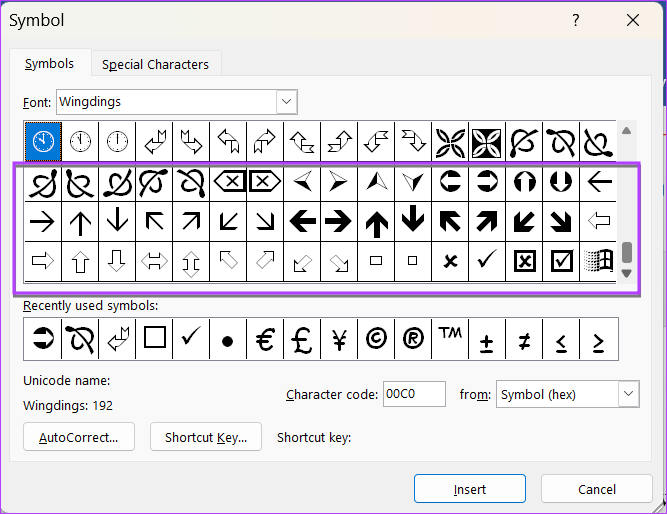
Scroll down in the Wingdings symbol section, and you will find different arrow symbols.
Step 4: Select the one that you want to use and press the Insert button. Or, double-click on the arrow symbol to add an arrow to your Word document.
Method 3: How to Make an Arrow Symbol in Word Using Code
If you want to insert an arrow symbol regularly in your Word document, you can add it by entering its code. That way, you don’t need to repeat the steps mentioned above again and again.
Note: Ensure the Number pad is enabled on your keyboard for this method. If you don’t have a number pad on the keyboard, use the on-screen keyboard.
Step 1: In your Word document, click on the Insert tab in the top bar.
Step 2: Click on the Symbol present on the right side, followed by More symbols.
Step 3: The Symbol window will show up. Select Wingdings from the Font drop-down box.
Step 4: Find the arrow that you want to use and note down its character code and also whether the character is Symbol (Hex) or Symbol (Decimal). If it’s Hex, it’s a Unicode symbol, and if it’s Decimal, that’s an ASCII.
Step 5: Close the Symbol window and place the cursor where you want to insert the arrow symbol.
Step 6: Now, to convert the character code into the relevant symbol, which in our case is an arrow, you need to press the combination of appropriate buttons.
For a Unicode symbol, type the code that you noted in Step 4 and press Alt + X. For the ASCII symbol, hold down the ALT button and type the code from Step 4.
Tip: Learn how to insert special characters in Google Docs
Method 4: Type an Arrow in Word Using Keyboard Shortcuts
Another way to create an arrow in Word is by using keyboard shortcuts. Basically, you need to type some signs like hyphens, equal to, less than, etc., to make an arrow.
Here’s the list of arrows that you can make using keyboard shortcuts:
- Type two hyphens followed by a More than sign to make a right arrow (–>).
- Type a Less than sign followed by two hyphens to make a left arrow ( <– ).
- Type a Less than sign followed by one Equal sign and a More than sign to insert a double arrow (<=>).
- Type two Equal to signs followed by more than (greater than) sign to insert a bold right arrow (==>).
- Type a Less than sign followed by two equal to signs to insert a bold left arrow (<==).
Pro Tip: To type the symbols, instead of converting them to an arrow, press the Backspace button on the keyboard.
If the keyboard shortcuts are difficult to remember, you can edit and create your custom arrow shortcuts. Go to File > Options > Proofing > Autocorrect on a Windows computer. Or, Word > Preferences > AutoCorrect on Mac. Find the arrow symbol, select it, and replace the shortcut.
Was this helpful?
Last updated on 24 July, 2024
1 Comment
Leave a Reply
Read Next
 3 Ways to Insert an Excel Spreadsheet into a Word Document
Method 1: Using the Insert Table Option The Insert tab on the Word Ribbon has different options, including an Insert Table button, which can be used to insert an Excel
3 Ways to Insert an Excel Spreadsheet into a Word Document
Method 1: Using the Insert Table Option The Insert tab on the Word Ribbon has different options, including an Insert Table button, which can be used to insert an Excel
 How to Insert Videos in a Microsoft Word Document
How to Insert an Online Video in Microsoft Word Microsoft Word for desktop allows you to insert videos from Vimeo, YouTube, and SlideShare.
How to Insert Videos in a Microsoft Word Document
How to Insert an Online Video in Microsoft Word Microsoft Word for desktop allows you to insert videos from Vimeo, YouTube, and SlideShare.
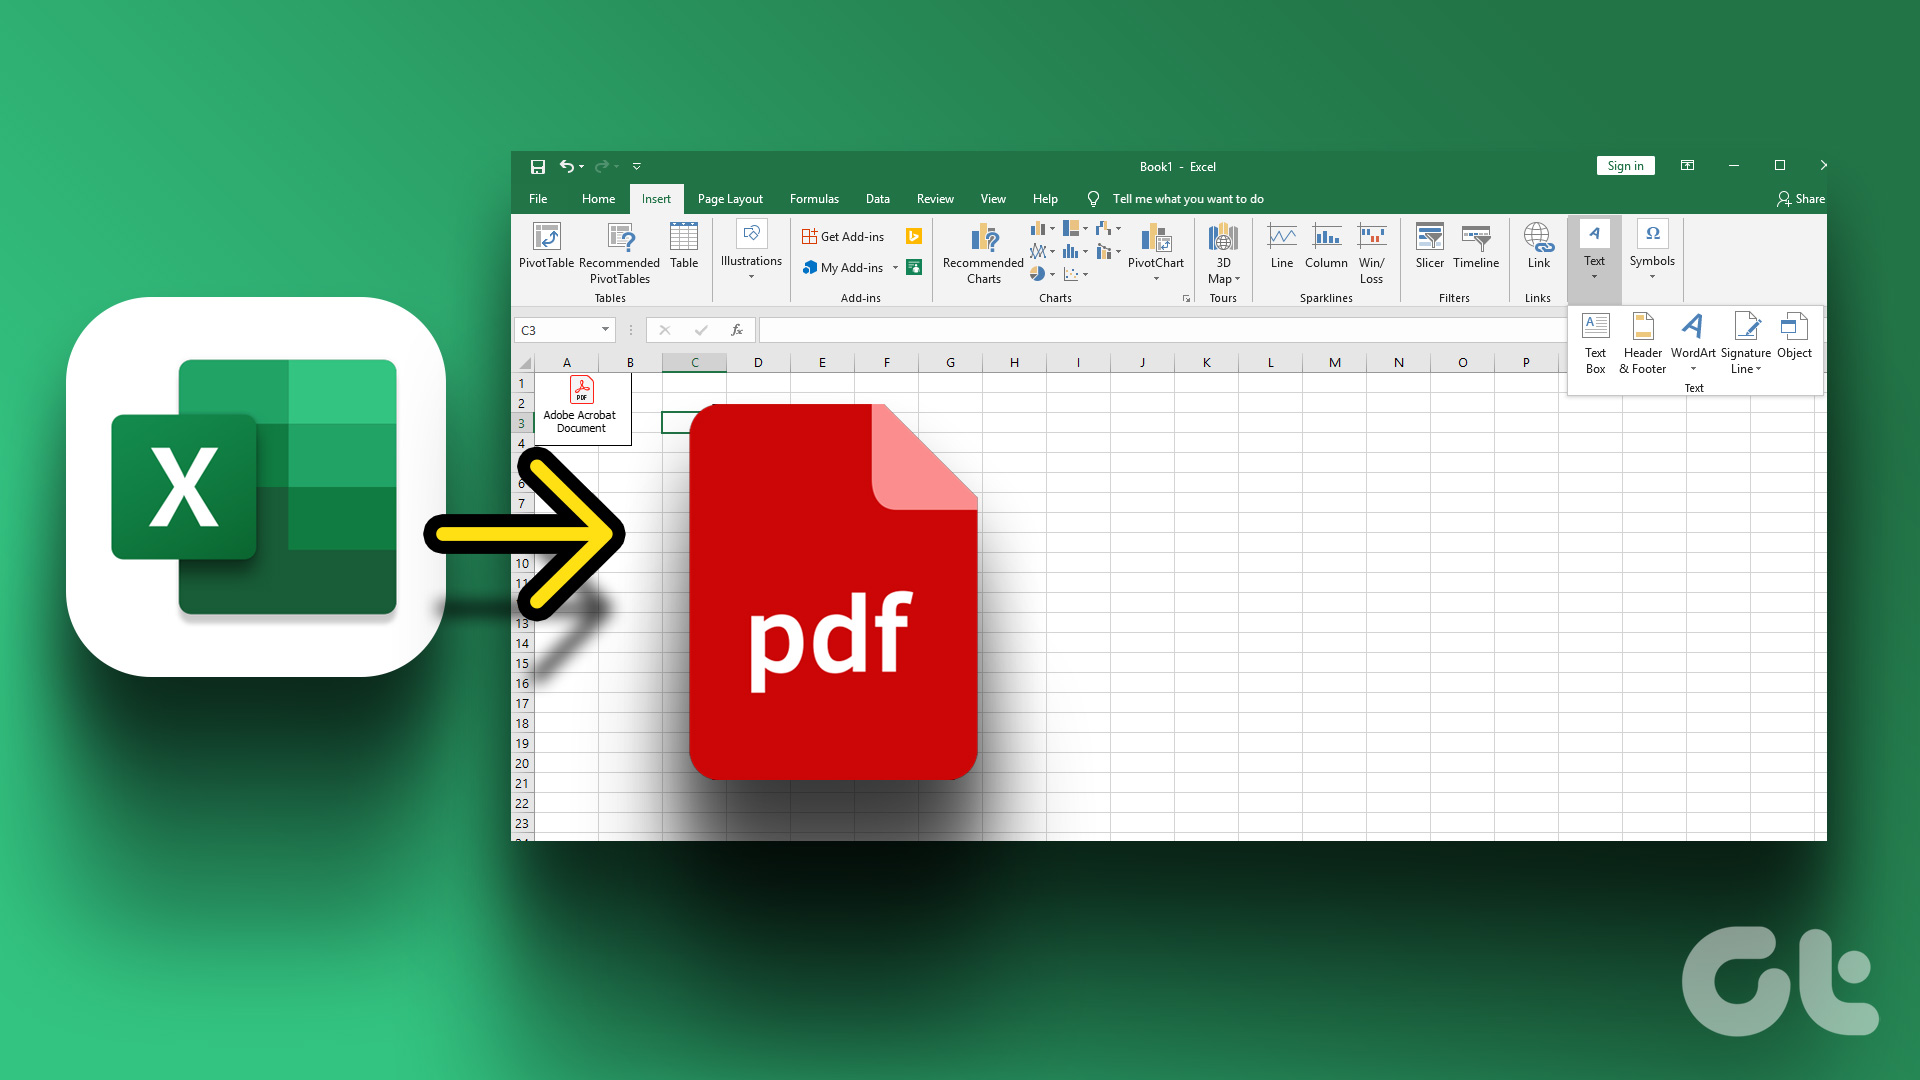 3 Ways to Insert a PDF Document into an Excel Spreadsheet on Windows
Method 1: Insert a PDF Document in Excel Spreadsheet Here's how you can insert a PDF into Excel and make sure the document is visible and easily accessible on the
3 Ways to Insert a PDF Document into an Excel Spreadsheet on Windows
Method 1: Insert a PDF Document in Excel Spreadsheet Here's how you can insert a PDF into Excel and make sure the document is visible and easily accessible on the
 How to Insert a Scanned Document in Google Docs
Types of Attachments Supported by Google Docs Besides charts, tables, and drawings, you can add images in all formats, such as JPG, PNG, GIFs, etc., to Docs.
How to Insert a Scanned Document in Google Docs
Types of Attachments Supported by Google Docs Besides charts, tables, and drawings, you can add images in all formats, such as JPG, PNG, GIFs, etc., to Docs.
 5 Ways to Change Background in a Word Document
Method 1: Using a New Background Color Changing the background color of your Word document is a little similar to the process you would take when changing the font color.
5 Ways to Change Background in a Word Document
Method 1: Using a New Background Color Changing the background color of your Word document is a little similar to the process you would take when changing the font color.
 5 Ways to Insert Tick Symbol in Word and Other Office Apps
Method 1: Using Emoji Panel Windows and Mac provide an emoji panel to access multiple emojis and symbols.
5 Ways to Insert Tick Symbol in Word and Other Office Apps
Method 1: Using Emoji Panel Windows and Mac provide an emoji panel to access multiple emojis and symbols.
 How to Lock Parts of a Microsoft Word Document
Method 1: Using Restrict Editing Feature As the name suggests, this feature lets you set up editing restrictions for your Word document.
How to Lock Parts of a Microsoft Word Document
Method 1: Using Restrict Editing Feature As the name suggests, this feature lets you set up editing restrictions for your Word document.
 How to Convert WordPad Document to Microsoft Word
Method 1: Using WordPad Step 1: Open the WordPad document you want to convert to Docx.
How to Convert WordPad Document to Microsoft Word
Method 1: Using WordPad Step 1: Open the WordPad document you want to convert to Docx.
The article above may contain affiliate links which help support Guiding Tech. The content remains unbiased and authentic and will never affect our editorial integrity.


Hi,
Question.. with which program were the purple, comet-shaped arrows made?
I like the conical shape of these arrows…