How to Create a Windows 11 USB Recovery Drive
Microsoft bundles the Recovery Drive app in Windows 11 to help you create a recovery disk. You can use any USB drive, but Microsoft recommends a minimum storage capacity of 16GB. But before creating a recovery drive, back up all the data on the USB drive to your computer or another external drive.
Step 1: Plug in the bootable USB recovery drive into your Windows computer.
Step 2: Press the Windows key to open the Start menu, type Recovery Drive in the search bar, and click on Open.
Step 3: The User Account Control window will pop up. Click on Yes to launch the tool.

Step 4: Select the Back up system files to the recovery drive checkbox and click on Next. It can take time to list all the available drives on your system.

Step 5: The tool will list the available USB drives on your system and notify you about the capacity of the USB drive you will need for it. Select the correct one and click on Next.

Step 6: You will see a warning about deleting all the data on the selected USB drive. Click on Create.

Step 7: Patiently wait for the process to complete. Then, click on Finish to close the Recovery Drive window.
How to Use a USB Recovery Drive in Windows 11
When your Windows PC cannot start normally, or you cannot access the lock screen or boot to the desktop, you can access the Windows Recovery Environment, which offers multiple tools to fix a Windows installation.
Step 1: Plug the recovery drive into the computer.
Step 2: Power on the computer and repeatedly press the designated Function key or Esc key to enter the boot devices menu.
Note: The F-keys to access BIOS and boot devices menu vary with each OEM. So, check the correct Function key for your system beforehand.
Step 3: After the boot devices menu launches, use the arrow keys to select the recovery drive. Press Enter to boot using the recovery drive.

Step 4: Wait a few minutes for the USB drive to boot to the Language selection page. Click on a language to select it.

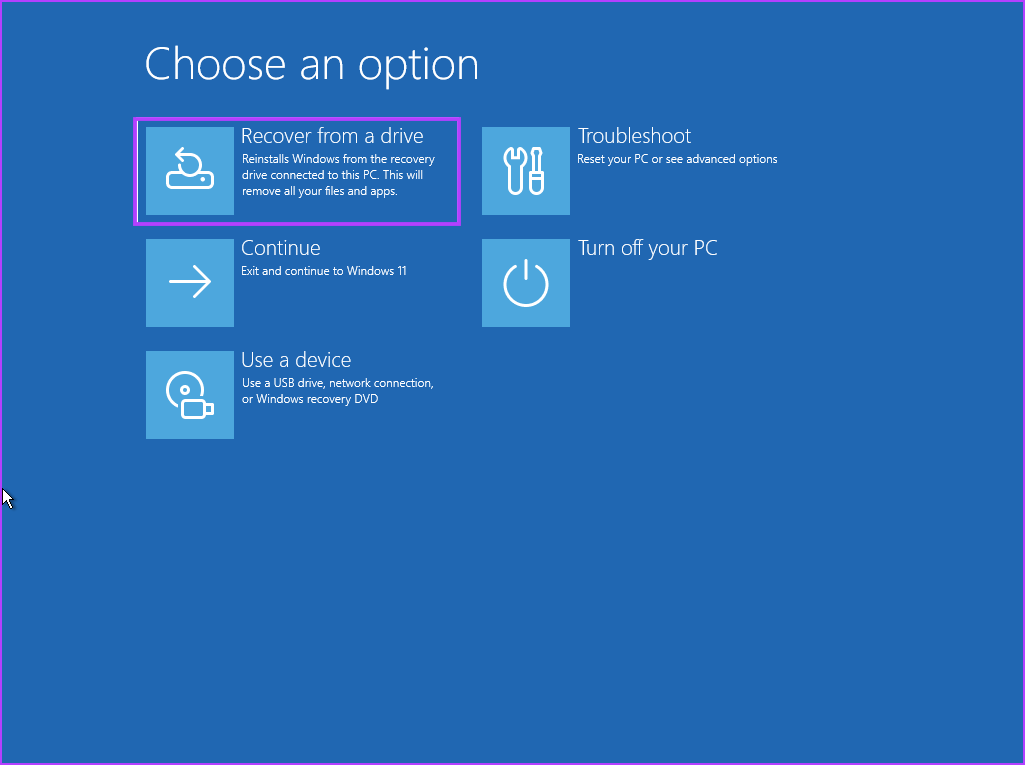
Step 5: On the Choose an option page, click on Troubleshoot.

Step 6: Try out Startup Repair, Uninstall Updates, System Restore, and other available tools to fix your system.
Step 7: If all these efforts fail, click the Back button. Now, click the Recover from a drive option.
Step 8: Click on Just remove my files.
Step 9: Lastly, click on Recover and follow the on-screen instructions to reinstall Windows.

After the Windows 11 reinstallation completes, set up your preferences (language, region, security, and tracking) like you would during a clean install.
FAQs
Microsoft recommends using a 16GB USB drive to create a recovery drive in Windows 11, but that recommendation doesn’t apply to everyone. When we created a recovery drive for a fairly old Windows 11 installation, it suggested using a 32GB drive.
The recovery drive consumed over 15GB of space due to the OEM driver’s backup. A 16GB USB drive will fall short of storage space, so you shouldn’t ignore the tool’s recommendation. Also, the USB drive must be in FAT32 format.
Creating a recovery drive takes one to two hours. We used a USB 3.2 Gen 1 drive and an NVMe Gen 4 SDD, and it took us that much time. It is a CPU-intensive process, so if you have a low-spec PC, it can take more time.
You can create a Windows 11 recovery USB from another computer, but it might not work with your PC. We tried it on a different PC, and it encountered an error and didn’t allow us to perform the reinstallation. This is because the recovery drive contains Windows installation files and OEM drivers, which won’t work with another system.
Another issue is that if the storage capacity of the C drive of another PC is smaller than that of the PC you used to create the Recovery Drive, it won’t allow you to reinstall Windows. So, you must use the Recovery Drive only on your PC.
Was this helpful?
Last updated on 31 May, 2024
Read Next
 5 Ways to Fix ‘We Can’t Create a Recovery Drive’ Error in Windows 11
Basic Fixes Close and restart the Recovery Drive app: Launch the Task Manager app by pressing Ctrl + Shift + Esc.
5 Ways to Fix ‘We Can’t Create a Recovery Drive’ Error in Windows 11
Basic Fixes Close and restart the Recovery Drive app: Launch the Task Manager app by pressing Ctrl + Shift + Esc.
 Reviewing the Free EaseUS Data Recovery Software For Windows
Till date, we have talked about quite a few file recovery tools that help us to restore files that are deleted accidentally from our computer.
Reviewing the Free EaseUS Data Recovery Software For Windows
Till date, we have talked about quite a few file recovery tools that help us to restore files that are deleted accidentally from our computer.
 GT Explains: Difference Between Recovery Drive and System Image in Windows 10
Windows offers multiple ways to take a backup of your precious data on your computer.
GT Explains: Difference Between Recovery Drive and System Image in Windows 10
Windows offers multiple ways to take a backup of your precious data on your computer.
 A Complete Guide to Fixing Android Recovery Mode Not Working
When was the last time your Android phone struggled to boot into Recovery mode?
A Complete Guide to Fixing Android Recovery Mode Not Working
When was the last time your Android phone struggled to boot into Recovery mode?
 A Guide to Fixing Mac Not Connecting to Wi-Fi in macOS Recovery
If your Mac acts up or keeps crashing, the built-in Recovery mode can be useful.
A Guide to Fixing Mac Not Connecting to Wi-Fi in macOS Recovery
If your Mac acts up or keeps crashing, the built-in Recovery mode can be useful.
 How to Create or Merge Disk Partitions in Windows 11
How to Create Hard Drive Partitions on Windows 11 Windows offers the Disk Management utility to undertake any storage-related tasks on your Windows PC.
How to Create or Merge Disk Partitions in Windows 11
How to Create Hard Drive Partitions on Windows 11 Windows offers the Disk Management utility to undertake any storage-related tasks on your Windows PC.
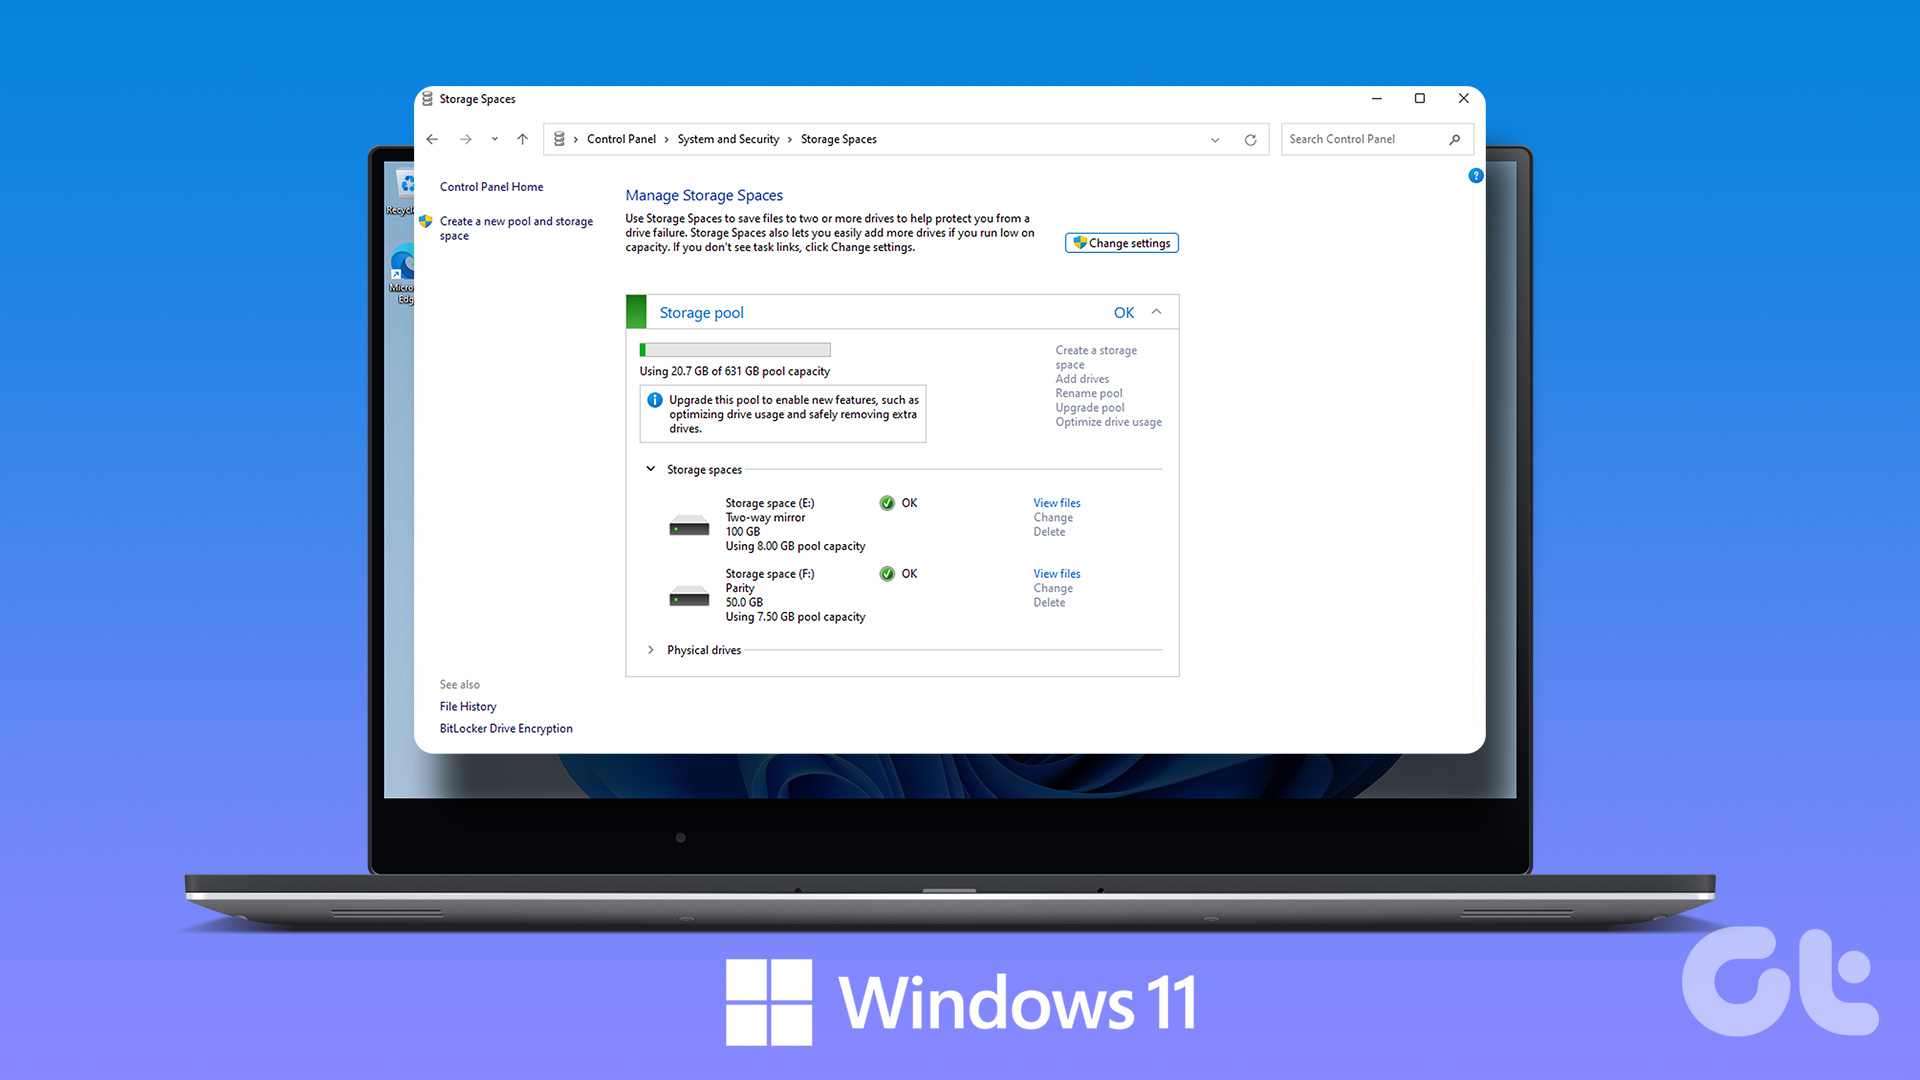 How to Create and Use the Storage Spaces Feature on Windows 11
What Are Storage Spaces in Windows 11 and Why Should You Create One Storage Spaces lets you create an array or group of two or more physical hard drives to create
How to Create and Use the Storage Spaces Feature on Windows 11
What Are Storage Spaces in Windows 11 and Why Should You Create One Storage Spaces lets you create an array or group of two or more physical hard drives to create
 How to Create Folders and Move Emails in Outlook on Mac and Windows
Microsoft Outlook app for Mac and Windows lets you manage email conversations and calendar events.
How to Create Folders and Move Emails in Outlook on Mac and Windows
Microsoft Outlook app for Mac and Windows lets you manage email conversations and calendar events.
The article above may contain affiliate links which help support Guiding Tech. The content remains unbiased and authentic and will never affect our editorial integrity.

