Create Print to PDF Button Using Quick Access Toolbar
The Quick Access toolbar for Microsoft Office apps can also be used to enable the Print to PDF function in Microsoft Excel. You can print any file as a PDF. That said, you’ll need a PDF reader program like Adobe Acrobat Reader to open your PDF file and its layout properly.
Step 1: Open Microsoft Excel and go to your spreadsheet.
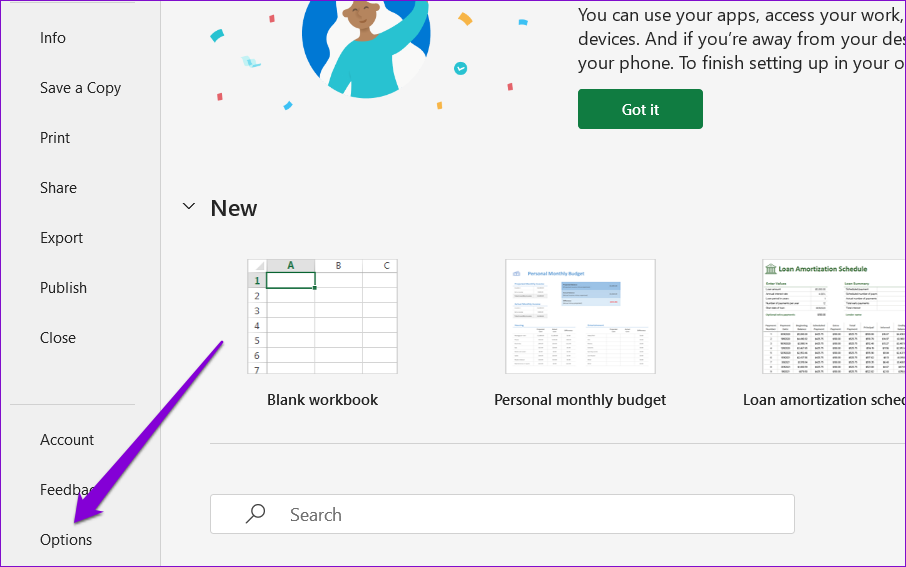
Step 2: Click on File from the top-left corner and select Options at the bottom-left menu.
Step 3: Click on the Quick Access Toolbar in the Excel Options window.
Step 4: Click the Popular Commands drop-down menu and select All Commands.

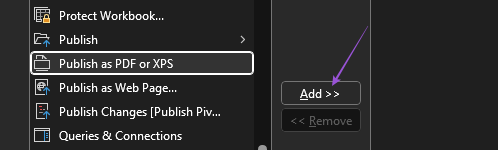
Step 5: Scroll down and select Publish as PDF or XPS.
Step 6: Click the Add button to copy the command. Then, click on Save at the bottom right side to confirm.
After you close the window, you will see the Print to PDF icon in the Quick Access Toolbar.

Step 7: Click the icon after selecting the cells you want to be printed as the PDF.
Step 8: Enter the file name, select the location for saving your PDF file, and click on Publish.
Your Excel file will now open as a PDF in Adobe Acrobat Reader or whichever program you have installed on your Windows 11 PC to open PDF files. You can now print that file.
You can also read our post if the Quick Access Toolbar is not working in Excel on your PC.
Create Print to PDF Button Using Macro Commands in Microsoft Excel
A Macro Command button lets you automate actions with a click. This advanced step requires you to enable the Developer Tab in Microsoft Excel. Here’s how.
Step 1: Open Microsoft Excel and go to your spreadsheet.
Step 2: Click on File and select Options at the bottom-left menu.
Step 3: Under Customize The Ribbon, scroll to the bottom and enable the Developer tab. Then, click on Save at the bottom-right corner.

After you enable the Developer tab in the Ribbon, here’s how to create a Macro Button for Print to PDF.
Step 1: Click the Developer tab at the top and click on Insert.
Step 2: Select the icon for Command Button (ActiveX Control). That’ll insert a command button inside your Excel sheet.

Step 3: Right-click on the command button and select Properties.

Step 4: Edit the Caption – the name of your macro command button. Name it something easy, like Print to PDF.
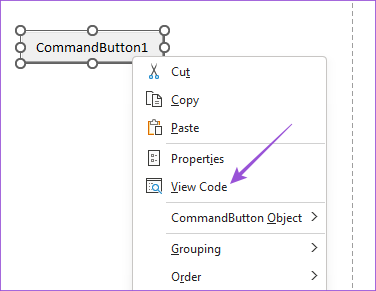
Step 5: Close the Properties window, right-click on your command button again, and select View Code.
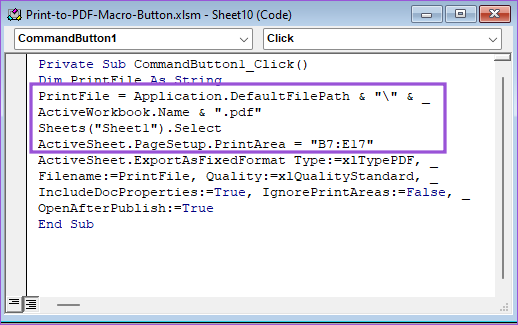
Step 6: You will now see the Microsoft Visual Basic window. Copy the command and paste it into the Visual Basic window.
Dim PrintFile As String PrintFile = Application.DefaultFilePath & "\" & _ ActiveWorkbook.Name & ".pdf" Sheets("Sheet1").Select ActiveSheet.PageSetup.PrintArea = "B7:E17" ActiveSheet.ExportAsFixedFormat Type:=xlTypePDF, _ Filename:=PrintFile, Quality:=xlQualityStandard, _ IncludeDocProperties:=True, IgnorePrintAreas:=False, _ OpenAfterPublish:=True Note that the VBA Sheets.Select statement has your sheet number that you need to print. You also must specify the PrintArea by entering the selected cell numbers.
Step 8: Press Control + S to save the code. Close the Visual Basic window and click the macro command button to print your Excel as a PDF file.
Enable permissions for Macro Buttons in Microsoft Excel
Step 1: Click on File and select Options at the bottom-left corner.
Step 2: Select Trust Center.
Step 3: Click on Trust Center Settings > select Macro Settings.

Step 4: Check the box next to Enable VBA macros, Enable Excel 4.0 macros when VBA macros are enabled, and Trust access to the VBA project object model.

Close the window, and your macro button should work now.
Was this helpful?
Last updated on 11 June, 2024
1 Comment
Leave a Reply
Read Next
 4 Ways to Fix Microsoft Print to PDF Not Working on Windows 11
Fix 1: Ensure Print to PDF Is Enabled in Windows Features Microsoft Print to PDF integrates into the Print dialog box on your PC.
4 Ways to Fix Microsoft Print to PDF Not Working on Windows 11
Fix 1: Ensure Print to PDF Is Enabled in Windows Features Microsoft Print to PDF integrates into the Print dialog box on your PC.
 5 Ways to Fix Unable to Print From Microsoft Excel on Windows 11
Fix 1: Save Your Excel File in XPS Format and Try Again If Excel can't respond to print requests, save your file in the XPS format and try again.
5 Ways to Fix Unable to Print From Microsoft Excel on Windows 11
Fix 1: Save Your Excel File in XPS Format and Try Again If Excel can't respond to print requests, save your file in the XPS format and try again.
 How to Print Emails to PDF in Outlook and Gmail for iOS
Print Emails to PDF in Outlook for iOS Step 1: Open the email you want to convert.
How to Print Emails to PDF in Outlook and Gmail for iOS
Print Emails to PDF in Outlook for iOS Step 1: Open the email you want to convert.
 How to Print First Row or Column on Every Excel Page
Print the First Row or Column on Every Excel Page Step 1: On your workbook, select the desired sheet and navigate to the Page Layout tab on the ribbon.
How to Print First Row or Column on Every Excel Page
Print the First Row or Column on Every Excel Page Step 1: On your workbook, select the desired sheet and navigate to the Page Layout tab on the ribbon.
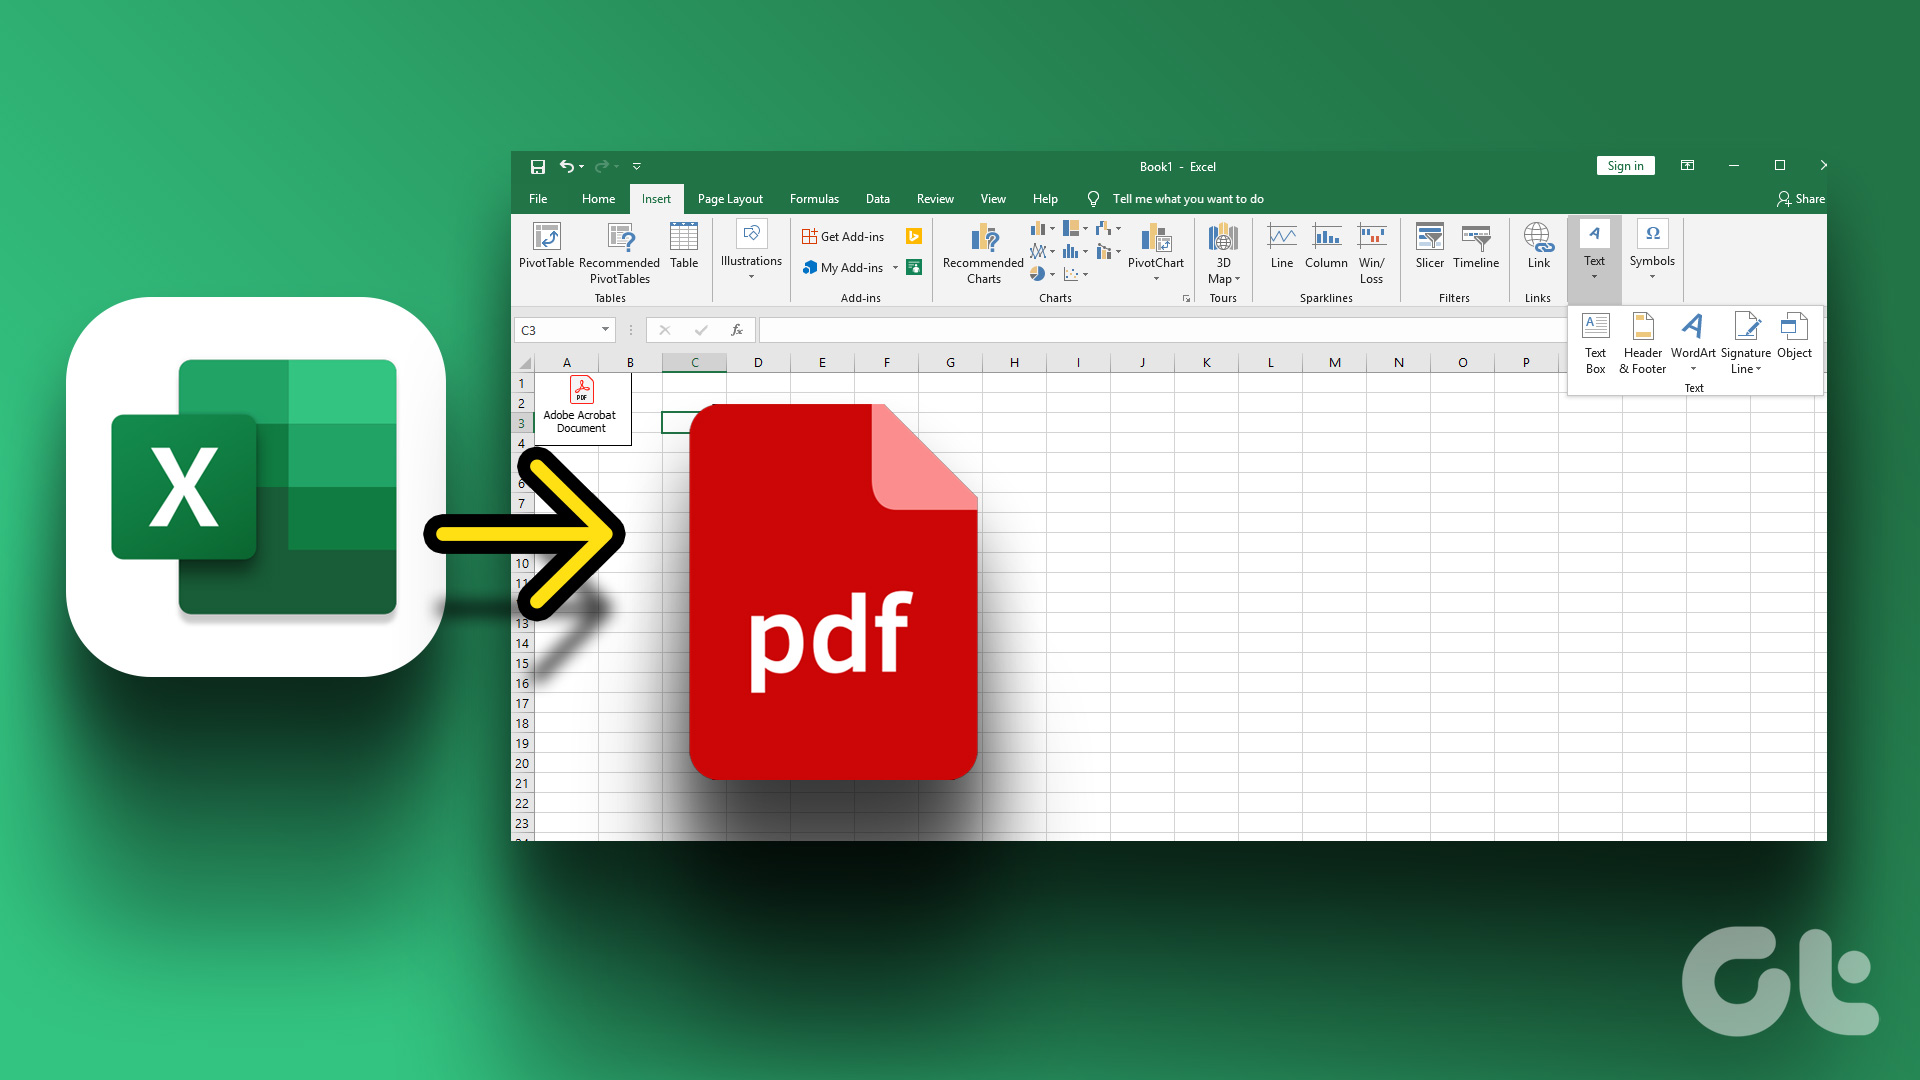 3 Ways to Insert a PDF Document into an Excel Spreadsheet on Windows
Method 1: Insert a PDF Document in Excel Spreadsheet Here's how you can insert a PDF into Excel and make sure the document is visible and easily accessible on the
3 Ways to Insert a PDF Document into an Excel Spreadsheet on Windows
Method 1: Insert a PDF Document in Excel Spreadsheet Here's how you can insert a PDF into Excel and make sure the document is visible and easily accessible on the
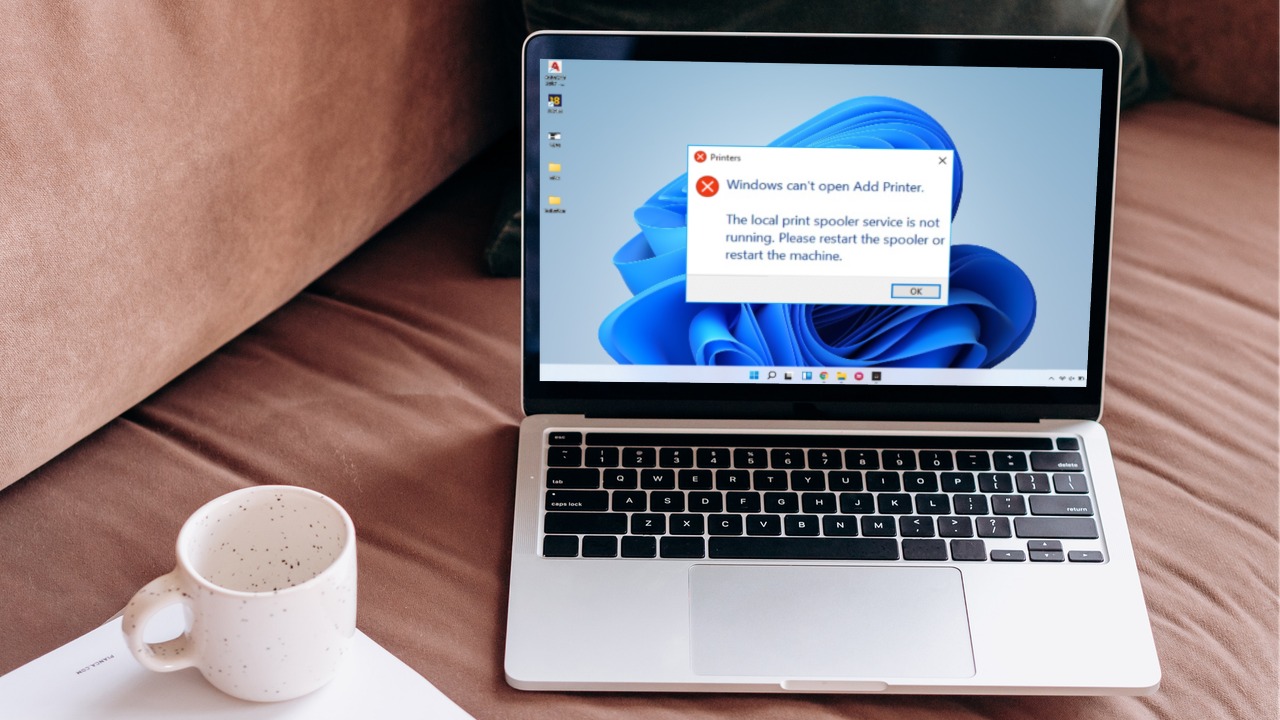 6 Ways to Fix Print Spooler Keeps Stopping on Windows 10 and Windows 11
Fix 1: Run Printer Troubleshooter Windows comes with a dedicated printer troubleshooter that can automatically diagnose and fix any printing issues on your PC.
6 Ways to Fix Print Spooler Keeps Stopping on Windows 10 and Windows 11
Fix 1: Run Printer Troubleshooter Windows comes with a dedicated printer troubleshooter that can automatically diagnose and fix any printing issues on your PC.
 A Complete Guide to Using Print Screen in Windows 10
Have you been told to take a screenshot using the Print Screen key on your Windows 10 computer?
A Complete Guide to Using Print Screen in Windows 10
Have you been told to take a screenshot using the Print Screen key on your Windows 10 computer?
 5 Ways to Remove a Stuck Print Job in Windows 11
Fix 1: Clear Print Queue Using the Settings App One of the most straightforward ways to remove stuck print jobs is to clear the entire print queue in Windows 11.
5 Ways to Remove a Stuck Print Job in Windows 11
Fix 1: Clear Print Queue Using the Settings App One of the most straightforward ways to remove stuck print jobs is to clear the entire print queue in Windows 11.
The article above may contain affiliate links which help support Guiding Tech. The content remains unbiased and authentic and will never affect our editorial integrity.

Excel