It is critical that your Windows computer shows the correct date and time. Usually, you don’t have to worry about it for Windows sets up the date and time whenever you connect it to the internet. However, if you’ve configured some settings incorrectly or have a faulty CMOS battery, Windows 11 may display an incorrect date or time.
When the Windows clock is out of sync, you may have trouble installing apps, syncing data, and performing other tasks. Fortunately, it’s possible to fix this issue. This post carries a few effective solutions to fix the Windows 11 clock showing wrong time. To make these changes, you’ll need to use an account with administrator rights on Windows.
1. Sync Windows Clock Manually
One of the easiest ways to fix an out-of-sync Windows clock is via the Settings app. You can visit the ‘Date & time’ section in the Settings app and sync your Windows clock manually. Here’s how:
Step 1: Open the Start menu and click the gear icon to launch the Settings app.

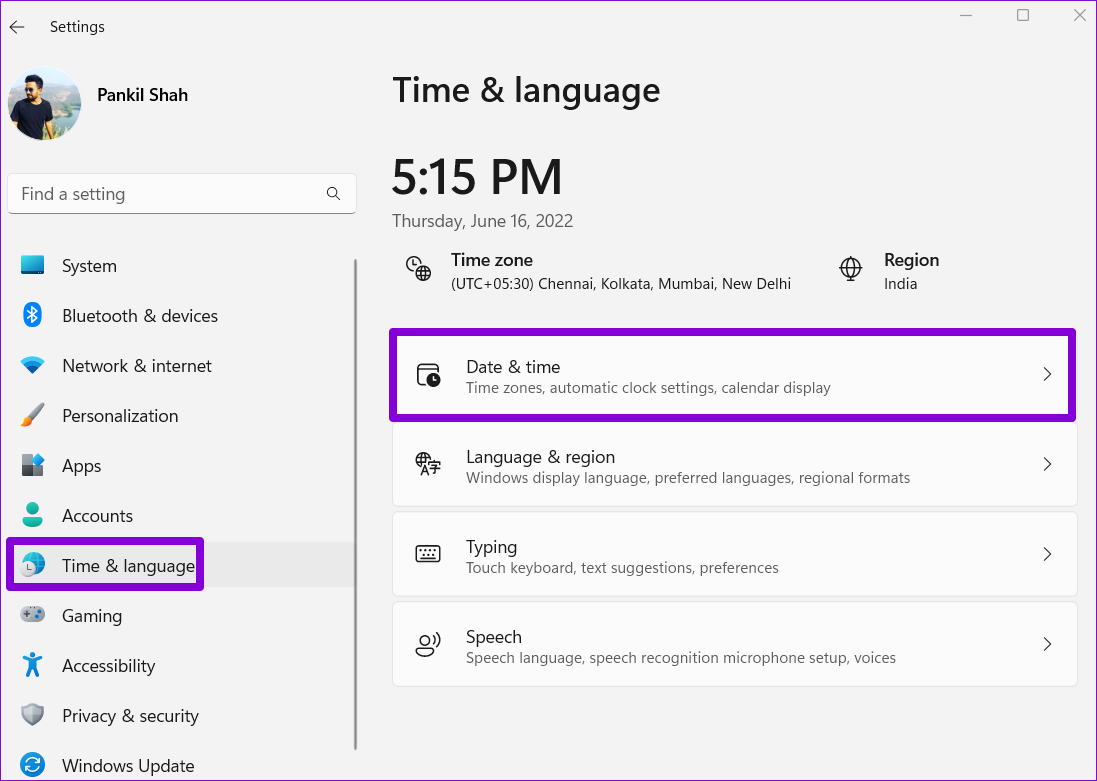
Step 2: Switch to the Time & language tab. Then, click Date & time.
Step 3: Under Additional settings, click the Sync now button.
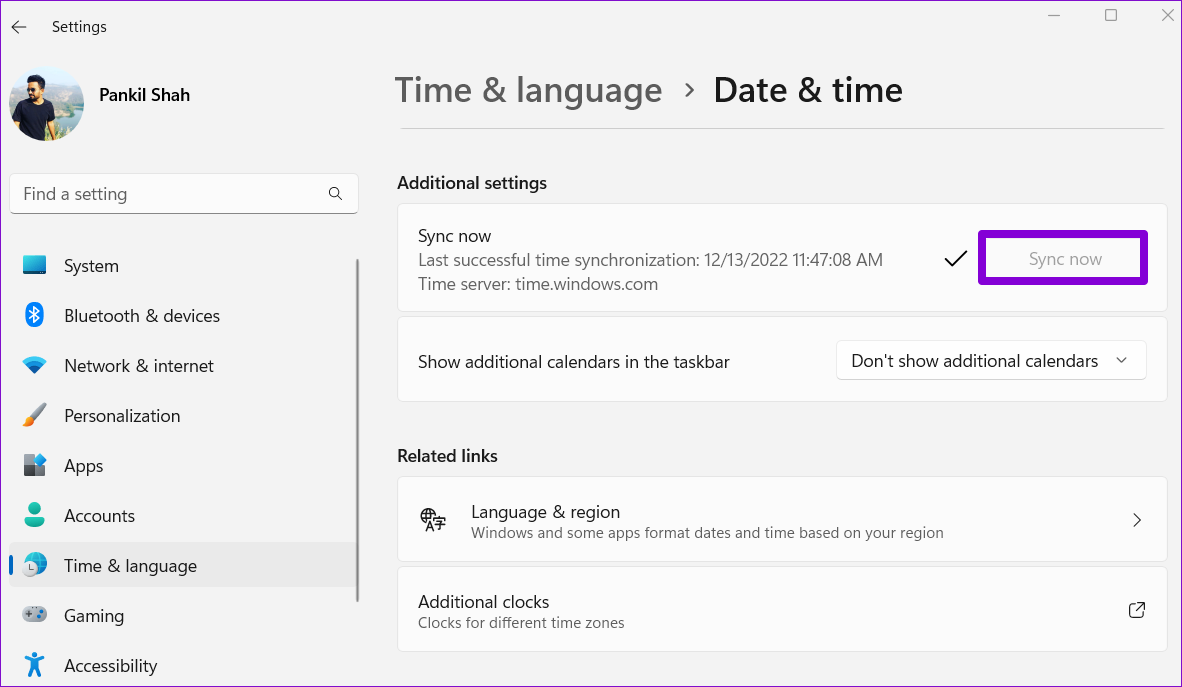
You will see a checkmark next to the Sync now button once the process is complete. Following that, the Windows clock should show the correct time.
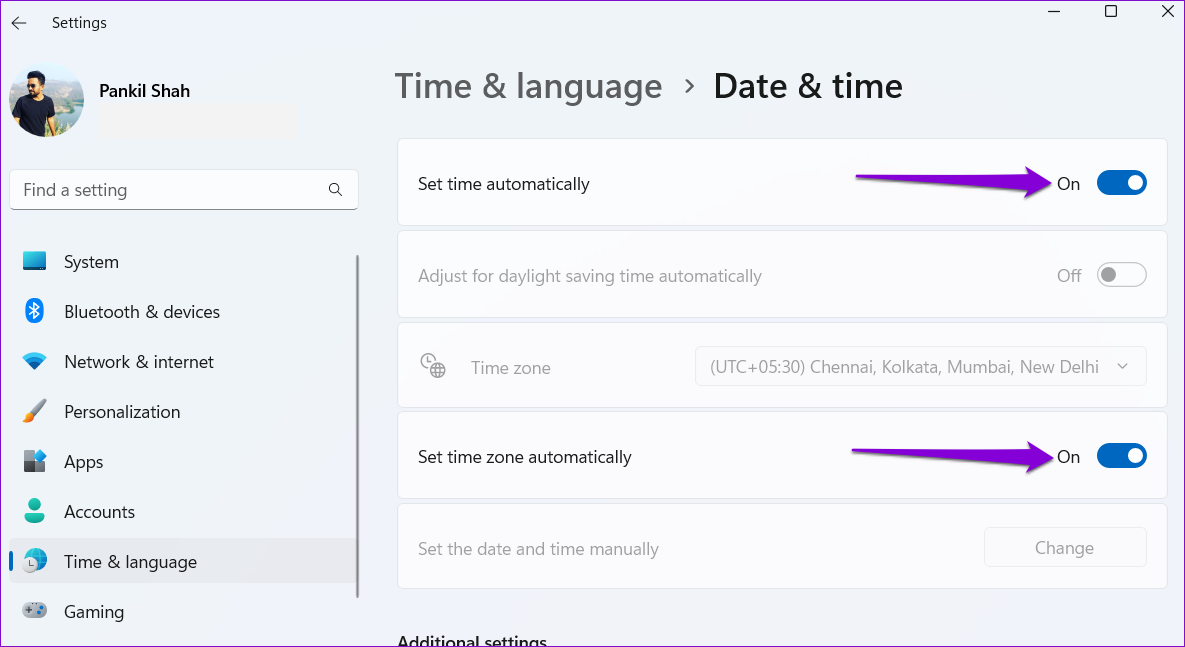
2. Enable Automatic Time in Windows Settings
If travel across countries or use VPN often, then the Windows clock may fall out of sync every few days. But, you can configure Windows to sync the time automatically. Here’s how to do it.
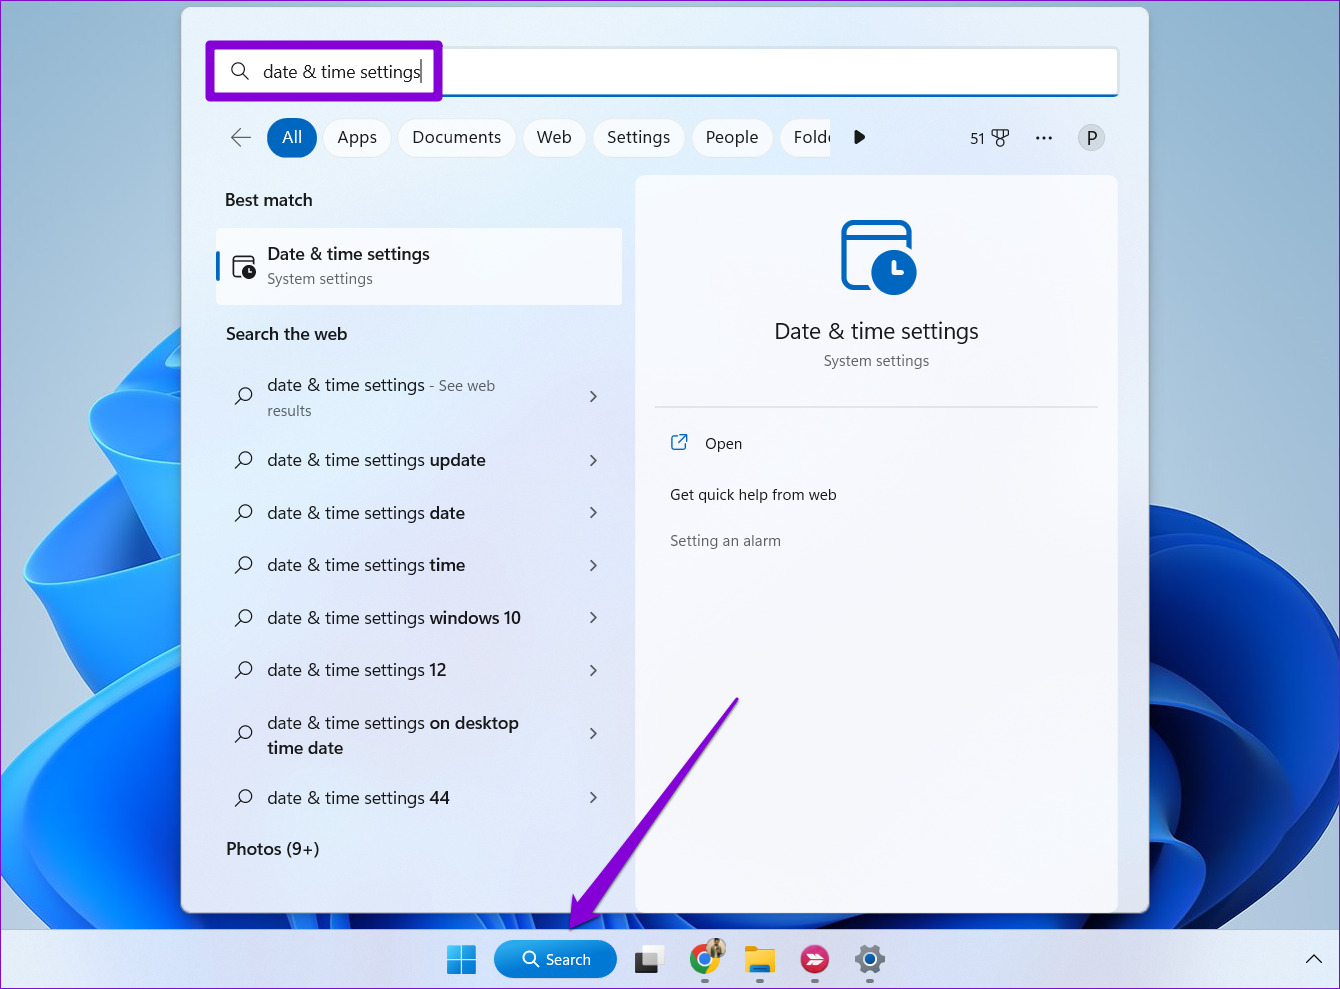
Step 1: Click the search icon on the Taskbar or press the Windows key + S to open the search menu. Type date & time settings in the search box and select the first result that appears.
Step 2: In the Settings window that opens, enable the toggles for ‘Set time automatically’ and ‘Set time zone automatically.’
3. Use Another Internet Time Server
Enabling the automatic time feature may not help much if there’s an issue with the internet time server that Windows uses. You can configure Windows to use a different internet time server and see if that helps.
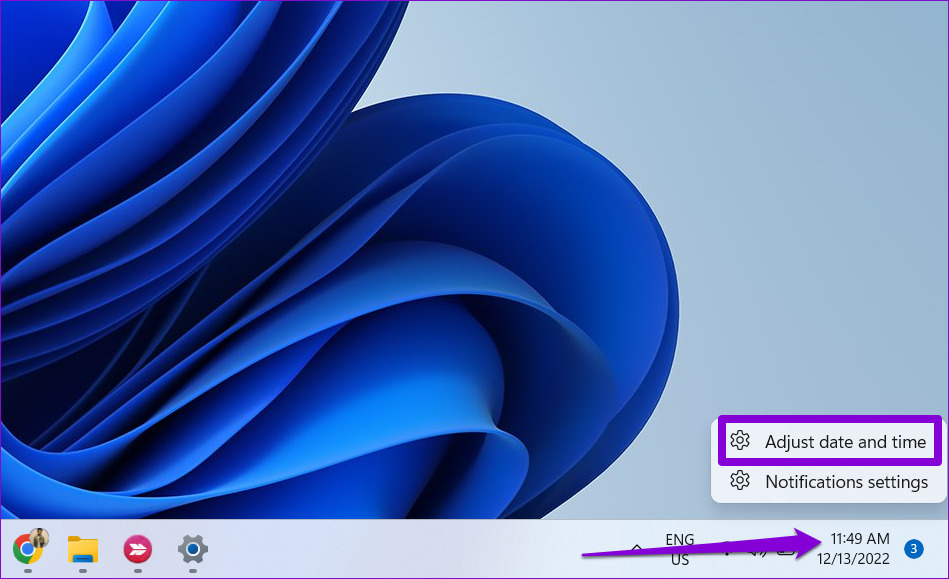
Step 1: Right-click on the taskbar clock and select ‘Adjust date and time’ from the menu that appears.
Step 2: Scroll down to Related links and click on Additional clocks.

Step 3: In the Date and Time window, switch to the Internet Time tab.
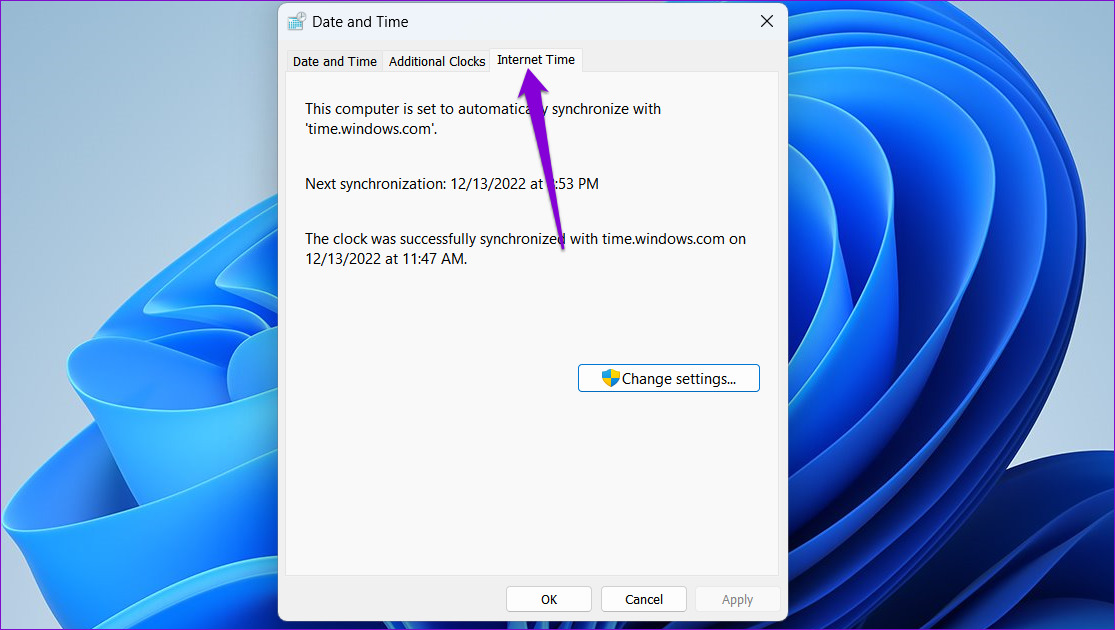
Step 4: Click the Change settings button.

Step 5: Select Yes when the User Account Control (UAC) prompt appears.

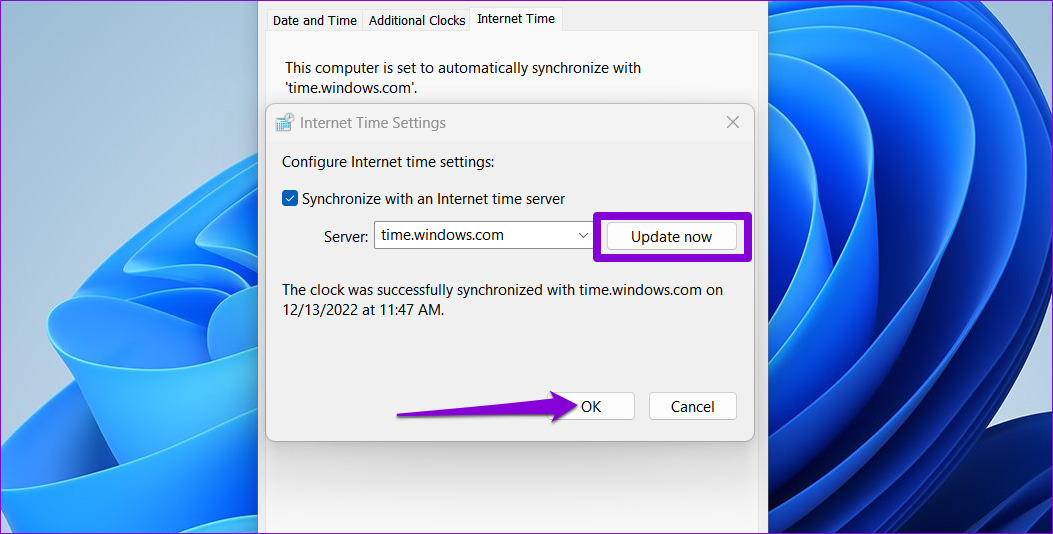
Step 6: Use the drop-down menu to select a different internet time server.

Step 7: Click the Update now button followed by OK.
4. Configure Windows Time Service
Windows Time service is a small program syncs your computer’s clock with the correct global time. This service needs to be active all the time so that Windows can display the correct date and time. However, if the service isn’t configured correctly, it may fail to run automatically at boot and cause problems. Here’s how you can change that.
Step 1: Press the Windows key + R to open the Run dialog box.
Step 2: Type services.msc in the box and press Enter.

Step 3: In the Services window that opens, scroll all the way down to locate the Windows Time service. Right-click on it and select Properties.

Step 4: Change the startup type to Automatic and hit Apply followed by OK.

Restart your PC after this, and Windows 11 clock will display the correct date and time after that.
5. Force Windows to Sync Time Using PowerShell
Windows PowerShell is a useful command-line tool that allows you to perform complex tasks with a few text commands. If none of the above solutions work, you can use PowerShell to re-register the Windows Time service and force your computer to sync time. Here are the steps you can follow.
Step 1: Click the search icon on the Taskbar, type in Windows PowerShell, and select Run as Administrator.

Step 2: When the User Account Control (UAC) prompt appears, select Yes.
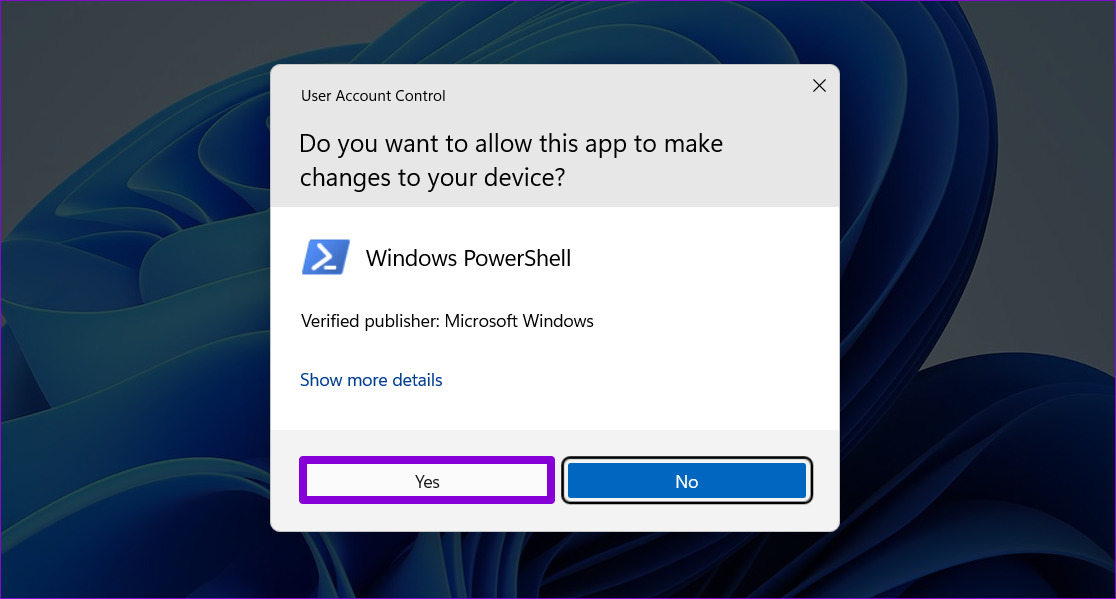
Step 3: In the console, type the following commands one by one and press Enter after each one.
Net stop w32time

w32tm /unregister

w32tm /register

Net start w32time

w32tm /resync

After running the above commands, restart your PC and see if the Windows clock displays the correct time.
6. Get the CMOS Battery Checked
A CMOS battery in your computer powers the Complementary Metal Oxide Semiconductor (CMOS) chip. This chip is responsible for maintaining system time and date along with other configurations. If the CMOS battery has a problem, the chip may fail to store any information, causing your Windows 11 clock to display an incorrect time.
Since replacing the CMOS battery requires technical know-how and your best option is to have the CMOS battery checked by a professional.
Don’t Let Time Get Away
You can resolve the incorrect Windows date and time issue by enabling the automatic time feature. If not, you may need to sync time manually or apply some of the other fixes. Go through the above solutions one at a time, and let us know which one works for you in the comments below.
Was this helpful?
Last updated on 14 December, 2022
3 Comments
Leave a Reply
The article above may contain affiliate links which help support Guiding Tech. The content remains unbiased and authentic and will never affect our editorial integrity.







My desktop file windows do not show the right time, such as when a file was created or edited. My clock is correct in the lower right. All time zones are set correctly and synced, but when I save a file from, say Photoshop, the file created in that moment is showing two days behind.
haha.. nevermind. Right-click desktop and Refresh. Now it all actually syncs
I used the 4th Solution. “Configure Windows time Service”.
Worked for me on my Laptop.
Thanks.