Basic Fixes:
- Restart the computer: Restarting the computer will force all running processes and services to shut down, effectively resolving random clicking.
- Update or Rollback Drivers: Faulty drivers are a possible cause. You should update all outdated drivers or roll back driver updates if the problem starts just after they are updated.
- Update Windows 11: Updating the operating system is effective at fixing bugs, as updates usually come with these fixes.
- Check for damage to the mouse: It may be caused by damage from regular wear and tear or a physical impact, such as a fall. You should check to see if this is the case.
- Check for keyboard malfunction.
- Switch the USB port: If the port is faulty, it may cause USB devices to disconnect and connect randomly, triggering the problem.
- Remove any remote desktop apps like AnyDesk or TeamViewer: These tools may be used to take control of your computer, and uninstalling them will solve the problem.
- Disable Touch Screen: Some users have attributed the problem to interference from the touchscreen. You should disable it.
Fix 1: Uninstall the Device from the Device Manager
Drivers are an integral part of your computer. They aid communication between hardware devices like the mouse and the operating system. A faulty mouse driver will trigger erratic behavior from the device. You may need to uninstall the device. After uninstalling the driver, you should follow the steps below to ensure you replace it with a new, updated version.
Step 1: Restart the computer.
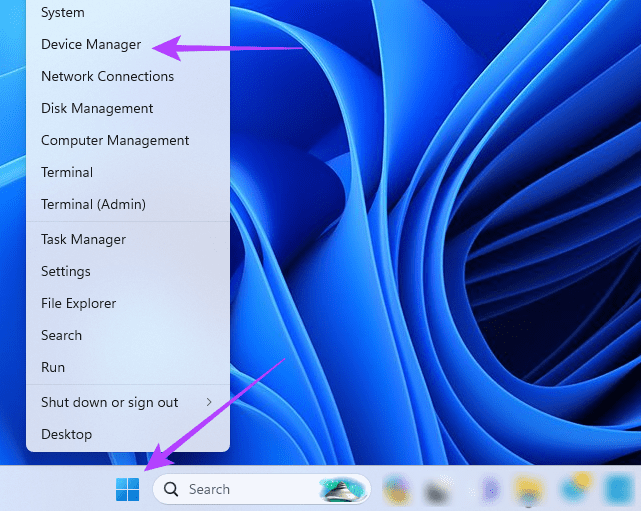
Step 2: Right-click the Start menu and click Device Manager.
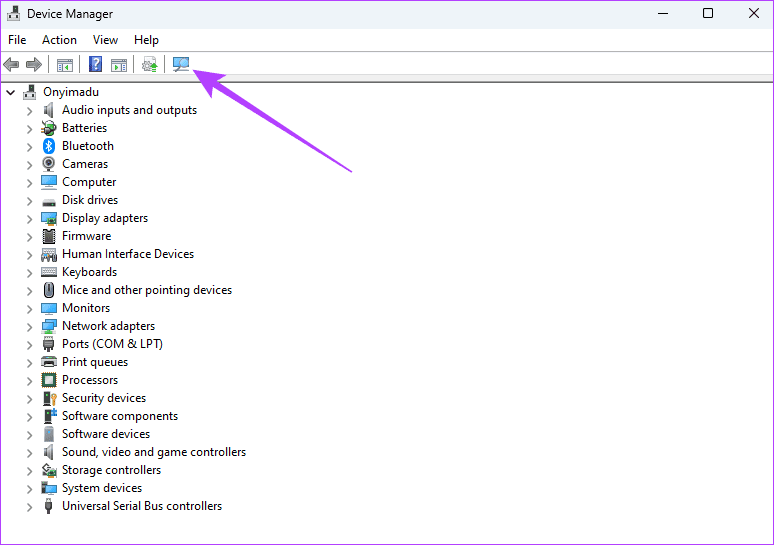
Step 3: Click the Scan for hardware changes icon.
Fix 2: Run A Malware Scan
Malware can also adversely affect a laptop’s touchpad. It often alters specific files, which may cause communication problems between your computer and some of its vital components. We recommend running a malware scan using the built-in Windows Security app.
Step 1: Click the Start menu, type security, and click the Windows Security app.

Step 2: Click Virus & threat protection on the right pane, then on the left, click Scan options.

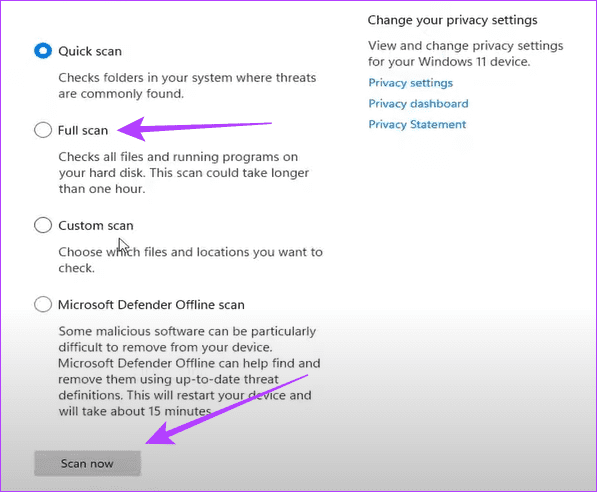
Step 3: Select Full scan, then click Scan now.
Fix 3: Clean Boot the Computer
Conflicting services on your computer may cause the mouse to click on its own. By clean-booting the device, you will force the computer to open with only a limited number of services or programs, thereby eliminating any conflicts that may trigger the mouse issue.
Step 1: Press your keyboard’s Windows + R keys to launch your Run dialog.
Step 2: Type msconfig and hit Enter on your Keyboard to open the Services console.

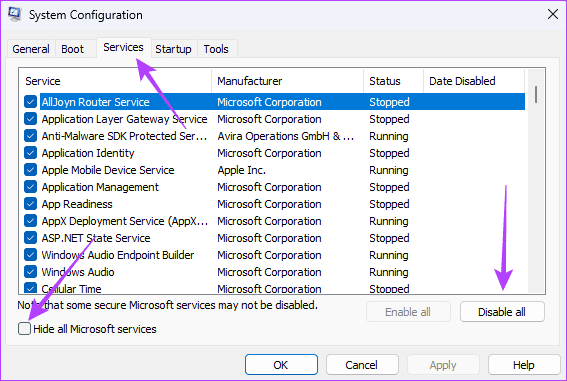
Step 3: Click the Services tab, tick Hide all Microsoft services, and click the Disable all button.
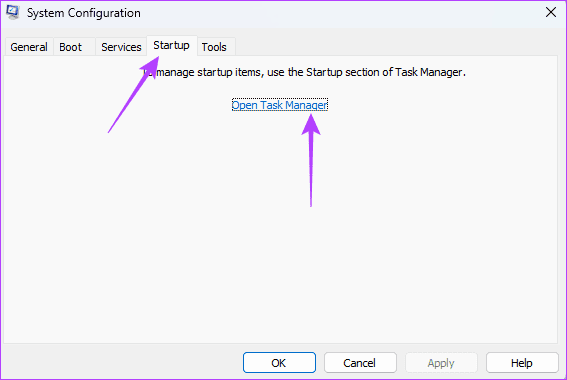
Step 4: Click the Startup tab and click the Open Task Manager link.
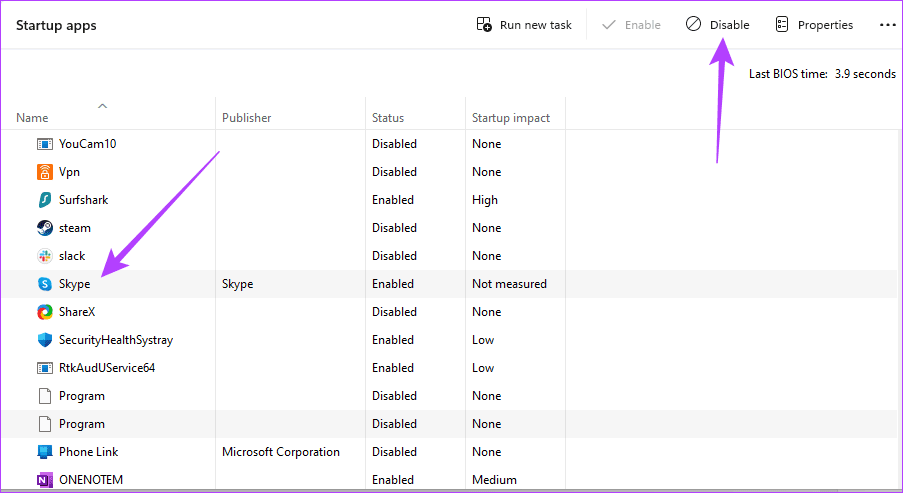
Step 5: Click on a startup app (any app with an Enabled status), then click the Disable button. Before closing the Task Manager, you can repeat this process for as many startup apps as possible.
Step 6: Open the System Configuration Window and click the Apply and OK buttons, then restart the computer.

Fix 4: Try Disabling the Touchpad on Your Laptop
Disabling the touchpad is vital because it eliminates unintended input, reduces Interference, and prevents cursor jumps.
Step 1: Right-click the Start menu and click Device Manager.
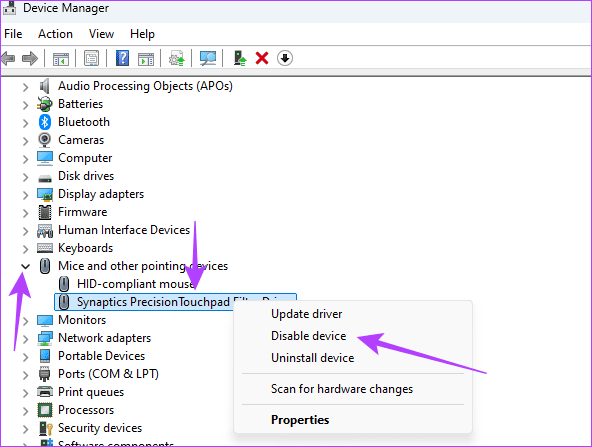
Step 2: Expand Mice and other pointing devices, right-click on your touchpad, and select Disable device.
Was this helpful?
Last updated on 28 August, 2024
Read Next
 6 Ways to Fix Mouse Cursor Moving on Its Own in Windows
Basic Fixes Change old mouse pads: If a portion of your mousepad has faded and lost the coarseness needed to hold the mouse in place, it can make your mouse
6 Ways to Fix Mouse Cursor Moving on Its Own in Windows
Basic Fixes Change old mouse pads: If a portion of your mousepad has faded and lost the coarseness needed to hold the mouse in place, it can make your mouse
 How to Fix iPhone Making Calls Randomly on Its Own
Basic Fixes Disconnect Bluetooth devices: If you accidentally press the dedicated call button on your Bluetooth accessory, your iPhone may place random calls.
How to Fix iPhone Making Calls Randomly on Its Own
Basic Fixes Disconnect Bluetooth devices: If you accidentally press the dedicated call button on your Bluetooth accessory, your iPhone may place random calls.
 4 Ways to Fix Safari Closing Tabs on Its Own
Basic Fixes Force quit and relaunch Safari: This helps give the app a fresh start if it has been running in the background for some time.
4 Ways to Fix Safari Closing Tabs on Its Own
Basic Fixes Force quit and relaunch Safari: This helps give the app a fresh start if it has been running in the background for some time.
 3 Ways to Fix Mouse Keeps Scrolling Automatically Windows 10 and Windows 11
https://youtu.be/1UZ3PWNr-lE Try Basic Fixes Disconnect and reconnect the mouse: Unplug your mouse cable or wireless adapter from your computer and reconnect it to a different port.
3 Ways to Fix Mouse Keeps Scrolling Automatically Windows 10 and Windows 11
https://youtu.be/1UZ3PWNr-lE Try Basic Fixes Disconnect and reconnect the mouse: Unplug your mouse cable or wireless adapter from your computer and reconnect it to a different port.
 Top 3 Touch Mouse Alternatives to Apple’s Magic Mouse
The Magic Mouse is useful for plenty of people, but some can get annoyed by its poor ergonomics.
Top 3 Touch Mouse Alternatives to Apple’s Magic Mouse
The Magic Mouse is useful for plenty of people, but some can get annoyed by its poor ergonomics.
 How to Check if Windows Laptop Has HDD or SSD and Its Type
Method 1: Using Task Manager Step 1: Right-click on the taskbar at the bottom and select Task Manager.
How to Check if Windows Laptop Has HDD or SSD and Its Type
Method 1: Using Task Manager Step 1: Right-click on the taskbar at the bottom and select Task Manager.
 How to Update Epic Games Launcher and Its Games on Windows
How to Check and Update Epic Games Launcher Epic Games Launcher auto-updates along with its games.
How to Update Epic Games Launcher and Its Games on Windows
How to Check and Update Epic Games Launcher Epic Games Launcher auto-updates along with its games.
 How to Change Google Background to Your Own Picture
Replace Google Background With Your Picture Step 1: Open the New tab page in Chrome.
How to Change Google Background to Your Own Picture
Replace Google Background With Your Picture Step 1: Open the New tab page in Chrome.
The article above may contain affiliate links which help support Guiding Tech. The content remains unbiased and authentic and will never affect our editorial integrity.