What Happens When You Remove Your Kindle Account
- All the purchased books on the account will also be removed from Kindle. However, note that you can still access these books if you add the account on your Kindle again.
- Books that are manually added, the ones that are not purchased on the Kindle store, will remain on your device. However, the reading progress on these books will reset.
- We observed that a few device settings linked to your Kindle account were reset once we removed the account.
- You will lose all the other benefits you availed on your account, like Kindle Unlimited, Prime Reading, etc.

How to Remove Your Kindle Account
You need to first remove or de-register your existing Kindle account before adding a new one.
Method 1: De-Register Amazon Account on Your Kindle
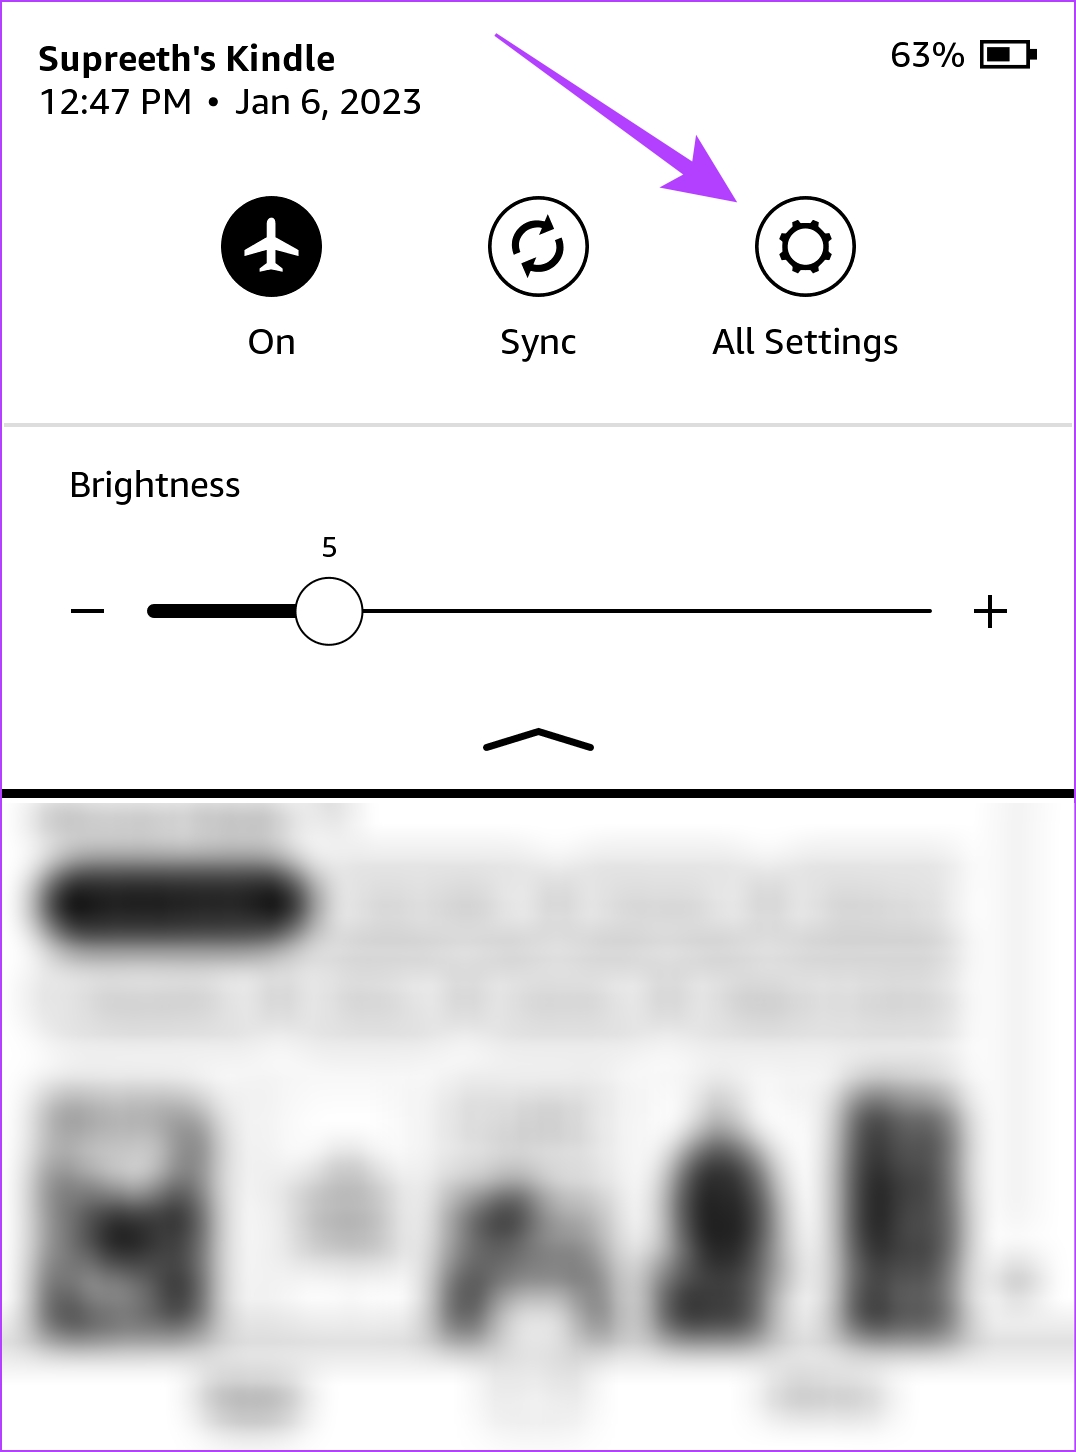
Step 1: Tap anywhere on the screen and select the downward-facing arrow on the topmost section of the screen.
Step 2: Tap on all Settings.
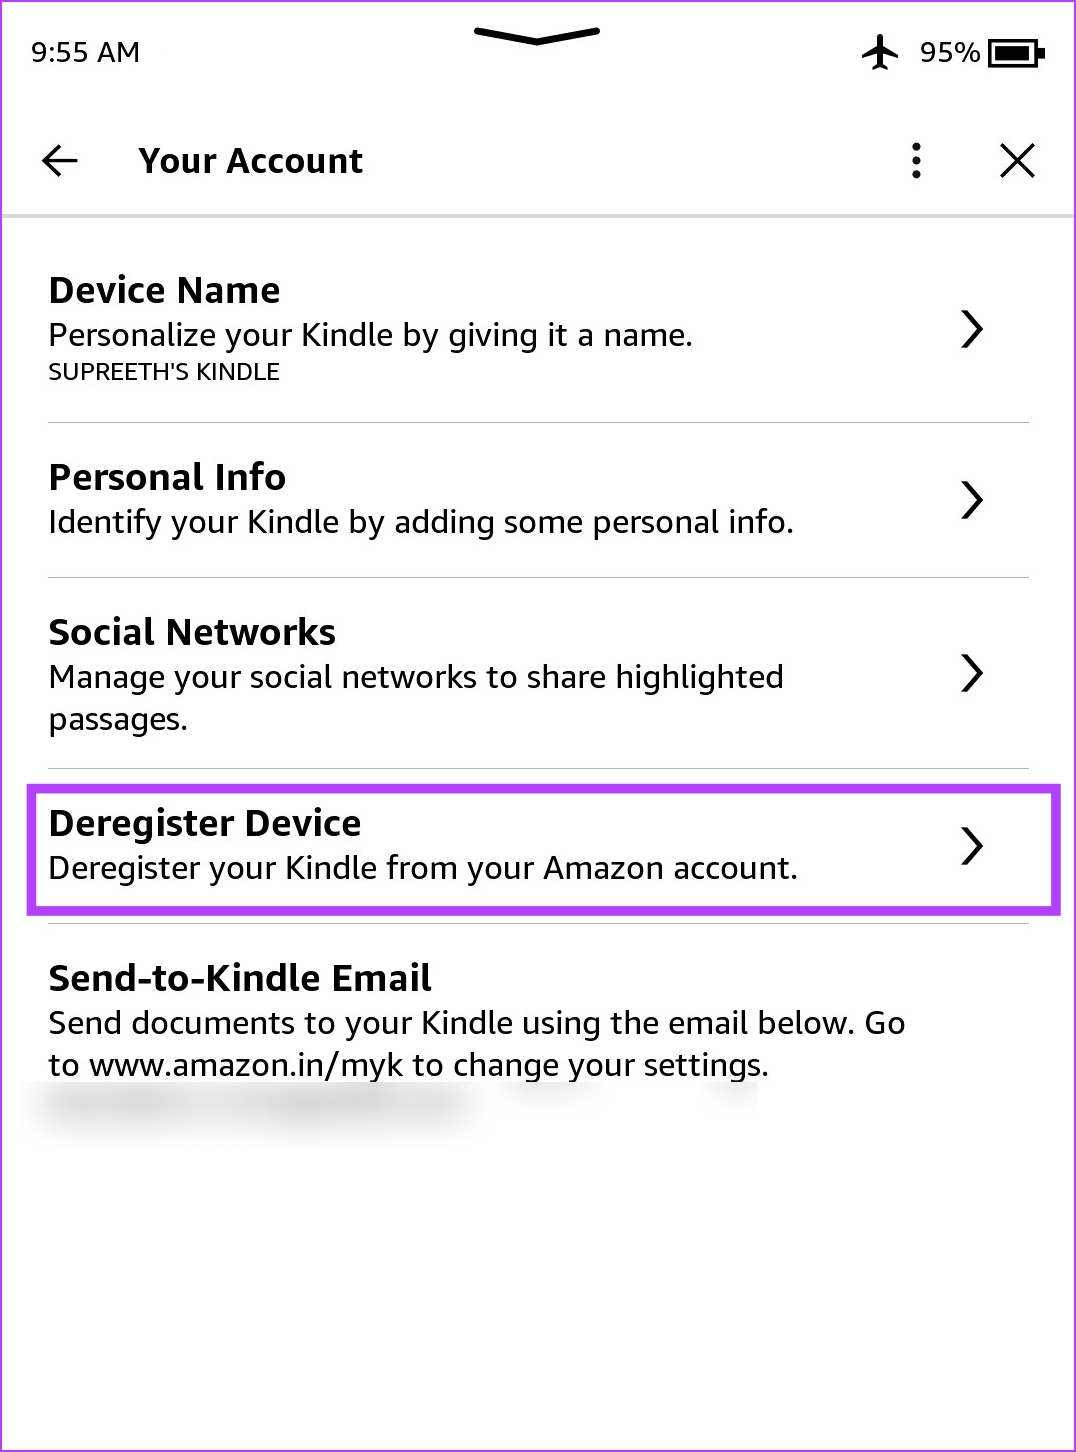
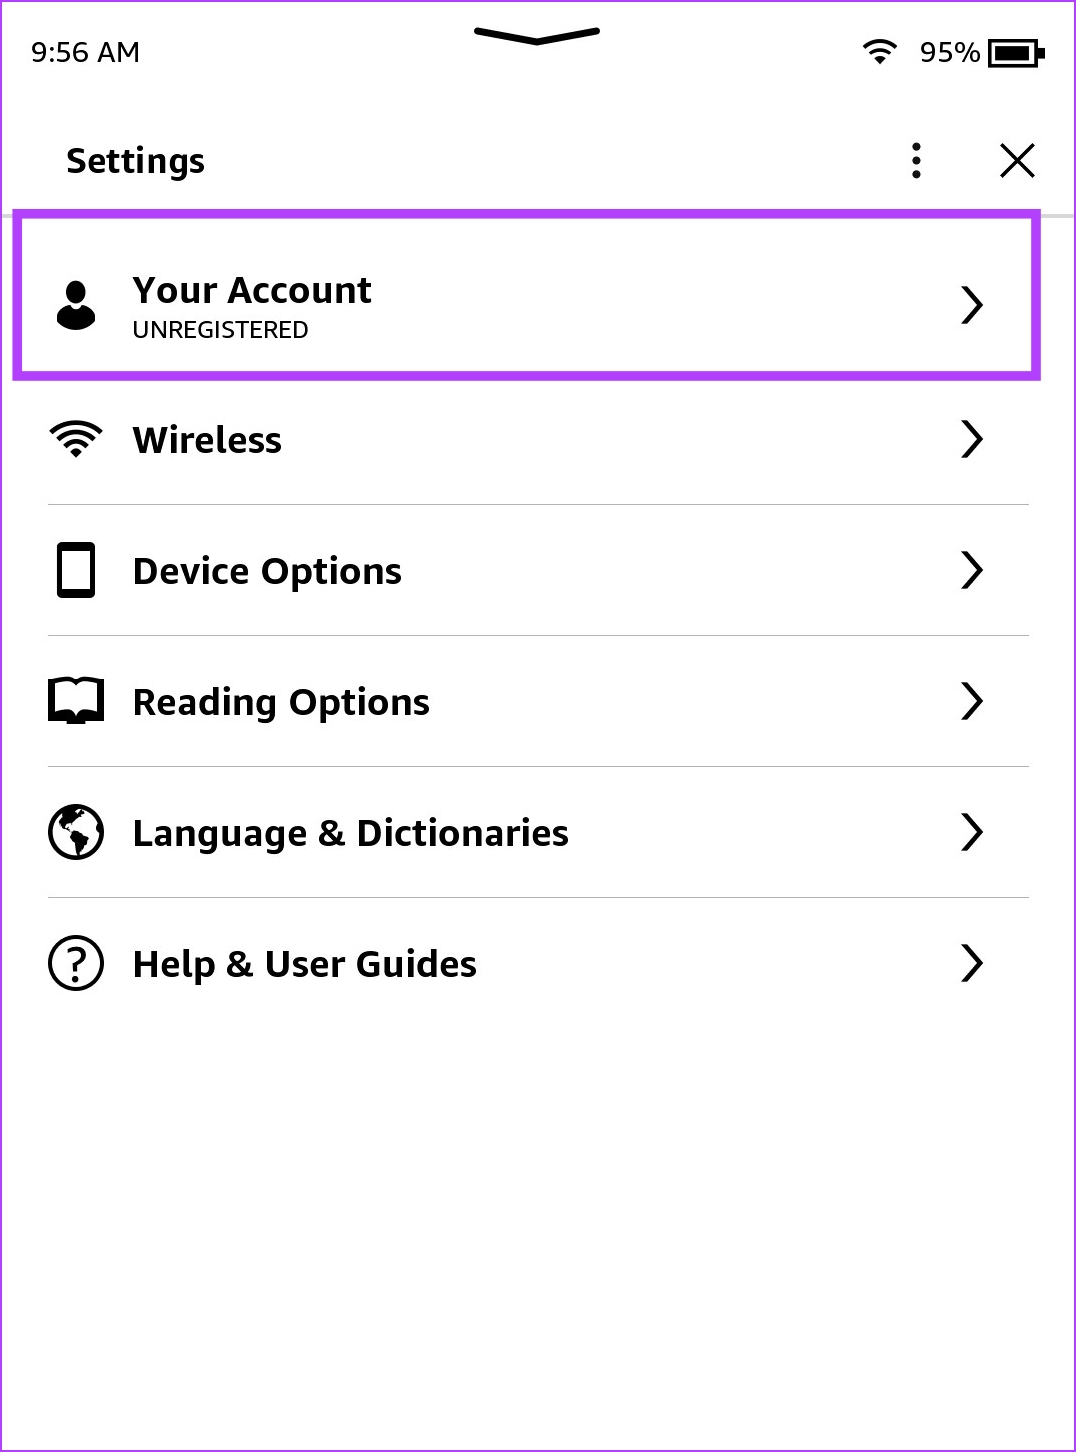
Step 3: Tap on Your Account, and tap on Deregister Device.

Method 2: Remove Kindle Account Using the Amazon App
Step 1: Ensure you have signed into the Amazon account that is present on your Kindle on the Amazon app.
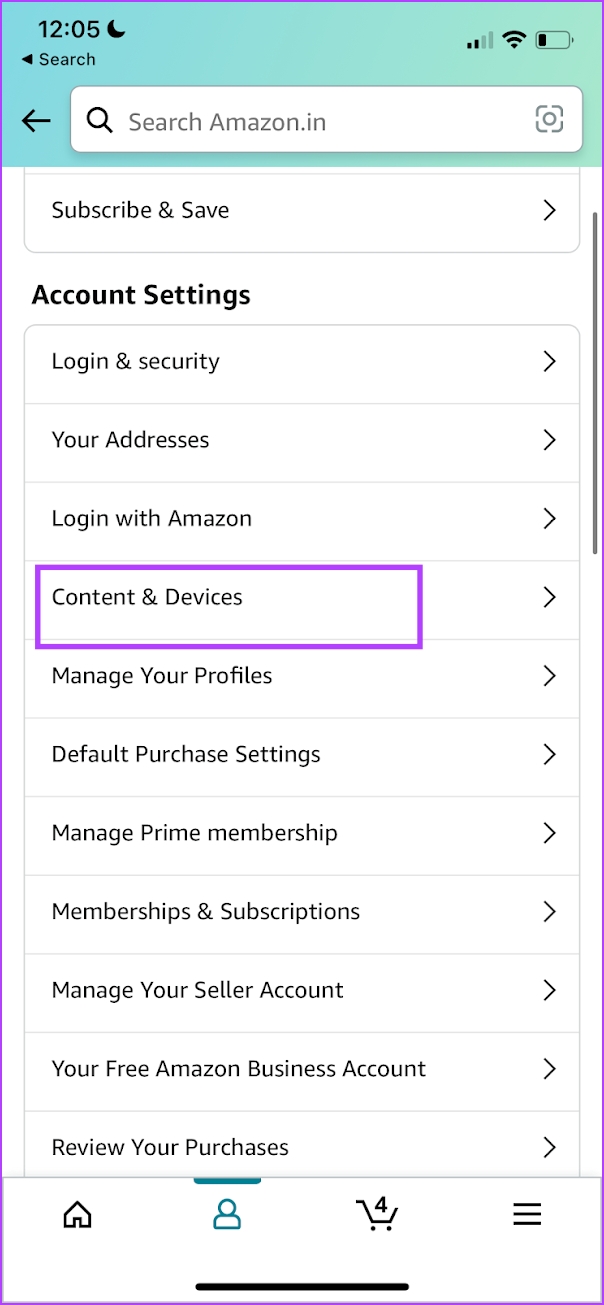
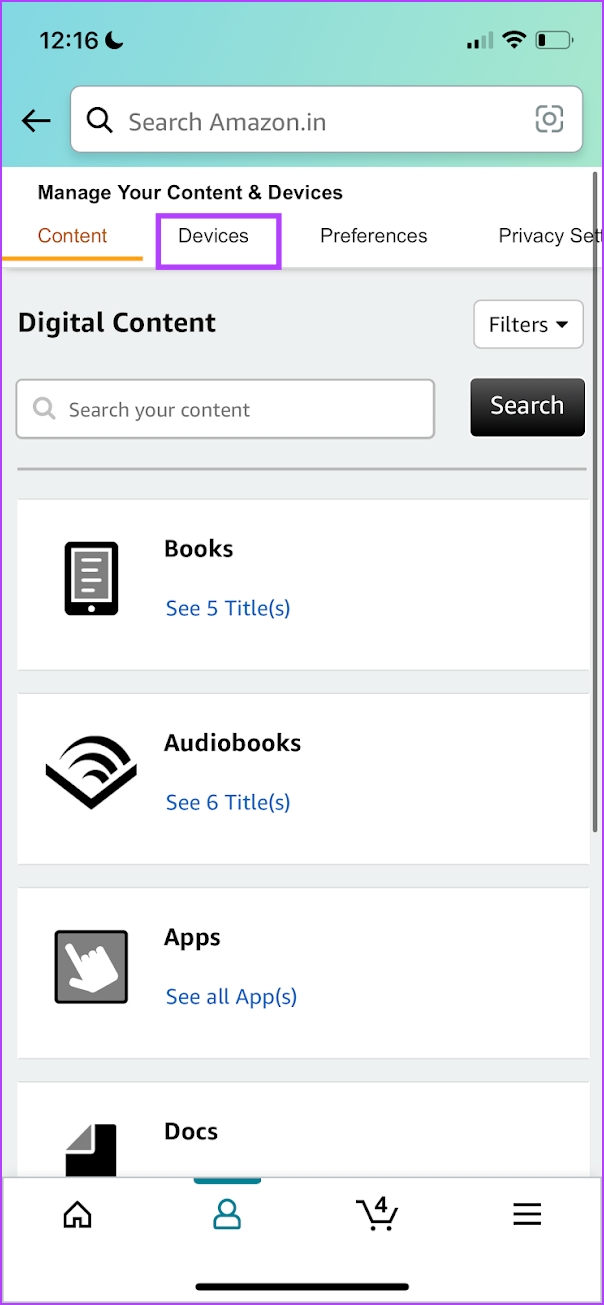
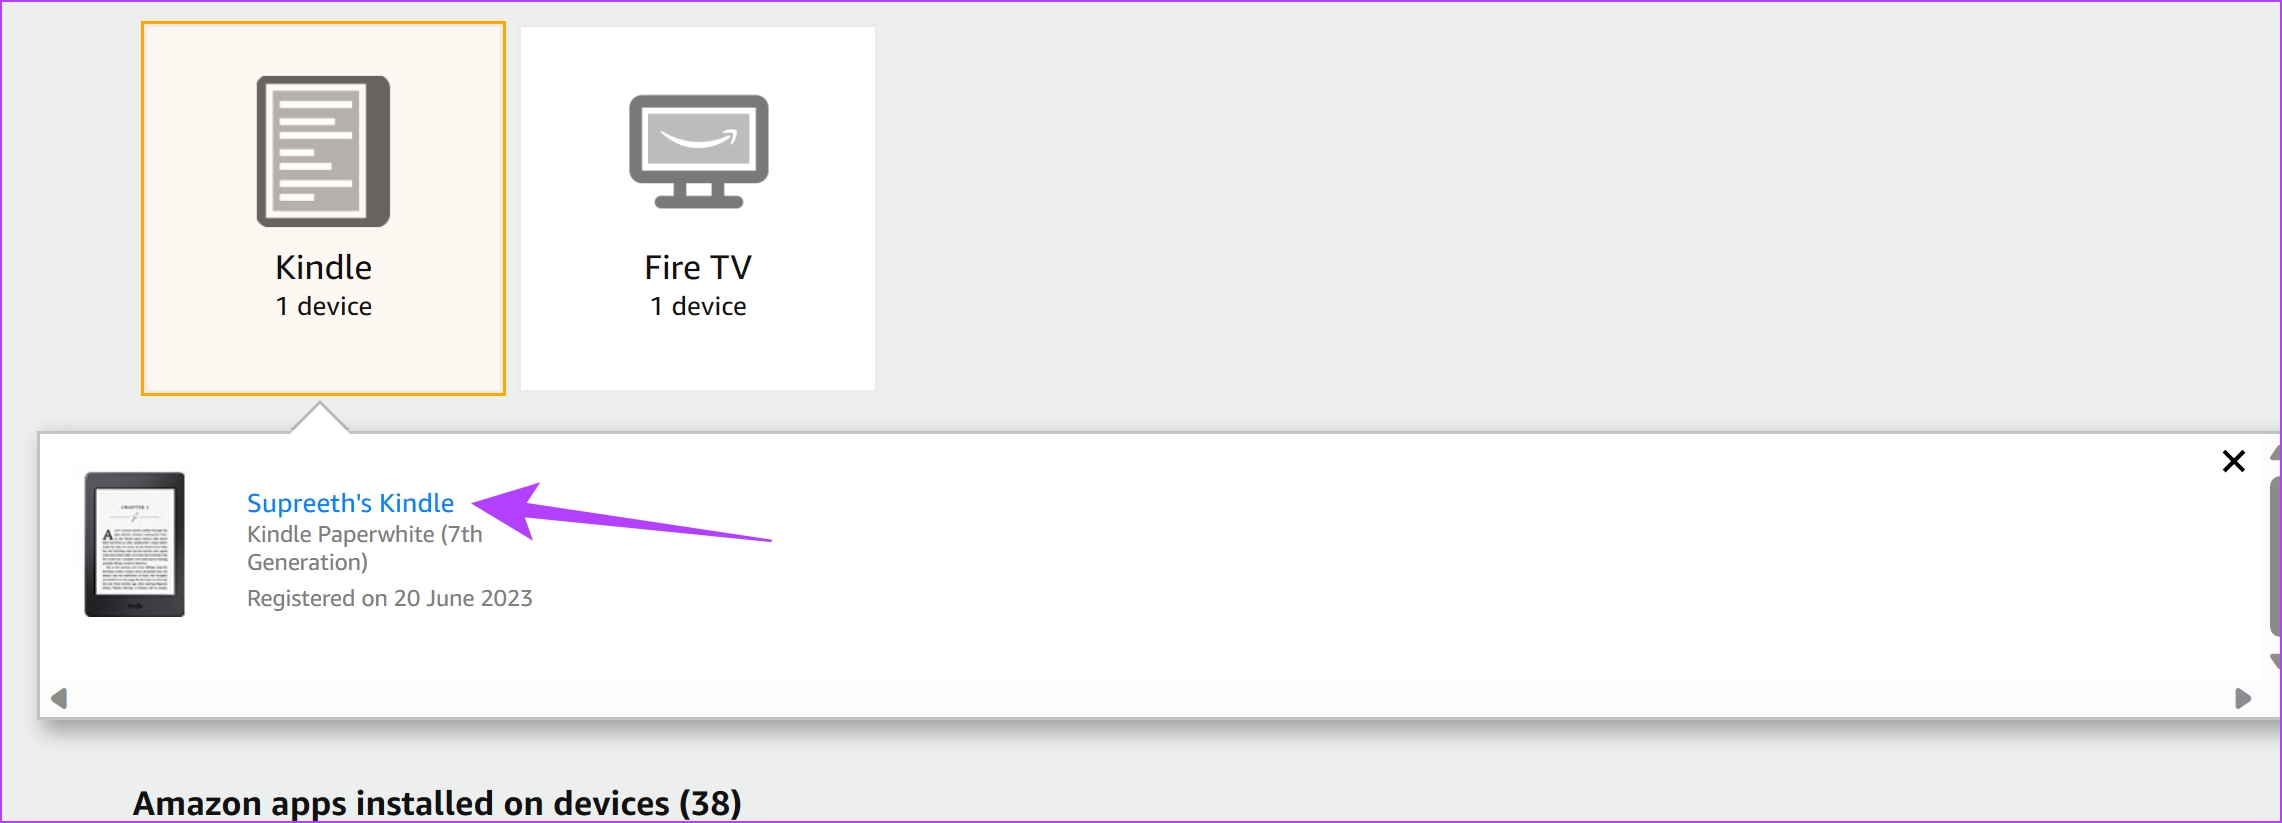
Step 2: Tap on the hamburger-shaped menu icon at the bottom bar. Tap on Account > Content & Devices. Select Devices.

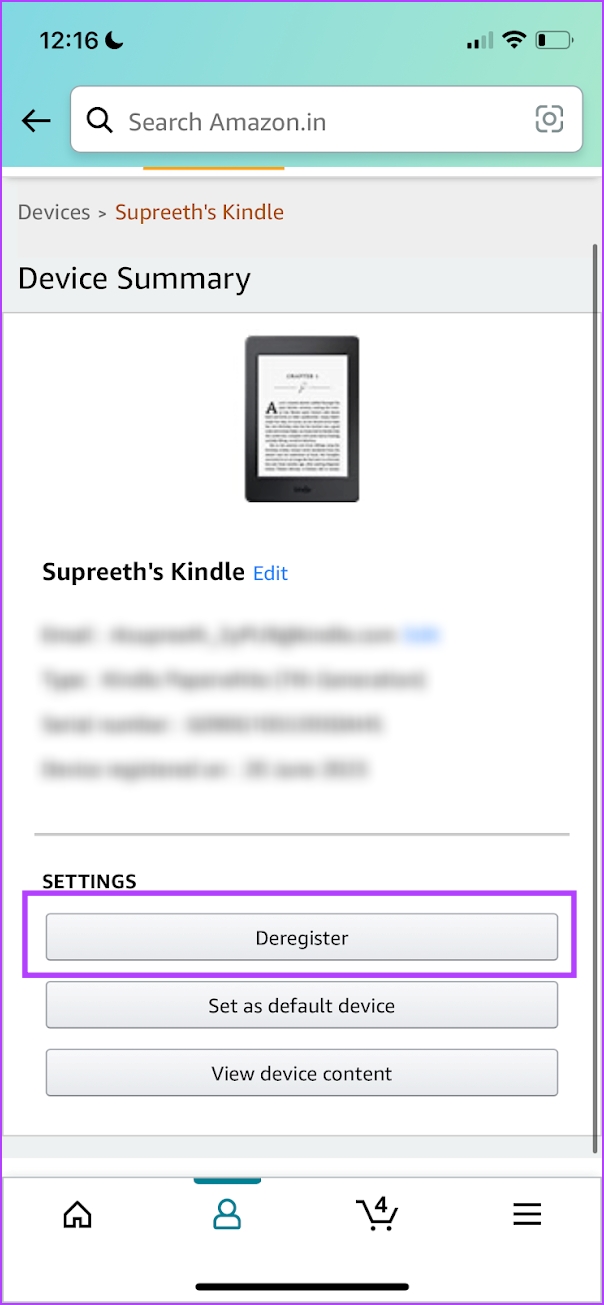
Step 3: Select the Kindle from which you want to remove the account.
Step 4: Tap on Deregister.


Method 3: Remove Kindle Account on PC or Mac
Step 1: Open Amazon on a web browser on your PC or Mac. Ensure you have signed into the account that you want to remove from your Kindle.
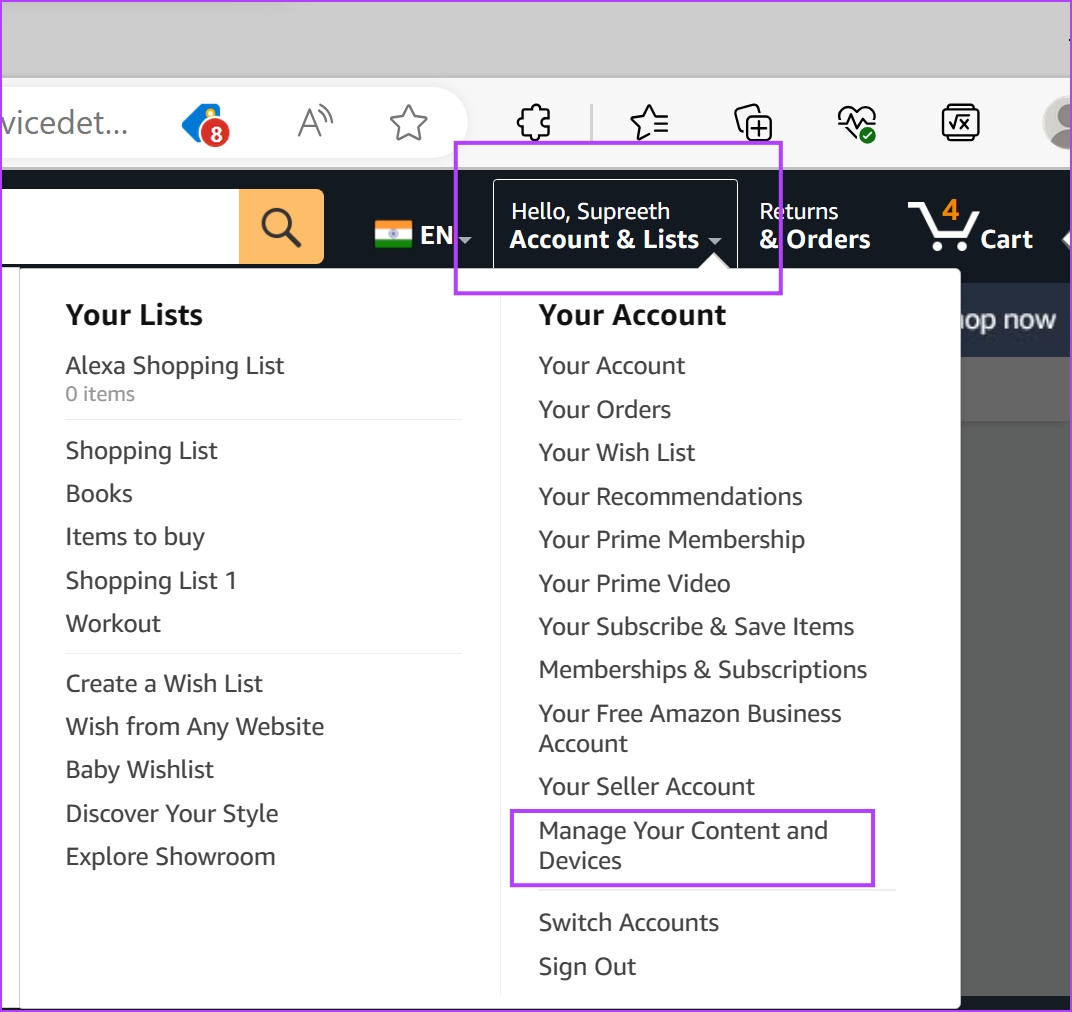
Step 2: Click on the drop-down menu on your username. Click on Manage Your Content and Devices.
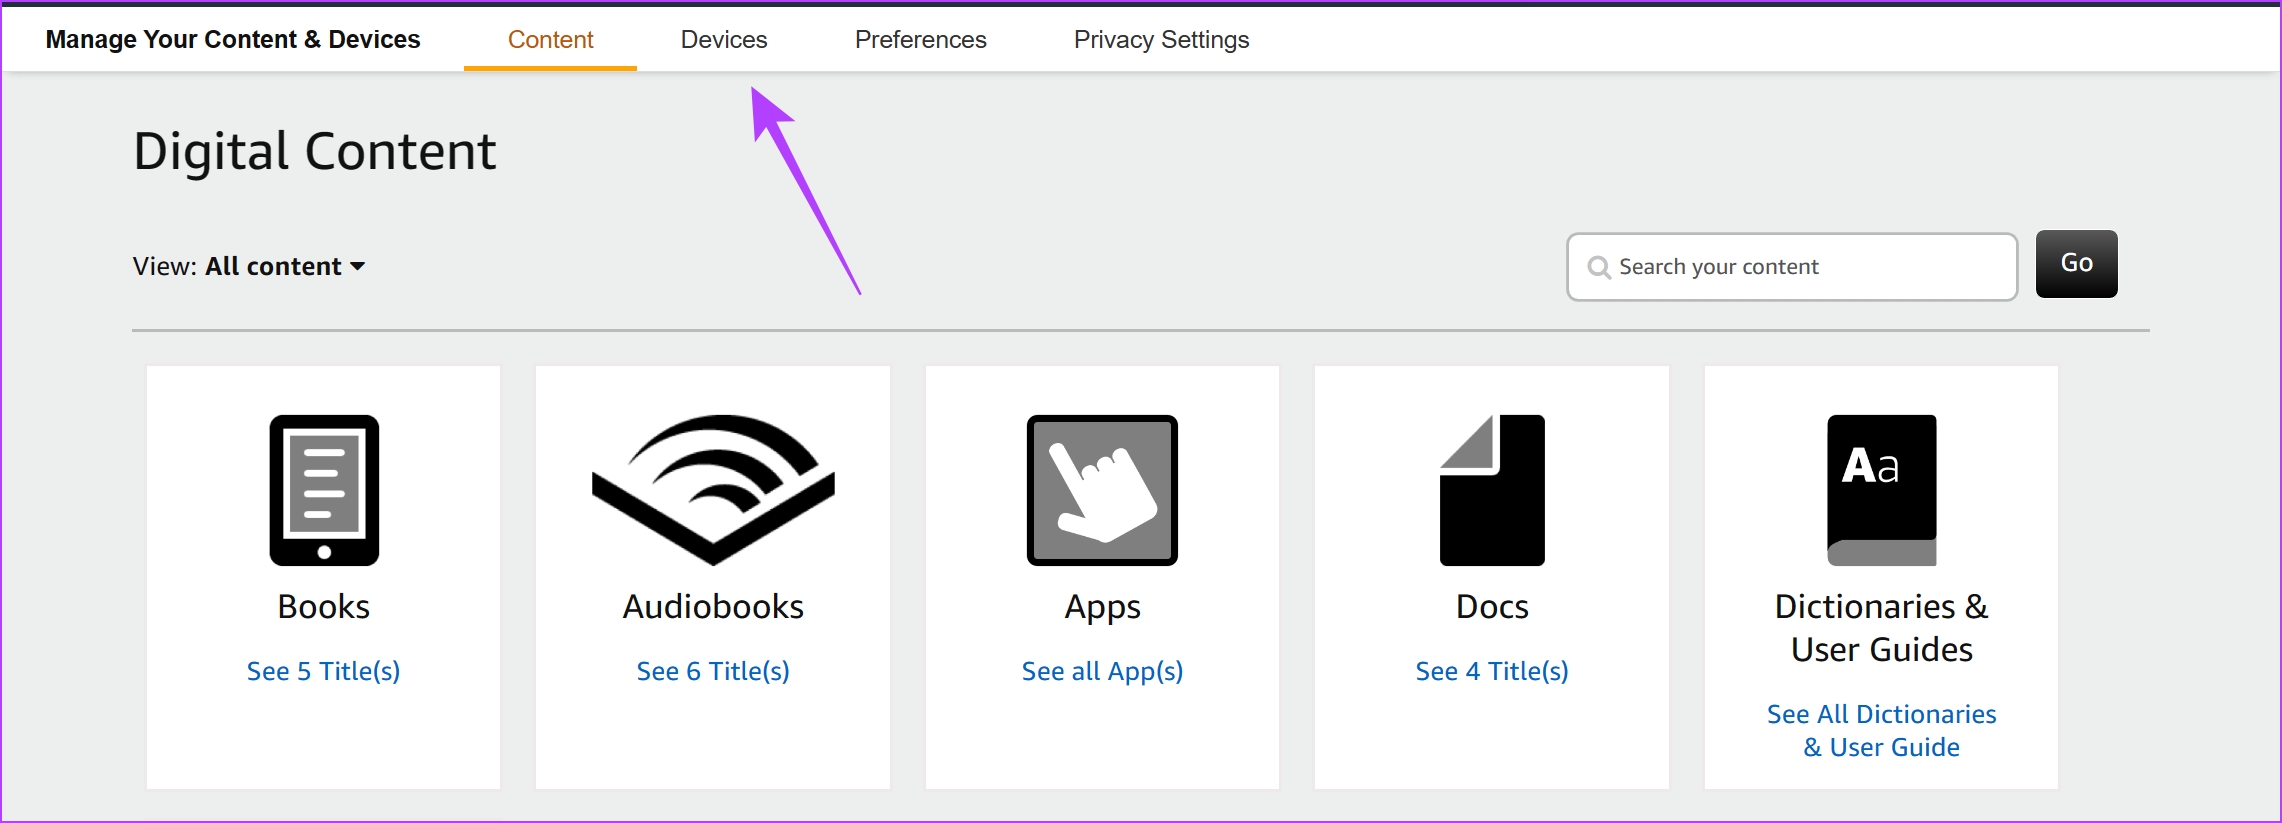
Step 3: Click on Devices.
Step 4: Click on Kindle.

Step 5: Select the Kindle device from which you want to remove the account.
Step 6: Click on Deregister. This will remove the account from your Kindle reader.

Also Read: How to create and manage collections on Amazon Kindle
How to Add a New Account on Your Kindle
To change the Amazon account on your Kindle reader, you need to add a new account once you remove the existing account. However, unlike removing the account, you can only add a new account to your Kindle reader on the reader itself and not through the Amazon mobile or web app.
Step 1: Tap anywhere on the screen and select the downward-facing arrow on the topmost section of the screen.
Step 2: Tap on all Settings.
Step 3: Tap on Your Account.
Step 4: You will see two options – either add an existing account or create a new account. Select the relevant option and enter the necessary credentials.
If you want to create a new account, we recommend you use the Amazon app on mobile or PC. Typing in all the details for a new account is a cumbersome process on your Amazon account.

Also Read: How to fix Amazon Kindle not showing book covers
FAQs on Amazon Account on Kindle
No. You cannot add multiple accounts to your Kindle reader.
No. You cannot add a profile on Kindle. However, you get to add a child profile for parental controls on Kindle.
Yes. You need an internet connection to remove an account on Kindle.
Was this helpful?
Last updated on 30 June, 2024
Read Next
 6 Best Amazon Kindle Scribe Covers and Cases
The Amazon Kindle Scribe is perhaps one of the largest eReaders right now. It has a huge footprint, and it can be difficult to hold.
6 Best Amazon Kindle Scribe Covers and Cases
The Amazon Kindle Scribe is perhaps one of the largest eReaders right now. It has a huge footprint, and it can be difficult to hold.
 How to Use Text-To-Speech on Amazon Kindle
Enable Text-To-Speech on Kindle The VoiceView Screen Reader is an accessibility feature that lets you listen to Kindle books over Bluetooth.
How to Use Text-To-Speech on Amazon Kindle
Enable Text-To-Speech on Kindle The VoiceView Screen Reader is an accessibility feature that lets you listen to Kindle books over Bluetooth.
 3 Fixes for Amazon Kindle Not Showing Book Covers
Basic Fixes Check the side loaded book file type: Besides ebooks, you can also documents and webpages to your Kindle reader.
3 Fixes for Amazon Kindle Not Showing Book Covers
Basic Fixes Check the side loaded book file type: Besides ebooks, you can also documents and webpages to your Kindle reader.
 How to Create and Manage Collections on Amazon Kindle
How to Set Up Collections on Your Kindle Having a Collection helps you manage titles from different genres or subjects stored on your Kindle.
How to Create and Manage Collections on Amazon Kindle
How to Set Up Collections on Your Kindle Having a Collection helps you manage titles from different genres or subjects stored on your Kindle.
 4 Best Ways to Add Ebooks to Kindle App From Mobile and Desktop
Amazon Kindle is a great ebook reader app for mobile devices.
4 Best Ways to Add Ebooks to Kindle App From Mobile and Desktop
Amazon Kindle is a great ebook reader app for mobile devices.
 How to Disable Word Wise on Your Kindle Reader
How to Turn Off Word Wise on Kindle Here are step-by-step instructions to turn off Word Wise on your Kindle reader.
How to Disable Word Wise on Your Kindle Reader
How to Turn Off Word Wise on Kindle Here are step-by-step instructions to turn off Word Wise on your Kindle reader.
 2 Ways to Fix a Frozen Kindle Screen
Basic Fixes Low battery: If your Kindle's battery is critically low, it might freeze as it may not have enough power to refresh the display.
2 Ways to Fix a Frozen Kindle Screen
Basic Fixes Low battery: If your Kindle's battery is critically low, it might freeze as it may not have enough power to refresh the display.
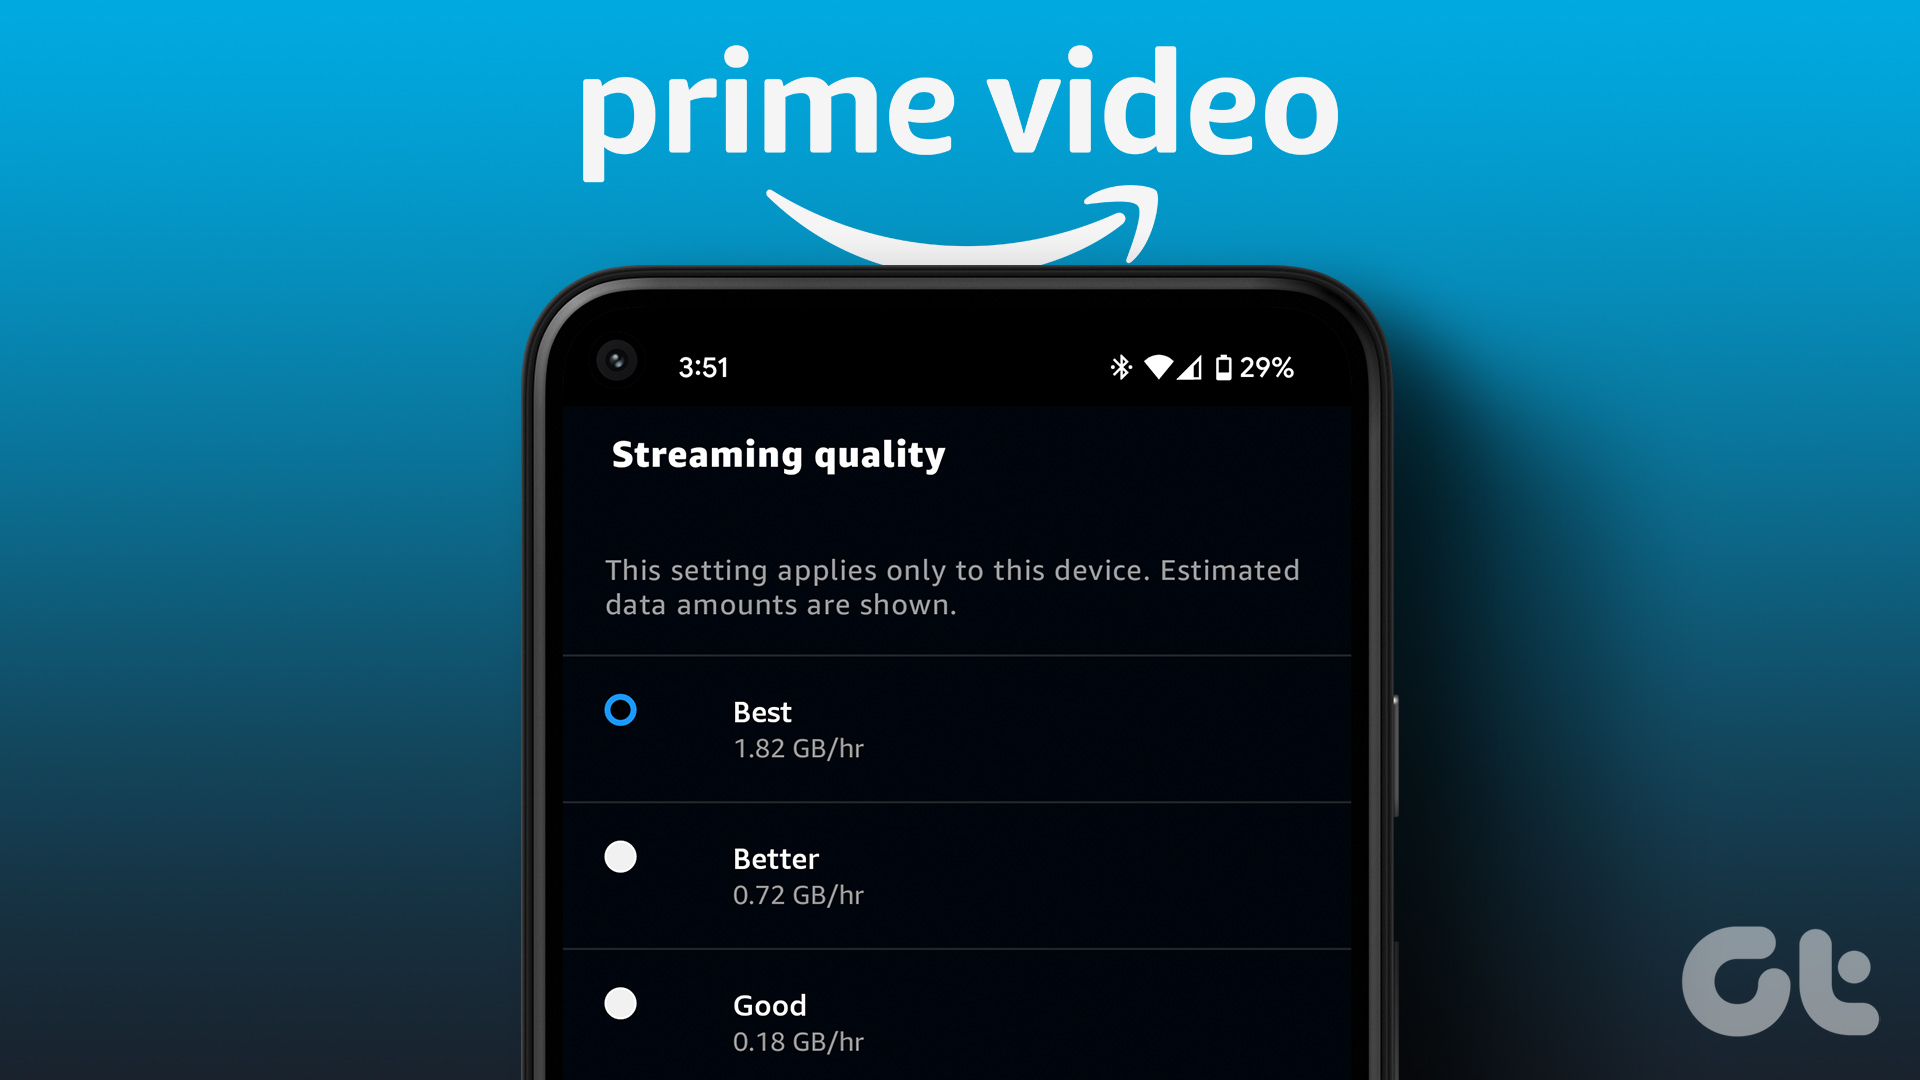 How to Change Amazon Prime Video Streaming Quality on Any Device
Most streaming services these days offer the best quality possible.
How to Change Amazon Prime Video Streaming Quality on Any Device
Most streaming services these days offer the best quality possible.
The article above may contain affiliate links which help support Guiding Tech. The content remains unbiased and authentic and will never affect our editorial integrity.