Microsoft regularly releases Windows updates to introduce new features and fix known issues. While most updates install without problem, some might throw errors during installation.
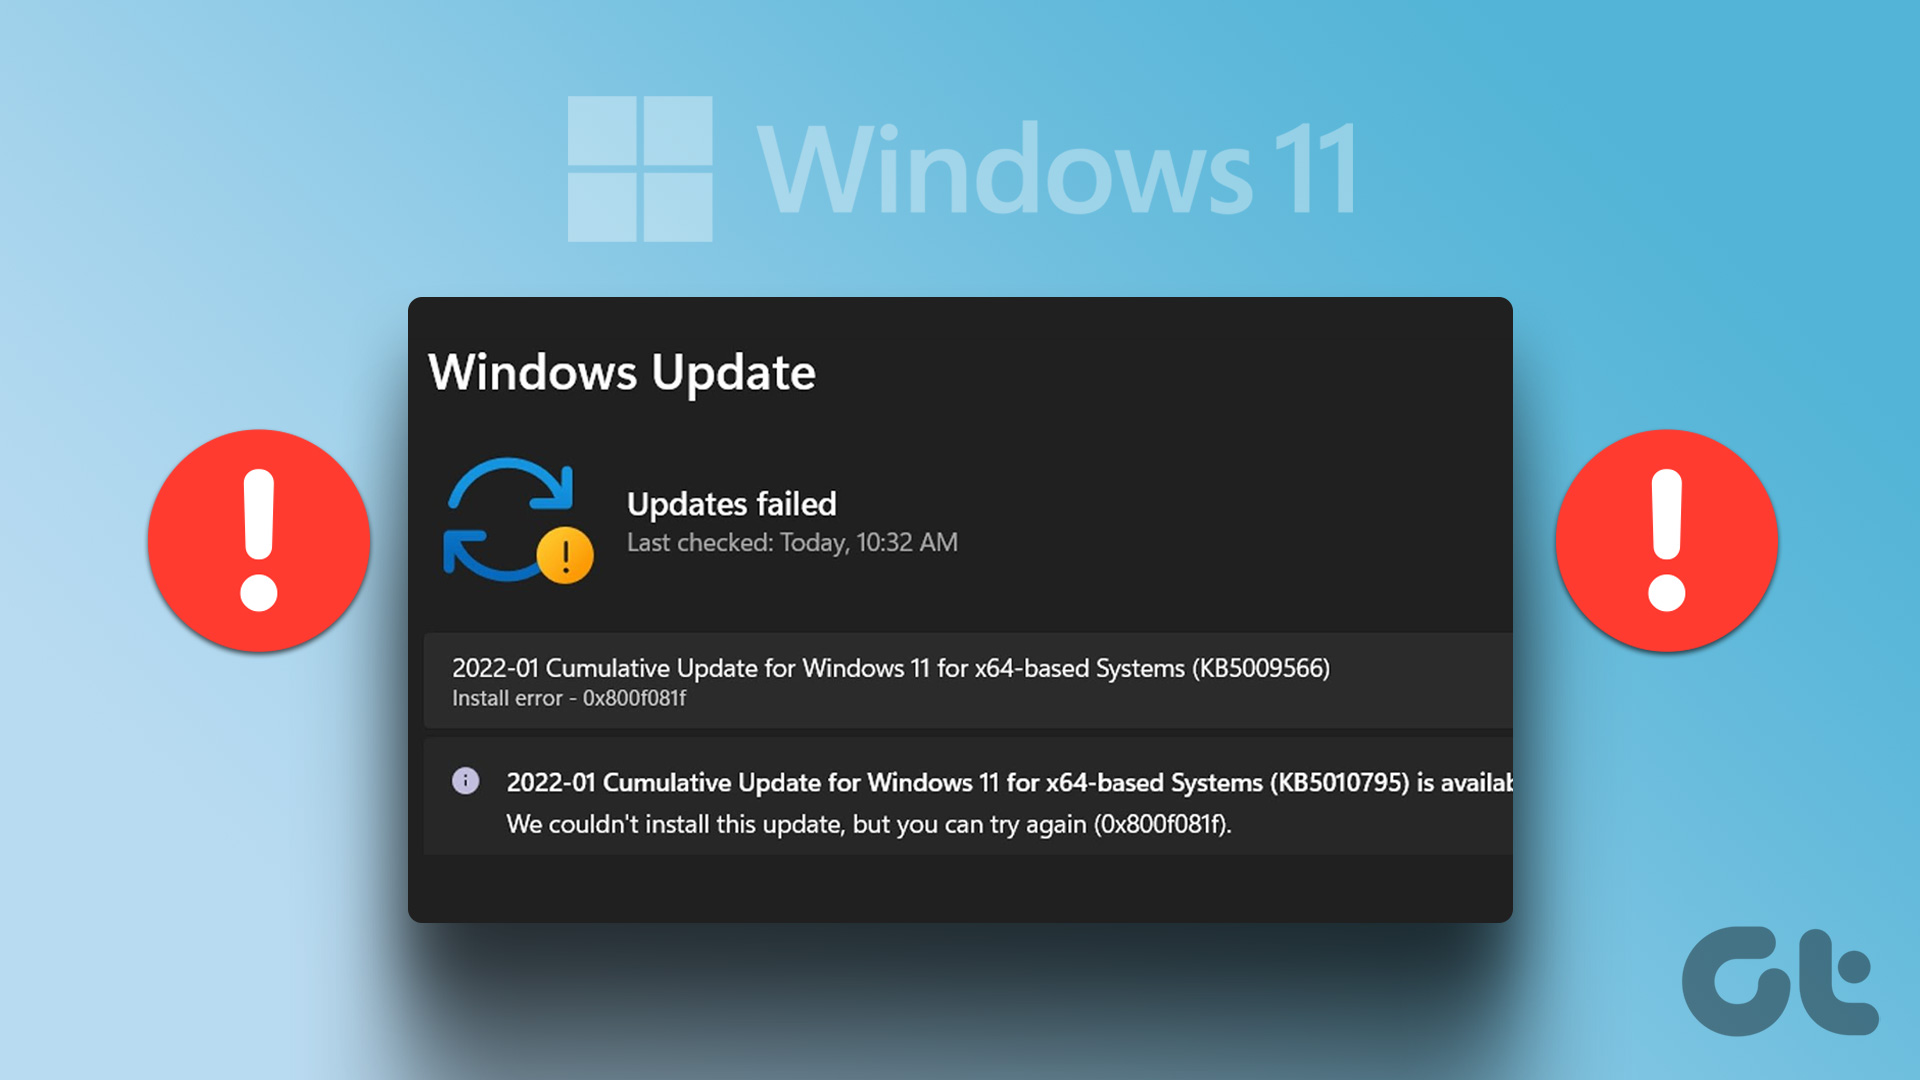
The error 0x800f081f is one of the many update errors you might face while downloading Windows 11 updates. Luckily, it’s a very common update error and can easily be eliminated. Check out all the working solutions to eliminate Windows update error 0x800f081f on Windows 11.
What Causes Windows Update Error 0x800f081f
Considering the number of updates Microsoft rolls out, you’re always likely to encounter an update error while downloading or installing an update. The update error 0x800f081f usually appears when your computer fails to download Windows 11 22H2 update.
Some of the prime culprits behind this update error are:
- Incompatible system
- Corrupt Windows update components
- Misconfigured Group policy settings
- Unavailability of Microsoft .NET Framework 3.5
Now that you know the main reasons behind the update error, let’s dive into all the working fixes.
1. Check Your Computer Compatibility With the Windows 11 22H2 Update
You’re likely to face the update 0x800f081f if your computer isn’t compatible with the Windows 11 22H2 update. This situation mainly arises on a system where you have installed Windows 11 by bypassing its minimum requirement.
You can check whether your computer is compatible with the 22H2 update or not by following the below steps:
Step 1: Press the Windows + R keys to open the Run dialog box.
Step 2: In the text field, type regedit and press Enter.

Step 3: In the Registry Editor, head toward the following location:
Computer\HKEY_LOCAL_MACHINE\SOFTWARE\Microsoft\Windows NT\CurrentVersion\AppCompatFlags\TargetVersionUpgradeExperienceIndicators\NI22H2
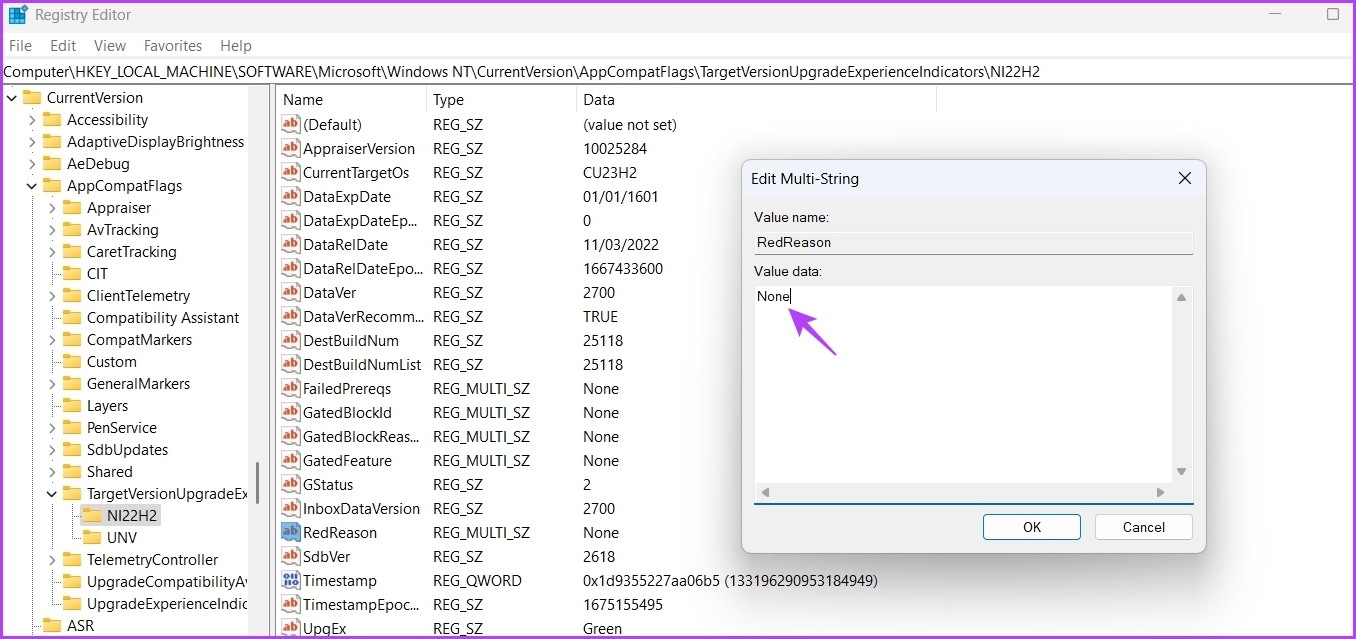
Step 4: Double-click on the RedReason entry in the right pane.
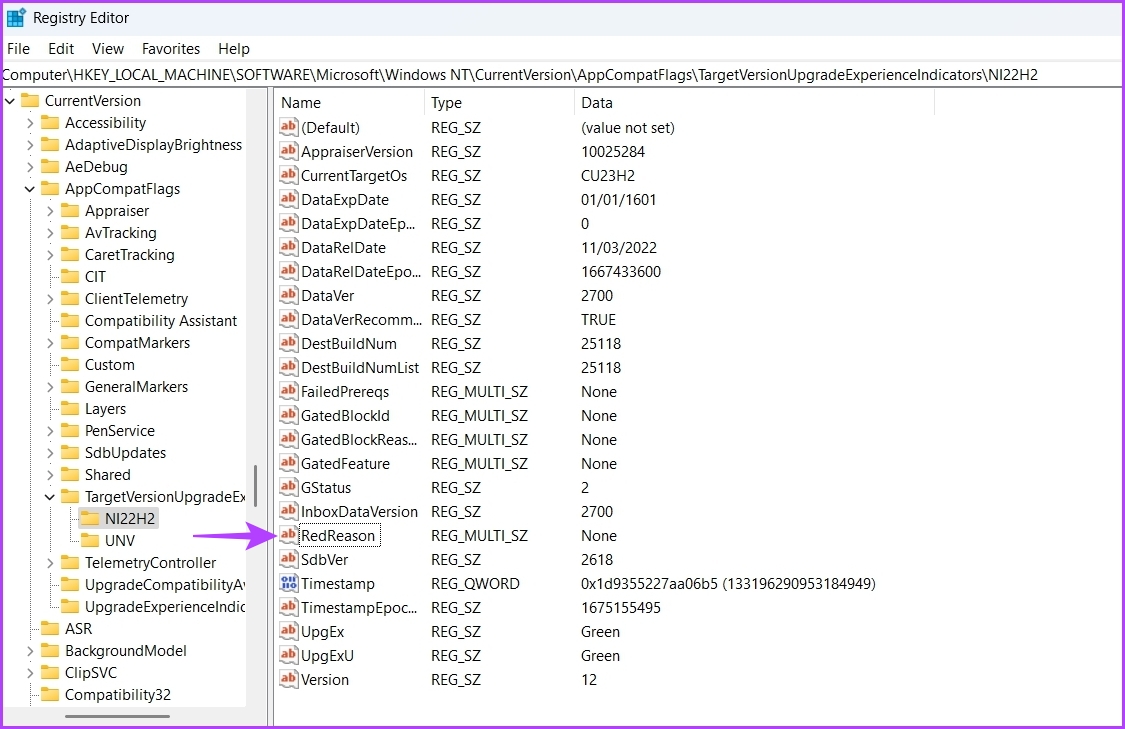
If the Value data says ‘None,’ your system is compatible with the 22H2 update. But if it says TPM UEFISecureBoot, you can’t install the update on your computer.
2. Use the Window Update Troubleshooter
Windows Update Troubleshooter is a built-in utility that can come in handy in resolving Windows Update issues. Here’s how you can run the Windows Update Troubleshooter on your computer:
Step 1: Press the Windows + I keys to open the Settings app.
Step 2: Choose the Troubleshoot option in the right pane.

Step 3: Select Other troubleshooters.
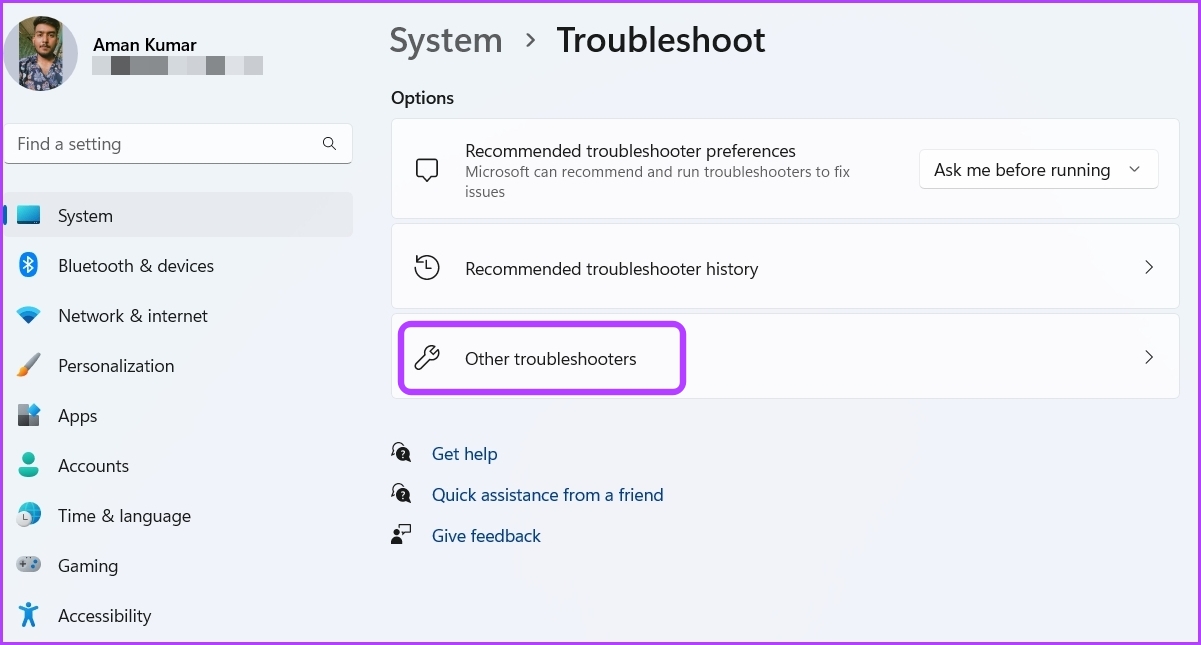
Step 4: Click the Run button next to the Windows Update option.
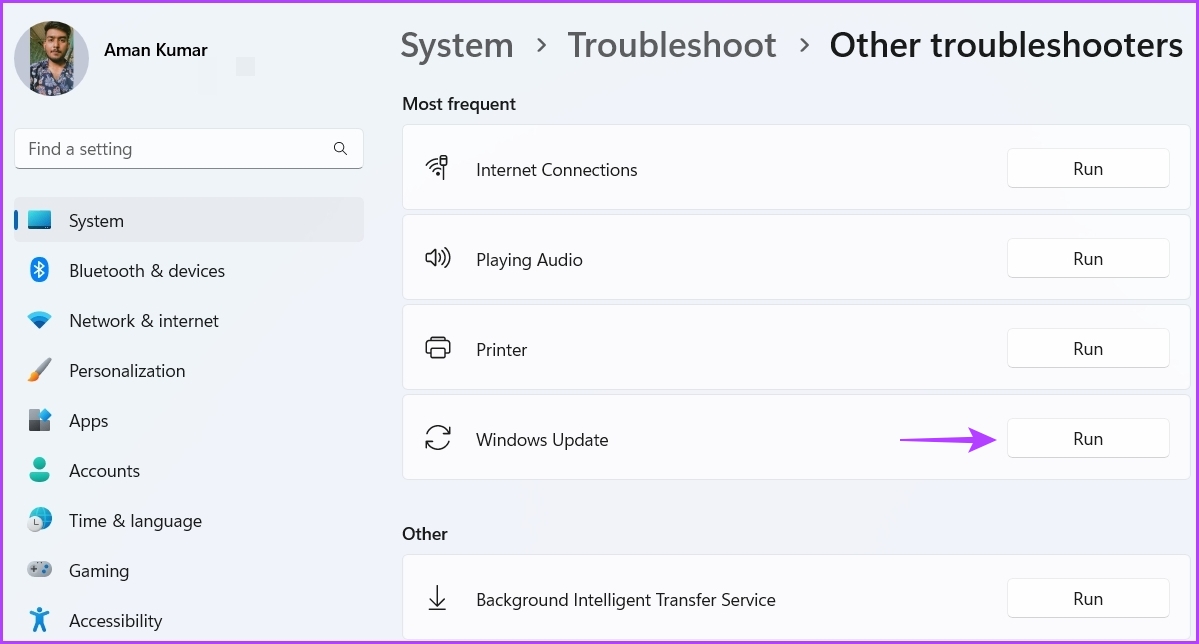
The Window Update Troubleshooter will crop up and look for any available issues. If it finds any, it will automatically resolve it without much user input.

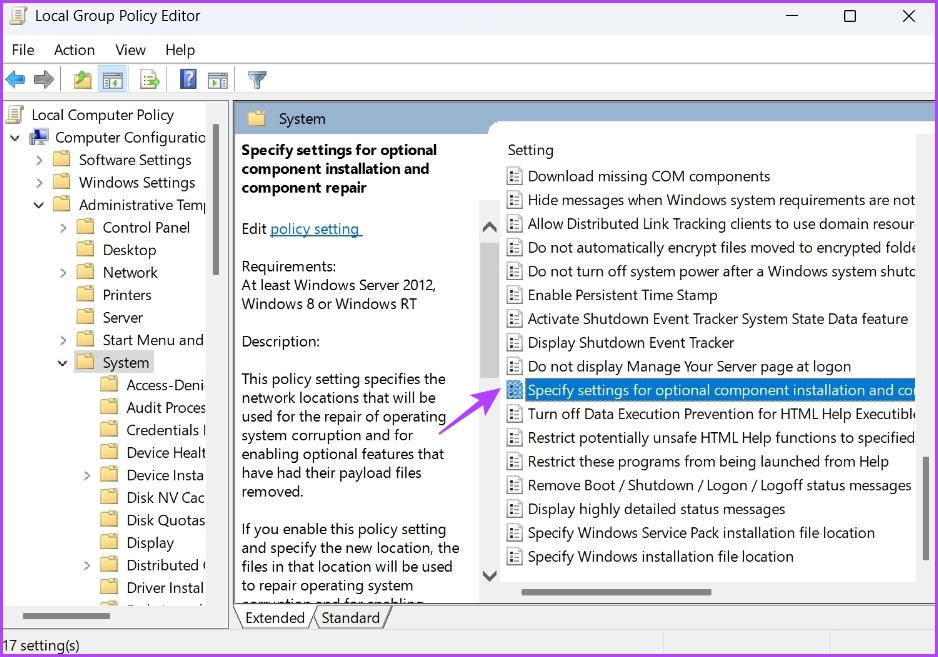
3. Edit the Group Policy Settings
The Windows update error 0x800f081f will likely appear if optional update installation is disabled on your computer. You can use the Local Group Policy Editor, but it isn’t available on the Windows 11 Home edition. The Group Policy Editor is available in Windows 11 Pro, Enterprise and Education editions.
To enable it, follow the below instructions:
Step 1: Press Windows + R keys to the Run dialog box, type gpedit.msc and click OK to open the Local Group Policy Editor.

Step 2: In the Local Group Policy Editor, navigate to the below location:
Computer Configuration > Administrative Templates > System

Step 3: In the right pane, look for and double-click on the ‘Specify settings for optional component installation and component repair’ policy.
Step 4: Click the Enabled option and click Apply to save the changes.
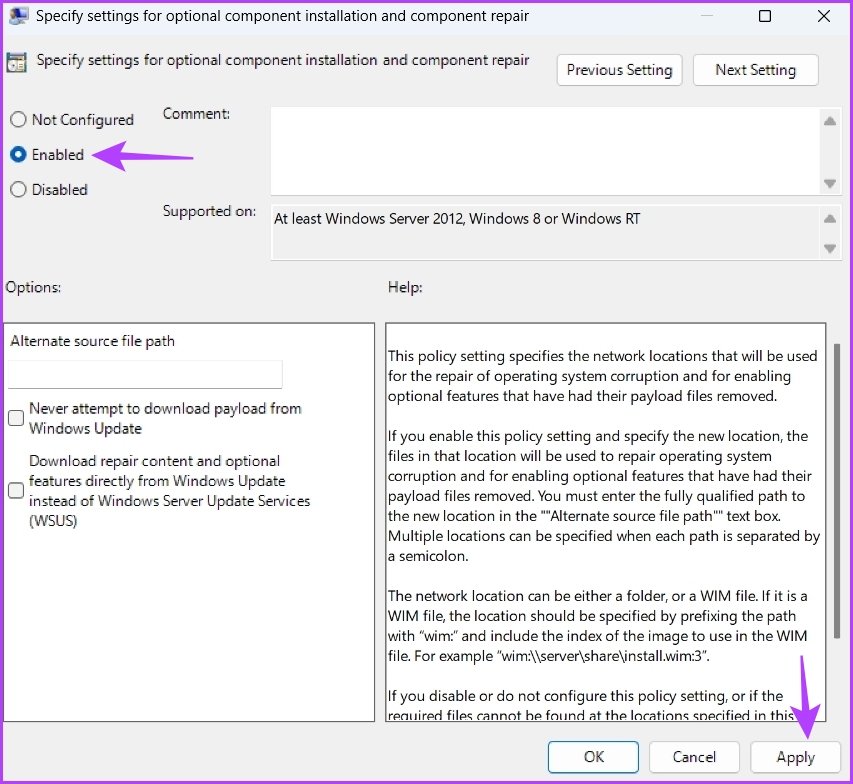
Try installing the update and check if you still face the error code.
4. Reinstall Microsoft .NET Framework 3.5
Reinstalling the .NET Framework 3.5 is another effective solution to eliminate the Windows update error 0x800f081f. Here’s how to do that:
Step 1: Press the Windows + S to open the Windows Search.
Step 2: In the search bar, type Turn Windows features on or off and choose Open.

Step 3: Uncheck the .NET Framework 3.5 (includes 2.0 and 3.0) option and click OK. Then, wait till the framework is uninstalled from your computer.
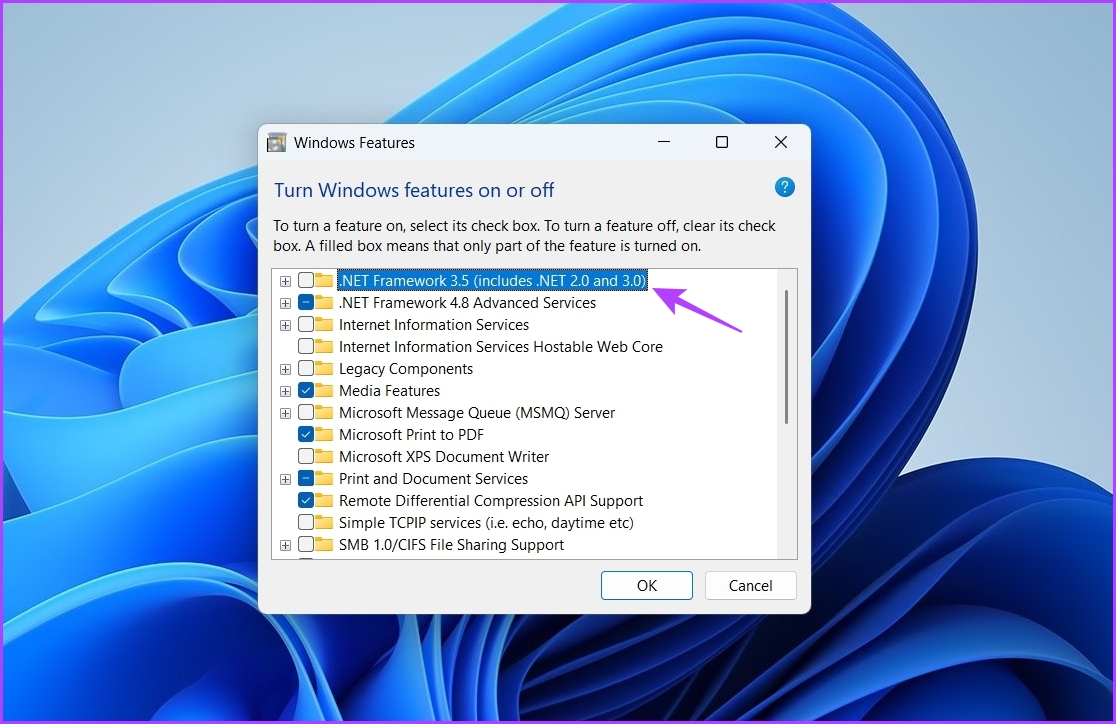
Step 4: Navigate to .NET Framework 3.5 download website and click the Download icon.
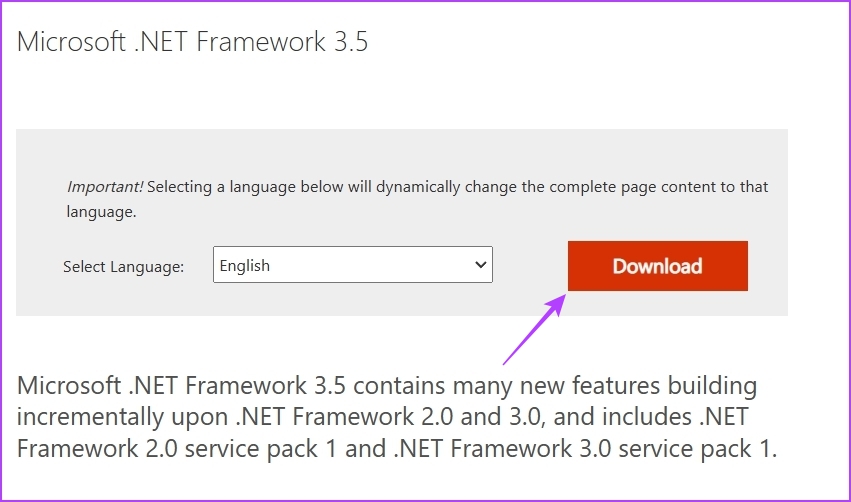
Step 5: Open the downloaded executable file and choose Download and install this feature option.

Windows will download and install the .NET Framework 3.5 on your computer. After that, check if the update error appears again.

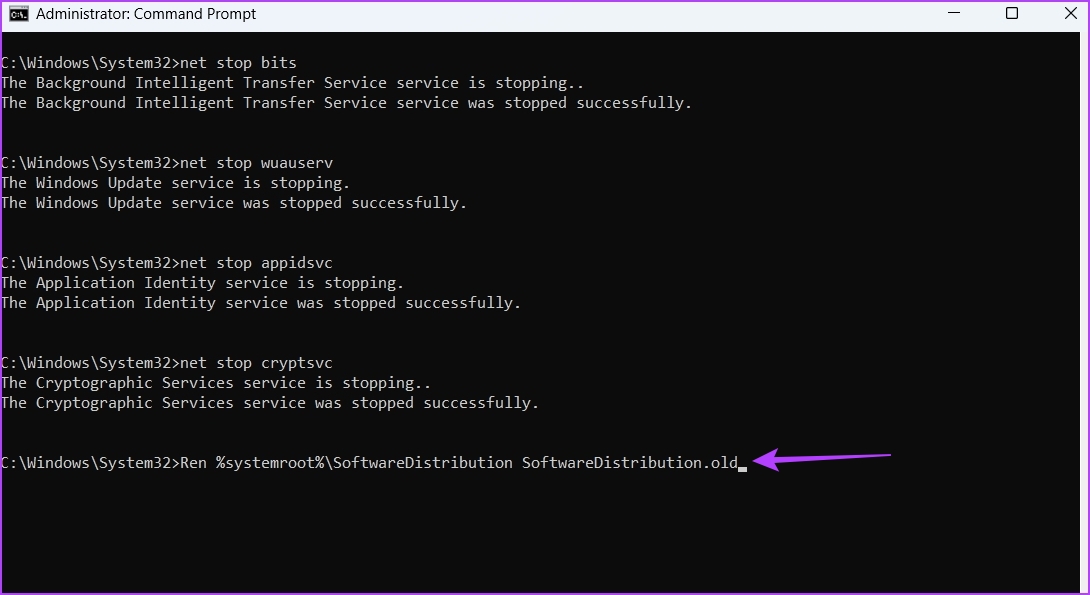
5. Reset Windows Update Components
The SoftwareDistribution and Catroot2 are two of the most important folders on a Windows operating system. They contain files required to install Windows updates.
If the content of these folders gets corrupted, you’ll face issues upon installing Windows updates. The best way to remove the corruption is to reset the Windows update components. Here’s how to do that:
Step 1: Press Windows + S keys to open Windows Search, type Command Prompt in the search bar, and choose ‘Run as administrator.’

Step 2: In the Command Prompt window, type these four commands and press Enter after each one:
net stop bits
net stop wuauserv
net stop appidsvc
net stop cryptsvc

Step 3: Type the following command and press Enter. Executing this command will rename the SoftwareDistribution folder:
Ren %systemroot%\SoftwareDistribution SoftwareDistribution.old
Step 4: To rename the Catroot2 folder, type the following command and press Enter:
Ren %systemroot%\SoftwareDistribution SoftwareDistribution.old
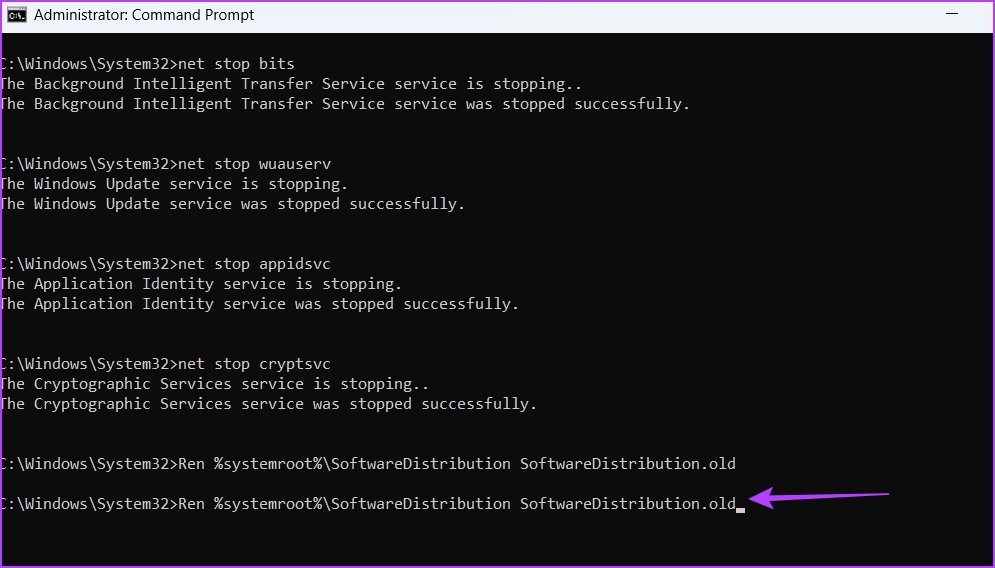
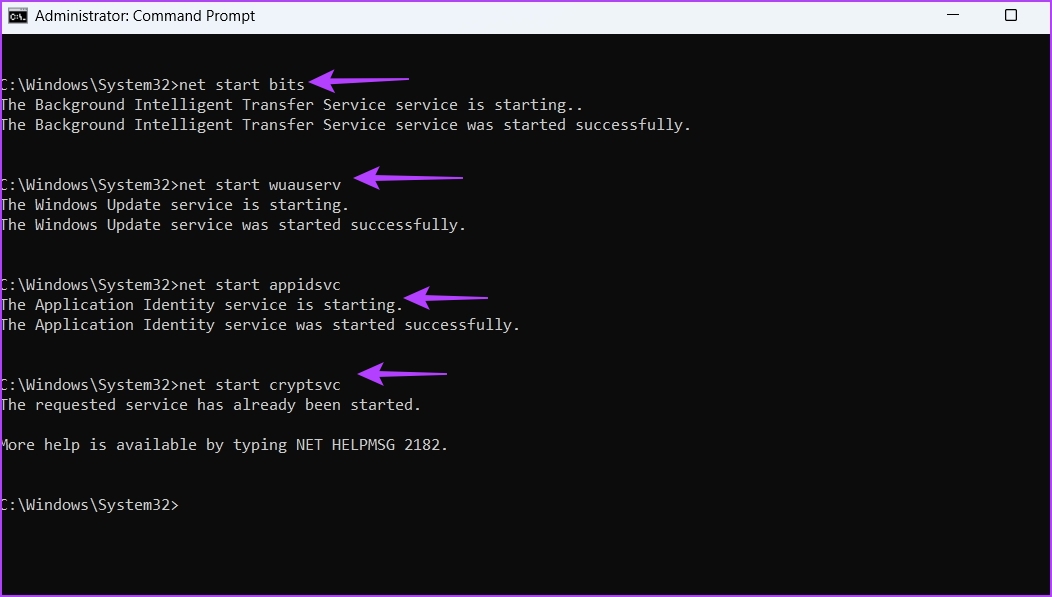
Step 5: Type the following and press Enter after each command to restart the stopped services:
net start bits
net start wuauserv
net start appidsvc
net start cryptsvc
6. Manually Enable Windows Update Services
A couple of Windows update services must be enabled and running for you to install Windows updates. If any of these services are disabled, you might face update errors.
Windows Update, Application Identity, and Background Intelligent Transfer Service are services. Here’s how to enable the Windows Update service:
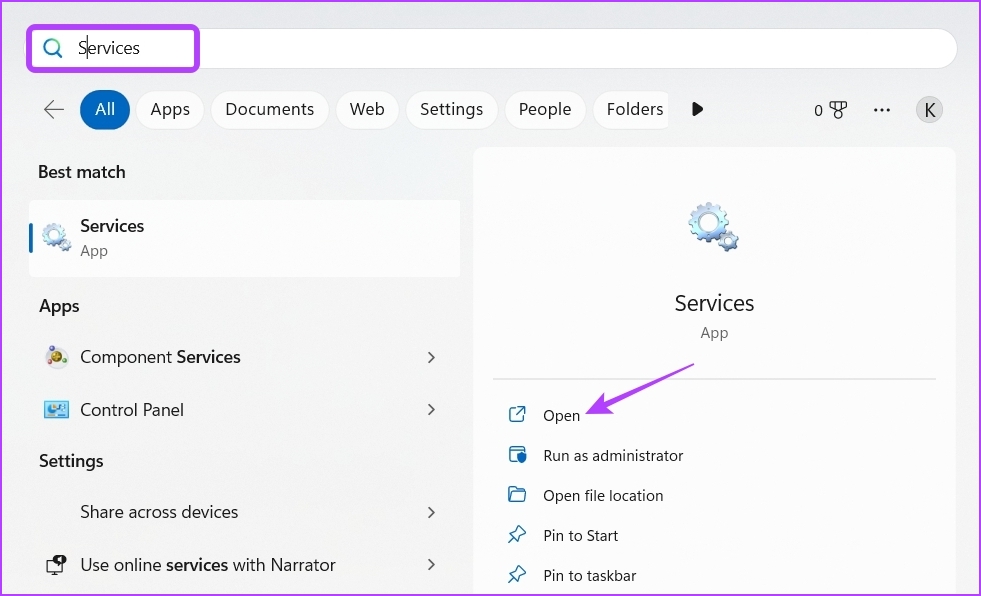
Step 1: Press Windows + S keys to open Windows Search, type Services and click Open.
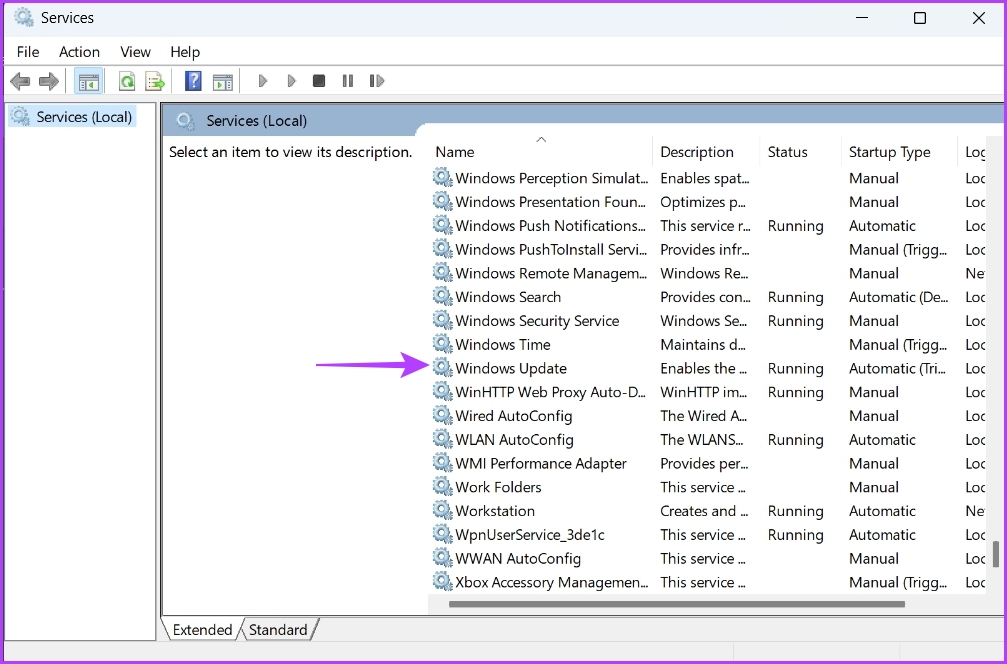
Step 2: Double-click on the Windows Update service to open its properties window.
Step 3: Change the Startup type to Automatic and click Start under the Service status section.
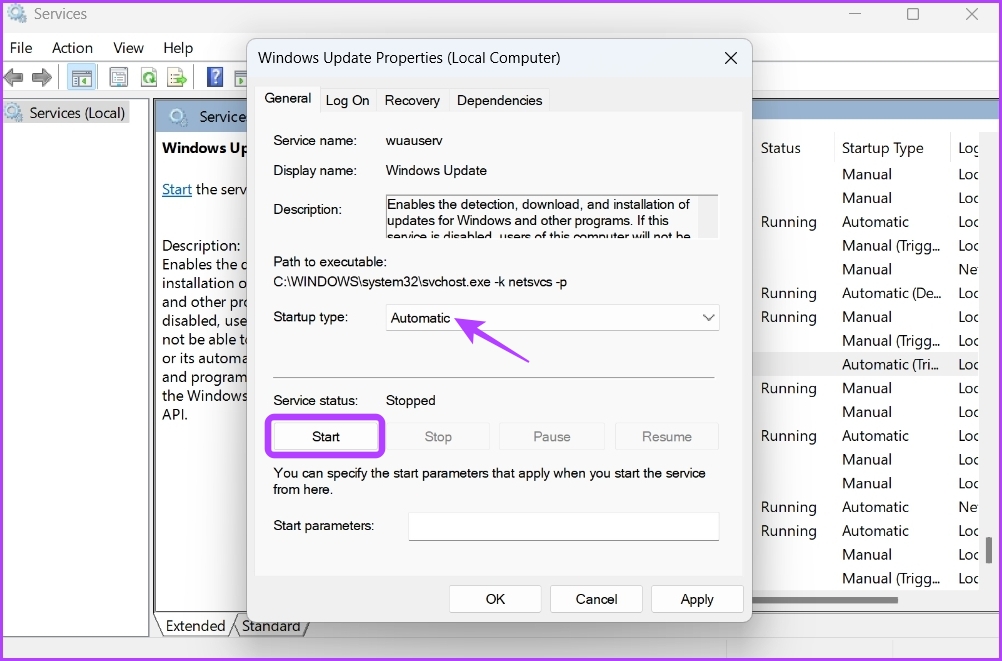
Step 4: Click Apply and OK buttons.
Similarly, enable the Application Identity and Background Intelligent Transfer Service.
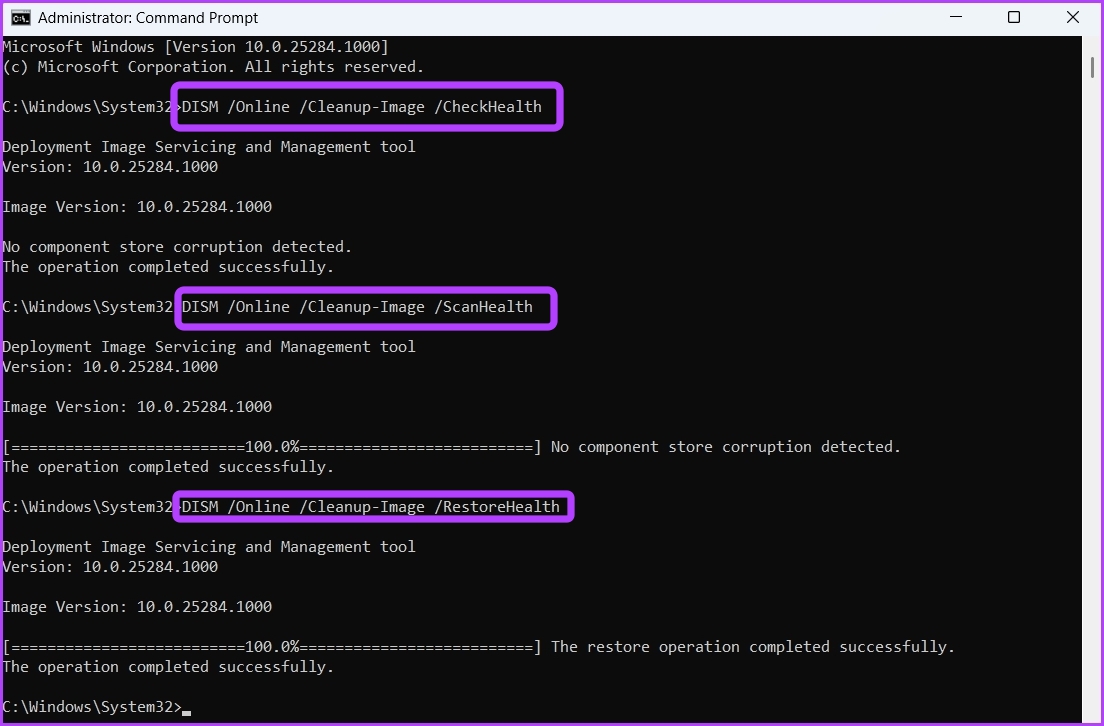
7. Run SFC and DISM Scan
Are you still unable to update your computer? If yes, then corruption in the OS files is likely causing the issue. You can detect and eliminate corrupt files by running the SFC scan. Here’s how:
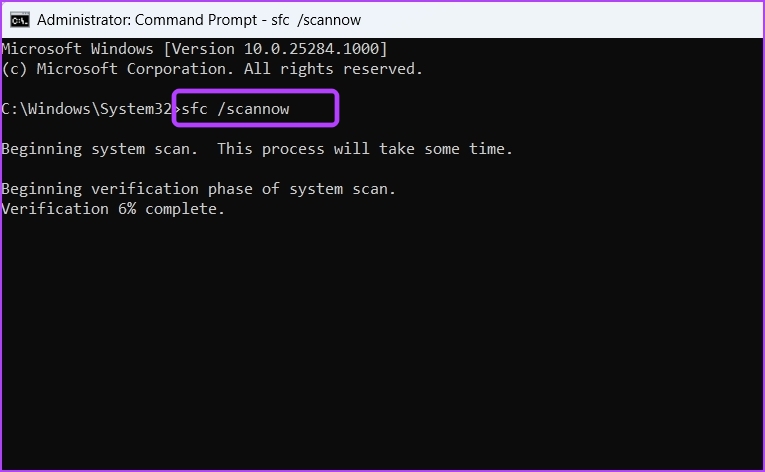
Step 1: Open Command Prompt as an administrator.
Step 2: Type sfc /scannow and press Enter.
After the scan is complete, restart your computer and check for the problem. If it persists, try executing the DISM scan.
Unlike SFC scan, DISM scan repair system images and files on your computer. To run the DISM scan, open Command Prompt with administrative access again, type the following commands one by one, and press Enter after each command:
DISM /Online /Cleanup-Image /CheckHealth
DISM /Online /Cleanup-Image /ScanHealth
DISM /Online /Cleanup-Image /RestoreHealth
Update Windows Without Issues
Nothing worse than facing an error code while downloading Windows updates. Like most error codes, Windows update error 0x800f081f can easily resolve. Just try the above solutions to eliminate the problem for good.
Was this helpful?
Last updated on 01 February, 2023
1 Comment
Leave a Reply
Read Next
 5 Fixes for “Word Experienced an Error Trying to Open the File” Error in Windows
Fix 1: Unblock Your Word File Microsoft Word may fail to open a document if it has been altered by third-party software.
5 Fixes for “Word Experienced an Error Trying to Open the File” Error in Windows
Fix 1: Unblock Your Word File Microsoft Word may fail to open a document if it has been altered by third-party software.
 5 Ways to Fix Some Update Files are Missing or Have Problems Error on Windows 11
Fix 1: Run the Windows Update Troubleshooter Windows 11 includes a dedicated troubleshooter to automatically identify and resolve any common issues with the Windows Update process.
5 Ways to Fix Some Update Files are Missing or Have Problems Error on Windows 11
Fix 1: Run the Windows Update Troubleshooter Windows 11 includes a dedicated troubleshooter to automatically identify and resolve any common issues with the Windows Update process.
 5 Ways to Fix Error Encountered During Windows Update
Basic Fixes: Check the network connection: If your internet speeds are less than ideal, it might cause the Windows update to fail mid-way.
5 Ways to Fix Error Encountered During Windows Update
Basic Fixes: Check the network connection: If your internet speeds are less than ideal, it might cause the Windows update to fail mid-way.
 How to Fix Update Error 0x80248007 in Windows 11
Are you struggling to update your Windows 11 operating system due to the frustrating error 0x80248007?
How to Fix Update Error 0x80248007 in Windows 11
Are you struggling to update your Windows 11 operating system due to the frustrating error 0x80248007?
 9 Ways to Fix “Update Device Settings to Accept Media Transfers” Error on Windows 11
When you connect your Android or iPhone to your Windows device, you can see most files in the Photos app.
9 Ways to Fix “Update Device Settings to Accept Media Transfers” Error on Windows 11
When you connect your Android or iPhone to your Windows device, you can see most files in the Photos app.
 3 Ways to Delete Old Windows Update Files From Windows 10 and 11
Method 1: Delete Old Windows Update Files via Settings The Storage section of the Settings app provides a detailed breakdown of all temporary files on your PC, including old Windows
3 Ways to Delete Old Windows Update Files From Windows 10 and 11
Method 1: Delete Old Windows Update Files via Settings The Storage section of the Settings app provides a detailed breakdown of all temporary files on your PC, including old Windows
 5 Best Ways To View Windows Update History In Windows 11
By constantly updating your Windows 11 operating system, you get access to new or improved features to deliver a better user experience.
5 Best Ways To View Windows Update History In Windows 11
By constantly updating your Windows 11 operating system, you get access to new or improved features to deliver a better user experience.
 5 Fixes for “Unspecified Error” When Copying Files or Folders in Windows
Fix 1: Check the Destination Drive Format Are you attempting to copy a file to an external drive that uses a non-NTFS format?
5 Fixes for “Unspecified Error” When Copying Files or Folders in Windows
Fix 1: Check the Destination Drive Format Are you attempting to copy a file to an external drive that uses a non-NTFS format?
The article above may contain affiliate links which help support Guiding Tech. The content remains unbiased and authentic and will never affect our editorial integrity.
Thank you for your “7 Best Fixes for Windows Update Error 0x800f081f in Windows 11”. My Windows 11 Pro PC is refusing to update. I’ve gone through your suggested solutions step-by-step without success. Spent almost a full day on it. I’m wondering whether a recent MS Windows 11 update has torpedoed the Windows update system.