Basic Fixes
- Run a Windows security scan: Malware in your Windows 11 system can easily corrupt the Recycle Bin. Open the Windows Security app, select ‘Virus & threat protection’, and click ‘Quick scan’ to remove the malware and fix the recycle bin corruption.
- Unplug the connected external drive: An external connected disk can malfunction the Recycle bin app and corrupt its contents. Unplug it and reboot the system.
- Restart the Windows Explorer: Restarting Windows Explorer is an effective way to resolve issues with the Recycle Bin, such as its contents not displaying properly or failing to refresh.
- Perform a System Restore: If you’re getting the ‘Recycle Bin is corrupted’ error or it suddenly fails to open, restore your Windows 11 system using the System Restore utility. Open the Run dialog using the Windows + R shortcut, type ‘rstrui’, and press Enter. Pick an old restore point and follow the on-screen instructions to complete it.
Fix 1: Repair Recycle Bin With CHKDSK Utility
CHKDSK (Check Disk) is a system tool to scan and fix all disk-related errors. You can run it with a single command on Command Prompt or Windows PowerShell to fix Recycle Bin errors.
Step 1: Press the Windows key, search Windows PowerShell, and click to open it.

Step 2: Paste the below command in the console, replace ‘X‘ with the Drive letter you’re facing issues with, and press Enter.
chkdsk X: /R

Step 3: Wait for the CHKDSK scan to complete and reboot your Windows 11 system.
Fix 2: Delete Hidden Files and Restore the Recycle Bin Icon
You might face the ‘Recycle Bin is Corrupted’ error on Windows if it contains hidden files that aren’t deleted. Clearing all the data in the Recycle Bin and restoring its icon manually should restore its normal functioning.
Step 1: Open the File Explorer app using the Windows + E shortcut. Click the three-dot menu at the top, and select Options.

Step 2: Open the View tab, enable Show hidden files, folders, and drives, and click Apply followed by OK to view all hidden items.

Step 3: Paste the below path into the File Explorer’s address bar and hit Enter to view all Recycle Bin app contents.
C:\$Recycle.Bin

Step 4: Delete all the contents and restart your PC to apply changes.
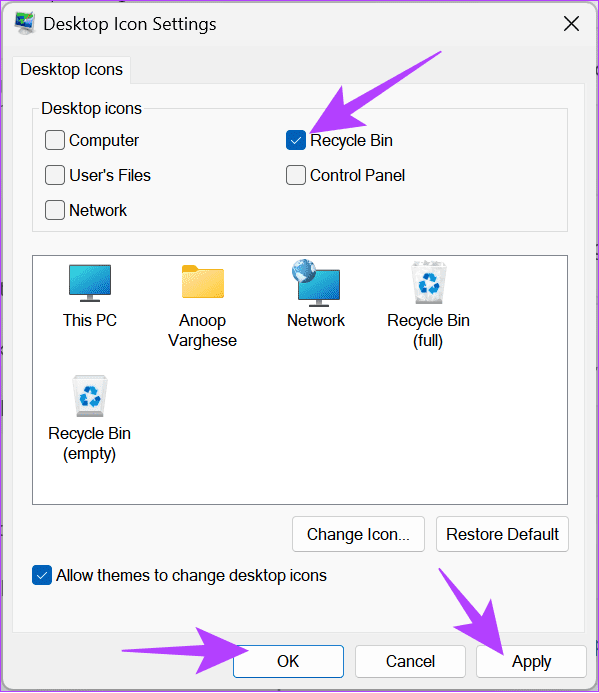
Step 5: Next, press the Windows + I shortcut to open Settings, select Personalization from the sidebar, and click Themes.

Step 6: Scroll down and select Desktop icon settings.
Step 7: Finally, enable Recycle Bin to reinstate its icon on your Desktop. If already enabled, disable and re-enable it. Click Apply followed by OK to save changes.
Fix 3: Reset Recycle Bin Using Command Prompt
If clearing the Recycle Bin contents manually doesn’t resolve its error, you can reset it using Command Prompt to restore normalcy.
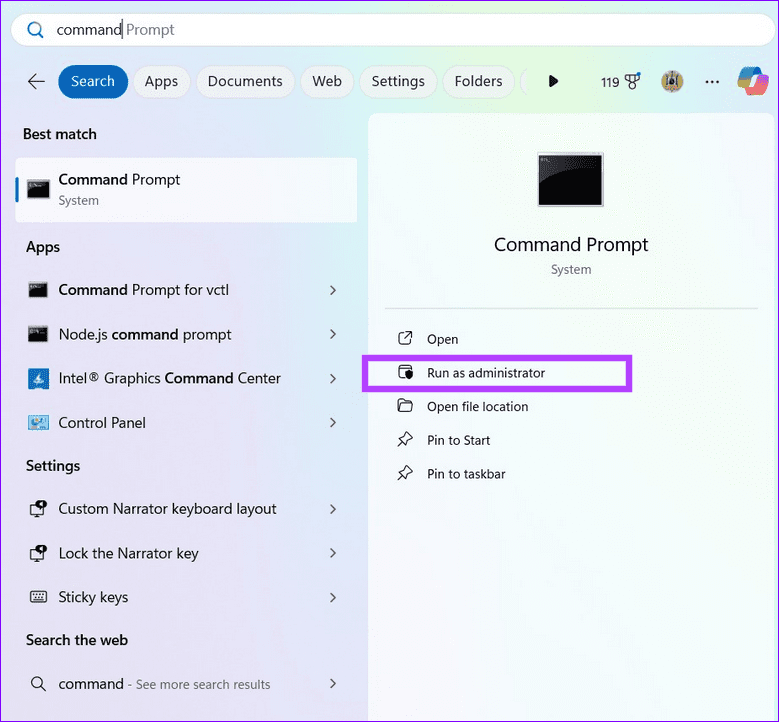
Step 1: Press the Windows key, search Command Prompt, and click Run as administrator.
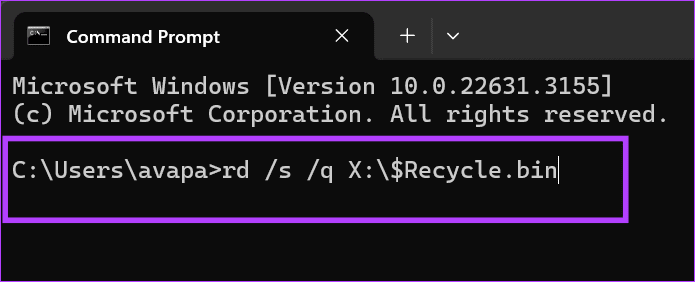
Step 2: Paste the below command in the console, replace ‘X‘ with your system installation drive letter, and press Enter to reset the Recycle Bin.
rd /s /q X:\$Recycle.bin
Fix 4: Repair Corrupt System Files
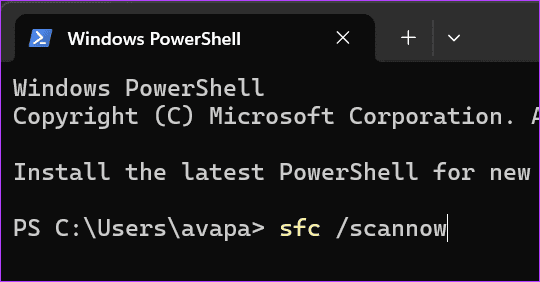
Lastly, you can use the System File Checker (SFC) to scan and repair corrupt system files causing the ‘Recycle Bin is corrupted’ error.
Step 1: Open the Command Prompt with administrative permissions (check the above steps).
Step 2: Type sfc /scannow in the console and hit Enter. Reboot your system once the scan completes.
Was this helpful?
Last updated on 19 August, 2024
Read Next
 Where Is Recycle Bin in Windows: 9 Ways to Find Recycle Bin
The Recycle Bin on your Windows computer lets you bring back a file or folder you accidentally deleted.
Where Is Recycle Bin in Windows: 9 Ways to Find Recycle Bin
The Recycle Bin on your Windows computer lets you bring back a file or folder you accidentally deleted.
 8 Ways to Fix Recycle Bin Is Grayed out Issue in Windows 10
The Recycle Bin acts as a failsafe for when you delete a file or folder and need to restore it.
8 Ways to Fix Recycle Bin Is Grayed out Issue in Windows 10
The Recycle Bin acts as a failsafe for when you delete a file or folder and need to restore it.
 Top 5 Ways to Fix Disk Structure Is Corrupted and Unreadable Error on Windows 10
Windows 10 gives you alerts whenever the external storage disk goes corrupt.
Top 5 Ways to Fix Disk Structure Is Corrupted and Unreadable Error on Windows 10
Windows 10 gives you alerts whenever the external storage disk goes corrupt.
 5 Fixes For a Corrupted User Profile on Windows 11
Basic Fixes: Update the computer: Windows updates often include bug fixes and patches and may correct the corrupted user profile.
5 Fixes For a Corrupted User Profile on Windows 11
Basic Fixes: Update the computer: Windows updates often include bug fixes and patches and may correct the corrupted user profile.
 5 Fixes for “Word Experienced an Error Trying to Open the File” Error in Windows
Fix 1: Unblock Your Word File Microsoft Word may fail to open a document if it has been altered by third-party software.
5 Fixes for “Word Experienced an Error Trying to Open the File” Error in Windows
Fix 1: Unblock Your Word File Microsoft Word may fail to open a document if it has been altered by third-party software.
 4 Ways to Fix Discord No Route Error on Windows 10 and Windows 11
Try Basic Fixes Restart your router: Since the "No Route" error mainly occurs when there's an interruption with your internet connection, you can start by restarting your router.
4 Ways to Fix Discord No Route Error on Windows 10 and Windows 11
Try Basic Fixes Restart your router: Since the "No Route" error mainly occurs when there's an interruption with your internet connection, you can start by restarting your router.
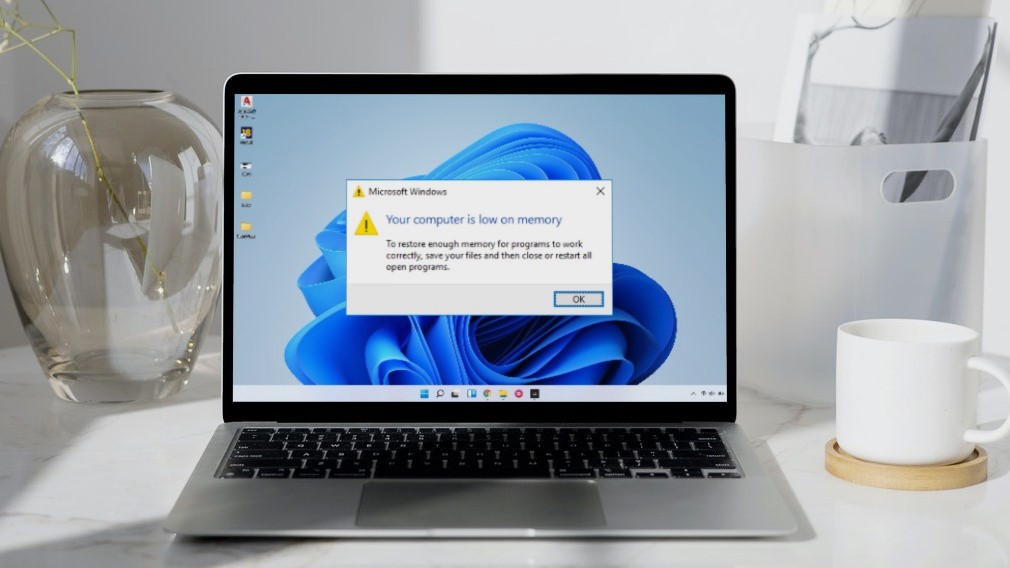 5 Ways to Fix “Your Computer Is Low on Memory” Error on Windows 10 and Windows 11
Try Basic Fixes Close unwanted apps and programs: Start by closing any unwanted apps and programs on your computer, especially the ones consuming a major chunk of your PC’s memory.
5 Ways to Fix “Your Computer Is Low on Memory” Error on Windows 10 and Windows 11
Try Basic Fixes Close unwanted apps and programs: Start by closing any unwanted apps and programs on your computer, especially the ones consuming a major chunk of your PC’s memory.
The article above may contain affiliate links which help support Guiding Tech. The content remains unbiased and authentic and will never affect our editorial integrity.