How to Use System Configuration Tool on Windows 11
The System Configuration Tool is divided into five tabs for easy navigation, each with different functions. Here’s what to do under each tab:
1. The General Tab
The General tab offers Startup selection options to configure your system’s startup behavior. The Startup section consists of three options that allow you to choose which services, devices, and drivers start whenever you boot your PC with varying degrees of control.

Those options are Normal Startup, Diagnostic Startup, and Selective Startup. Here’s what they do:
- Normal startup: As the name suggests, this mode loads up all the usual services and drivers as they normally would when the PC boots up.
- Diagnostic startup: Similar to Safe Mode, this option only loads up the essential services and devices. However, more advanced services, such as Networking, System Restore, and Windows Error Reporting, are halted to diagnose and fix software issues.
- Selective startup: This mode offers two other sub-options, which allow you to select whether to load system services, load startup items, or both.
To boot your PC into a certain Startup mode, click on the boot mode under Startup selection, followed by Apply. Next, restart your PC.
2. The Boot Tab
The boot tab of the System Configuration Tool lets you change how your computer boots and offers the ability to choose the default operating system (if you have more than one operating system on your PC), enable Safe mode with different configurations or drivers, and more.
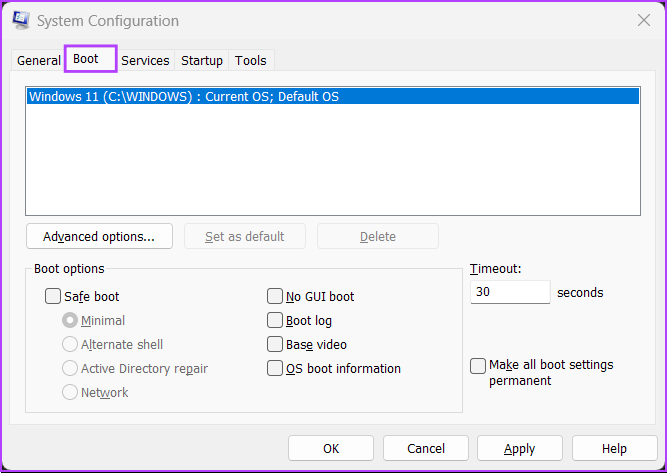
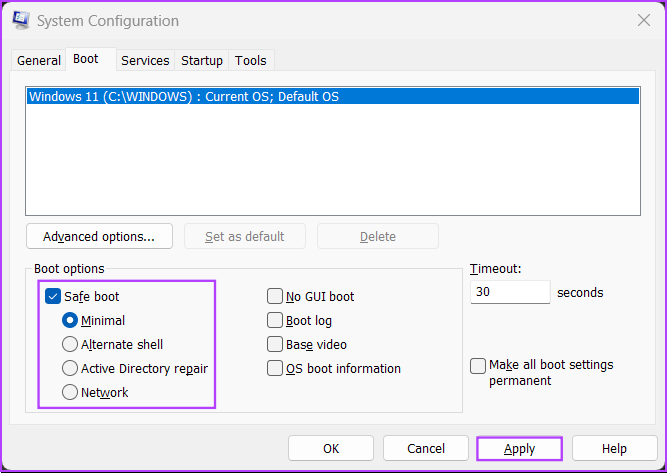
The primary function of the Boot tab is to let you customize the different settings that may impact booting your PC. It is also a quick way to boot your PC into safe mode by clicking the Safe Boot check box, followed by Apply.
As for the four sub-options listed below, you can choose any one according to your use case. Here’s what selecting each option does:
- Minimal: Selecting this option disables networking and allows you to load Windows in safe mode while running critical system services.
- Alternate shell: This option also disables networking but safely boots to a Command Prompt Window while running critical system services.
- Active Directory repair: It is only applicable to Windows Server operating systems. Selecting Active Directory repair allows an administrator to repair an Active Directory database.
- Network: Pretty similar to the Minimal boot mode, except with networking enabled.
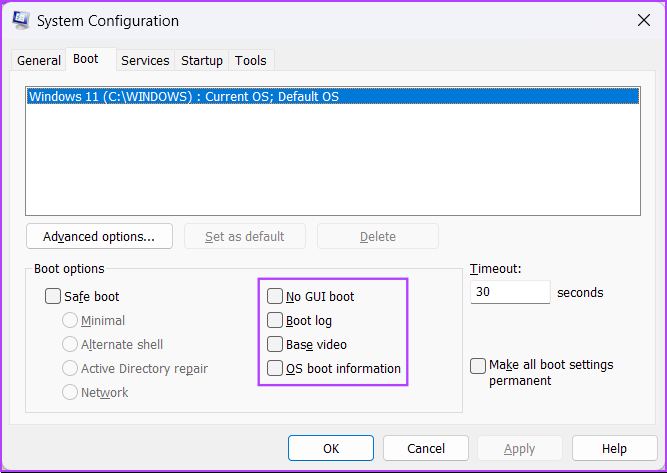
Safe boot and its sub-options aside, four other options are listed under Boot Options. Here’s what selecting each one does:
- No GUI boot: This option disables the Windows splash screen (manufacturer/Windows logo) when booting. It is helpful in troubleshooting issues related to the graphics/video card.
- Boot log: Select this option to create a log file with all the technical information about the boot process.
- Base video: This option Boots Windows in minimal VGA (lower resolution) mode. It is also helpful in troubleshooting issues related to graphics/video cards.
- OS boot information: Selecting this option lets you reveal the name of every driver and service when loaded during the boot process.
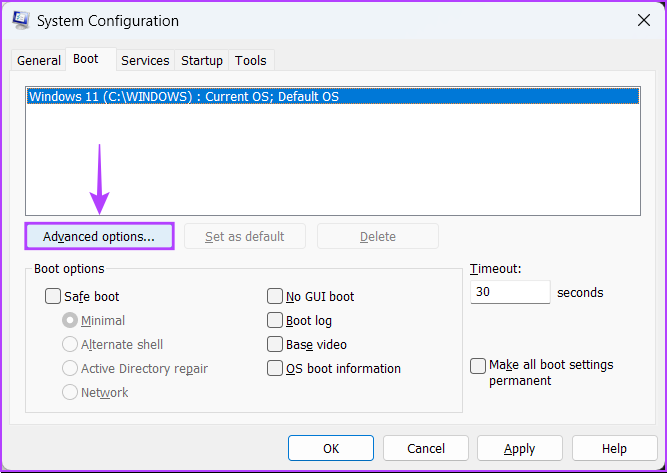
You can also use the Boot tab to limit the processors (CPU processing cores) and the maximum memory (RAM) your system can utilize. Here’s how:
Step 1: Open the System Configuration Tool > go to the Boot tab > select your current operating system > click Advanced Options.
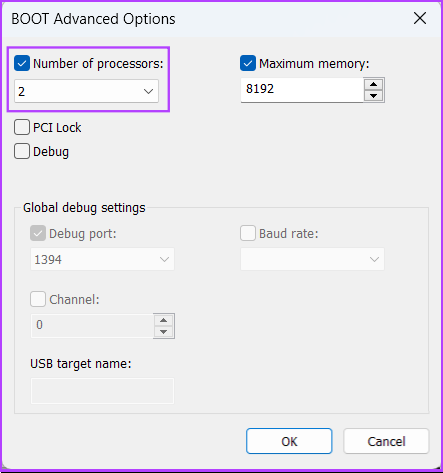
Step 2: When a BOOT Advanced Options dialog appears on your screen, click the Number of processors check box, followed by the drop-down list right below it, to select the number of processors your system can use.
Step 3: To change your system’s maximum memory, click on the Maximum memory checkbox and use the arrow keys on your keyboard to set its value.
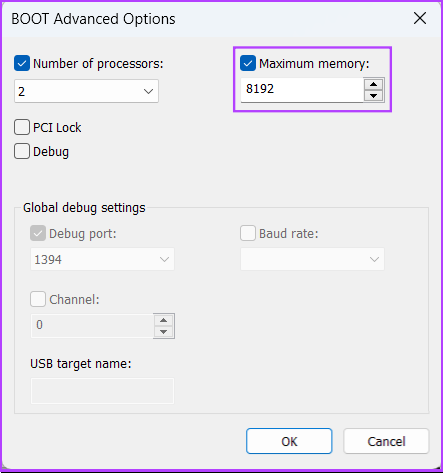
Step 4: Once configured, click on OK to save the changes.
You can check the Make all boot settings permanent: Changes made in System Configuration are not tracked. If you want to make changes later, you must do so manually. Selecting Normal startup in the General tab does not work if this feature is selected.
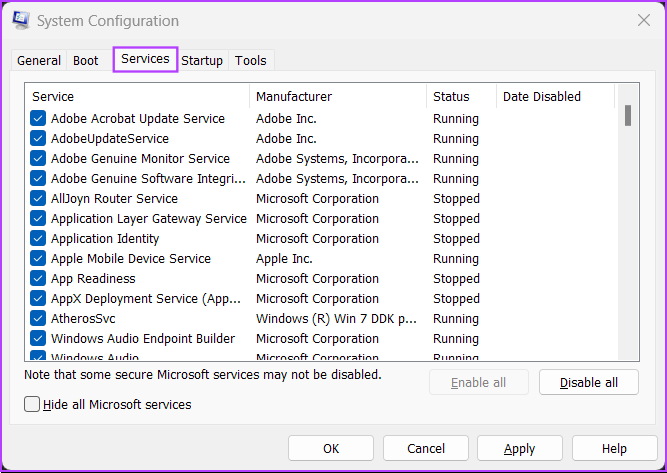
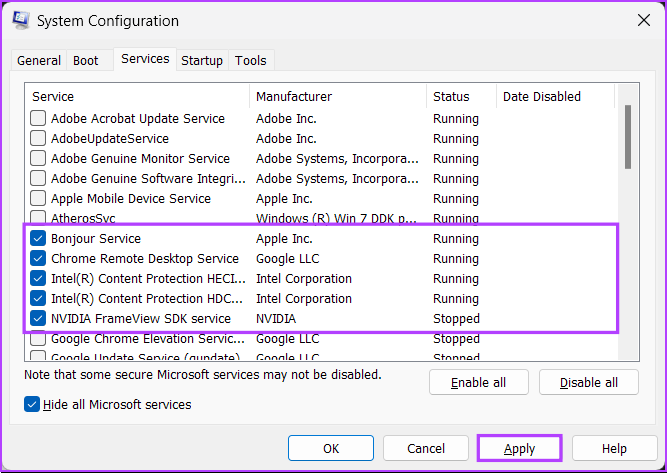
3. The Services Tab
The Services tab lets you manually enable or disable the services that start with your PC. It’s a perfect way to look for and stop rouge services that might interfere with your system’s stability.
To choose which services launch when you boot your PC, follow the steps below:
Step 1: To prevent affecting an important service, check the box for Hide all Microsoft services. Then, click on Disable All.
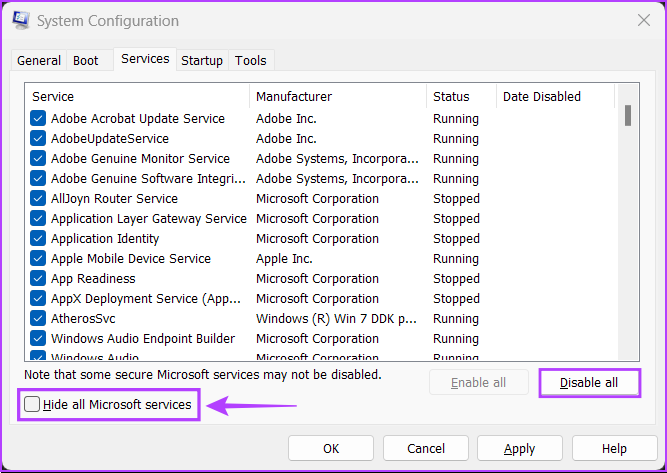
Step 2: Select the ones you want by clicking on the check boxes before their name. After you’re done, click on Apply.
Your PC will restart and boot only with the selected services. You may repeat the process to add or remove more services to run at startup.
4. The Startup Tab
The Startup tab is where you can configure which apps should launch automatically every time your PC starts, at least on Windows 10 and other older versions.
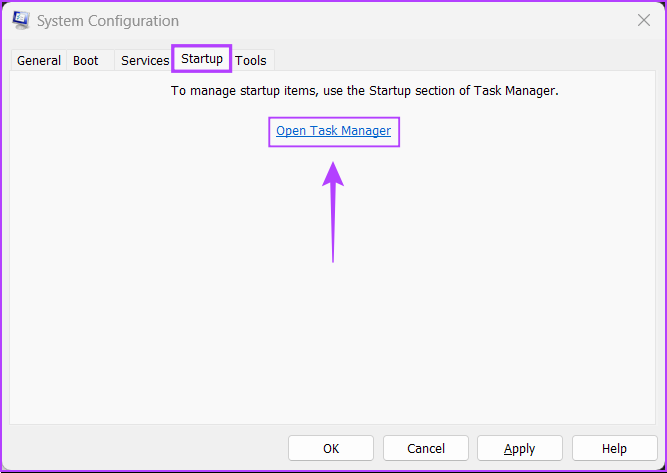
Microsoft has changed things with the advent of Windows 11’s resigned Task Manager. The Startup tab found in the System Configuration Tool only offers a link that redirects you to the Task Manager’s Startup tab.
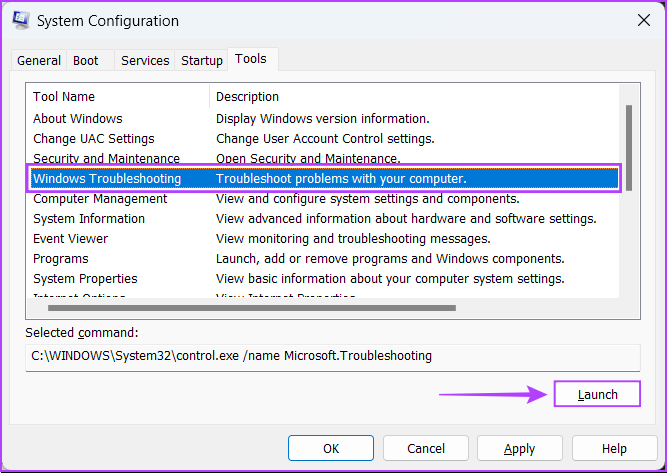
5. The Tools Tab
The Tools tab in the System Configuration Tool launches many other useful Windows utilities. It organizes all the important tools and utilities into a handy list for easy access when needed.
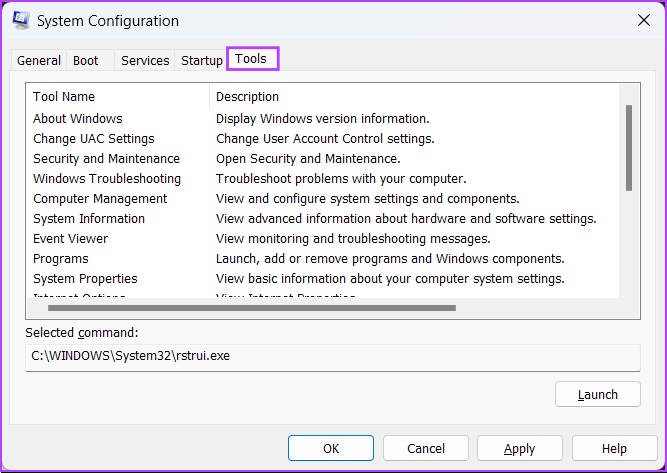
If you want to access a utility listed under the Tools tab of the System Configuration Tool, select the tool of your choice and click on Launch.
Was this helpful?
Last updated on 28 May, 2024
1 Comment
Leave a Reply
Read Next
 3 Ways to Access MSConfig on Windows 11
Method 1: Access MSConfig Using File Explorer Step 1: Press the Windows + E keys on your keyboard to open the File Explorer.
3 Ways to Access MSConfig on Windows 11
Method 1: Access MSConfig Using File Explorer Step 1: Press the Windows + E keys on your keyboard to open the File Explorer.
 How to Optimize FaceTime Audio and Video Settings on iPhone
The FaceTime app is commonly available across all Apple devices, including the iPhone.
How to Optimize FaceTime Audio and Video Settings on iPhone
The FaceTime app is commonly available across all Apple devices, including the iPhone.
 How to Optimize Steam Deck’s Performance in Games
Valve's Steam Deck is easily one of the best handheld gaming consoles.
How to Optimize Steam Deck’s Performance in Games
Valve's Steam Deck is easily one of the best handheld gaming consoles.
 Top 6 Ways to Fix Chrome Side-by-Side Configuration Is Incorrect in Windows
Fix 1: Run System File Checker Step 1: Click the Start menu, search for Command Prompt, and open it.
Top 6 Ways to Fix Chrome Side-by-Side Configuration Is Incorrect in Windows
Fix 1: Run System File Checker Step 1: Click the Start menu, search for Command Prompt, and open it.
 6 Fixes for “Wi-Fi Doesn’t Have a Valid IP Configuration” Error on Windows 11
Fix 1: Set IP Address Settings to Automatic Such errors can occur if you have recently modified your PC's wireless network adapter with a custom IP address.
6 Fixes for “Wi-Fi Doesn’t Have a Valid IP Configuration” Error on Windows 11
Fix 1: Set IP Address Settings to Automatic Such errors can occur if you have recently modified your PC's wireless network adapter with a custom IP address.
 5 Ways to Fix Startup Programs Not Launching on Windows 10 or 11
Try Basic Fixes Install Windows updates: A buggy or outdated Windows build could cause such issues.
5 Ways to Fix Startup Programs Not Launching on Windows 10 or 11
Try Basic Fixes Install Windows updates: A buggy or outdated Windows build could cause such issues.
 4 Ways to Disable Fast Startup on Windows 11
Method 1: Disable Fast Startup Using Control Panel Using the Control Panel is an old-school way of making changes to your Windows computer.
4 Ways to Disable Fast Startup on Windows 11
Method 1: Disable Fast Startup Using Control Panel Using the Control Panel is an old-school way of making changes to your Windows computer.
 4 Ways to Fix OneDrive Not Opening on Startup in Windows 11
Fix 1: Enable OneDrive as a Startup App Windows 11 provides several options for running apps at startup.
4 Ways to Fix OneDrive Not Opening on Startup in Windows 11
Fix 1: Enable OneDrive as a Startup App Windows 11 provides several options for running apps at startup.
The article above may contain affiliate links which help support Guiding Tech. The content remains unbiased and authentic and will never affect our editorial integrity.


Very Lucid instructions. Easy to follow. Even an armature windows user can understand and follow.