Basic Fixes
- Restart the Steam Client: Before starting the Steam client, close it using the Task Manager. Press Esc + Shift + Ctrl to open the Task Manager, right-click Steam (32 bit) or (64 bit), and click End task.
- Reinstall the game: The issues might be limited to the game files, so your best option is to delete all the game data and completely reinstall the game.
- Ensure the Steam server is not down: Nothing else will work if the server is down. You should check for downtime and only proceed with fixes if the server is up.
Fix 1: Repair Microsoft Visual C++
Broken or missing Visual C++ files may lead to the problem. If this is the case, you may repair them. Follow the steps below.
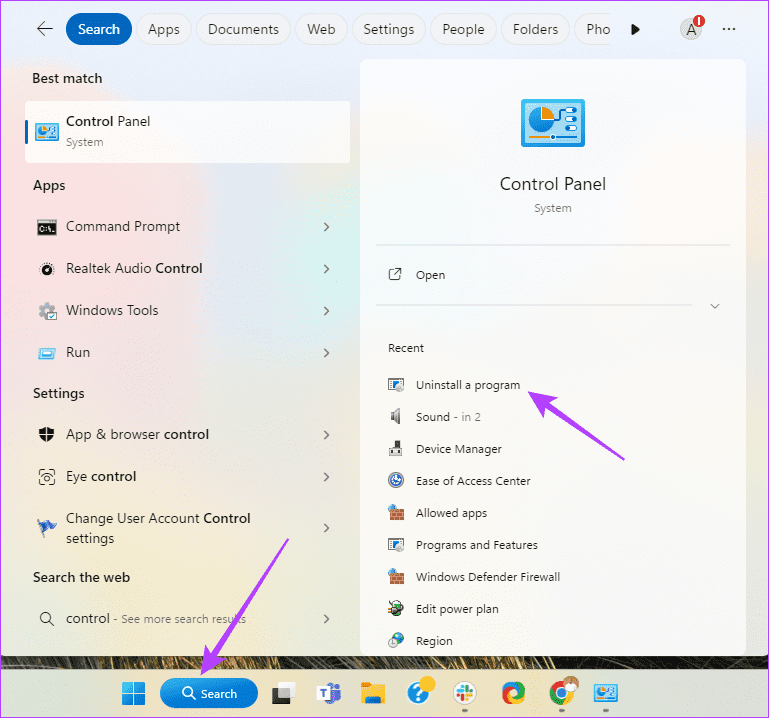
Step 1: Click the magnifying lens on the Taskbar, type control, and click on Uninstall a program.
Step 2: Click on Microsoft Visual C++ (if there are many of them, you may perform the same steps for each) and select Change.

Step 3: Click on Repair and follow any on-screen instructions to complete the process.

Fix 2: Run Games as Administrator
You might have trouble launching games in Steam due to a lack of elevated privileges to access a certain directory on your computer. If that’s the case, try launching the games as an Administrator.
Step 1: Launch Steam.
Step 2: Right-click on the game you’re having issues launching and select Manage > Browse local files.

Step 3: Double-click on the game folder to access all the game data. Note that some games may not require you to click additional folders with the game files located right within the local files folder.

Step 4: Right-click the game’s executable (.EXE) file and select Properties.
Note: You can also click on Run as administrator in the context menu. However, that won’t be helpful if you want the games launched with administrator privileges every time you start it from Steam.

Step 5: When a Properties dialog opens, click and navigate to the Compatibility tab.
Step 6: Under the Settings section, click and select the checkbox for Run this program as an administrator. Then, click on Apply.

Fix 3: Verify the Integrity of Game Files
The games left sitting on your drive might often corrupt over time for multiple reasons, including human error caused by the accidental deletion of game files, malware lurking on your system, etc. Steam offers a built-in tool that can verify the integrity of the game files and fix any issues by replacing the corrupted or missing files.
Step 1: Launch Steam.
Step 2: Right-click on the game that is experiencing difficulty launching and select Properties.

Step 3: Click on the LOCAL FILES option from the sidebar.

Step 4: Click on Verify integrity of game files.

Wait for Steam to complete the Validation scan. If all the game files are intact and validated successfully, you should see a message stating so. If any corrupted or missing game files are detected, Steam will re-download them for you.

Fix 4: Run Games in Compatibility Mode
Some older Steam games may refuse to work on Windows 11. You can try running the game in compatibility mode. Here is how to run Steam games in combability mode on your computer:
Step 1: Launch Steam.
Step 2: Right-click on the games you have issues launching and select Manage, followed by Browse local files.
Step 3: Double-click on the game folder to access all the game data.
Step 4: Right-click the game’s executable (.EXE) file and select Properties from the context menu.
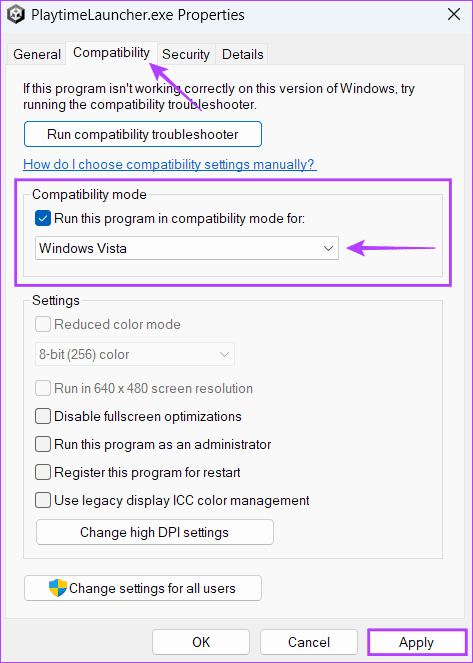
Step 5: Click the Compatibility tab > check the box for Run this program in compatibility mode for: and click on the drop-down below it to select a compatible version of Windows supported by the game.
Step 6: Then, click on Apply.
Fix 5: Delete the Steam Download Cache
Over time, the accumulated Steam download cache can prevent games from automatically updating themselves, which may prevent games from launching on your computer. To fix this, try clearing the Steam download cache by following the steps listed below:
Step 1: Launch Steam.
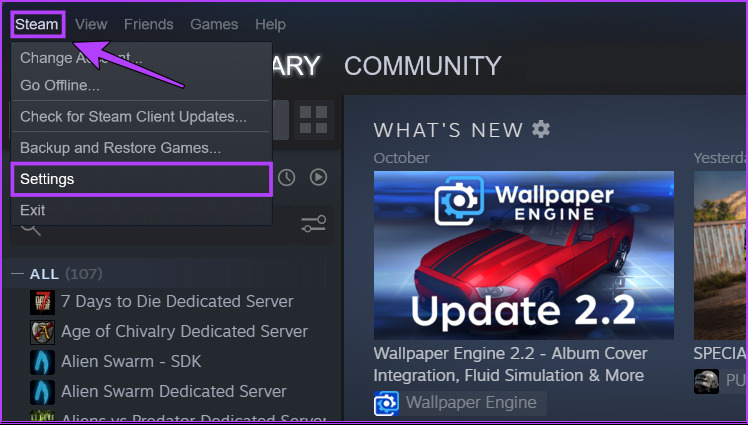
Step 2: Click on Steam at the top-left corner. From the context menu, click on Settings.
Step 3: Click on Downloads > CLEAR DOWNLOAD CACHE > OK to close the Settings dialog.

Fix 6: Reinstall the Steam Client
If none of the previous solutions works, remove Steam and reinstall it from scratch. Uninstalling Steam from your PC will remove all your games, their downloadable content (DLCs), and saved files. You may want to create a backup of Steam game files before proceeding further.
Step 1: Press the Windows + I keys to open the Settings app.
Step 2: When the Settings app opens, click the Apps option in the left sidebar and Installed Apps on the right.

Step 3: Type Steam in the search box at the top.

Step 4: From the search results, click the horizontal three dots menu next to the Steam result > select Uninstall.

Step 5: After removing Steam, download and install a new version on your computer.
Was this helpful?
Last updated on 28 May, 2024
Read Next
 3 Ways to Fix Zoom Not Launching on Windows 11 and 10
Preliminary Fixes Restart PC: Refreshing system processes and clearing temporary glitches can resolve the Zoom not launching issue.
3 Ways to Fix Zoom Not Launching on Windows 11 and 10
Preliminary Fixes Restart PC: Refreshing system processes and clearing temporary glitches can resolve the Zoom not launching issue.
 5 Ways to Fix Startup Programs Not Launching on Windows 10 or 11
Try Basic Fixes Install Windows updates: A buggy or outdated Windows build could cause such issues.
5 Ways to Fix Startup Programs Not Launching on Windows 10 or 11
Try Basic Fixes Install Windows updates: A buggy or outdated Windows build could cause such issues.
 7 Best Ways to Fix Valorant Not Launching on Windows 11
Valorant is a popular free-to-play battle royale game for Windows.
7 Best Ways to Fix Valorant Not Launching on Windows 11
Valorant is a popular free-to-play battle royale game for Windows.
 5 Ways to Fix Rocket League Not Launching in Windows 11
Fix 1: Restart Your Computer Step 1: Press the Windows key to open the Start menu.
5 Ways to Fix Rocket League Not Launching in Windows 11
Fix 1: Restart Your Computer Step 1: Press the Windows key to open the Start menu.
 4 Ways to Fix for NSIS ‘Error Launching Installer’ in Windows
Basic Fixes Download the installer file again: A partially downloaded or corrupt installer file can cause an installer integrity check failure.
4 Ways to Fix for NSIS ‘Error Launching Installer’ in Windows
Basic Fixes Download the installer file again: A partially downloaded or corrupt installer file can cause an installer integrity check failure.
 5 Fixes for Roblox Not Launching on Windows
Try Basic Fixes Close Roblox completely and reopen it: Sometimes, apps and games on your Windows PC may experience problems while opening, causing them to become unresponsive.
5 Fixes for Roblox Not Launching on Windows
Try Basic Fixes Close Roblox completely and reopen it: Sometimes, apps and games on your Windows PC may experience problems while opening, causing them to become unresponsive.
 Top 5 Ways to Fix WhatsApp Not Launching on Mac
Preliminary Fixes Check Network Connection: A stable internet connection is crucial for WhatsApp to function properly.
Top 5 Ways to Fix WhatsApp Not Launching on Mac
Preliminary Fixes Check Network Connection: A stable internet connection is crucial for WhatsApp to function properly.
 How to Update Epic Games Launcher and Its Games on Windows
How to Check and Update Epic Games Launcher Epic Games Launcher auto-updates along with its games.
How to Update Epic Games Launcher and Its Games on Windows
How to Check and Update Epic Games Launcher Epic Games Launcher auto-updates along with its games.
The article above may contain affiliate links which help support Guiding Tech. The content remains unbiased and authentic and will never affect our editorial integrity.