Basic Fixes
- Check internet connection: Ensure your PC is connected to a stable Wi-Fi or Ethernet connection.
- Check date and time: An incorrect date and time can cause issues checking Windows Updates.
- Restart PC: Restart your PC to eliminate any temporary bugs causing the problem.
- Perform SFC Scan: Perform an SFC scan on your PC to repair corrupted system files.
Fix 1: Run Windows Update Troubleshooter
The Windows Update Troubleshooter can help your PC detect and fix problems related to Windows Update Services.
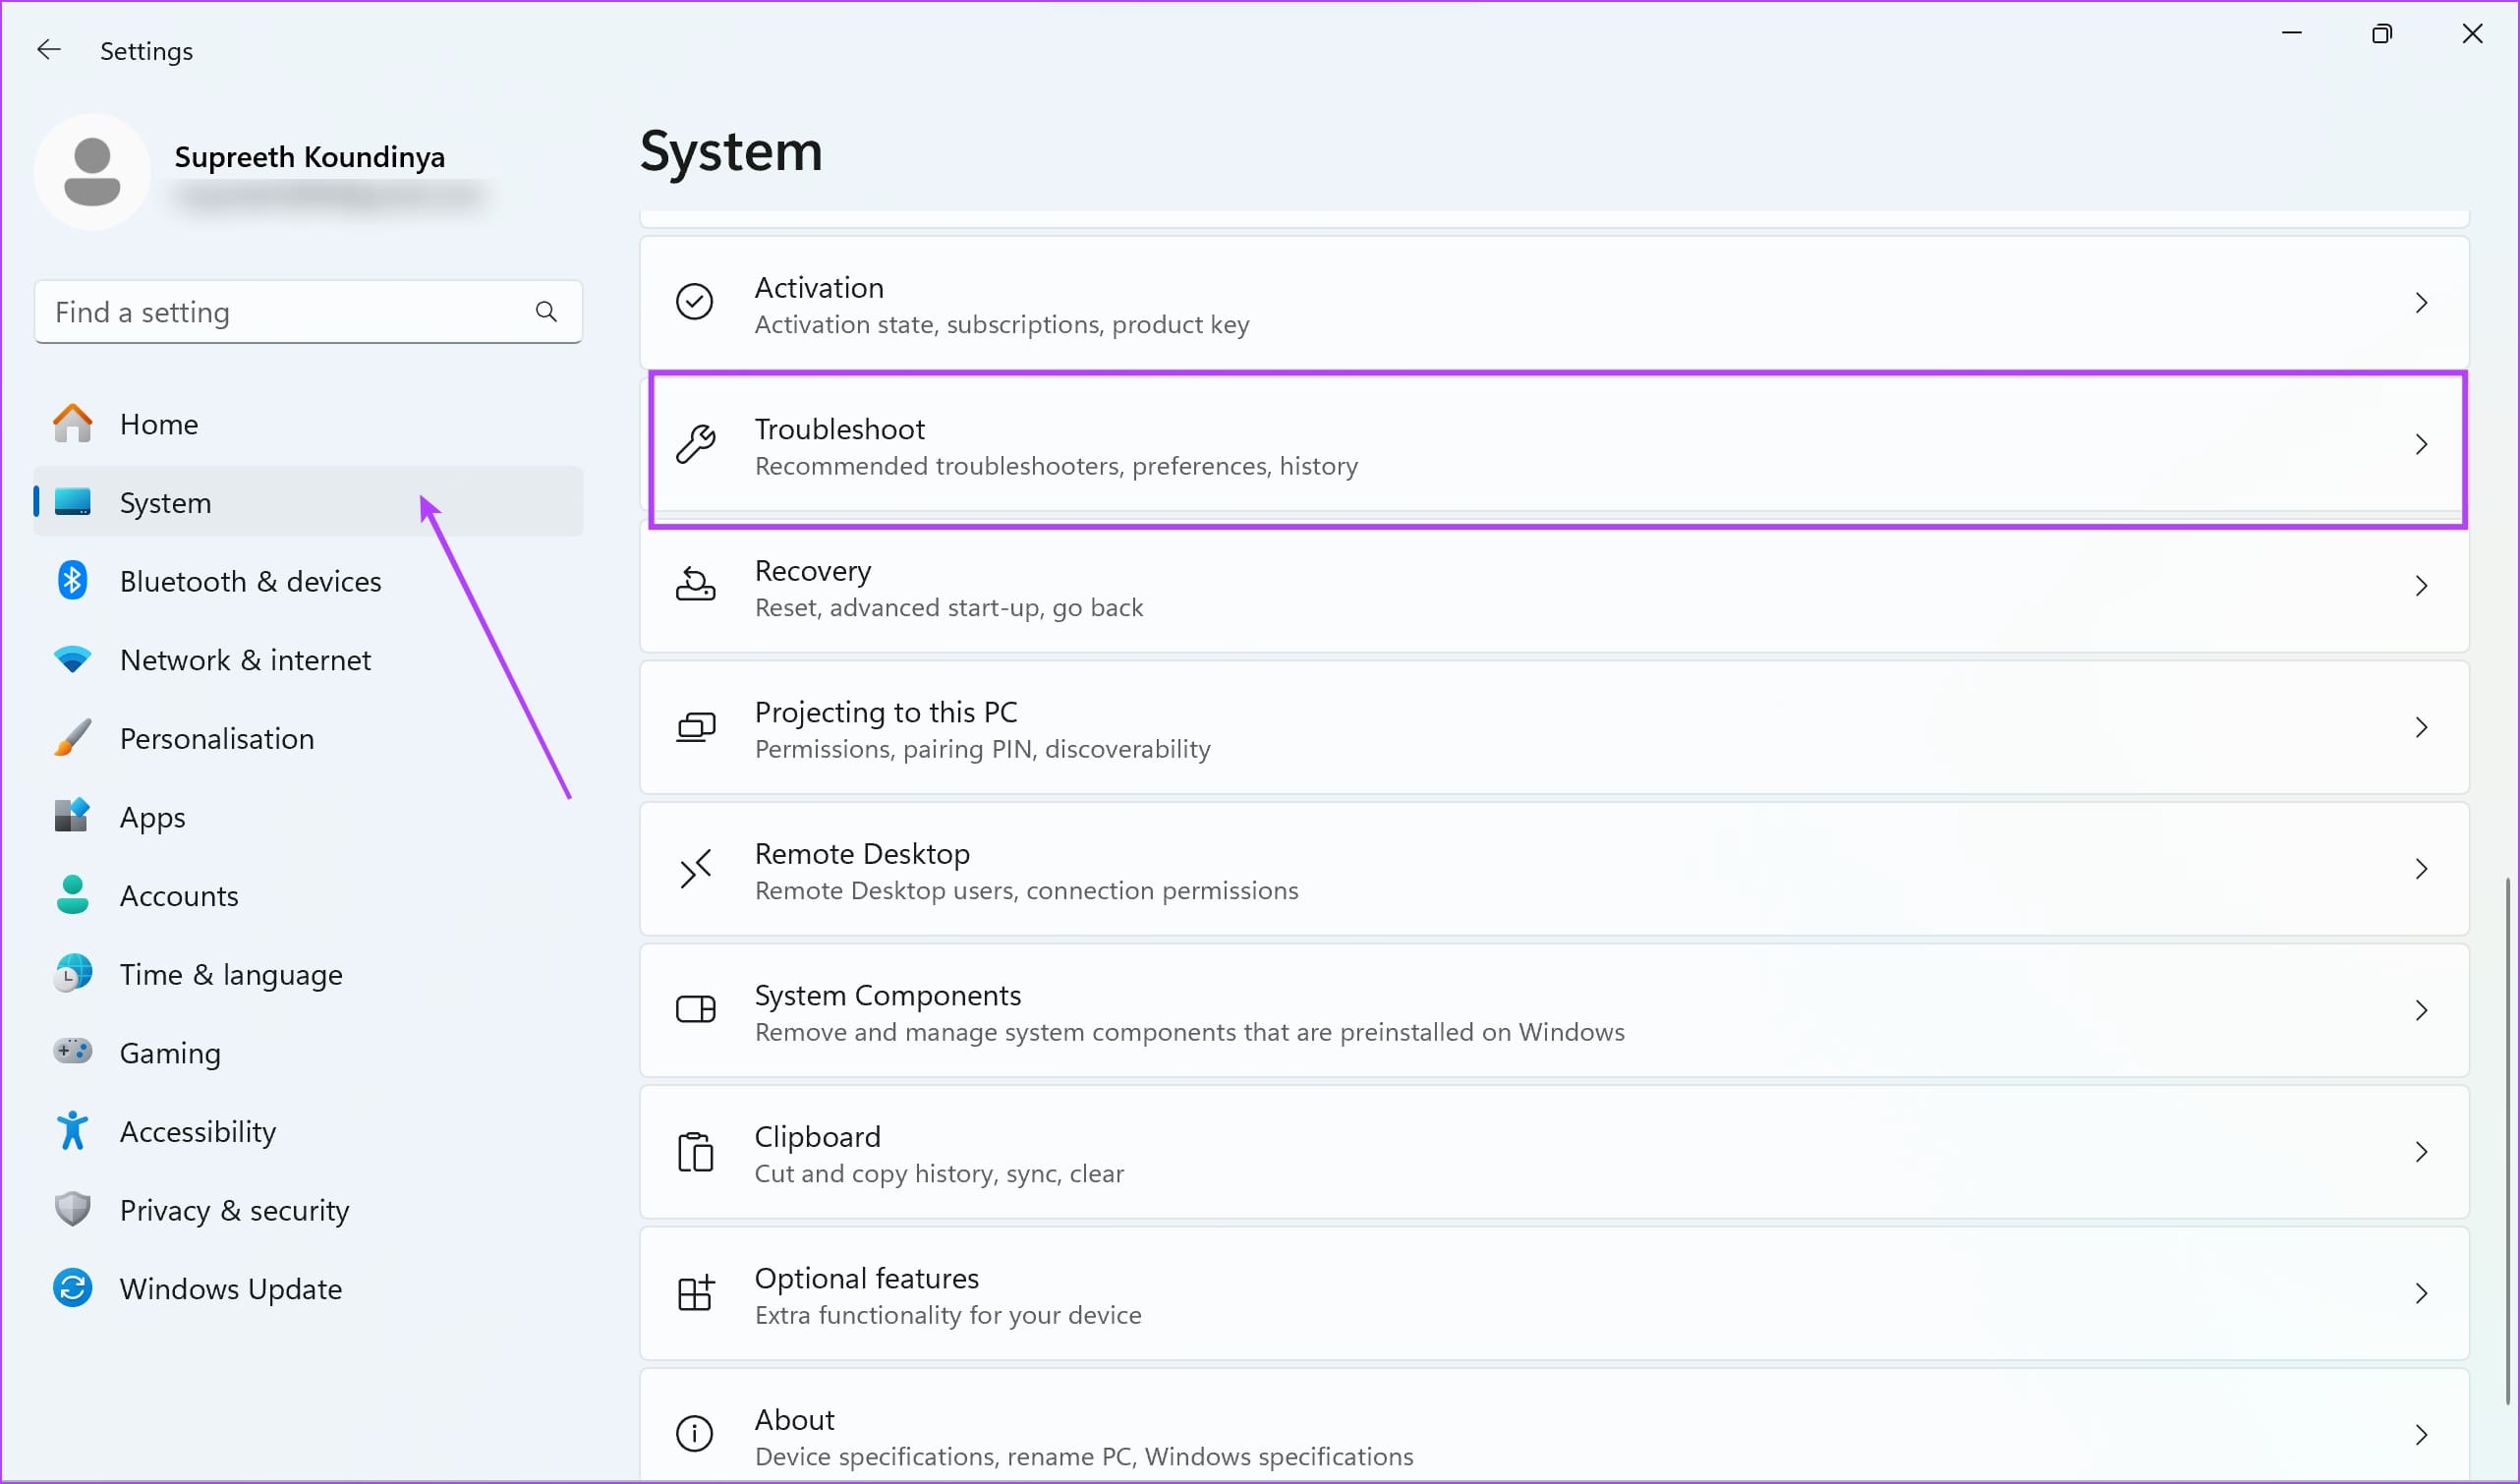
Step 1: Open the Settings app on your PC > select System from the sidebar.
Step 2: Select Troubleshoot.
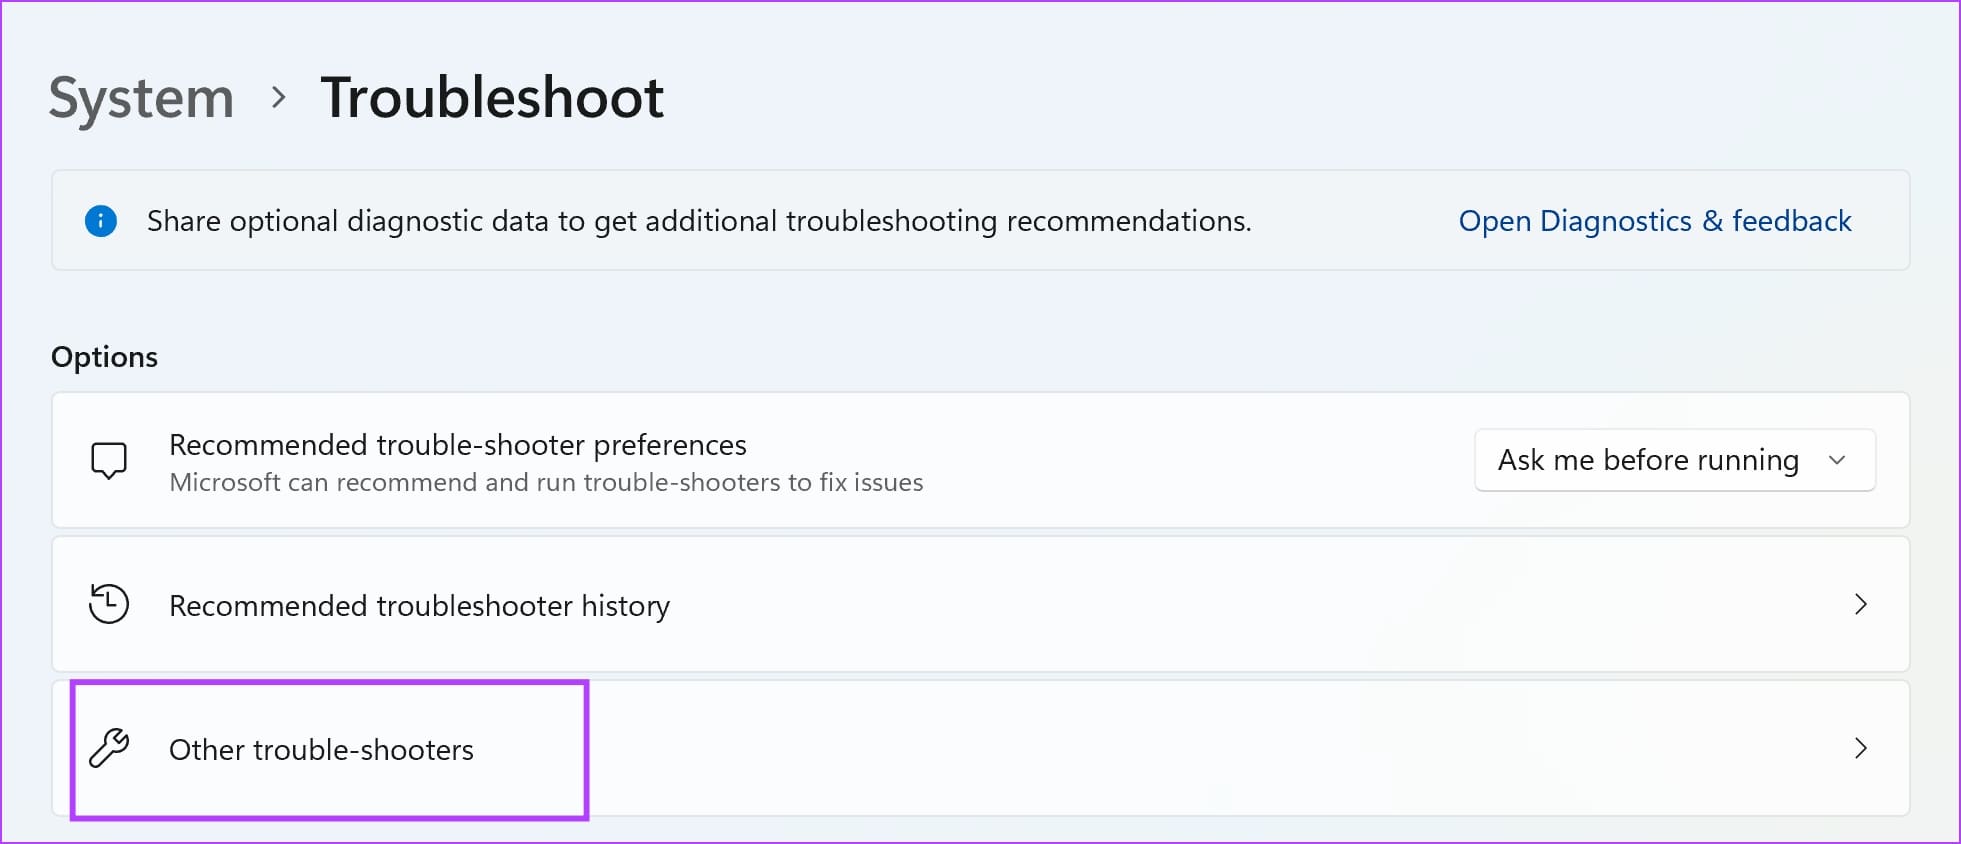
Step 3: Click on Other trouble-shooters.
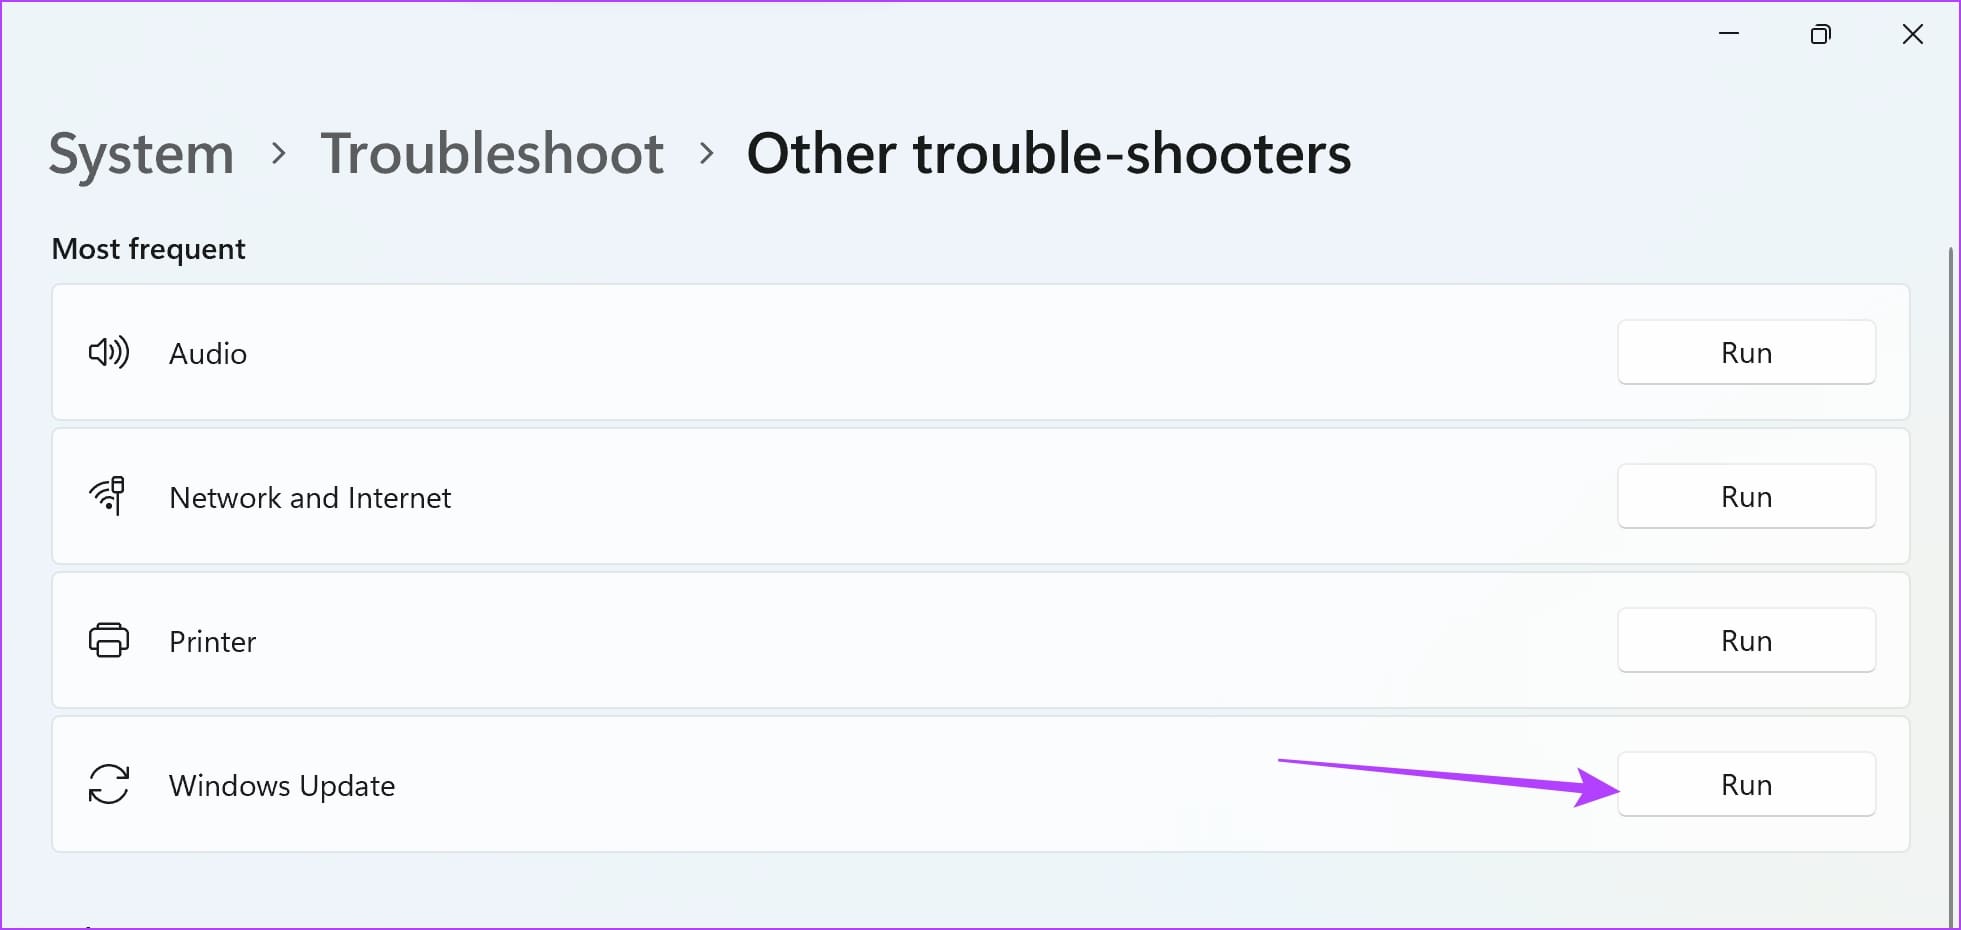
Step 4: Click on Run next to Windows Update. This will open the troubleshooter, and you can follow the on-screen instructions to fix the problem.
Go back to Windows Updates, and check if the above method fixed the issue.
Fix 2: Restart Windows Update Service
Restarting the Windows Update Service on your PC can resolve the issue by eliminating any bugs and corrupted processes.
Step 1: Open the Services app on your PC using the start menu.
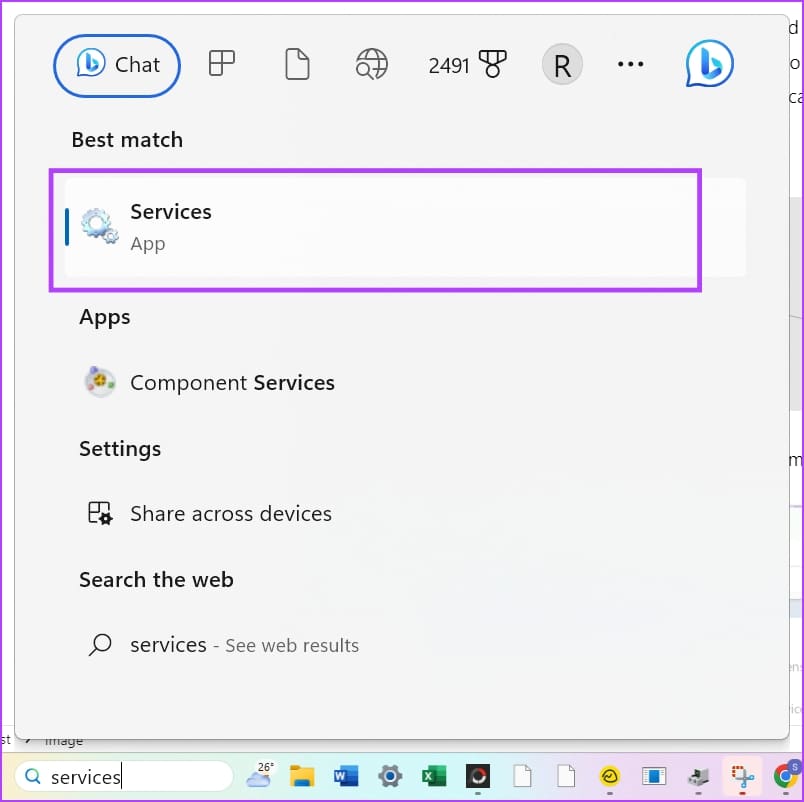
Step 2: In the list of services, scroll down and right-click on Windows Update > select Restart.
This will restart the Windows Update service, and you can try checking for an update once again.

Fix 3: Manually Reset Windows Update Service
You can use Command Prompt to restart all the components of the Windows Update Service. This can resolve any temporary bugs and glitches.
Step 1: Open Command Prompt as an administrator.

Step 2: Enter the commands one after the other.
net stop wuauserv
net stop cryptSvc
net stop bits
net stop msiserver
net start wuauserv
net start cryptSvc
net start bits
net start msiserver
Go to Windows Update and check if the problem is solved.

Fix 4: Delete datastore.edb File
Deleting the datastore.edb file can resolve Windows Update issues by removing a corrupted database.
Step 1: Open Command Prompt as an administrator. To safely delete the file later, you must stop the update services first. Run the following commands one after the other:
net stop wuauserv
net stop bits
Step 2: Now, go to the following folder and delete the DataStore.edb file.
C:\Windows\SoftwareDistribution\DataStore

Was this helpful?
Last updated on 19 July, 2024
Read Next
 3 Ways to Fix Discord Stuck on Checking for Updates
Preliminary Fixes Restart your PC: This will stop all the running background processes in Discord from working properly and allow you to check again.
3 Ways to Fix Discord Stuck on Checking for Updates
Preliminary Fixes Restart your PC: This will stop all the running background processes in Discord from working properly and allow you to check again.
 5 Ways to Fix Error Checking for Updates in the Google Play Store
Basic Fixes Check the app update preference: If you can't update apps manually, check the app update preference to automate it.
5 Ways to Fix Error Checking for Updates in the Google Play Store
Basic Fixes Check the app update preference: If you can't update apps manually, check the app update preference to automate it.
 3 Ways to Fix Apple Mail Stuck on Checking for Mail on iPhone
Basic Fixes: Check the network connection: First, check the network connection quality on your iPhone. If you face network issues, you can enable Airplane mode on your iPhone and disable it
3 Ways to Fix Apple Mail Stuck on Checking for Mail on iPhone
Basic Fixes: Check the network connection: First, check the network connection quality on your iPhone. If you face network issues, you can enable Airplane mode on your iPhone and disable it
 3 Ways to Fix WhatsApp Checking for New Message Notifications on Android
Basic Fixes Connect your device to the internet: In most cases, the notification disappears as soon as the device connects to the Internet.
3 Ways to Fix WhatsApp Checking for New Message Notifications on Android
Basic Fixes Connect your device to the internet: In most cases, the notification disappears as soon as the device connects to the Internet.
 7 Ways to Fix Windows 11 Updates Not Downloading or Installing
Fix 1: Run the Windows Update Troubleshooter Windows 11 includes a dedicated troubleshooter that can automatically scan, detect, and fix any issues with Windows Updates.
7 Ways to Fix Windows 11 Updates Not Downloading or Installing
Fix 1: Run the Windows Update Troubleshooter Windows 11 includes a dedicated troubleshooter that can automatically scan, detect, and fix any issues with Windows Updates.
 5 Ways to Turn off Automatic Updates on Windows 11
Note: All the methods mentioned below help pause or restrict automatic updates on Windows 11.
5 Ways to Turn off Automatic Updates on Windows 11
Note: All the methods mentioned below help pause or restrict automatic updates on Windows 11.
 4 Ways to Disable Office Updates on Windows 11
Method 1: Using an Office App You can use any Microsoft Office app to turn off automatic updates for all Office applications.
4 Ways to Disable Office Updates on Windows 11
Method 1: Using an Office App You can use any Microsoft Office app to turn off automatic updates for all Office applications.
 How to Unpause Windows Updates and What to Do if You Can’t
How to Resume Windows Updates The process of resuming Windows updates is quite similar to pausing them.
How to Unpause Windows Updates and What to Do if You Can’t
How to Resume Windows Updates The process of resuming Windows updates is quite similar to pausing them.
The article above may contain affiliate links which help support Guiding Tech. The content remains unbiased and authentic and will never affect our editorial integrity.