Basic Fixes
- Check your internet connection – Verify that you have an active internet connection on your iPhone. Ensure you have full or at least a couple of network bars to use the mobile data or a fast Wi-Fi connection.
- Enable and disable Airplane mode – To ensure the error doesn’t lie with network connectivity and to remove any glitches, reset the connection by enabling and disabling Airplane mode.
- Keep the Mail app open when sending a large attachment – Gmail and Outlook can send up to 25MB of files over an email. If you are dealing with such large files to send over an email, keep the Mail app open until you hear the sent email sound.
- Check Gmail or Outlook storage—When you run out of email space, you can’t receive/send emails or load images on your iPhone. None of the tricks mentioned in the post will work. So, check your Gmail or Outlook space and empty it if necessary.
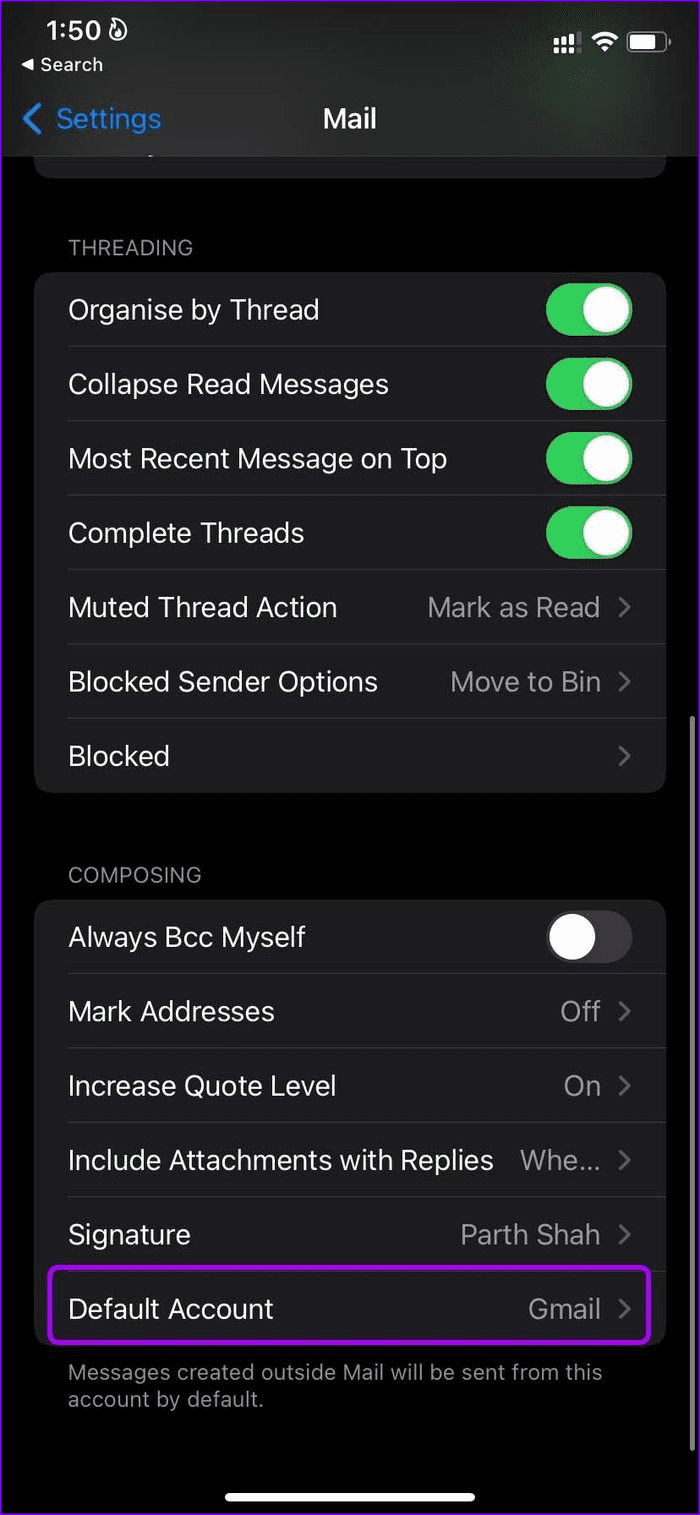
Fix 1. Change Default Email Account
The Mail app is perfectly compatible with Gmail, Outlook, Yahoo, and other popular email providers. If you have trouble sending an email with Gmail, move to Outlook, compose, and send the email.
Once comfortable with a specific email provider, you should make it the default account to send emails on your iPhone.
Step 1: Open Settings. Go to the Mail menu.
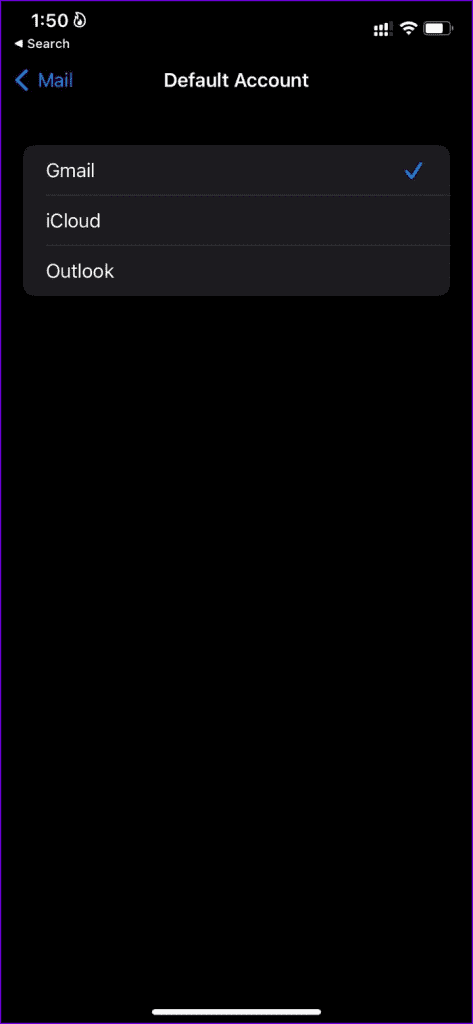
Step 2: Scroll down, and you will find an option to choose the Default Account.
Step 3: Select your preferred email provider from the following menu.
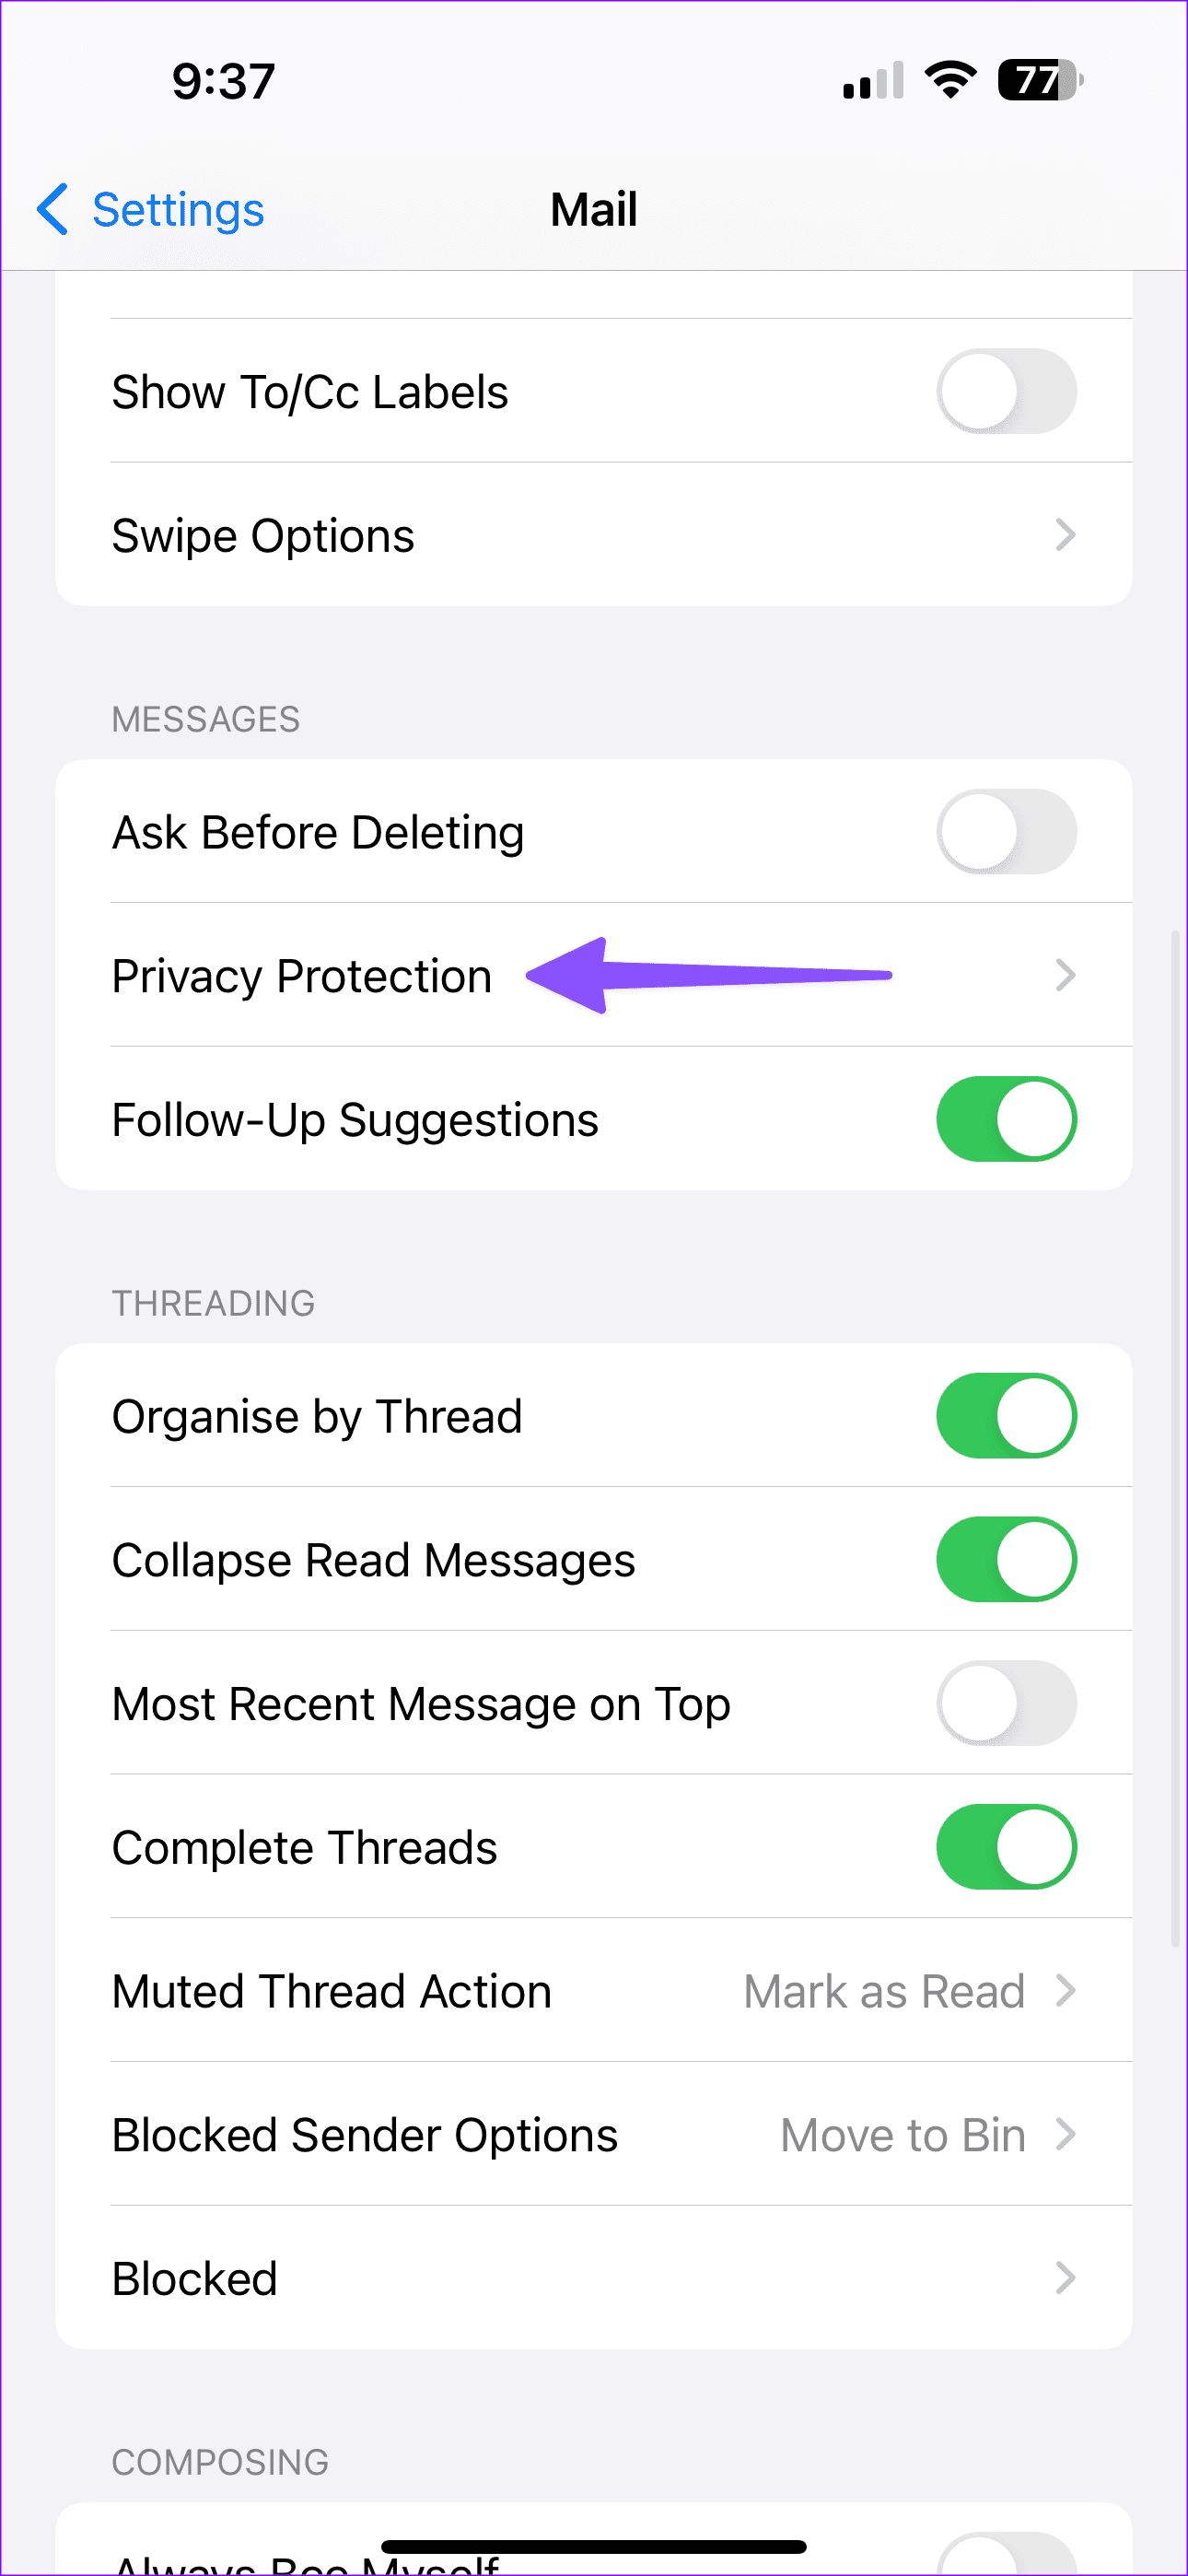
Fix 2. Disable Privacy Protection in Mail
Privacy Protection is part of iCloud+ and Apple One subscriptions. It is designed to hide your iPhone’s Mail activity. The privacy feature also hides your IP address and loads remote content privately in the background.
The feature might be interfering with the email functions on iPhone. Let’s disable it and try again.
Step 1: Open Settings. Go to the Mail menu.
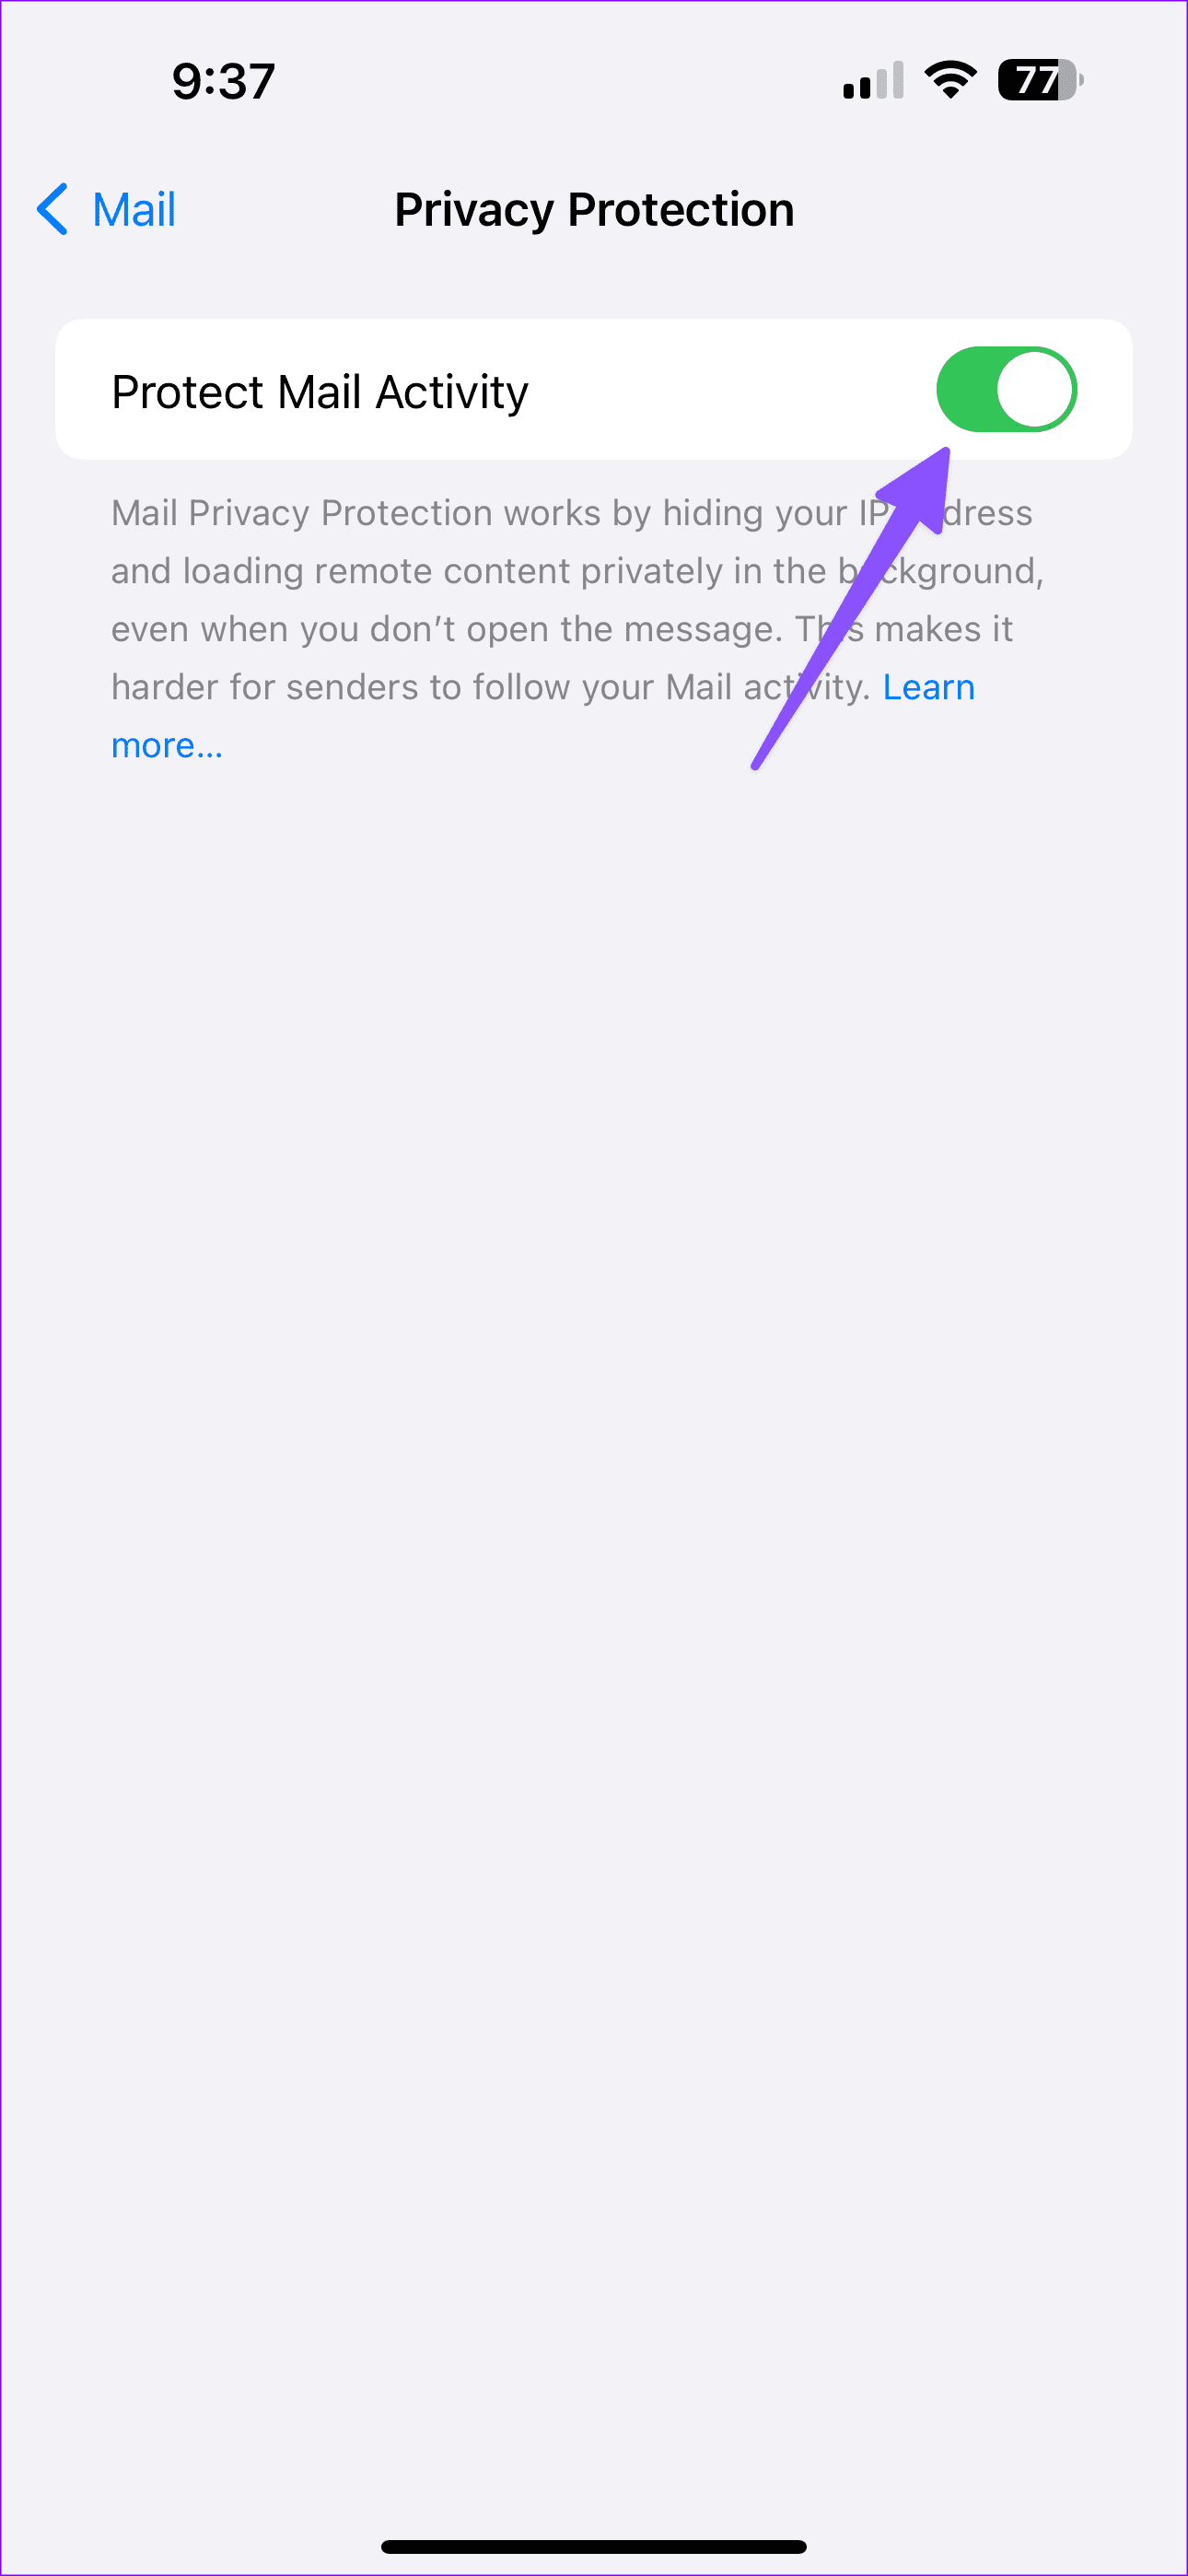
Step 2: Find Privacy Protection under the Messages menu.
Step 3: Disable the Protect Mail Activity toggle and try sending the email again.
Fix 3. Contact Your Email Provider or System Admin
Are you facing issues sending or receiving emails from a specific email provider? The default Mail app also supports a custom email domain. If you use one of such email providers, contact the company or your company admin to resolve the problem.
You can also reach out to your school IT admin and ask for the latest credentials to send emails from your school email address.
Fix 4. Remove and Add Email Account Again
If you encounter trouble with a specific account on the Mail app, remove it and add it again.
You might have changed your Gmail or Outlook email password. The Mail app on iPhone will ask you to authorize the account again to enable email functions.
Step 1: Launch Settings → Mail menu.
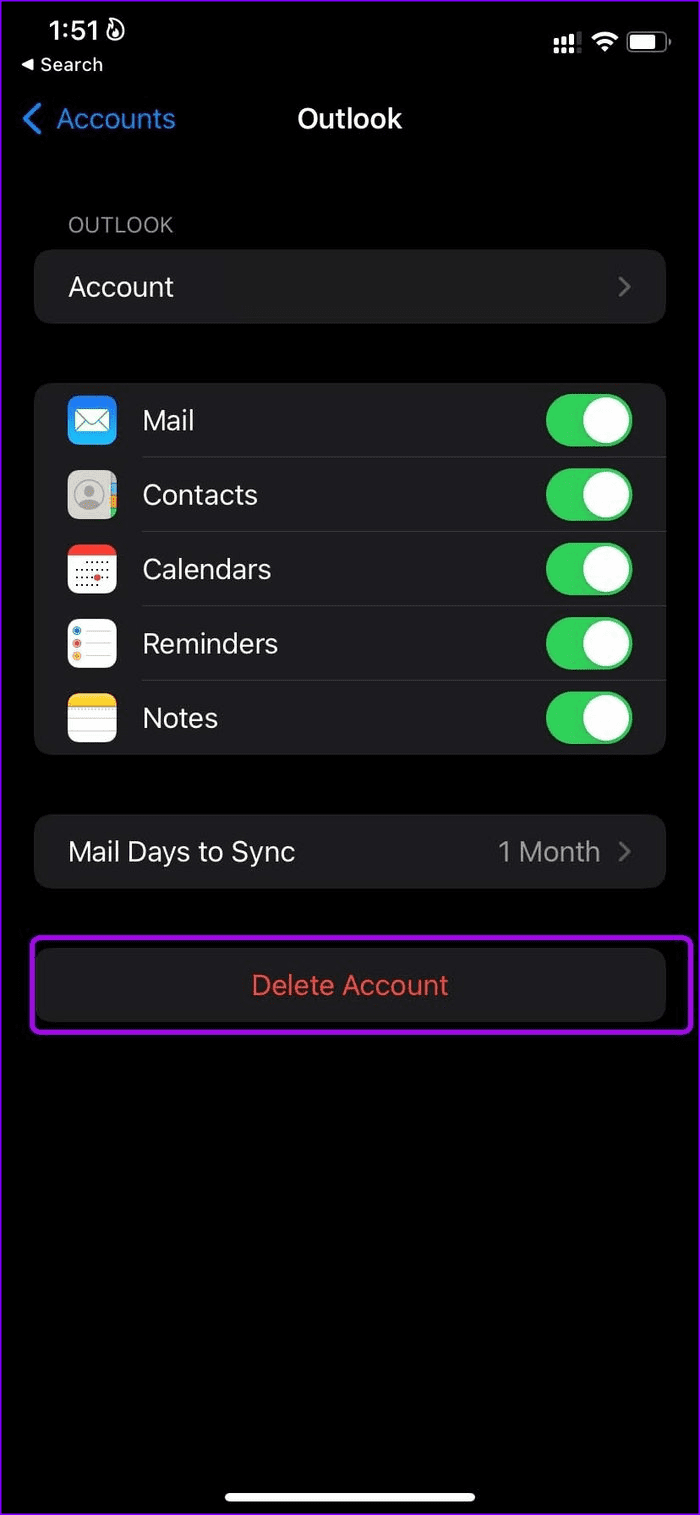
Step 2: Select Account. Tap the email account that troubles you.
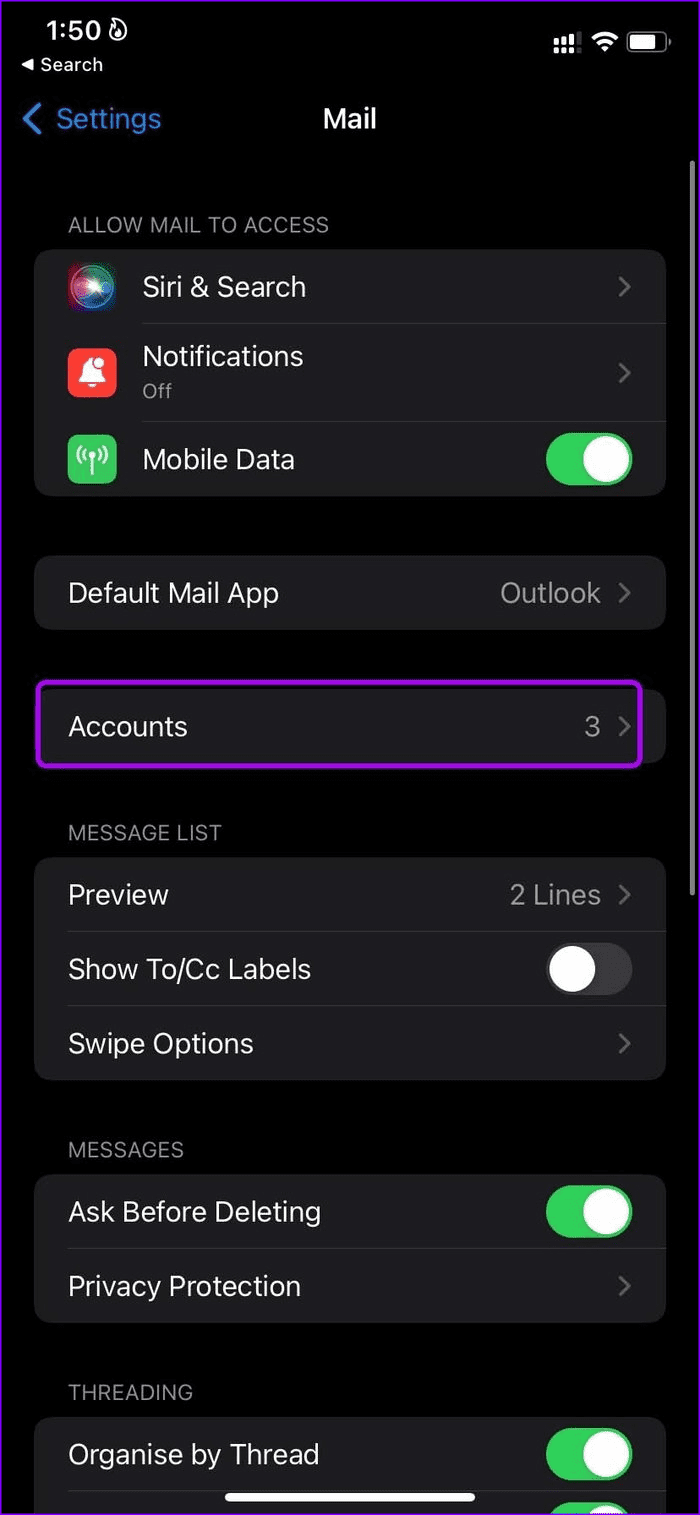

Step 3: Select Delete Account and confirm your decision.
Step 4: Go back to the Accounts menu, select Add Account, and choose your email provider to add login details.

Once you add the account, go to the Mail app and start firing up emails to send.
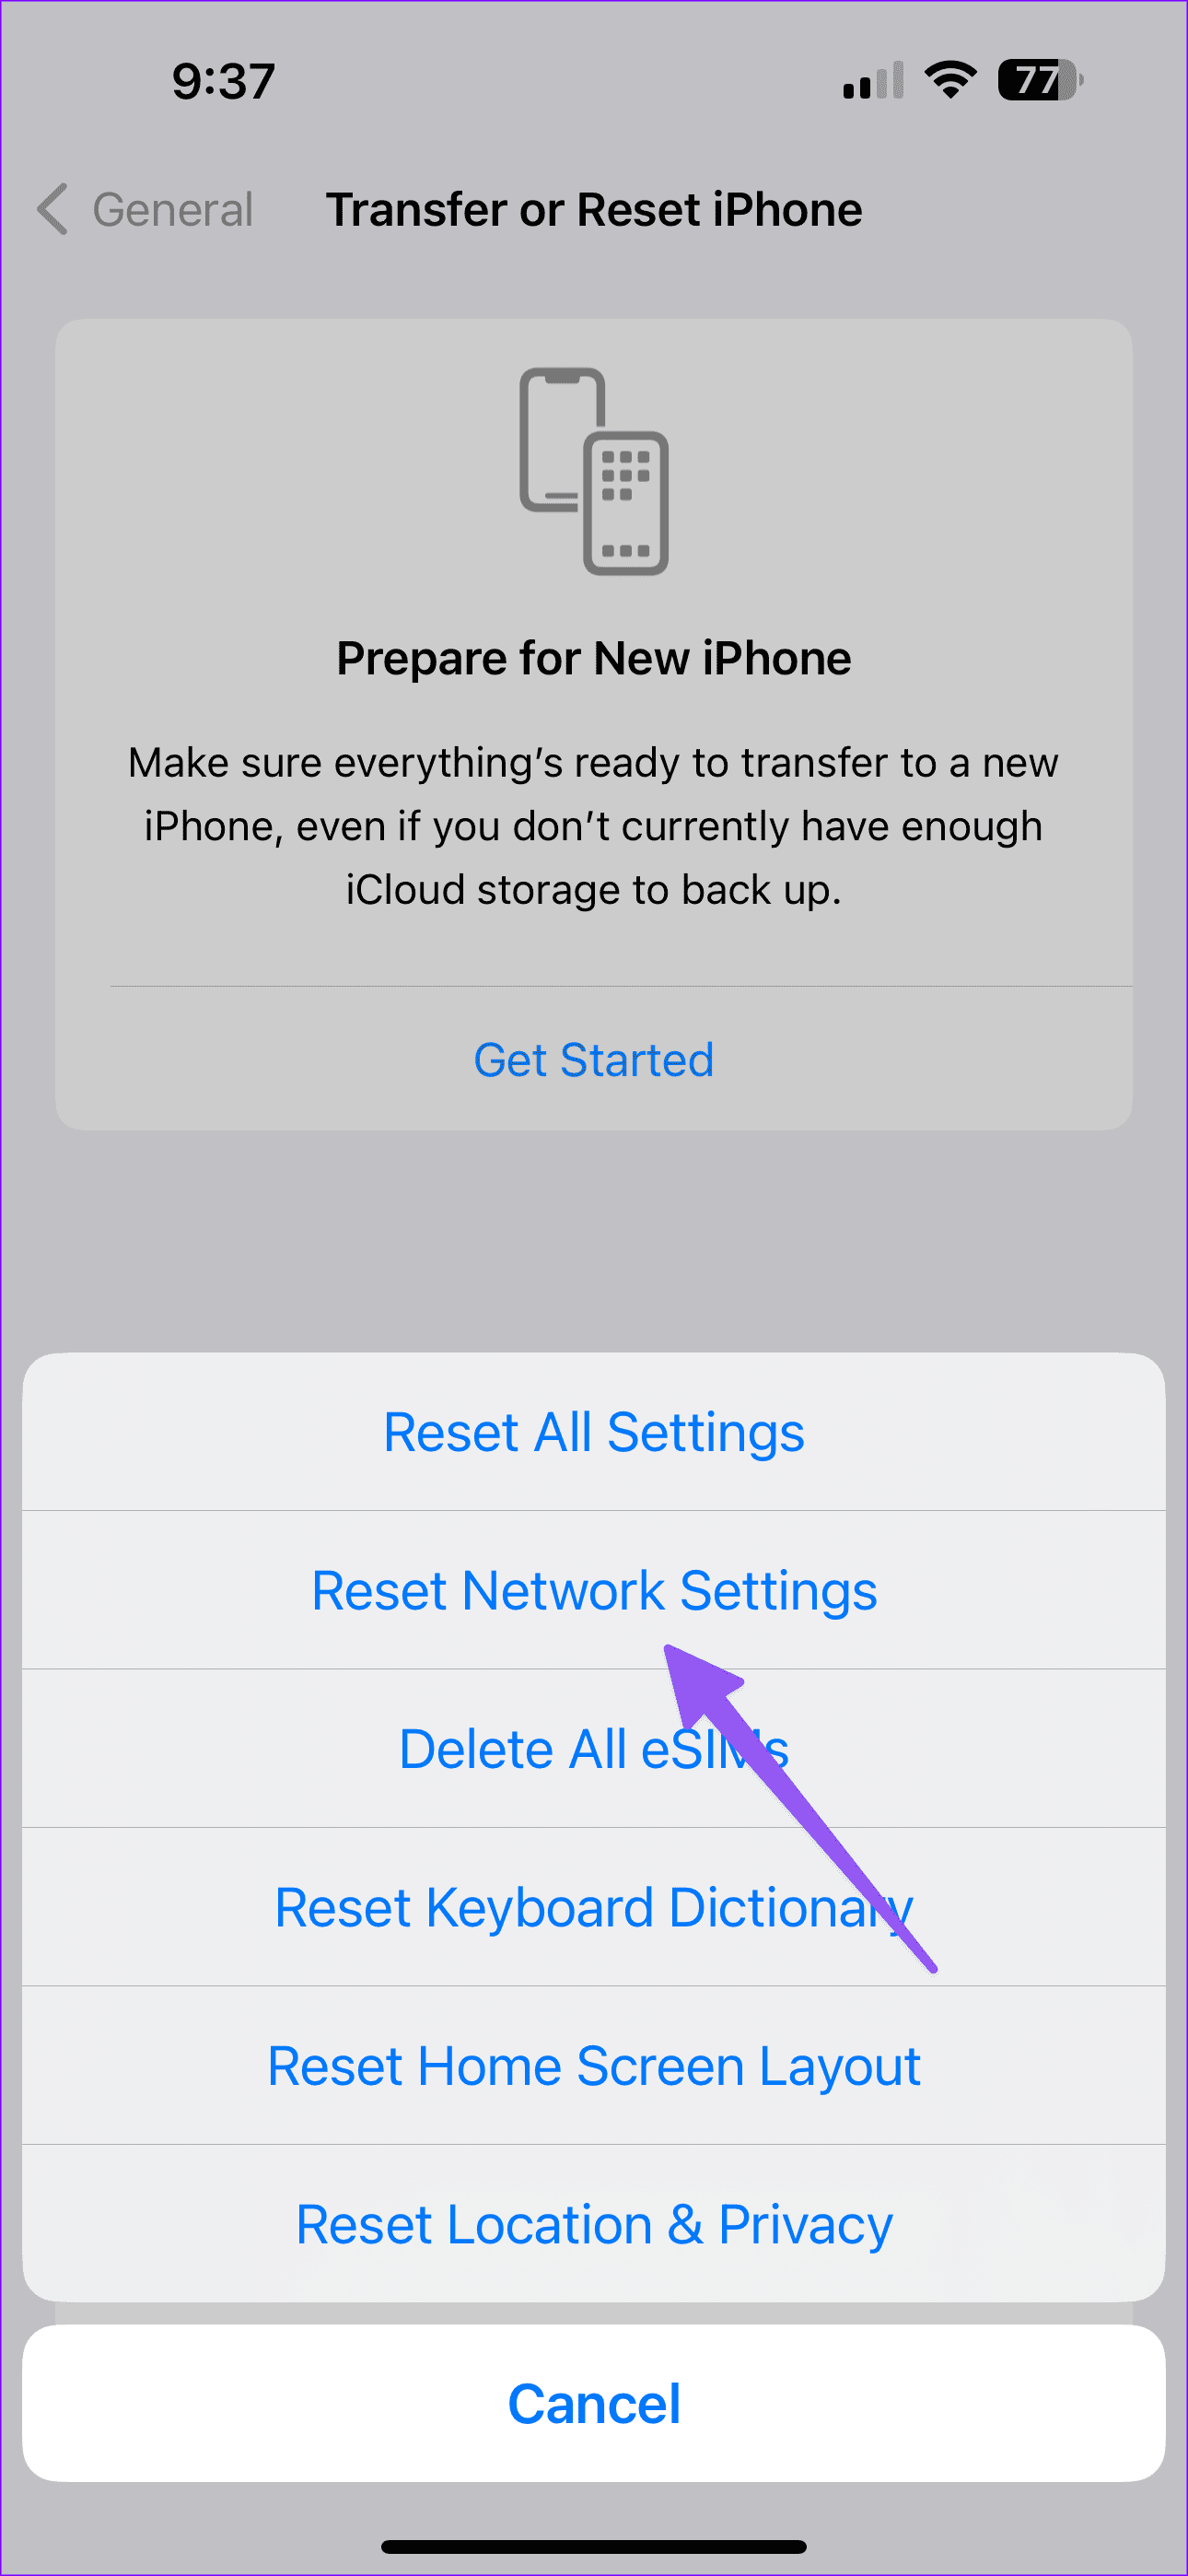
Fix 5. Reset Network Settings
Incorrect network settings can cause issues with sending emails via the Mail app on iPhone. Here’s how to reset network settings on your iPhone.
Tip: Before proceeding, read our dedicated post to learn the implications of resetting network settings on iPhone.
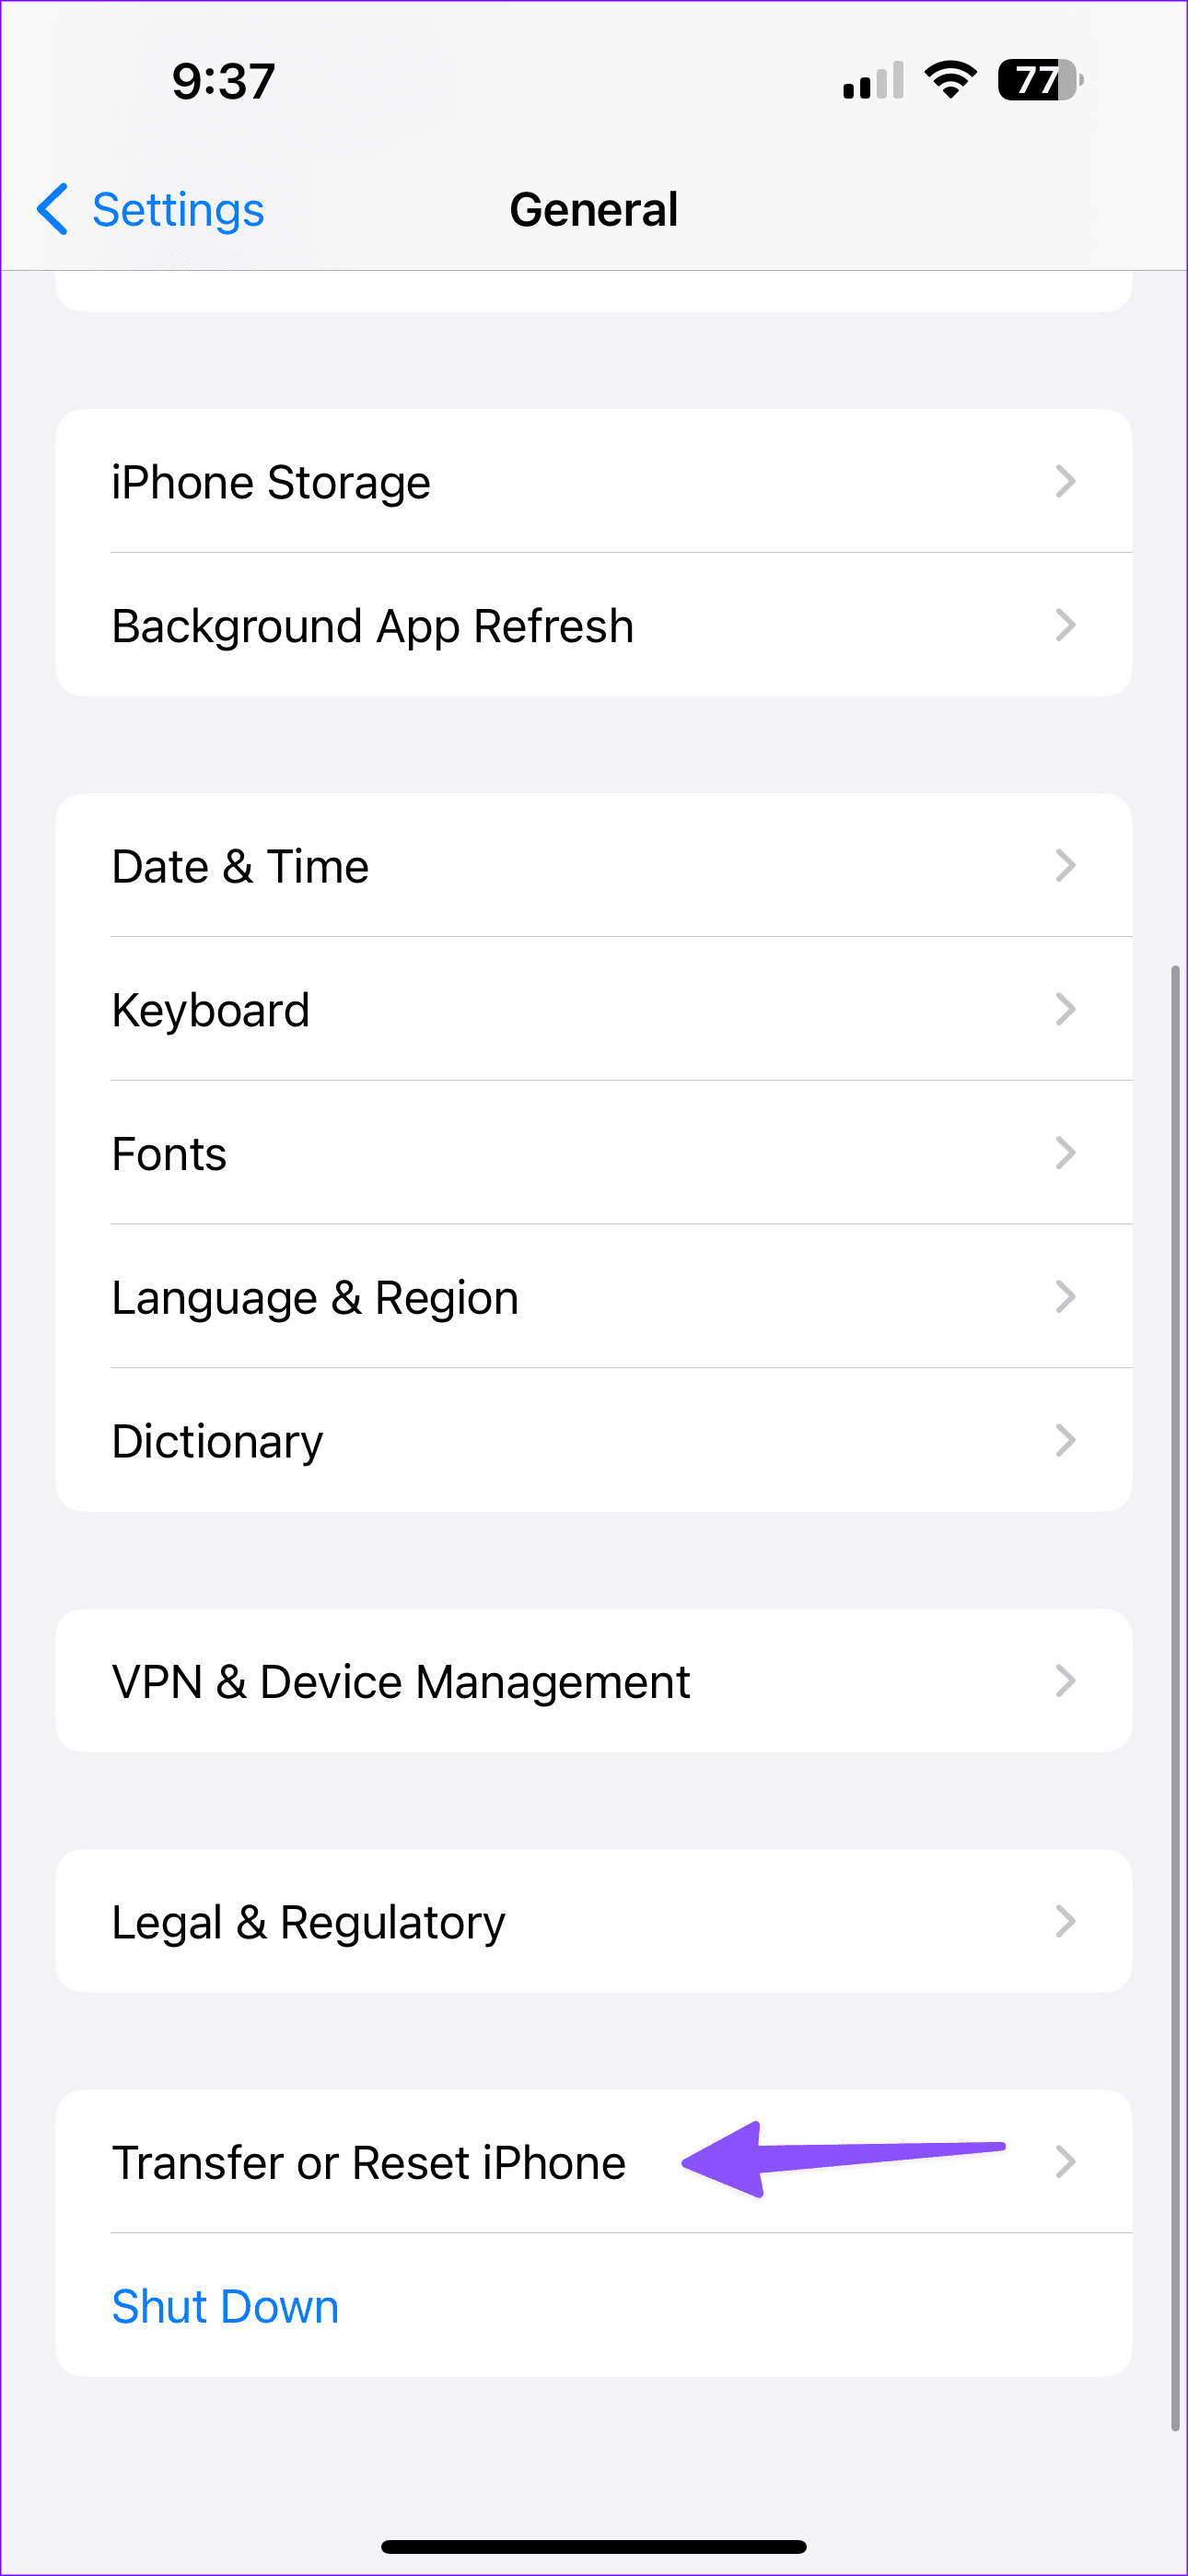
Step 1: Open Settings. Scroll to General.
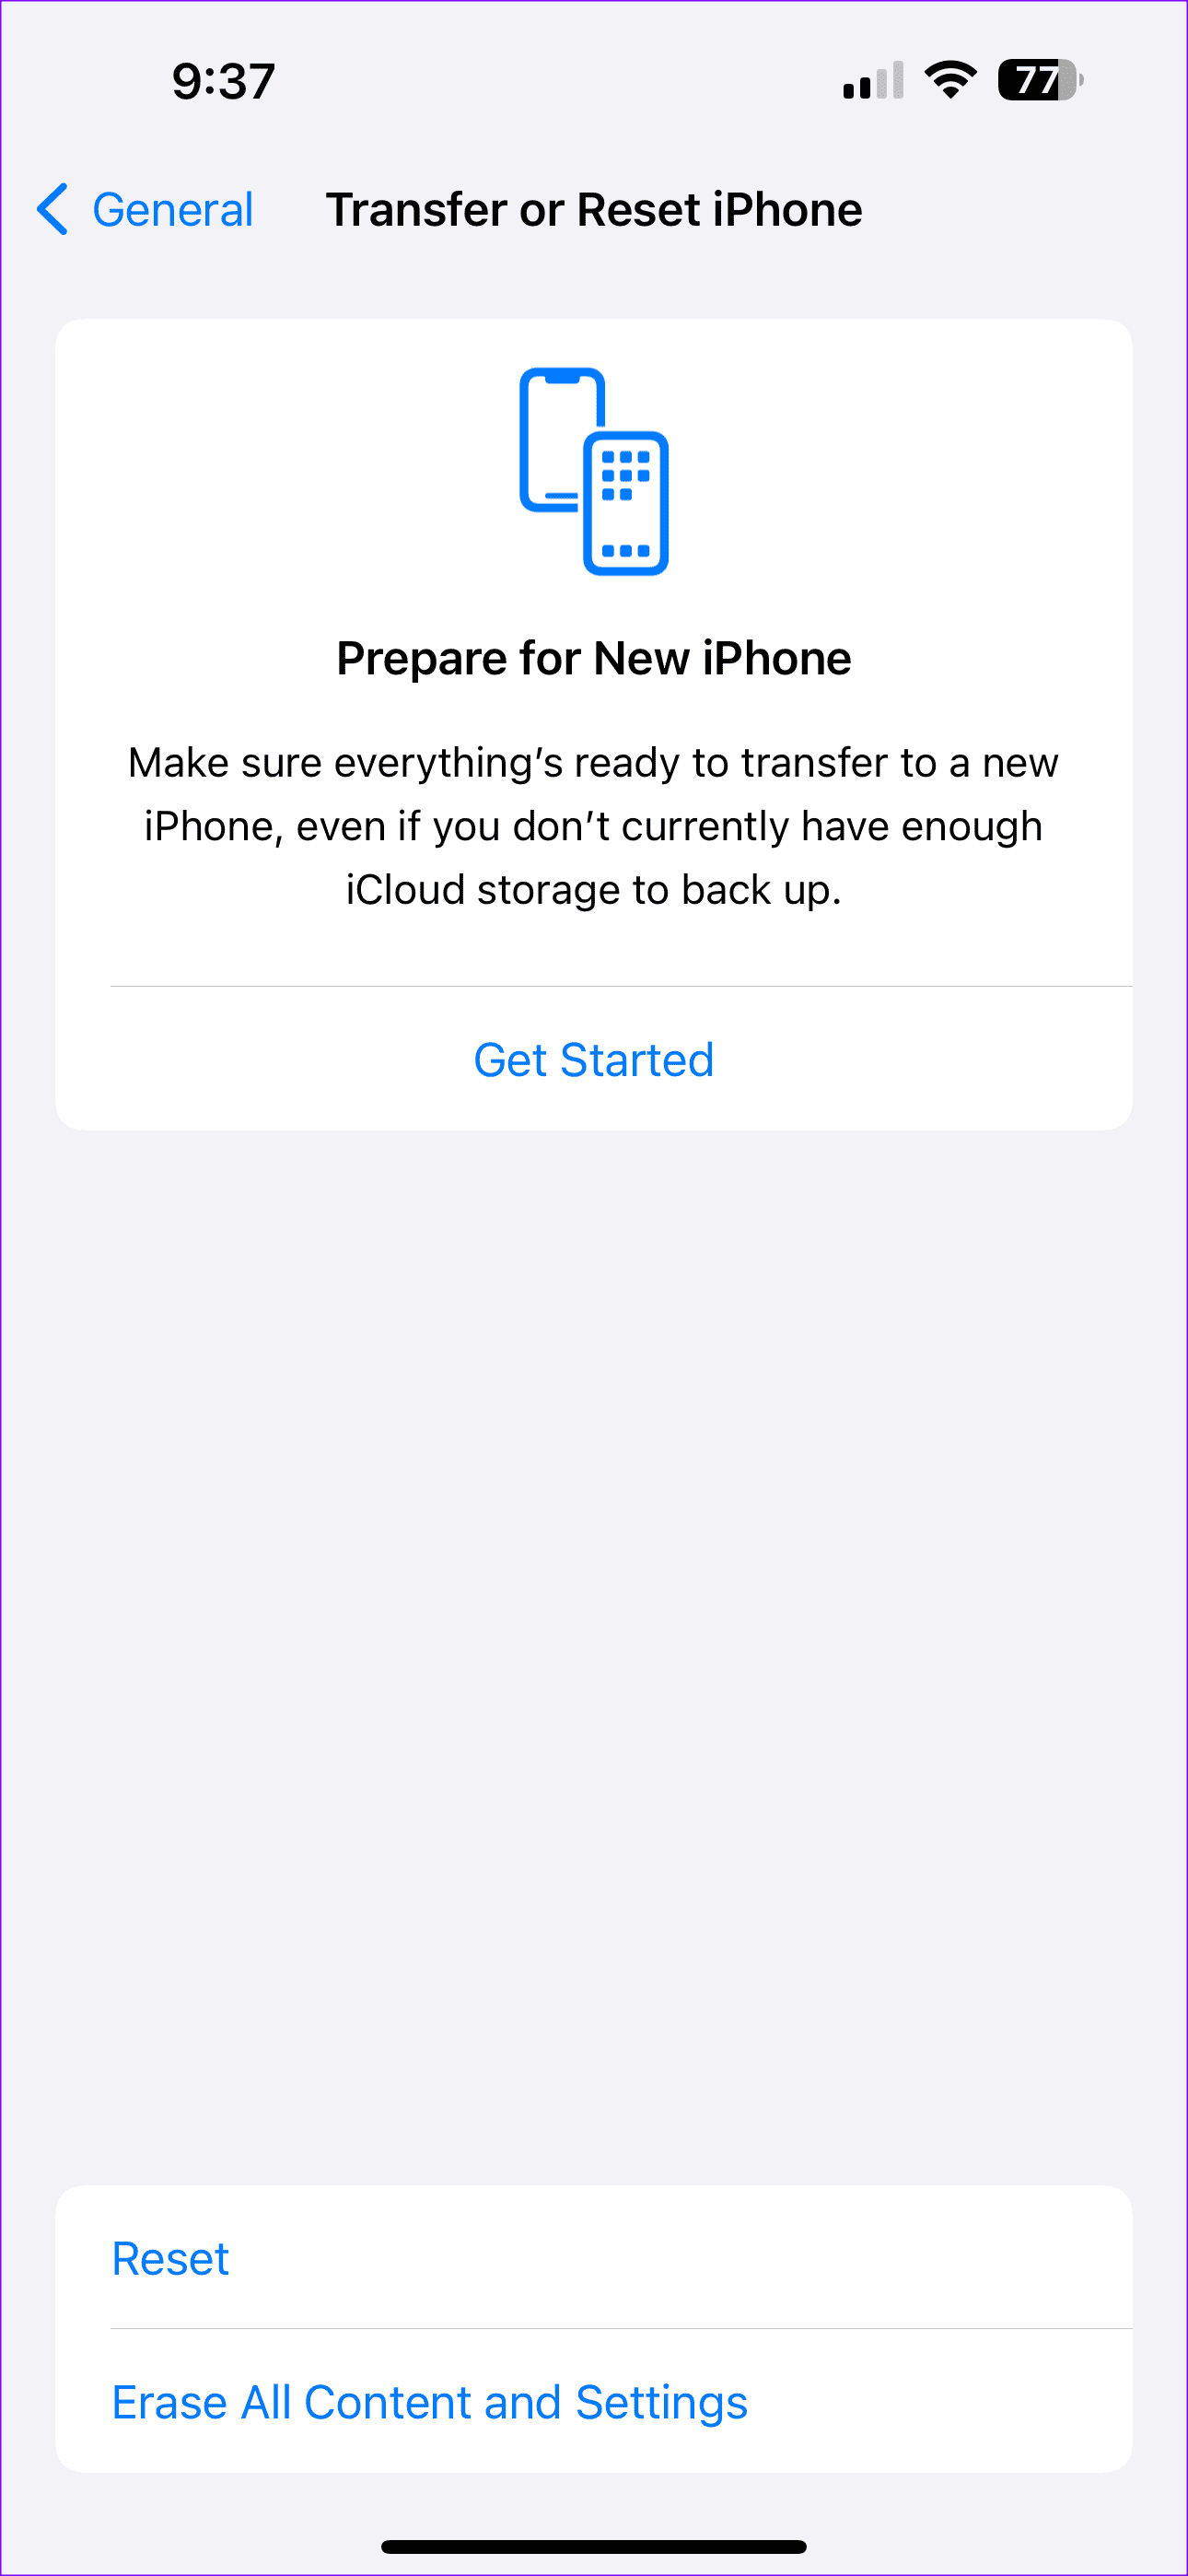
Step 2: Tap Transfer or Reset iPhone.

Step 3: Select Reset. Tap Reset Network Settings and confirm your decision.
Was this helpful?
Last updated on 30 August, 2024
1 Comment
Leave a Reply
Read Next
 3 Ways to Fix Microsoft Outlook Not Sending Emails on Android and iPhone
Basic Fixes Double-check the email address and attachment size: Outlook may fail to send an email if you have accidentally misspelled the recipient's email address.
3 Ways to Fix Microsoft Outlook Not Sending Emails on Android and iPhone
Basic Fixes Double-check the email address and attachment size: Outlook may fail to send an email if you have accidentally misspelled the recipient's email address.
 4 Ways to Fix Gmail Not Sending Emails on Android
Basic Fixes Recheck the email address: Type the correct email address while composing and recheck it to avoid errors.
4 Ways to Fix Gmail Not Sending Emails on Android
Basic Fixes Recheck the email address: Type the correct email address while composing and recheck it to avoid errors.
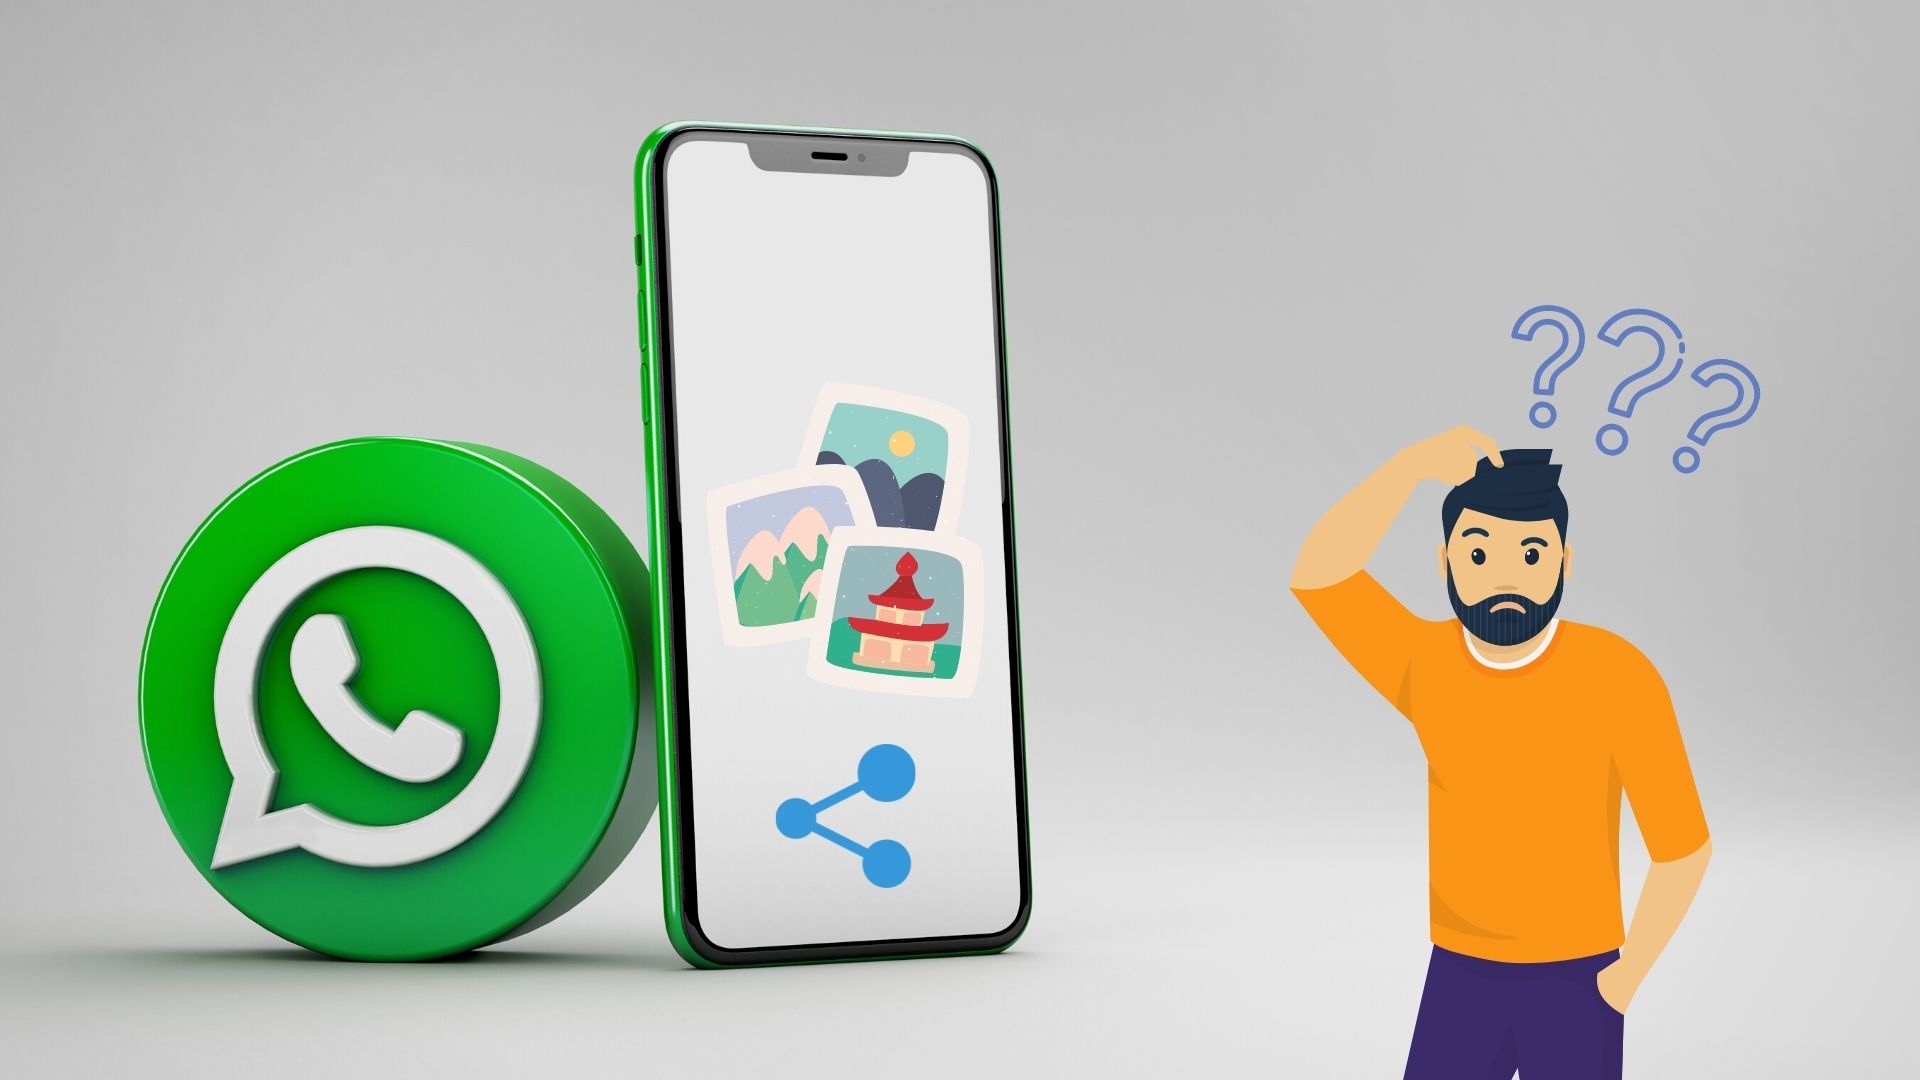 4 Ways to Fix WhatsApp Not Sending Pictures From iPhone
Try Basic Fixes Toggle the Airplane mode: Enabling and disabling the airplane mode on your iPhone can help fix any minor network connection issues preventing WhatsApp from sending photos.
4 Ways to Fix WhatsApp Not Sending Pictures From iPhone
Try Basic Fixes Toggle the Airplane mode: Enabling and disabling the airplane mode on your iPhone can help fix any minor network connection issues preventing WhatsApp from sending photos.
 3 Ways to Fix Telegram Not Sending Messages on Android and iPhone
Try Basic Fixes The contact may have blocked you: If the message not sending issue is limited to one or two people, the other person may have blocked you.
3 Ways to Fix Telegram Not Sending Messages on Android and iPhone
Try Basic Fixes The contact may have blocked you: If the message not sending issue is limited to one or two people, the other person may have blocked you.
 7 Ways to Fix Reminders App Not Sending Notifications
Basic Fixes: Disable DND and Focus Mode: DND and Focus Mode can help block notifications to ensure you're not disturbed.
7 Ways to Fix Reminders App Not Sending Notifications
Basic Fixes: Disable DND and Focus Mode: DND and Focus Mode can help block notifications to ensure you're not disturbed.
 How to Fix iPhone Not Sending or Receiving Pictures
https://www.youtube.com/watch?v=n-Z00F3Tgs8 Basic Fixes The first order of business is to establish whether you can't send pictures in Messages or iMessage or both.
How to Fix iPhone Not Sending or Receiving Pictures
https://www.youtube.com/watch?v=n-Z00F3Tgs8 Basic Fixes The first order of business is to establish whether you can't send pictures in Messages or iMessage or both.
 How to Fix WhatsApp Messages Not Sending on iPhone and Android
Why Doesn't WhatsApp Send My Messages Here are some of the reasons behind WhatsApp's sketchy behavior on your phone.
How to Fix WhatsApp Messages Not Sending on iPhone and Android
Why Doesn't WhatsApp Send My Messages Here are some of the reasons behind WhatsApp's sketchy behavior on your phone.
 4 Ways to Fix Telegram Not Sending SMS Codes on iPhone and Android
Basic Fixes Check network connection: Ensure there are no problems with internet connectivity on your device.
4 Ways to Fix Telegram Not Sending SMS Codes on iPhone and Android
Basic Fixes Check network connection: Ensure there are no problems with internet connectivity on your device.
The article above may contain affiliate links which help support Guiding Tech. The content remains unbiased and authentic and will never affect our editorial integrity.

I tried all those things and my problem is not fixed!!! I can’t believe there is no way to contact Microsoft !!!!!