How to Navigate and Read Apple Weather App
Apple offers a pre-installed Weather app on iPhone. The app shows 24-hour and 10-day forecasts with all important details like temperature, UV, humidity, wind, etc. If you have been looking for an iPhone Weather app guide, you have landed on the right page. Here we explain all the features and tell you how to use the Weather app on your iPhone.
Open the Apple Weather app on your iPhone. At the top of the app’s home screen, you will find the current temperature and the predicted high and low temperatures for the day.
Tip: Learn how to add weather, date, and time to the home screen.
24-hour Forecast Card
The card below the current temperature shows the expected maximum temperature and weather conditions for the next 24 hours. Swipe left on this card to see the forecast for each hour. You will also see the sunrise and sunset times in this card. Tap on this card to view the 24-hour prediction in detail.


10-Day Forecast Card
Next, you get the 10-day forecast card, where you will see the expected minimum (left) and maximum (right) temperature of each day. The icon next to the day represents the chance of precipitation.
View Wind, Feels Like, Humidity, and Other Cards
Scroll down further below the 10-day forecast card to see other cards like UV index, Sunset, Wind, Precipitation, Feels Like, Humidity, Visibility, and Pressure. You will see the information for the current date and time in these cards. Tap on any card to view more details about it.


You will land on the screen where you will see a graph of the selected parameter. Long-press on the graph and slide the finger right or left to view expected conditions for 24 hours. You can also change and view the data from the dates at the top for another day.
Alternatively, you can change and switch to a different parameter by tapping on the small down arrow. Then, choose the preferred parameter.
Tip: Check out the best weather widget apps for iPhone.
How to View Expected Temperature or Other Forecasts Per Hour for Upcoming Dates
To view detailed information for temperature, UV index, humidity, precipitation, etc., for 10 days, you can simply tap on any card at the bottom of the home screen, as shown above.
Alternatively, follow these steps:
Step 1: On the home screen of the Weather app, tap on the day in the 10-Day Forecast for which you want to view the temperature range.
A new screen will show up. This is the same screen that you will see if you tap on any other card, like UV index, Wind, etc., on the Weather app home screen.
Step 2: Press and hold anywhere on the graph and move the finger right or left to show the expected temperature for 24 hours of that day.

Step 3: Tap on the small down arrow at the top-right corner to change the parameter for that day. You can view expected wind, predication, humidity, visibility, and other conditions similarly. Press the X icon at the top-right corner to go back.


Tip: Learn how to get severe weather alerts on iPhone.
How to View Weather Map
Do you like to track the weather using the Weather app? Apple Weather app provides a function to do that too. You can get a bird’s eye view of the selected area’s temperature, air quality, and precipitation using a weather map.
To view and use the weather map, follow these steps:
Step 1: Tap on the Map icon at the bottom-left corner of the Weather app.
Step 2: Now, zoom in and out using two fingers to change the location. Or move the map by dragging it using one finger. On this screen, you will find the following three icons:
- GPS: This icon takes you to your current location on the map.
- Three-bar icon: Tap this icon to switch the weather map between multiple or your favorite cities added to the Weather app.
- Stack icon: The third icon, which looks like a stack, lets you switch the display between temperature, precipitation, and air quality.
Step 3: Tap Done to go back to the previous screen.


Check our detailed guide on how to use weather map in the Apple Weather app.
How to Add More Places to Weather App
Apple Weather app allows you to view the weather of multiple locations. You can easily add or remove cities from the app.
Follow these steps to add a new city to the iPhone Weather app:
Step 1: Open the Weather app on your iPhone and then tap on the three-bar icon at the bottom-right corner.
Here, you will see your current city along with other cities that you have added.
Step 2: Tap on the search bar at the top and enter the name of the city. Select the city from the search results.
Step 3: The weather details of the selected city will show up. If you want to view the information just once, tap on the Cancel button at the top. However, if you want to check the weather information of the city regularly, tap on the Add button.


That’s it. The city will show in the list of favorite cities in the Weather app. Similarly, repeat the steps to add more places to track their weather conditions.
Tip: Learn how to add the iPhone Weather app icon to home screen.
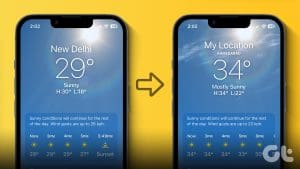
How to Change Weather Location
Once you have added multiple cities to the Weather app, you will see tiny dots at the bottom of the app. These dots represent the added places. Swipe right or left on the home screen of the Weather app to switch between your favorite cities.
Alternatively, tap on the three-bar icon at the bottom-right corner to get a temperature overview of your favorite locations. Tap on any location to view its detailed information.


Pro Tip: You will see the local time of different locations along with the temperature.
To set any location as the default location in the Weather app, tap on it from the list of favorite locations and close the app. Basically, the iPhone Weather app will show the last used location each time you open the app.
How to Delete or Rearrange Cities
Step 1: Launch the Weather app and then tap on the three-bar icon.
Step 2: Tap on the three-dot icon and then select Edit List from the menu.
Step 3: Tap on the red (-) remove icon next to the city that you want to remove from the Weather app and then tap on the Trashcan icon.


Step 4: To rearrange cities, press and hold the city to drag it upwards or downwards and leave it at the preferred position.
Step 5: Tap on Done to save the changes.
Was this helpful?
Last updated on 29 July, 2024
Read Next
 3 Ways to Fix Apple Weather App Not Working on iPhone
Basic Fixes: Check the Apple system status page: Before starting, it is worth checking Apple's System Status.
3 Ways to Fix Apple Weather App Not Working on iPhone
Basic Fixes: Check the Apple system status page: Before starting, it is worth checking Apple's System Status.
 How to Change Weather Location on iPhone, iPad, or Apple Watch
If you own an iPhone or an Apple Watch, you probably know how convenient it is to check the weather forecast on these devices.
How to Change Weather Location on iPhone, iPad, or Apple Watch
If you own an iPhone or an Apple Watch, you probably know how convenient it is to check the weather forecast on these devices.
 iPhone Weather App Not Accurate? Here’s What to Do
Basic Fixes Disable VPN: An active VPN connection may change your location to show incorrect weather app data.
iPhone Weather App Not Accurate? Here’s What to Do
Basic Fixes Disable VPN: An active VPN connection may change your location to show incorrect weather app data.
 4 Fixes for Apple Watch Weather Not Showing or Updating
Basic Fixes Check Apple Watch connectivity: Ensure your Apple Watch is connected to Wi-Fi and your iPhone via Bluetooth.
4 Fixes for Apple Watch Weather Not Showing or Updating
Basic Fixes Check Apple Watch connectivity: Ensure your Apple Watch is connected to Wi-Fi and your iPhone via Bluetooth.
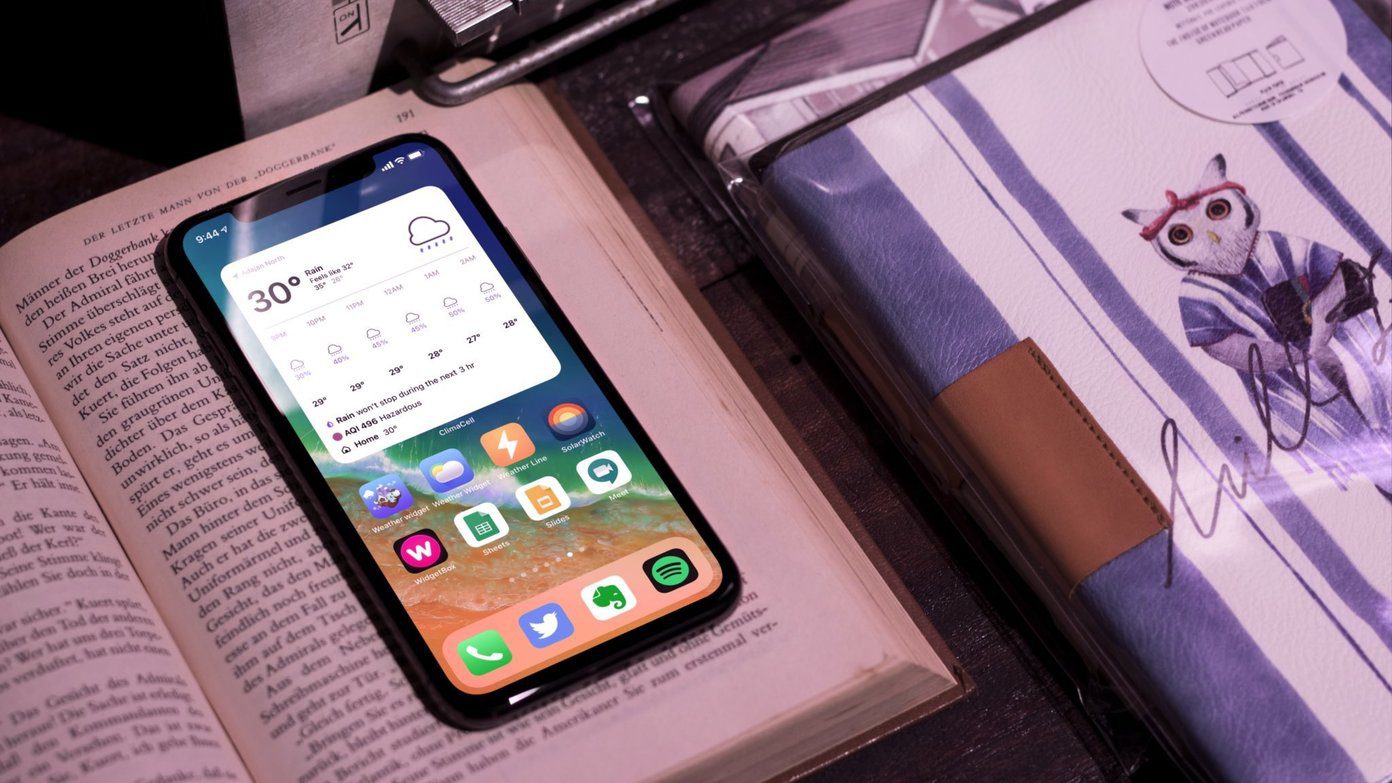 6 Best Weather Widget Apps for iPhone
iOS 14 update brings much-needed customization options for iPhone users.
6 Best Weather Widget Apps for iPhone
iOS 14 update brings much-needed customization options for iPhone users.
 4 Fixes for Location Not Updating in Weather App on Samsung Galaxy Phones
Basic Fixes Switch to 5G: To get the most accurate weather data, we suggest switching to 5G network on your Samsung phone.
4 Fixes for Location Not Updating in Weather App on Samsung Galaxy Phones
Basic Fixes Switch to 5G: To get the most accurate weather data, we suggest switching to 5G network on your Samsung phone.
 How to Add Date, Time and Weather to Your Phone’s Home Screen
How to Show Date, Time, and Weather on iPhone Home Screen You can do so, in the following two ways.
How to Add Date, Time and Weather to Your Phone’s Home Screen
How to Show Date, Time, and Weather on iPhone Home Screen You can do so, in the following two ways.
 4 Fixes for Weather Widget Not Updating on Android
Basic Fixes Disable data saver: Open Settings > Network and internet > Disable Data saver.
4 Fixes for Weather Widget Not Updating on Android
Basic Fixes Disable data saver: Open Settings > Network and internet > Disable Data saver.
The article above may contain affiliate links which help support Guiding Tech. The content remains unbiased and authentic and will never affect our editorial integrity.