Method 1: Using Microsoft Photos App
The default Photos app on Windows has several editing features. You can also use it to reduce a photo’s size. Follow the steps below.
Step 1: Press Windows + E to open the Windows Explorer menu.
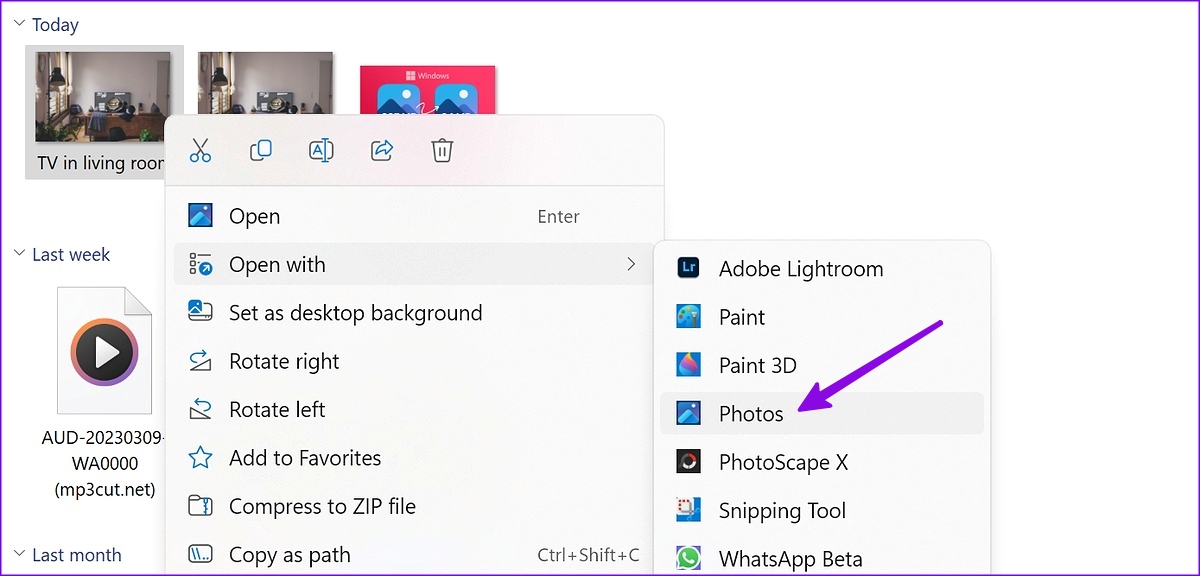
Step 2: Browse to the folder with pictures. Right-click on a picture, select Open with, and choose Photos app from the submenu.
Step 3: Click the three horizontal dots menu at the top and select Resize.

Step 4: Use the Quality slider to reduce the photo size further. From the same menu, you can change the image width and height. Hit Save.

Save your compressed image to a preferred location in the Windows Explorer app.
Method 2: Using Microsoft Paint
Microsoft has completely redesigned the default Paint app on Windows. You can easily resize and compress photo sizes using the Paint app. Here’s how.
Step 1: Press Windows + E to open Windows Explorer. Browse to the pictures, right-click on a photo, select Open with, and select Paint from the submenu.

Step 2: Click the Resize option at the top or press Control + W shortcut.

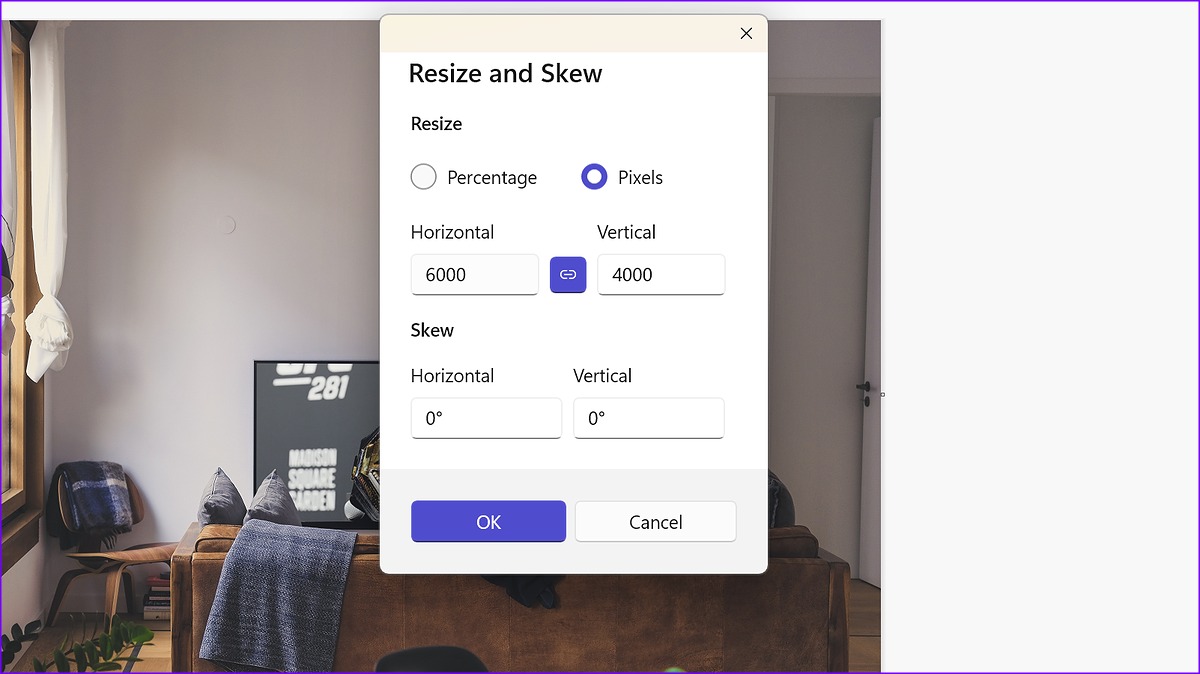
Step 3: You can resize a photo by adjusting the Percentage or Pixels. After that, click OK to see the reduced image file in action.
Step 4: Hit the Save button and check the reduced file size on the bottom bar.

Step 5: Click File at the top and expand the Save As menu.

Step 6: Pick a preferred file type to save your picture and export it to a relevant folder on your PC.
Method 3: Compress Photos in Bulk Using Web Tools
You can also use web tools to reduce photo size on Windows. However, be careful while using web tools, as some sites may store a copy of the image you upload. Two options, especially for bulk compression, are TinyPNG and Compressor.io.
Step 1: Visit your preferred compression site.
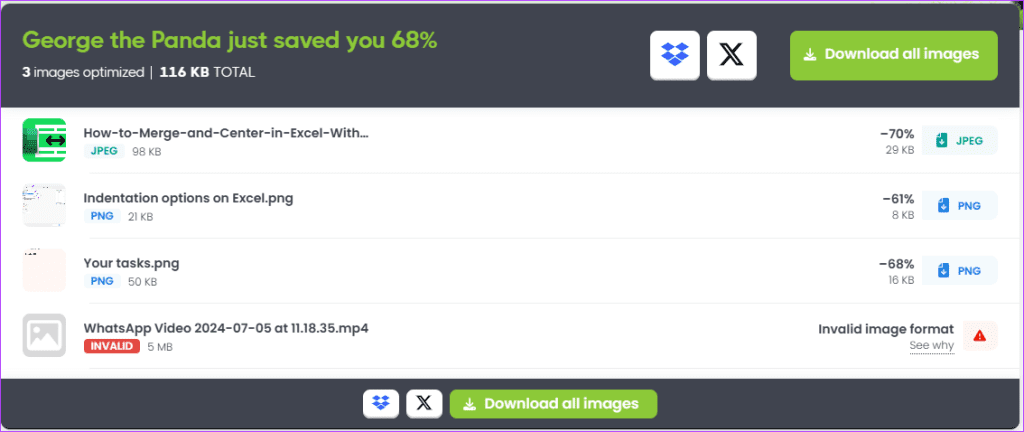
Step 2: Drop your images or browse them from your PC. The images will be compressed automatically.

Step 3: Click Download all images.
Method 4: Using PowerToys
Microsoft offers PowerToys software, which comes with several tools to improve productivity. We recommend using PowerToys to reduce file size in several photos simultaneously.
Step 1: Install PowerToys from the Microsoft Store on Windows.
Step 2: Open PowerToys and select Image Resizer from the left sidebar. Turn on the toggle next to Enable Image Resizer.
Step 3: Check the default Preset sizes that can be used in the editor. You can add a new size or edit existing ones, too.

Step 4: Launch Windows Explorer by pressing Windows + E shortcut and select several images.
Step 5: Right-click on them and select Resize pictures from the context menu.

Step 6: Select a relevant size preset from the top menu, enable or disable necessary orientation options, and click Resize.

That’ll batch convert all those photos into smaller images per your choice.
Method 5: Using Third-Party Apps
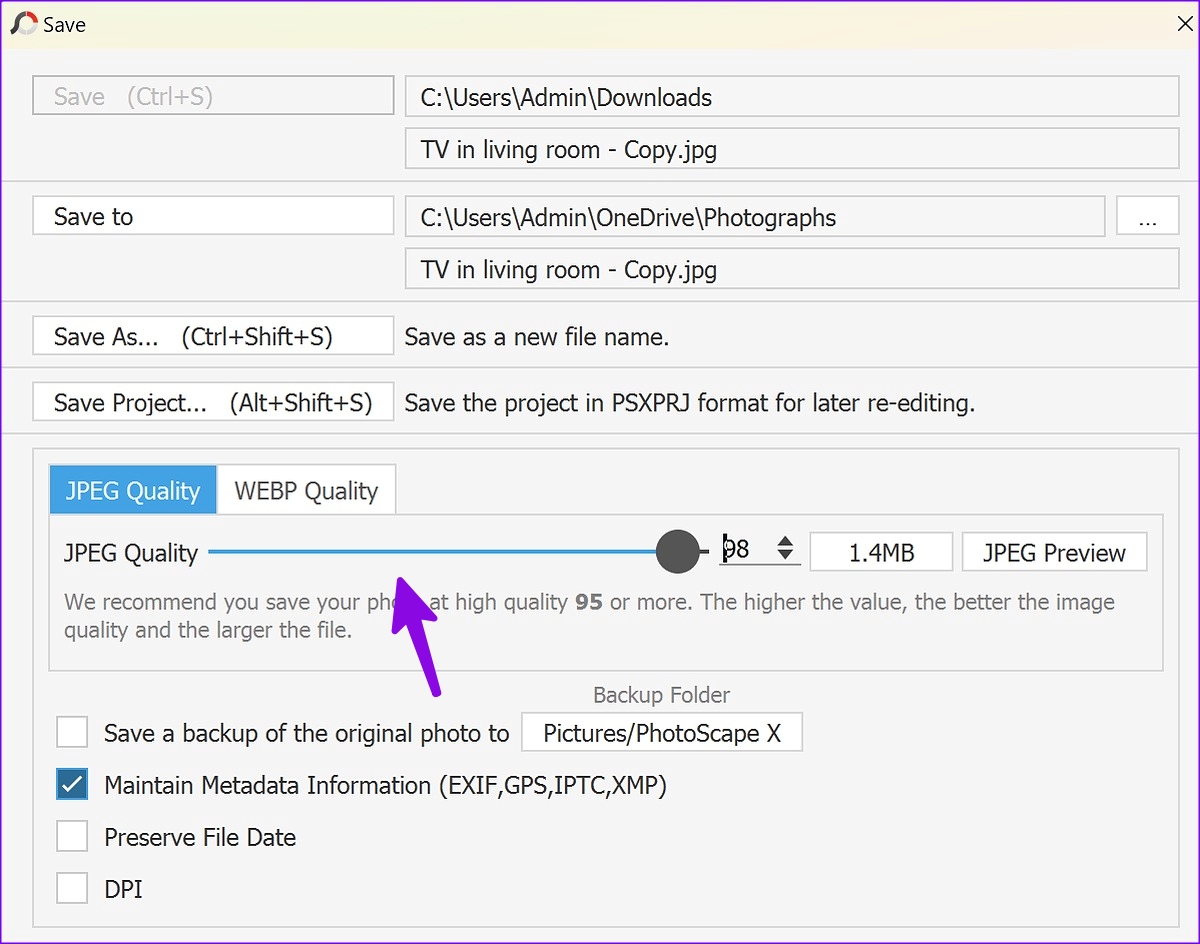
There is no drought of third-party photo editing apps on Windows. Among them, PhotoScape X stands out due to its rich editing options. Here’s how to use PhotoScape X to reduce photo size on Windows.
Step 1: Install PhotoScape X from the Microsoft Store.
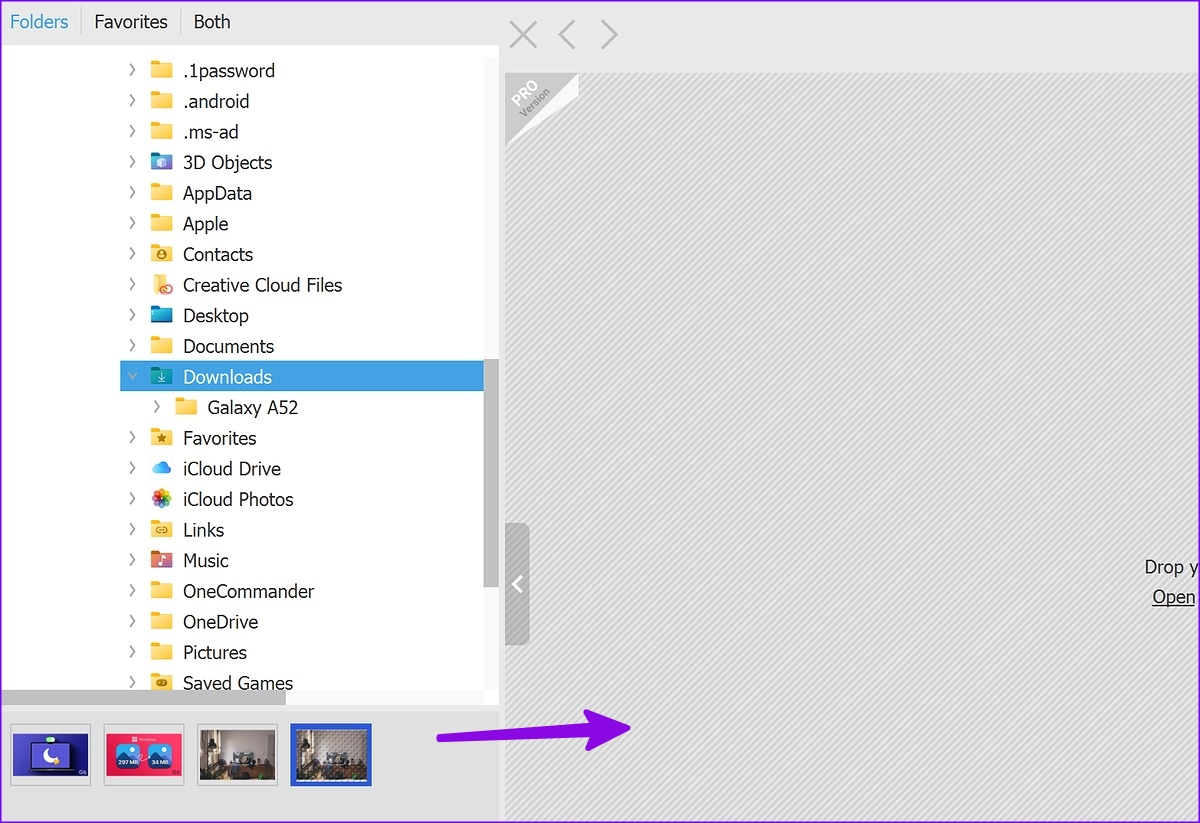
Step 2: Open PhotoScape X and select the path from the sidebar.
Step 3: Drag and drop images to the empty Editor area.
Step 4: From the menu that pops up at the top-right corner, click on Resize and change the width and height of the image. Then, hit Apply.

Step 5: Press Ctrl + S shortcut to open the Save menu. Use a JPEG Quality slider to reduce image size. Click Save.
While PhotoScape X is free, some editing features are behind a paywall. The Pro version costs $39.99.
Was this helpful?
Last updated on 08 July, 2024
Read Next
 6 Ways to Reduce Photo File Size on Android
Method 1: Reduce Photo Size Using the Gallery App (Samsung) You can use the default Gallery app on Galaxy phones to edit media files, create collages, and even resize them.
6 Ways to Reduce Photo File Size on Android
Method 1: Reduce Photo Size Using the Gallery App (Samsung) You can use the default Gallery app on Galaxy phones to edit media files, create collages, and even resize them.
 7 Ways to Reduce How Much Data Your Windows 10 PC Uses
https://youtu.be/RsUvBsjgi5k 1.
7 Ways to Reduce How Much Data Your Windows 10 PC Uses
https://youtu.be/RsUvBsjgi5k 1.
 2 Ways to Reduce PDF File Size on Windows 11
Method 1: Using Adobe Acrobat Pro Adobe Acrobat is part of the Adobe Creative Suite.
2 Ways to Reduce PDF File Size on Windows 11
Method 1: Using Adobe Acrobat Pro Adobe Acrobat is part of the Adobe Creative Suite.
 6 Ways to Reduce Microsoft Teams Memory Usage in Windows 10 or 11
Fix 1: Disable GPU Hardware Acceleration in Teams GPU hardware acceleration is enabled by default in Microsoft Teams for smooth performance.
6 Ways to Reduce Microsoft Teams Memory Usage in Windows 10 or 11
Fix 1: Disable GPU Hardware Acceleration in Teams GPU hardware acceleration is enabled by default in Microsoft Teams for smooth performance.
 How to Reduce CPU and RAM Usage in Microsoft Teams on Windows 11
Common Fixes Update or reinstall the Microsoft Teams app: Open the Microsoft Store, search Microsoft Teams, and click Update (if available).
How to Reduce CPU and RAM Usage in Microsoft Teams on Windows 11
Common Fixes Update or reinstall the Microsoft Teams app: Open the Microsoft Store, search Microsoft Teams, and click Update (if available).
 How to Add Photo Cutout Sticker to Another Photo on iPhone
Method 1: Using Markup Editor In this method, first, you need to add the sticker to the sticker gallery.
How to Add Photo Cutout Sticker to Another Photo on iPhone
Method 1: Using Markup Editor In this method, first, you need to add the sticker to the sticker gallery.
 3 Ways to Reduce Video Size on Android
Method 1: Use Google Photos to Compress Video Size When you select Storage Saver or Express, Google Photos compresses your videos to high- or standard-definition resolution.
3 Ways to Reduce Video Size on Android
Method 1: Use Google Photos to Compress Video Size When you select Storage Saver or Express, Google Photos compresses your videos to high- or standard-definition resolution.
 How Much Data Does Instagram Use and 3 Ways to Reduce It
https://youtu.be/dM091rbuEIk How Much Data Does Instagram Use We cleared the data usage history on our iPhone and started using Instagram on mobile data.
How Much Data Does Instagram Use and 3 Ways to Reduce It
https://youtu.be/dM091rbuEIk How Much Data Does Instagram Use We cleared the data usage history on our iPhone and started using Instagram on mobile data.
The article above may contain affiliate links which help support Guiding Tech. The content remains unbiased and authentic and will never affect our editorial integrity.