Try Basic Fixes
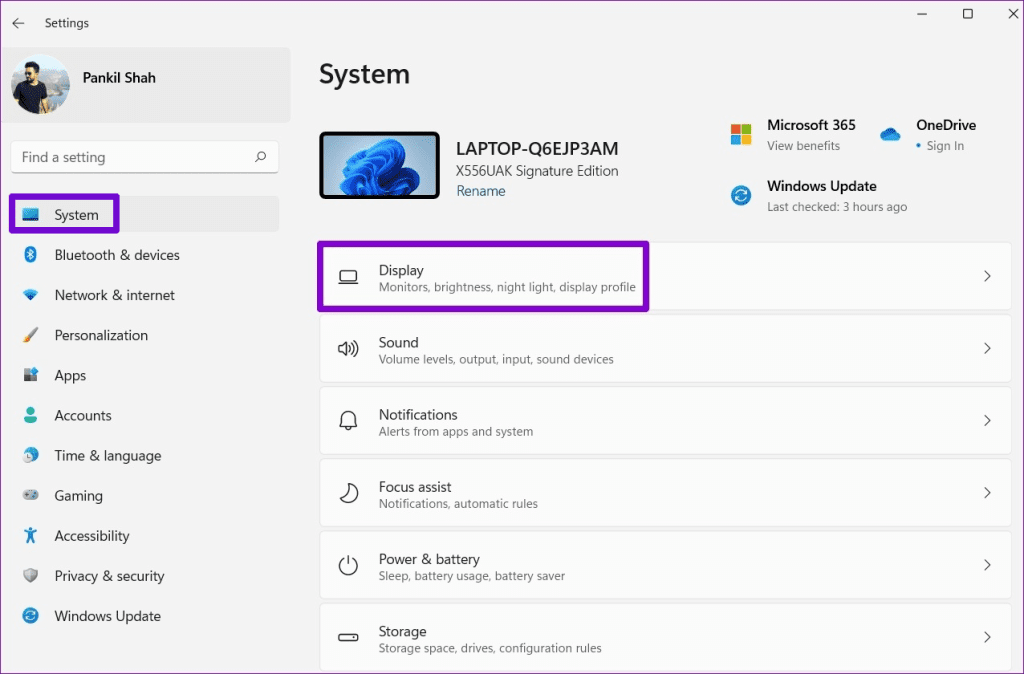
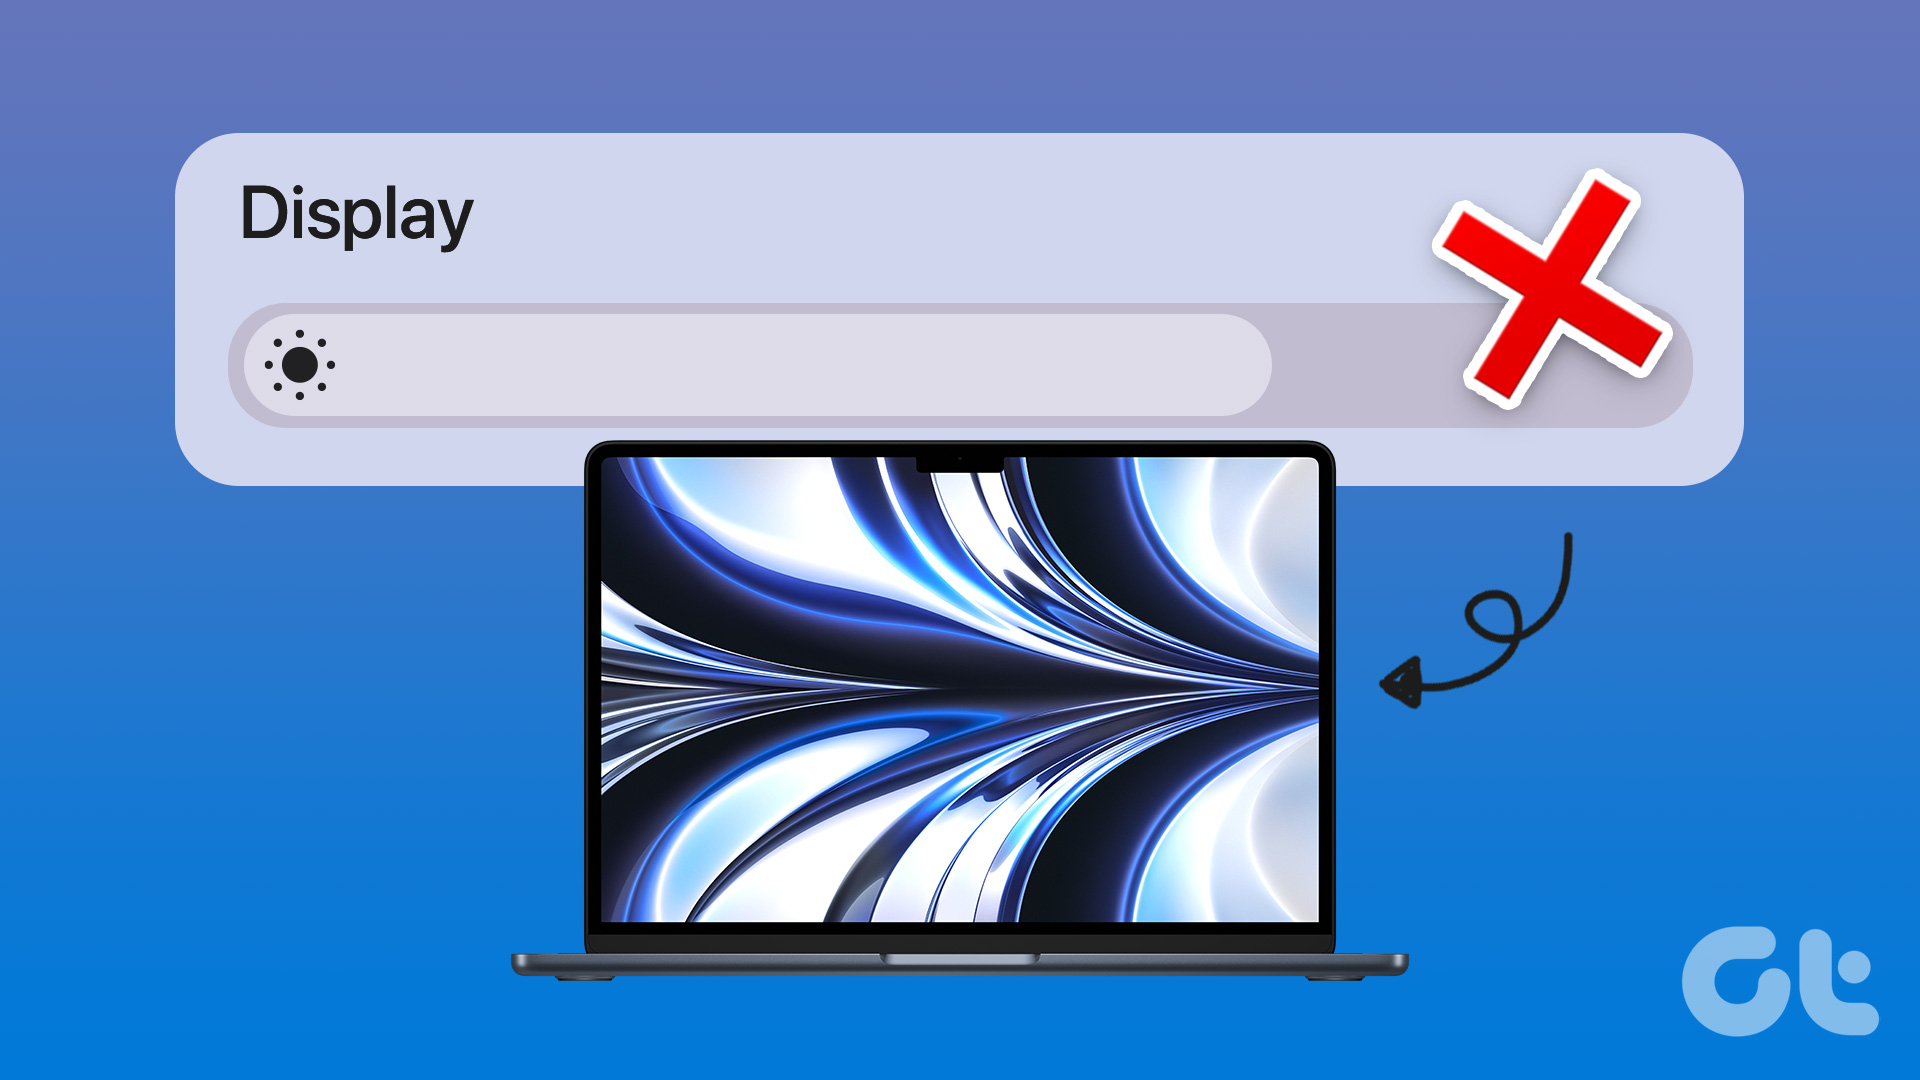
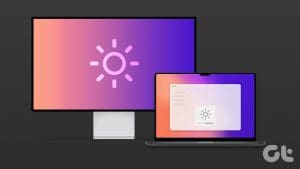
- Adjust brightness from the Quick Settings panel or Settings app: If you can’t seem to adjust the screen brightness using the function keys on your keyboard, press the Windows key + A to access the Quick Settings panel and use the slider next to the brightness icon to modify it. Alternatively, go to Settings > Display to change the screen brightness.
- Install Windows updates: It’s possible that the brightness controls not working issue is due to a bug within the Windows 11 build your laptop is running. If that’s the case, installing pending updates should help.
Fix 1: Disable Auto-Brightness
Next, you should check if the auto-brightness feature is enabled on your PC. If it is, you may have trouble changing the screen brightness manually.
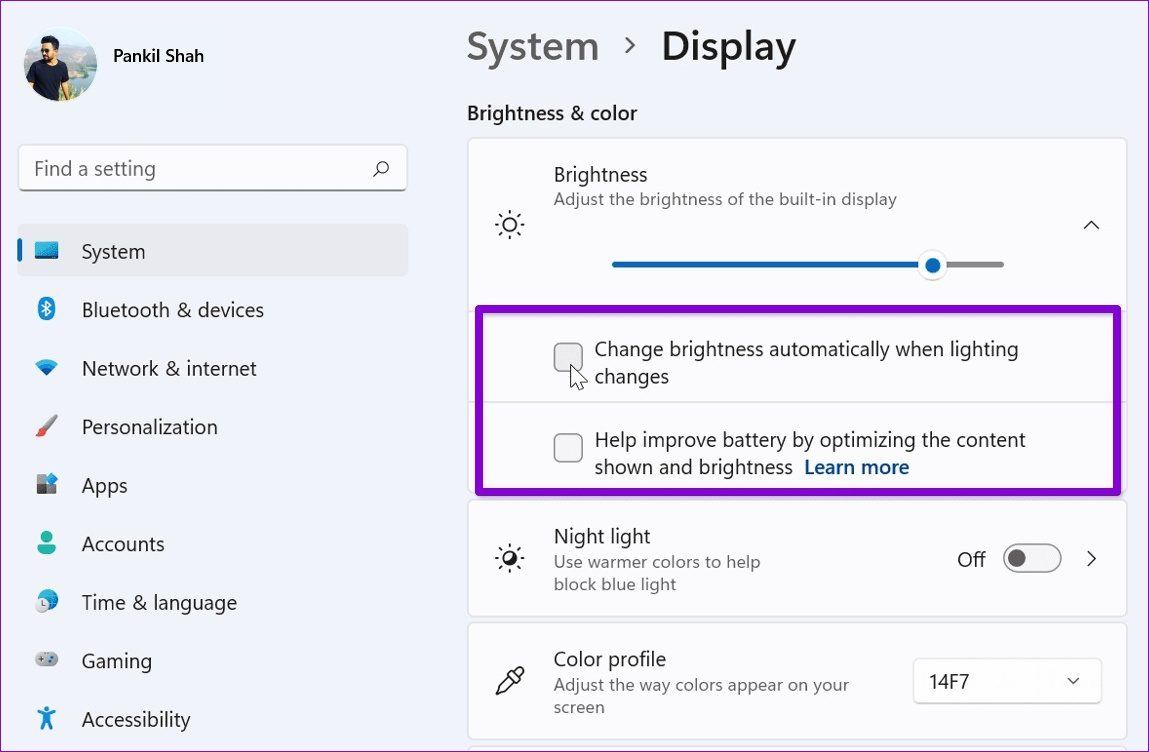
Step 1: Press the Windows key + I to open the Settings app and head to System > Display.
Step 2: Click on the arrow next to Brightness to expand it. Then, uncheck the boxes that read Change brightness automatically when lighting changes and Help improve battery by optimizing the content shown and brightness.
Fix 2: Update Display Driver
The display drivers on your PC can become outdated over time. When this happens, brightness controls may not work as expected in Windows 11. To fix this, you can update the display drivers by following the steps below.
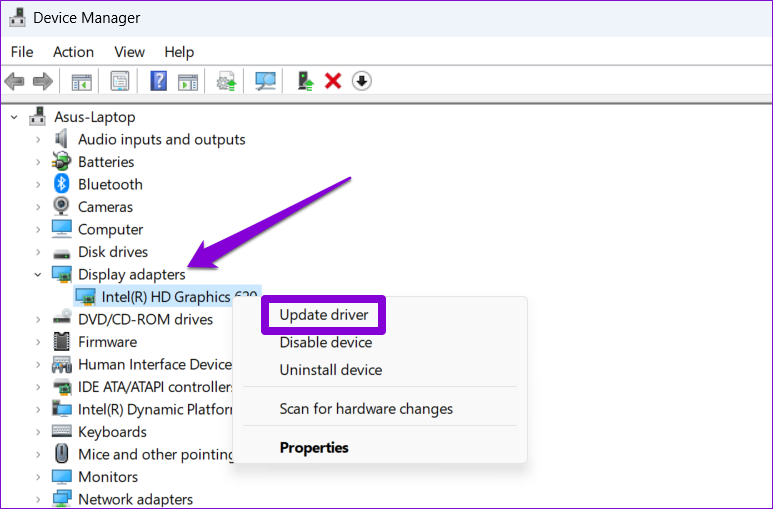
Step 1: Press the Windows key + S to access the search menu. Type in device manager and press Enter.

Step 2: Expand Display adapters, right-click on your display drivers, and select Update driver.

Follow the on-screen instructions to finish updating the display drivers.
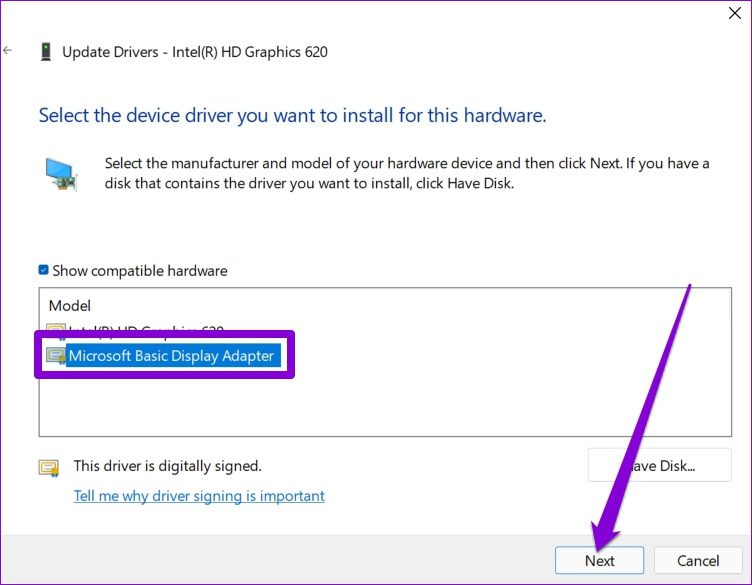
Fix 3: Use Microsoft Basic Display Adapter
If the brightness keys or slider do not work even after you update the display driver, you can try switching to Microsoft’s basic display adapter driver.
Step 1: Open Device Manager using the search menu.
Step 2: Expand Display adapters, right-click on your driver, and select Update driver from the list.
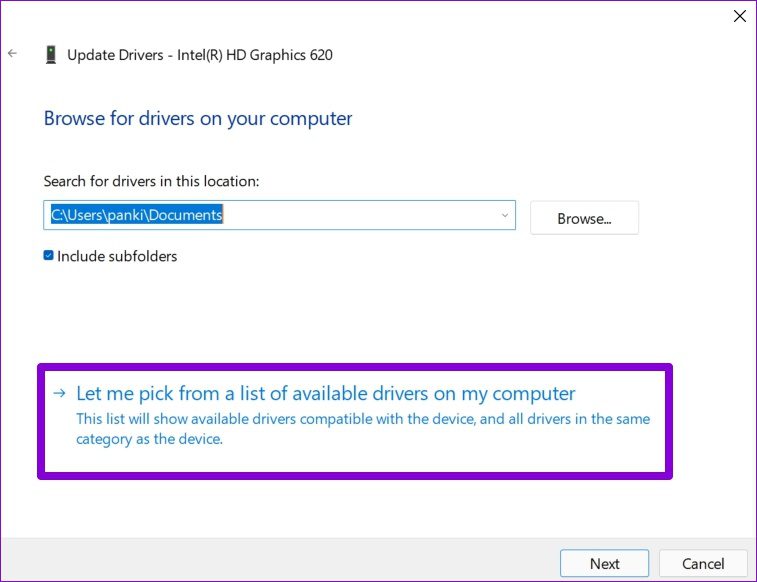
Step 3: Select Browse my computer for drivers.

Step 4: Click the Let me pick from a list of available drivers on my computer option.
Step 5: Select Microsoft Basic Display Adapter and click Next to install them.
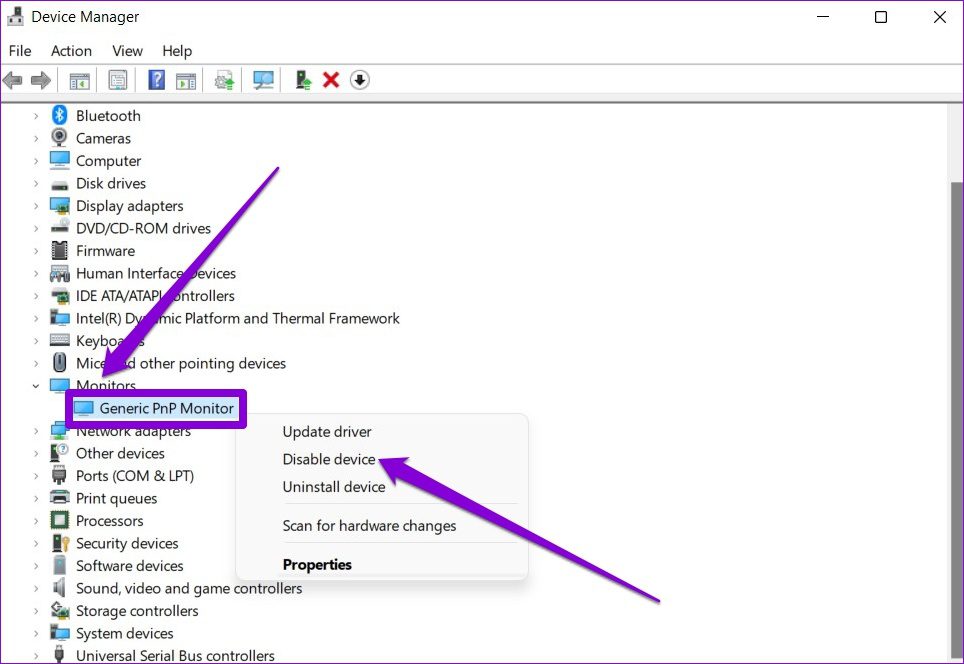
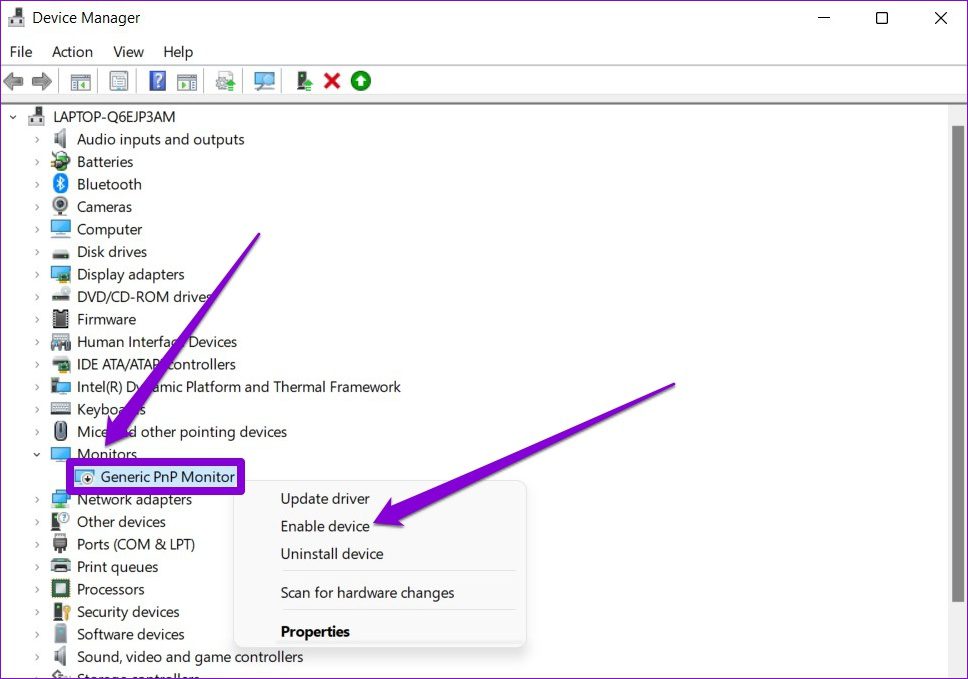
Fix 4: Re-Enable Generic Monitor Drivers
Generic PnP (Plug and Play) monitor drivers on Windows help you connect external displays without requiring any additional setup. However, if you’re having trouble changing the brightness on your external monitor, you can try disabling the Generic PnP monitor driver and enabling it again.
Step 1: Open Device Manager using the search menu.
Step 2: Expand Monitors, right-click on Generic PnP Monitor, and select Disable device from the list.
Step 3: Restart your PC and follow the steps above to enable the Generic PnP Monitor.
Fix 5: Repair System Files
Such issues can also arise if some of the system files on your PC are damaged or missing. If that’s the case, running the SFC (System File Checker) scan will help fix the brightness problem on your Windows 11 laptop.
Step 1: Right-click on the Start icon and select Terminal (Admin) from the resulting menu.

Step 2: Type the command mentioned below and press Enter.
SFC /scannow

Wait for the scan to complete and then restart your Windows laptop.
Was this helpful?
Last updated on 08 July, 2024
12 Comments
Leave a Reply
Read Next
 4 Ways to Fix Adaptive Brightness Not Working on Android
Try Basic Fixes Install Android updates: Software updates are crucial for any device.
4 Ways to Fix Adaptive Brightness Not Working on Android
Try Basic Fixes Install Android updates: Software updates are crucial for any device.
 3 Ways to Fix Auto Brightness Not Working on iPhone
Try Basic Fixes Remove the screen protector: Your iPhone uses the built-in ambient light sensor to detect your current lighting conditions and adjust the brightness accordingly.
3 Ways to Fix Auto Brightness Not Working on iPhone
Try Basic Fixes Remove the screen protector: Your iPhone uses the built-in ambient light sensor to detect your current lighting conditions and adjust the brightness accordingly.
 4 Ways to Fix Display Brightness Not Working on Mac
Fix 1: Check Display Dimming Settings Step 1: Open Settings > click on Battery from the left menu.
4 Ways to Fix Display Brightness Not Working on Mac
Fix 1: Check Display Dimming Settings Step 1: Open Settings > click on Battery from the left menu.
 3 Best Ways to Adjust Brightness on External Monitor in Windows 10
One can easily adjust the screen brightness of their Windows 10 laptop or computer using the slider in the Action Center or with buttons on the keyboard.
3 Best Ways to Adjust Brightness on External Monitor in Windows 10
One can easily adjust the screen brightness of their Windows 10 laptop or computer using the slider in the Action Center or with buttons on the keyboard.
 6 Best Ways to Adjust the Display Brightness on Windows 11
Whether you're working late into the night or working outdoors, having the perfect brightness level on your Windows machine can make all the difference.
6 Best Ways to Adjust the Display Brightness on Windows 11
Whether you're working late into the night or working outdoors, having the perfect brightness level on your Windows machine can make all the difference.
 6 Ways to Fix iPhone Brightness Keeps Changing
Basic Fixes Turn off True Tone: The True Tone feature on your iPhone controls brightness and screen colors based on your surroundings.
6 Ways to Fix iPhone Brightness Keeps Changing
Basic Fixes Turn off True Tone: The True Tone feature on your iPhone controls brightness and screen colors based on your surroundings.
 3 Ways to Control External Monitor Brightness From Mac
1.
3 Ways to Control External Monitor Brightness From Mac
1.
 12 Ways to Prevent Apps from Controlling Brightness on Android
Isn’t it annoying when certain apps take over your phone's brightness settings and change the brightness level on their own?
12 Ways to Prevent Apps from Controlling Brightness on Android
Isn’t it annoying when certain apps take over your phone's brightness settings and change the brightness level on their own?
The article above may contain affiliate links which help support Guiding Tech. The content remains unbiased and authentic and will never affect our editorial integrity.
Life saver! Thank you for this article…really helpful
my screen shows the brightness bar going down but the actual brightness doesn’t go down 🙁
You saved my life. Thanks a lot !!
thank you for saving the day, much appreciated
It actually worked, thanks for the help, u have no idea how much I was struggling with this????
Super……point# 5 worked for me….updated the drivers 🙂
I implemented method #4 , and it worked successfully.. You saved my eyes and my life.. Thanks!!
Thanks a lot !
#4 worked for me! Thanks a lot!
it didnt work for me unfortunately, i tried every step except for #6 because im scared i wont be able to turn my monitor back on since i only have one… ahhh why wont my pc just work right, thanks for helping me correct corrupted files though!
Thank you very much, suggestion number four helped me. There were three adapter options to choose and one of them was working right.
Life saver
4th step worked for me!!!
Love this article..