Tip 1: Enable Audio Enhancements
Your Windows 11 PC has an audio enhancement feature that automatically improves sound quality. Hence, if you want better audio quality, this is the first thing you should enable.
Step 1: Press the Windows key + I to open the Settings app and head to System > Sound.

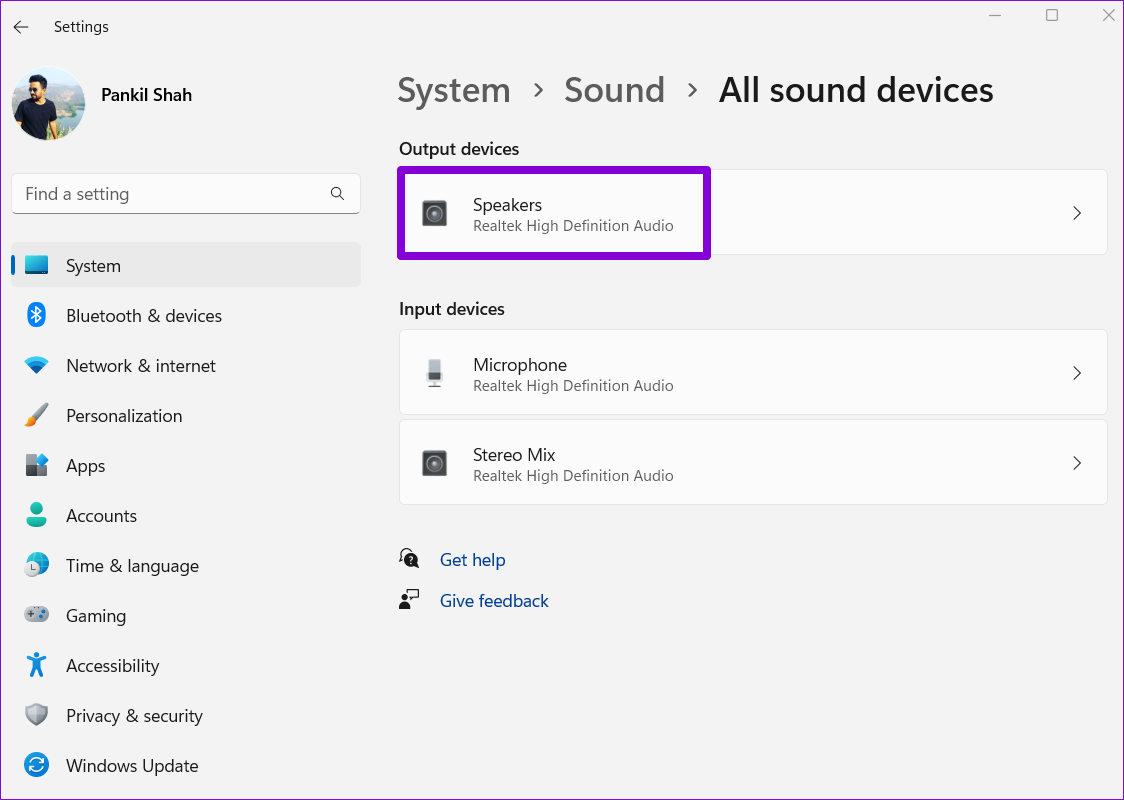
Step 2: Scroll down to the Advanced section and click on All sound devices.

Step 3: Select your audio device from the list.
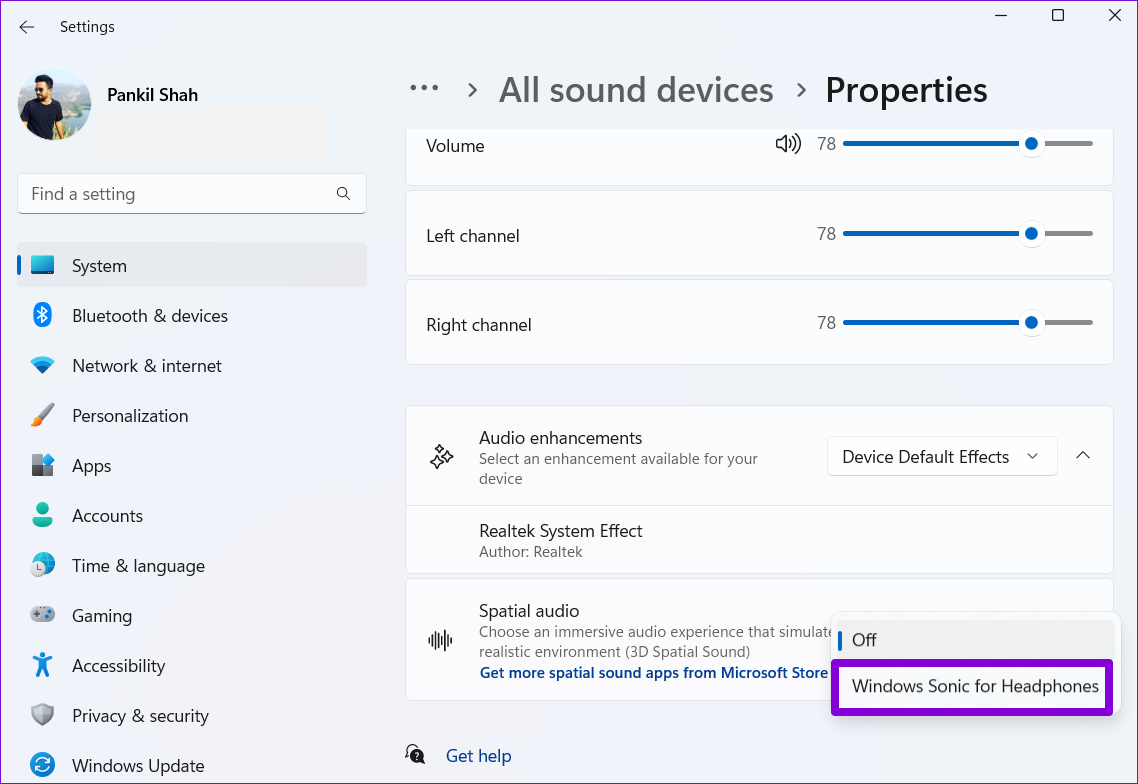
Step 4: Use the drop-down menu next to Audio enhancements and select Device Default Effects.

You’ll have to repeat the steps above for the audio input and output devices separately.
Tip 2: Enable Spatial Sound
Spatial sound on Windows offers an immersive audio experience by simulating a surround sound setup. It’s similar to a three-dimensional audio experience where the sound comes in from all directions. If you’re looking to enhance your movie or gaming experience on Windows, enabling spatial sound would help.
Step 1: Press the Windows key + I to open the Settings app and head to System > Sound.
Step 2: Select your audio device.

Step 3: Use the drop-down menu next to Spatial audio and select Windows Sonic for Headphones.
You can also try different spatial audio formats, such as DTS Sound Unbound, Dolby Access, and more, by downloading them from the Microsoft Store.
Tip 3: Set Higher Sample Rate and Bit Depth
Another way to improve the sound quality on Windows is to bump up the sample rate and bit depth. This can also be useful if the audio is distorted.
Step 1: Press the Windows key + I to open the Settings app. Then, go to System > Sound.
Step 2: Click on your audio device to open its properties.
Step 3: Under Output settings, use the drop-down menu next to Format to set a higher sample rate and bit depth.
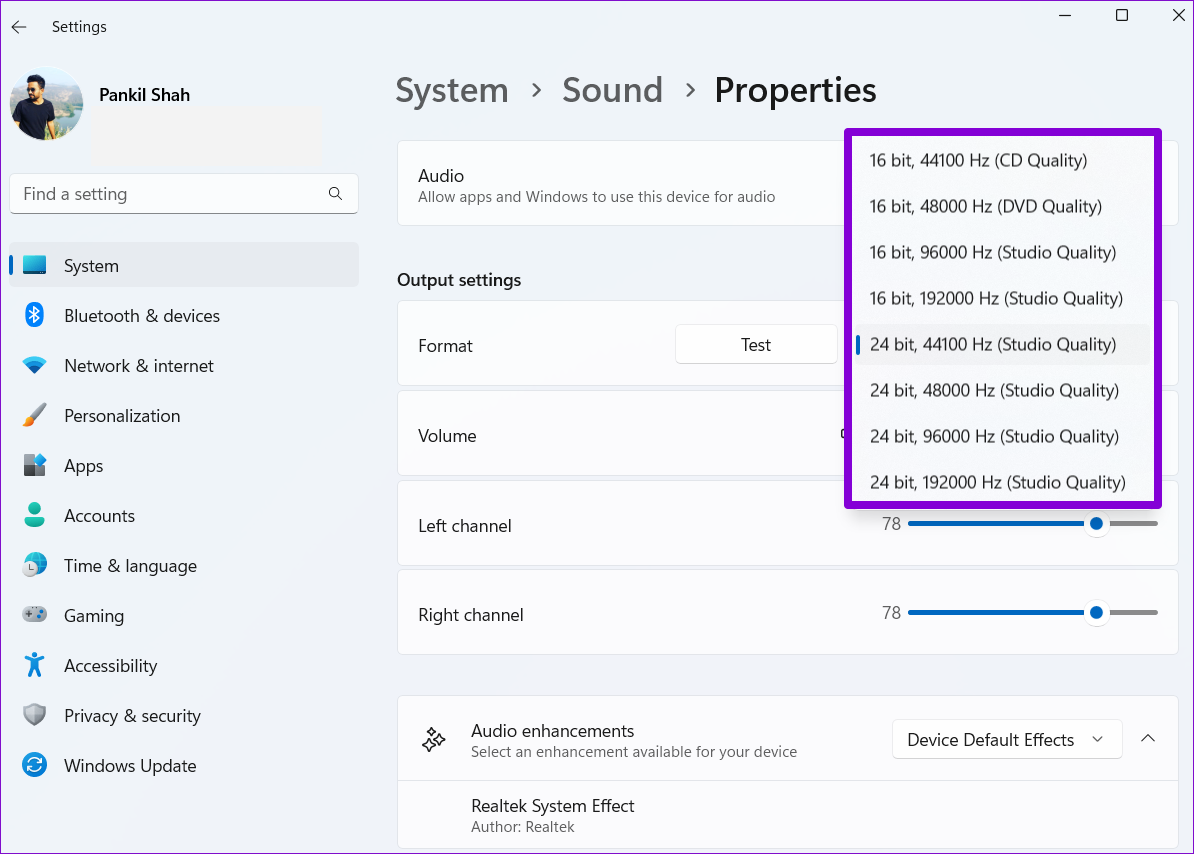
Step 4: Click the Test button to hear sample audio.

Tip 4: Change the Audio Profile Preset
Windows 11 also offers audio presets, such as Bass Boost, Loudness Equalization, Virtual Surround, etc. You can use different audio presets to achieve the best sound output possible.
Step 1: Press the Windows key + I to open the Settings app and head to System > Sound.
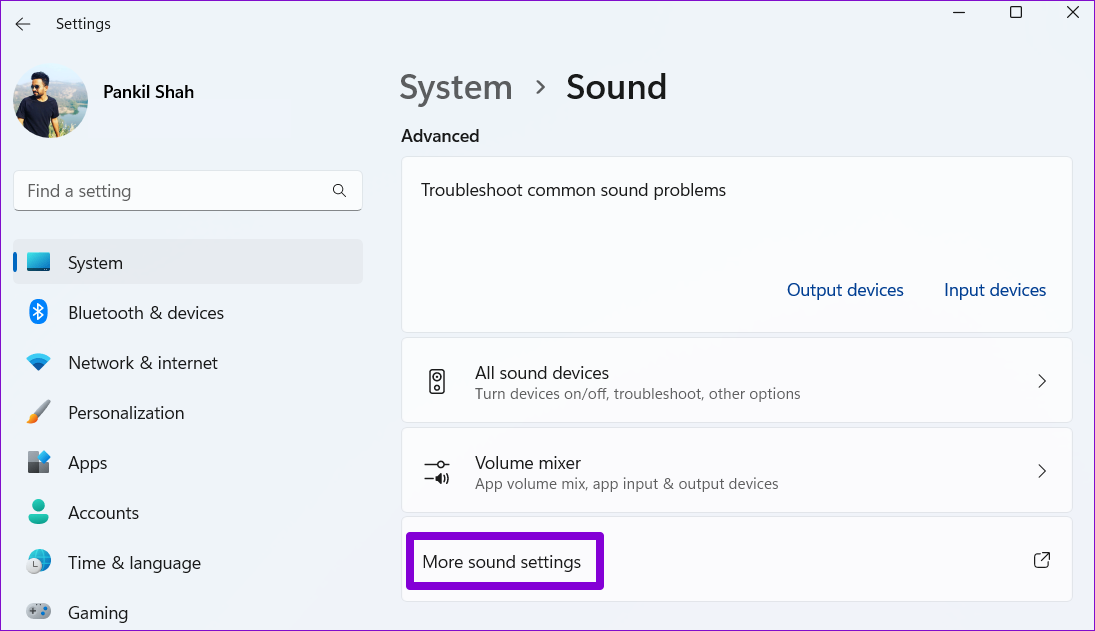
Step 2: Scroll down to Advanced and click on More sound settings.
Step 3: Double-click on your audio device to open its properties.

Step 4: Switch to the Enhancements tab and find all the available sound effects with descriptions.
Step 5: Select your preferred sound effects and click Apply.

Tip 5: Try Different Equalizer Settings
Besides audio presets, Windows also offers a sound equalizer. Although it’s basic, you can use it to adjust the sound effects and emulate the frequency to your liking. Here’s how.
Step 1: Press the Windows key + I to open the Settings app and head to System > Sound.
Step 2: Scroll down to Advanced and click on More sound settings.
Step 3: Double-click on your audio device to open its properties.
Step 4: Under the Enhancements tab, select Equalizer. Then, click the three-dot menu icon next to Settings to adjust the bands yourself.

Step 5: After tweaking the equalizer, click on Save. Then, enter a name for your preset and click OK.

Step 6: Click Apply to save changes.

Tip 6: Update Audio Drivers
Lastly, keep the audio drivers on your PC. Besides improving audio quality, updating drivers will keep you from running into audio issues on Windows 11.
Step 1: Press the Windows key + X and select Device Manager from the list.

Step 2: Double-click on Sound, video and game controllers to expand it. Right-click on your device and select Update driver.

From there, follow the on-screen prompts to finish updating the drivers.
Was this helpful?
Last updated on 08 May, 2024
Read Next
 Top 6 Ways to Fix Bad Discord Stream Quality
Preliminary Fixes Stable Network Connection: A stable and fast internet connection is crucial for streaming high-quality video on Discord.
Top 6 Ways to Fix Bad Discord Stream Quality
Preliminary Fixes Stable Network Connection: A stable and fast internet connection is crucial for streaming high-quality video on Discord.
 8 Fixes for “Your Device Is Missing Important Security and Quality Fixes” on Windows
Is there anything more frustrating than seeing the "Your Device Is Missing Important Security and Quality Fixes" message when waiting for your Windows updates to complete?
8 Fixes for “Your Device Is Missing Important Security and Quality Fixes” on Windows
Is there anything more frustrating than seeing the "Your Device Is Missing Important Security and Quality Fixes" message when waiting for your Windows updates to complete?
 5 Ways to Fix Apple TV+ Low Quality on Windows
Fix 1: Install Apple TV App: A Sureshot Way to Fix the Problem Download the Apple TV app from the Microsoft App Store and sign in with your credentials.
5 Ways to Fix Apple TV+ Low Quality on Windows
Fix 1: Install Apple TV App: A Sureshot Way to Fix the Problem Download the Apple TV app from the Microsoft App Store and sign in with your credentials.
 How to Record High-Quality Gameplay Videos Using OBS Studio
How to Setup OBS Studio to Recording Game Play Before recording your gameplay, you must set up OBS Studio.
How to Record High-Quality Gameplay Videos Using OBS Studio
How to Setup OBS Studio to Recording Game Play Before recording your gameplay, you must set up OBS Studio.
 5 Ways to Fix Bad Sound Quality on Spotify Mobile App
Basic Fixes Check Your Spotify Plan: Using a free version of Spotify does not offer the best audio quality.
5 Ways to Fix Bad Sound Quality on Spotify Mobile App
Basic Fixes Check Your Spotify Plan: Using a free version of Spotify does not offer the best audio quality.
 4 Ways to Fix YouTube Quality Unavailable on iOS and Android
Basic Fixes Check Internet Connectivity: Ensure your device is connected to a Wi-Fi network or cellular data with good signal strength and an active plan.
4 Ways to Fix YouTube Quality Unavailable on iOS and Android
Basic Fixes Check Internet Connectivity: Ensure your device is connected to a Wi-Fi network or cellular data with good signal strength and an active plan.
 5 Ways to Fix Netflix Streaming in Low Quality on Android and iPhone
Common Fixes Check internet speed - I recommend at least 5Mbps to stream Netflix in high definition (HD) and a minimum of 25Mbps for Ultra HD and 4K video quality.
5 Ways to Fix Netflix Streaming in Low Quality on Android and iPhone
Common Fixes Check internet speed - I recommend at least 5Mbps to stream Netflix in high definition (HD) and a minimum of 25Mbps for Ultra HD and 4K video quality.
 How to Send High Quality Photos and Video on Telegram
Send High-Quality Photos and Videos on Telegram on Mobile Let us show you the steps to send photos and videos without losing quality on your iPhone and Android using Telegram.
How to Send High Quality Photos and Video on Telegram
Send High-Quality Photos and Videos on Telegram on Mobile Let us show you the steps to send photos and videos without losing quality on your iPhone and Android using Telegram.
The article above may contain affiliate links which help support Guiding Tech. The content remains unbiased and authentic and will never affect our editorial integrity.