Imagine working on your Windows PC on a busy weekday and out of the blue, it shuts down abruptly. Well, if you’re baffled because Windows 11 keeps shutting down for no apparent reason, you’re not alone. To help you out, we’ve prepared a list of troubleshooting tips that’ll help fix those random shutdowns on Windows 11. So, let’s start.

1. Monitor Your PC’s Temperature
If your PC overheating, then Windows might end up shutting itself down to prevent any damage to the internal components. You can avoid this by keeping your PC’s temperatures in check.
To check GPU’s temperature, press Ctrl + Shift + Esc to launch the Task Manager. Under the Performance tab, check your GPU’s temperature.
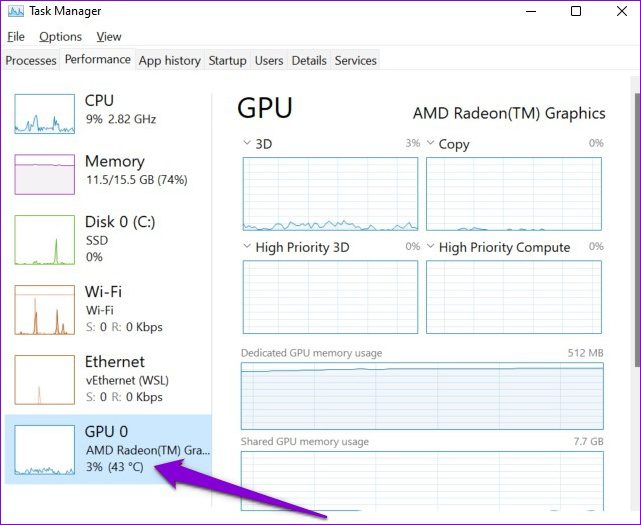
GPU temperatures below 85° Celsius (or 185° F) are considered normal. While Windows doesn’t offer a way to check your CPU’s temperature natively, you can use a third-party program like HWMoniter for that.
If your PC is overheating, you should spend some time cleaning your PC’s fans and other internal components. Plus, ensure that nothing is blocking the air vents and your PC is not exposed to excessive heat.
2. Run Power Troubleshooter
Next, you can run the Power troubleshooter on Windows. It’ll automatically fix any issues with the current power plan or system settings that might be responsible for the issue.
Step 1: Open the Start menu, type in troubleshoot settings, and press Enter.

Step 2: Select Other troubleshooters.

Step 3: Click on the Run button next to Power to begin the troubleshooting process.

3. Disable Fast Startup
Fast startup is a handy utility on Windows that helps your PC boot faster than usual. But since Fast startup doesn’t let your PC shut down entirely, it can also lead to occasional crashes and random shutdowns. Hence, you can try disabling the Fast startup on Windows to see if that improves the situation.
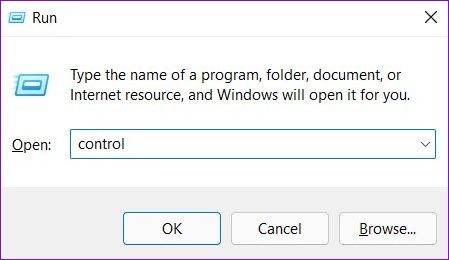
Step 1: Press Windows key + R to open the Run dialog, type in control, and press Enter.
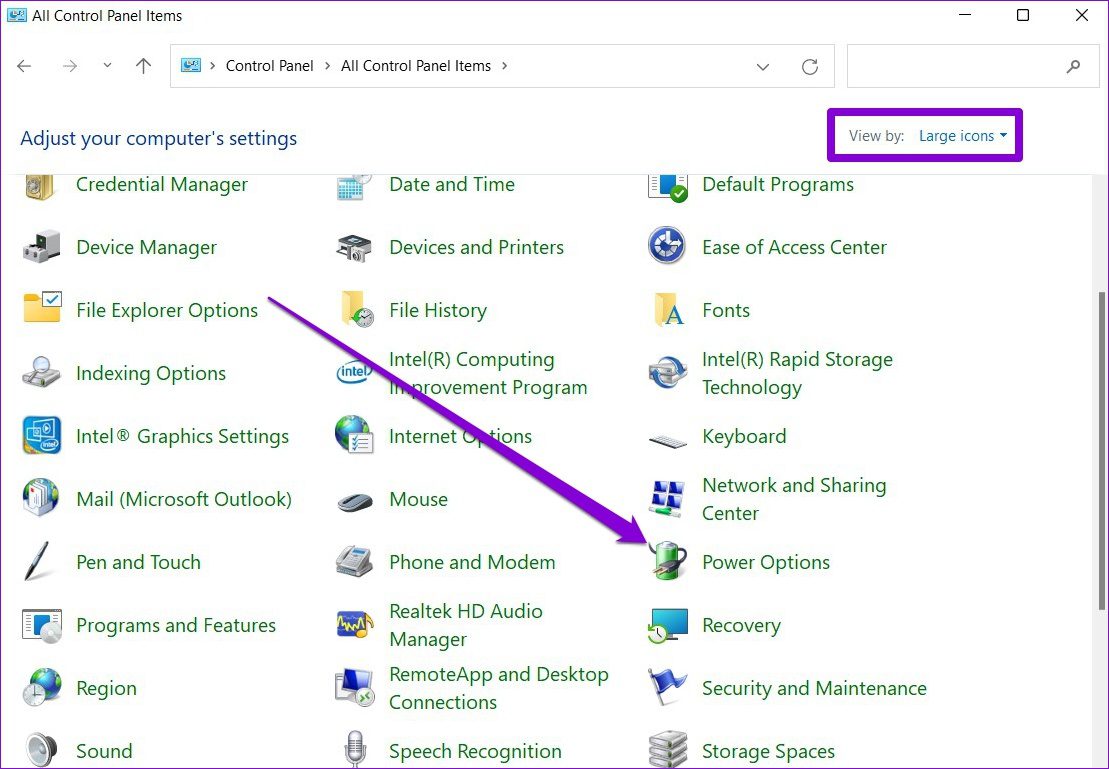
Step 2: Switch the view type to small or large icons and select Power Options.
Step 3: Click on ‘Choose what the power buttons do’ on the left sidebar.
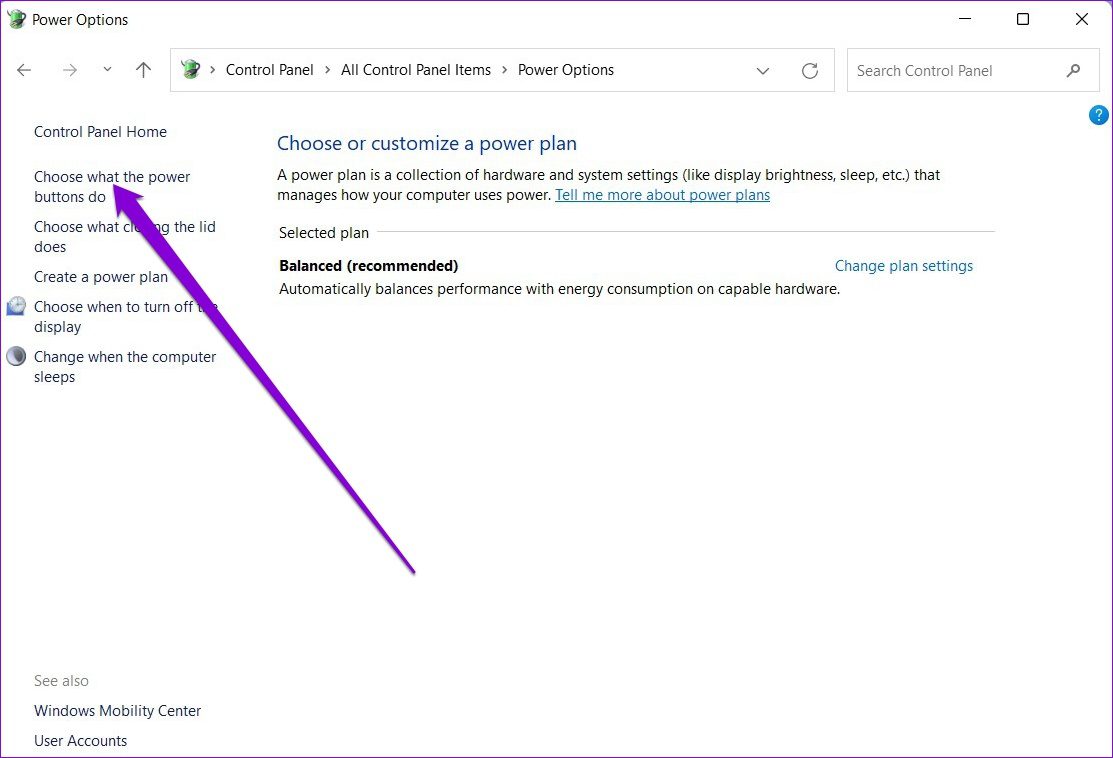
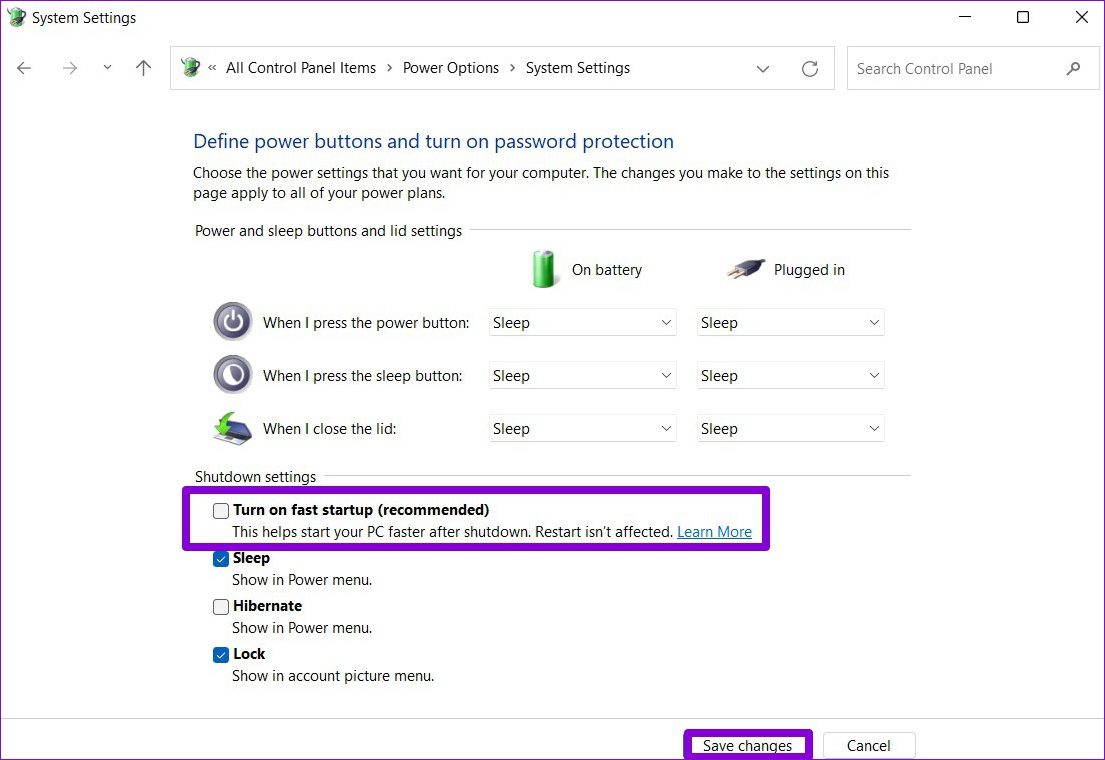
Step 4: Since you’ll need administrator permissions to disable the fast startup, click on ‘Change settings that are currently unavailable’ at the top.

Step 5: Uncheck the box that reads the ‘Turn on fast startup (recommended)’ box, and hit Save Changes.
4. Turn Off Sleep Mode
While sleep mode on Windows allows you to save power when you’re away, there have been instances where users have reported their PC shutting down instead of going to sleep. To avoid this, you can consider disabling the sleep mode entirely. Here’s how.
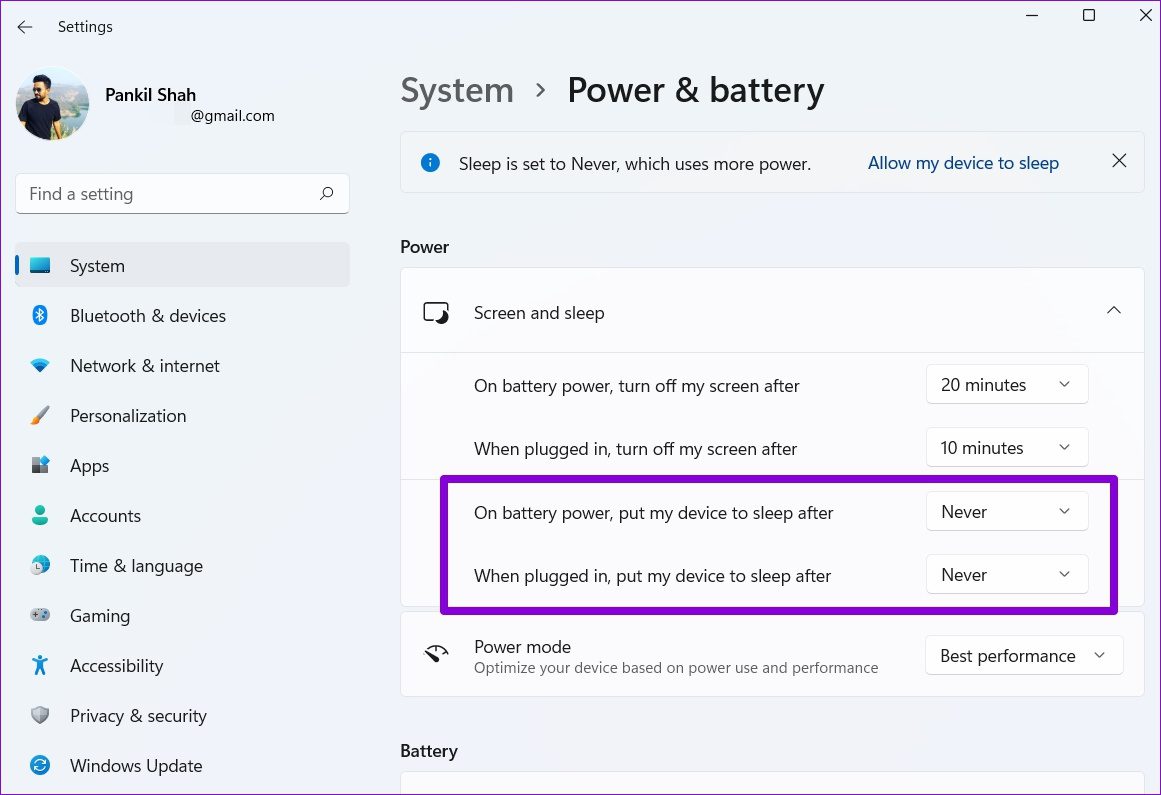
Step 1: Press Windows key + X and select Power Options from the resulting menu.

Step 2: Expand Screen and sleep settings. Use the drop-down menus next to ‘On battery power, put my device to sleep after’ and ‘When plugged in, put my device to sleep after’ to select Never.
5. Scan for Malware
At times a malware or virus infection can lead to your computer behaving erraticaly. To rule this out, you can try running a full system scan of your PC with Windows Defender or an antivirus program of your choice.
6. Run DISM and SFC Scan
If your PC is missing any critical system files or if they’re corrupted, then Windows will run into all kinds of issues. Thankfully, you can fix those system files easily by running a DISM & SFC scan. Here’s how.
Step 1: Right-click on the Start menu and select Windows Terminal (admin).

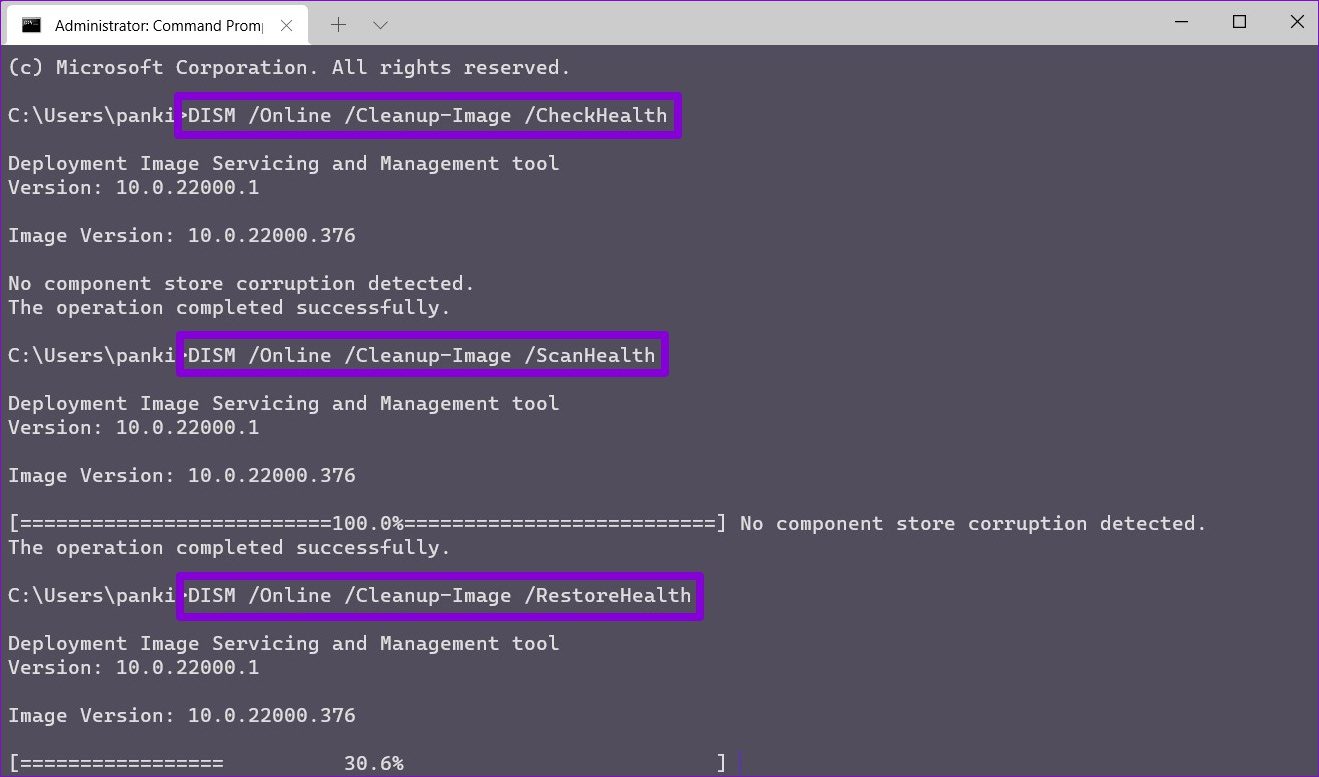
Step 2: Run the following commands one by one.
DISM /Online /Cleanup-Image /CheckHealth
DISM /Online /Cleanup-Image /ScanHealth
DISM /Online /Cleanup-Image /RestoreHealth
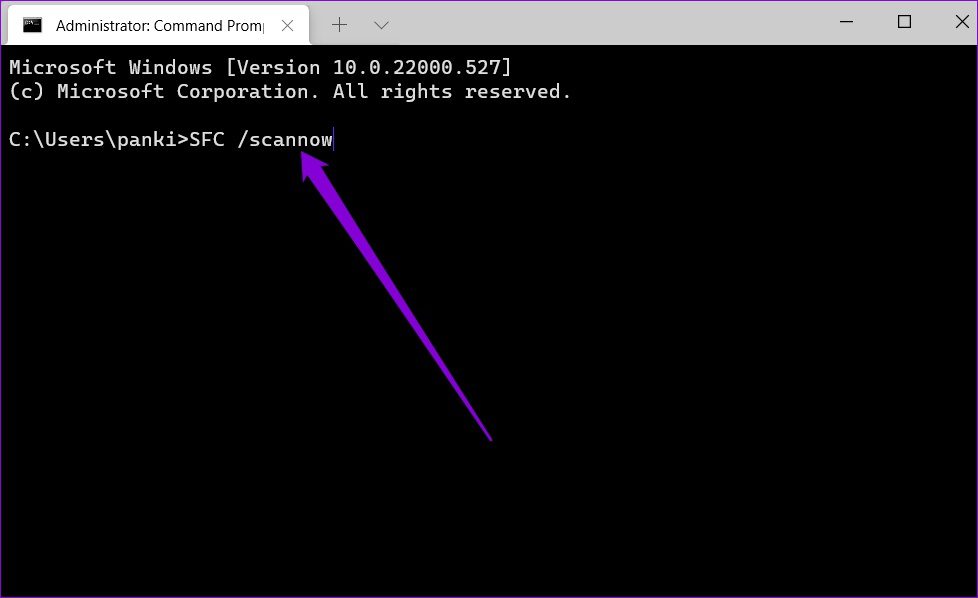
Step 3: After running the DISM scan, run the SFC scan by entering the following command.
sfc /scannow
7. Update Windows 11
If you haven’t updated Windows in a while, you might be on one of the early builds on Windows 11. While that shouldn’t be a problem, if the issue is related to the particular build you’re on, then updating your PC will help.
Open the Settings app and visit the Windows Update tab to check for pending updates. Download and install any pending updates to see if that helps with the random shutdowns on Windows 11.

8. View Shutdown Log
If the above solutions didn’t work, and Windows is still shutting down unexpectedly, then it’s time to go through the event log on Windows. Event Viewer is a handy utility on Windows that keeps track of everything that happens on your PC, including shutdown and restarts.
Step 1: Open Windows search, type in event viewer, and press Enter.

Step 2: Expand the Windows Logs on your left, right-click on the System category and select the Filter Current Log option.
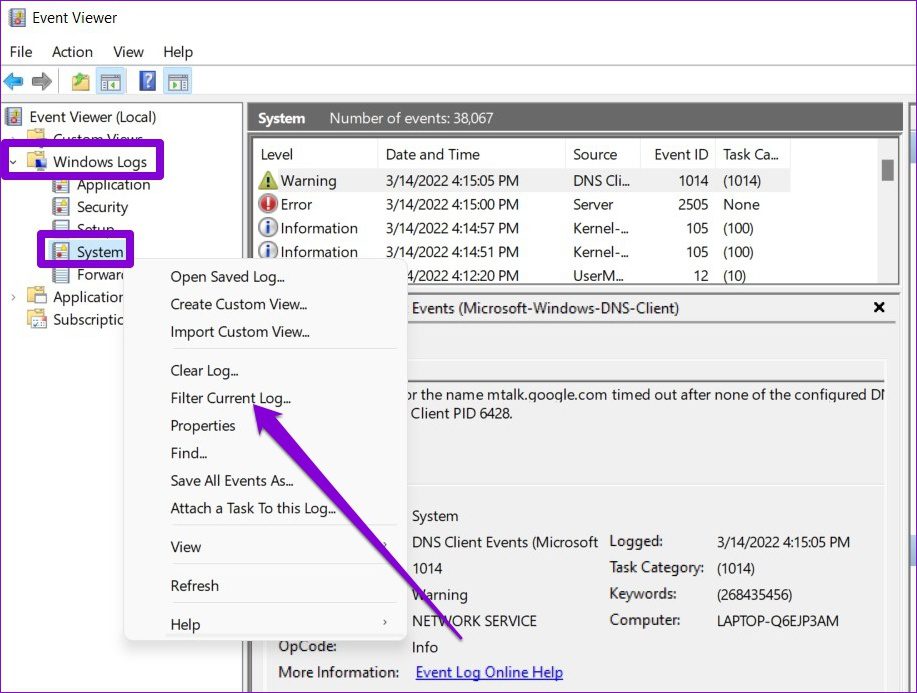
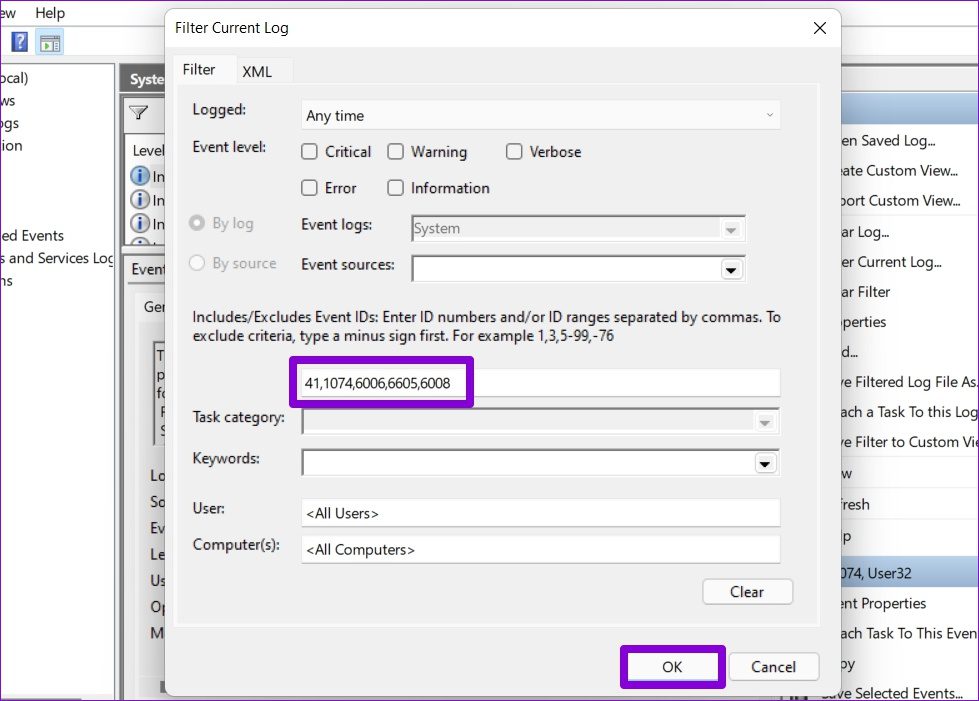
Step 3: In the following window, type 41,1074,6006,6605,6008 in the Includes/Excludes Event IDs field and hit OK.
The numbers above refer to the Event IDs during which your PC might have shut down or restarted.
Step 4: Windows will show you all the corresponding shutdown and restart logs. Click on a log to view the reason behind the shutdown or restart.

Once you’ve identified the root cause for those random shutdowns, you can troubleshoot to prevent that from happening on Windows 11.
Discover the Unexpected
Such unexpected shutdowns can easily lead to loss of unsaved work, loss of productivity, and a dissatisfactory Windows experience. That said, we’re confident that one of the solutions has helped you fix those random shutdowns on Windows 11 for good.
Was this helpful?
Last updated on 15 March, 2022
Read Next
 How to Find and Fix Windows 10 Making Random Sounds
Recently, when I was working on my Windows 10 laptop, I heard some random ding sounds coming from the speaker.
How to Find and Fix Windows 10 Making Random Sounds
Recently, when I was working on my Windows 10 laptop, I heard some random ding sounds coming from the speaker.
 4 Ways to Stop Random People From Adding You on Snapchat
Method 1: Disable Add by Email and Mobile Number If you have this option enabled, anyone who knows either your phone number or email ID will be able to add
4 Ways to Stop Random People From Adding You on Snapchat
Method 1: Disable Add by Email and Mobile Number If you have this option enabled, anyone who knows either your phone number or email ID will be able to add
 Top 7 Ways to Fix Windows Key Not Working on Windows 10
Windows 10 operating system is full of keyboard shortcuts.
Top 7 Ways to Fix Windows Key Not Working on Windows 10
Windows 10 operating system is full of keyboard shortcuts.
 2 Ways to Fix Discord Not Opening on Windows 10 and Windows 11
Try Basic Fixes End Discord processes: Press Ctrl + Shift + Esc to launch the Task Manager.
2 Ways to Fix Discord Not Opening on Windows 10 and Windows 11
Try Basic Fixes End Discord processes: Press Ctrl + Shift + Esc to launch the Task Manager.
 Top 5 Ways to Fix Bluetooth Headphones Connected but No Sound on Windows 10
On a usual day, you'd hook your wireless Bluetooth headphones to your PC to listen to a song.
Top 5 Ways to Fix Bluetooth Headphones Connected but No Sound on Windows 10
On a usual day, you'd hook your wireless Bluetooth headphones to your PC to listen to a song.
 Top 9 Ways to Fix Copy-Paste Not Working on Windows 10 Issue
The copy-paste function in Windows 10 is often taken for granted.
Top 9 Ways to Fix Copy-Paste Not Working on Windows 10 Issue
The copy-paste function in Windows 10 is often taken for granted.
 Top 6 Ways to Fix Microsoft Edge Black Screen Issues on Windows 10
Microsoft Edge continues to quickly pace ahead in the browser race on mobile and desktop.
Top 6 Ways to Fix Microsoft Edge Black Screen Issues on Windows 10
Microsoft Edge continues to quickly pace ahead in the browser race on mobile and desktop.
 7 Top Ways to Fix OneNote Notebook Disappearing Error on Windows
Microsoft OneNote has gone through a number of iterations.
7 Top Ways to Fix OneNote Notebook Disappearing Error on Windows
Microsoft OneNote has gone through a number of iterations.
The article above may contain affiliate links which help support Guiding Tech. The content remains unbiased and authentic and will never affect our editorial integrity.