Windows 10 operating system is full of keyboard shortcuts. While using my Windows laptop, the Windows key is my most-used key on the keyboard. The Windows key allows you to open the start menu and search for apps and files within the system. It even works when you are in-app and wants to open and jump to an app quickly. There can be times when the Windows key stops working on your keyboard. The issue can be irritating and breaks the workflow for you.

There can be various reasons behind the odd Windows key behavior on Windows 10. It can be a hardware issue, or a bug due to the latest Windows 10 update, filter keys bug, gaming mode relates issue, and more.
In this post, we will discuss the top seven ways to fix the Windows key not working on Windows 10 issue. Go through the step by step and keep checking the Windows key on the keyboard. Let’s get started.
1. Disable Gaming Mode
Most Gaming keyboards support Gaming Mode on the keyboard. Gaming mode is designed to disable certain keys during gameplay sessions that can interfere with your game.
For example, during playing games, you might accidentally hit the Windows key and open the start menu. That can be a problem if you’re playing an online game with your friends, and this is why gaming keyboards offer a Gaming mode.
Many keyboards have Gaming mode switch on by default. Make sure to turn off the mode. You can also disable the Gaming mode from the Windows 10 Settings.
Step 1: Open the Settings app on Windows.
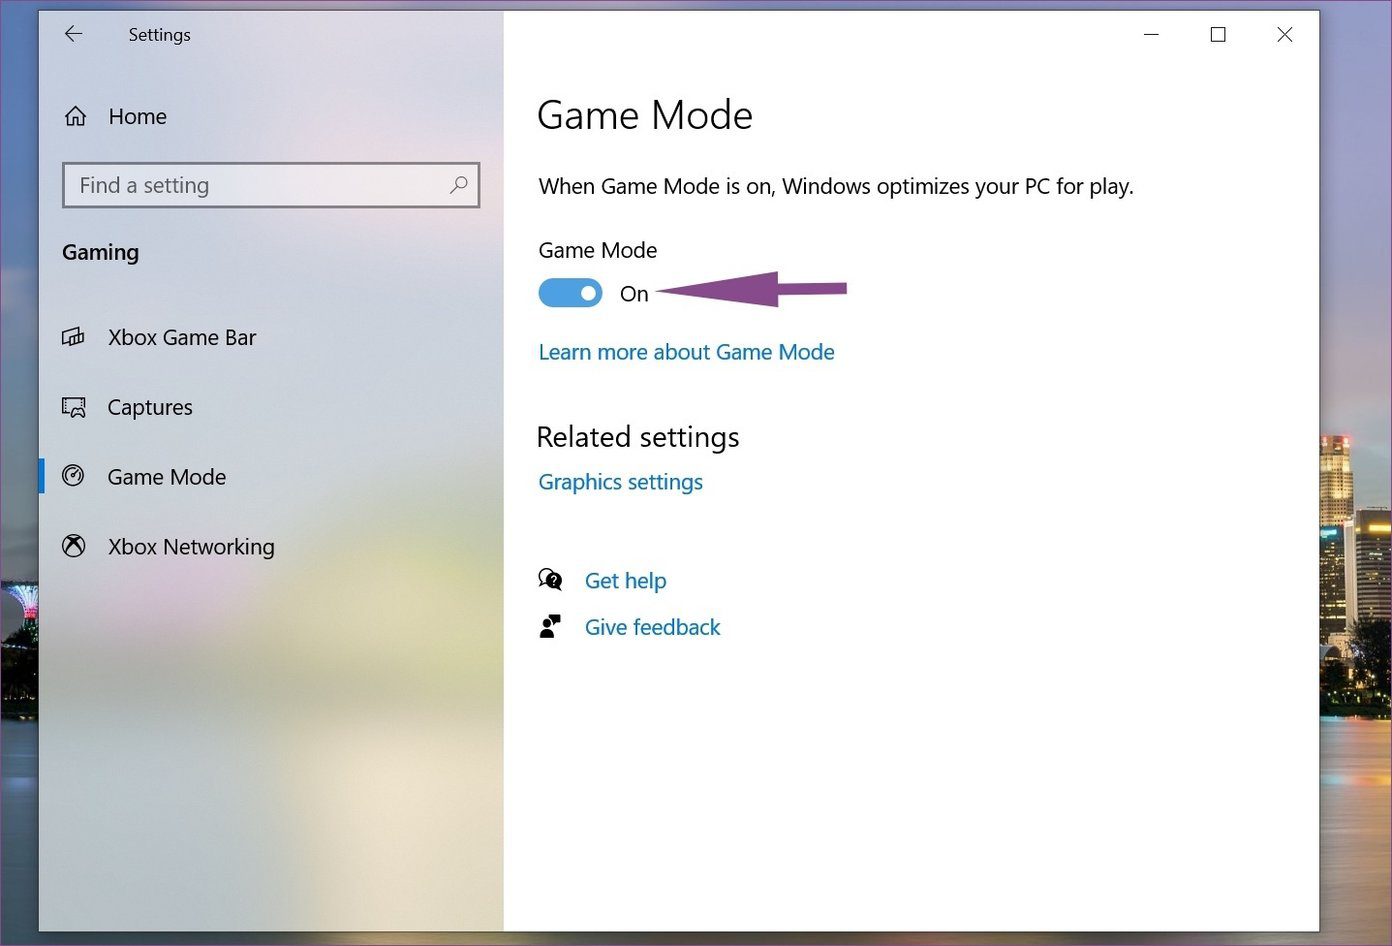
Step 2: Navigate to Gaming > Game Mode > Disable the option.
2. Disable Win Lock Key
Some third-party keyboards have support for the Win Lock key. When enabled, the option disables the Windows key on your keyboard. You will mostly find it at the upper right corner of the keyboard. Disable the Win Lock option and try using the Windows key again.
3. Make Adjustments to Windows Registry
Window Key not working on Windows 10 is often resolved through this registry tweak. Follow the steps below.
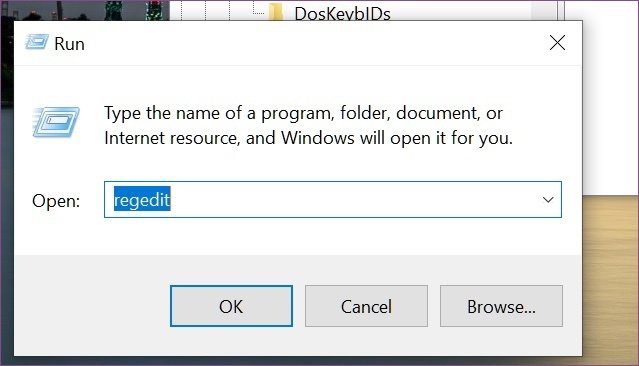
Step 1: Right-click on your Start menu icon and select the Run menu.
Step 2: It will open a small Run Window. Type regedit to launch Registry Editor.
Step 3: Navigate to:
HKEY_LOCAL_MACHINE\SYSTEM\CurrentControlSet\Control\Keyboard Layout
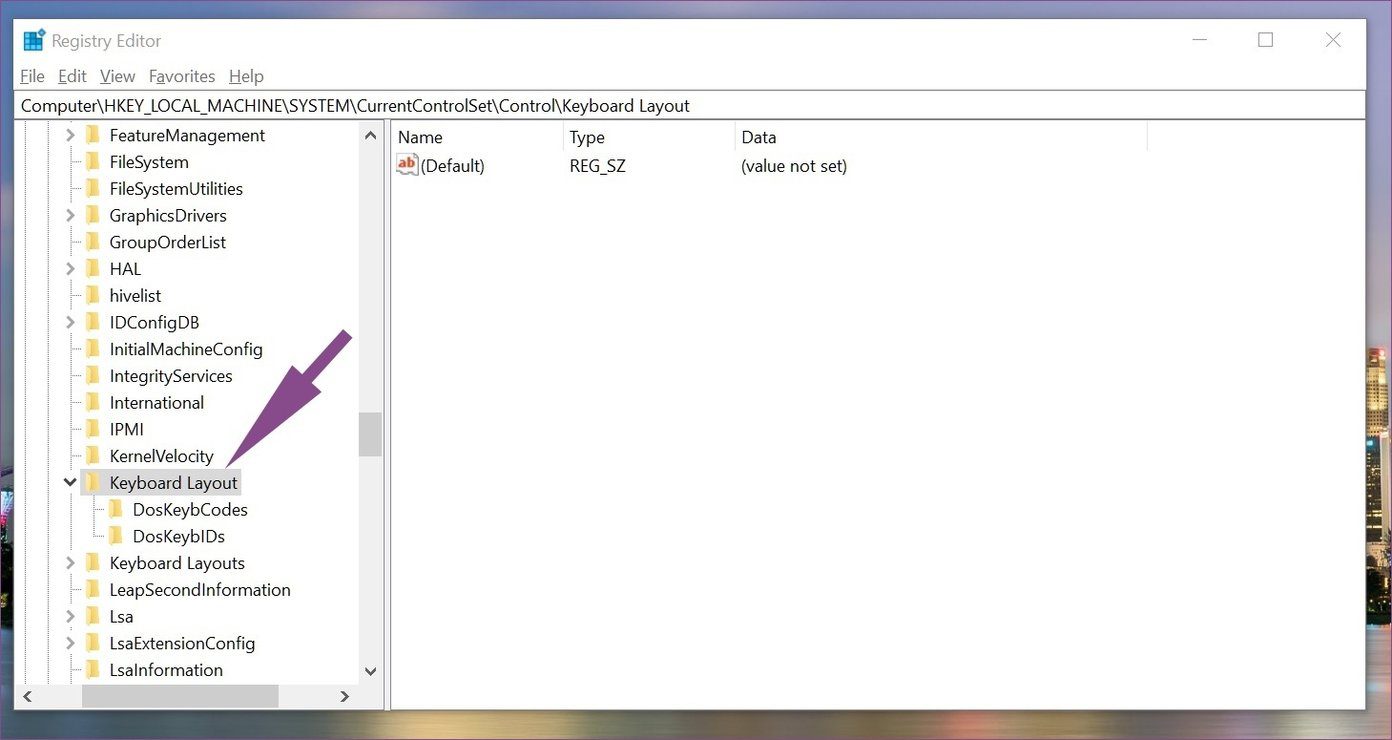
Step 4: In the right pane, locate Scancode Map.
Step 5: Right-click on it and select Delete.
Close Registry and reboot the PC and see if it has fixed the issue. If you can’t find Scancode Map entry, it might not be available on your PC, so you should skip this solution and try the following solutions.
4. Disable Filter Keys Option
Filter keys option makes your keyboard ignore repeated keystrokes. The option is mostly disabled on your device, but if you have enabled it, it’s time to turn off the option from the Windows Settings.
Step 1: Open the Settings app on your Windows 10 PC.
Step 2: Navigate to Ease of Access > Keyboard.
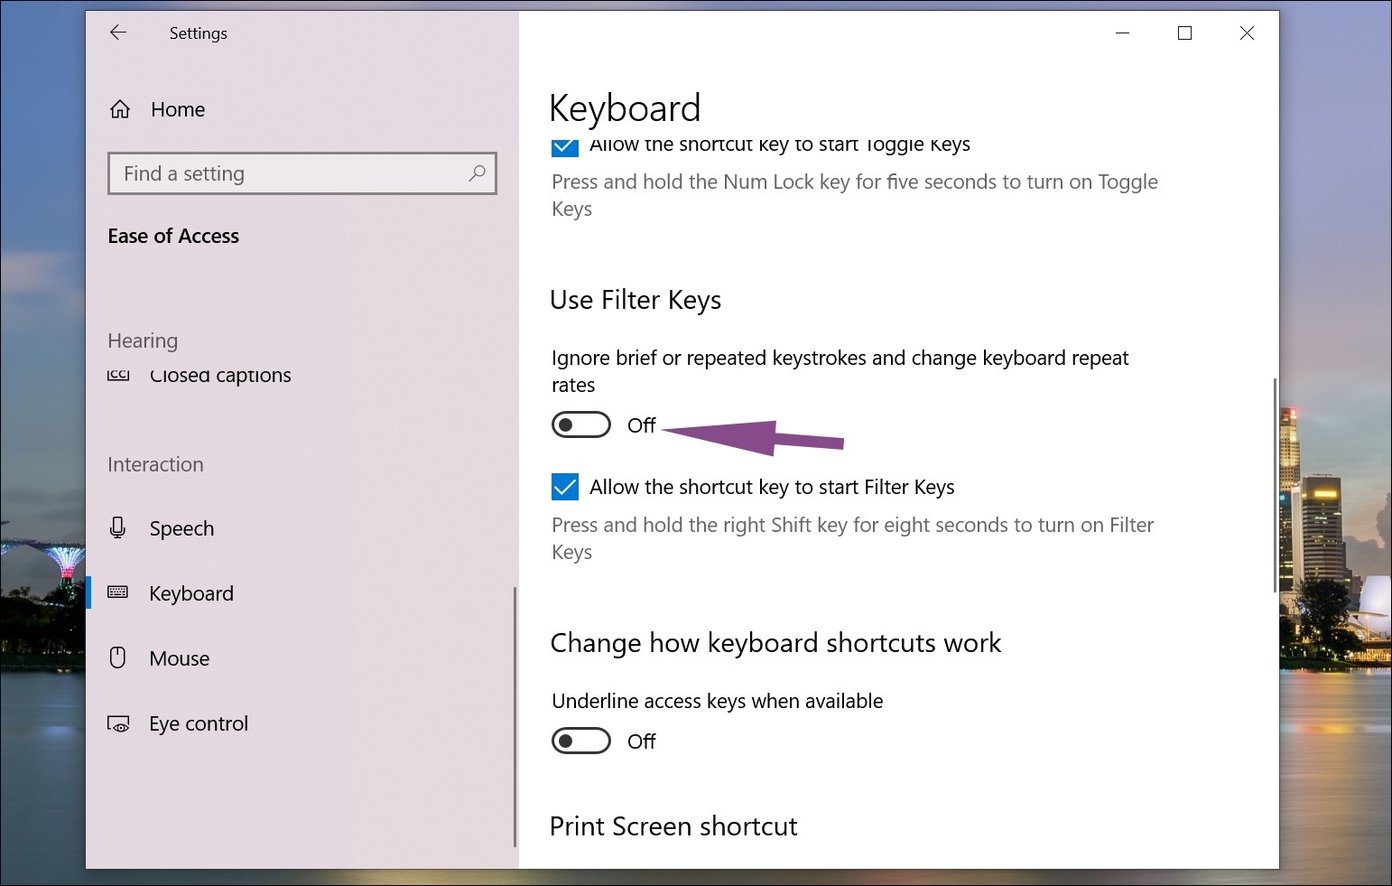
Step 3: From the right pane, scroll down to the Filter keys and disable the option.
5. Use PowerShell
PowerShell is a powerful tool for making changes to your Windows computer, as well as troubleshooting. It gives you the ability to execute commands and directly tell your Windows 10 PC what to do through a scripting language. It’s an effective command-line tool that allows you to remove core Windows 10 components.
We are going to fix the Windows key not working issue with the help of PowerShell. Go through the steps below.
Step 1: From the Windows Search, look for the Windows PowerShell and open the software.
Step 2: Copy and Paste the following command in the PowerShell.
Get-AppXPackage -AllUsers | Foreach {Add-AppxPackage -DisableDevelopmentMode -Register “$($_.InstallLocation) \AppXManifest.xml”}
Step 3: Hit enter and let the command run.

After the command is executed, the Windows key should start working again.
6. Update Keyboard Drivers
Windows key not working might be due to the outdated keyboard drivers on your device. You need to update the drivers to the latest version.
There are a couple of ways to update keyboard drivers on your laptop. You can either search for the keyboard drivers on the manufacturer’s website or download the necessary drivers from the Device Manager utility.
Step 1: Right-click on the Windows icon and go to Device Manager.
Step 2: Scroll down to Keyboard and find your connected keyboard.

Step 3: Right-click on it and select ‘Update Drivers’.
7. Scan for Malware
Recently, downloaded a bunch of unknown files or software from the web. You might need to scan the PC using the Windows Defender to remove any malware or suspicious files.
Step 1: Open the Windows Security app.
Step 2: Go to Virus & threat protection and scan the PC.
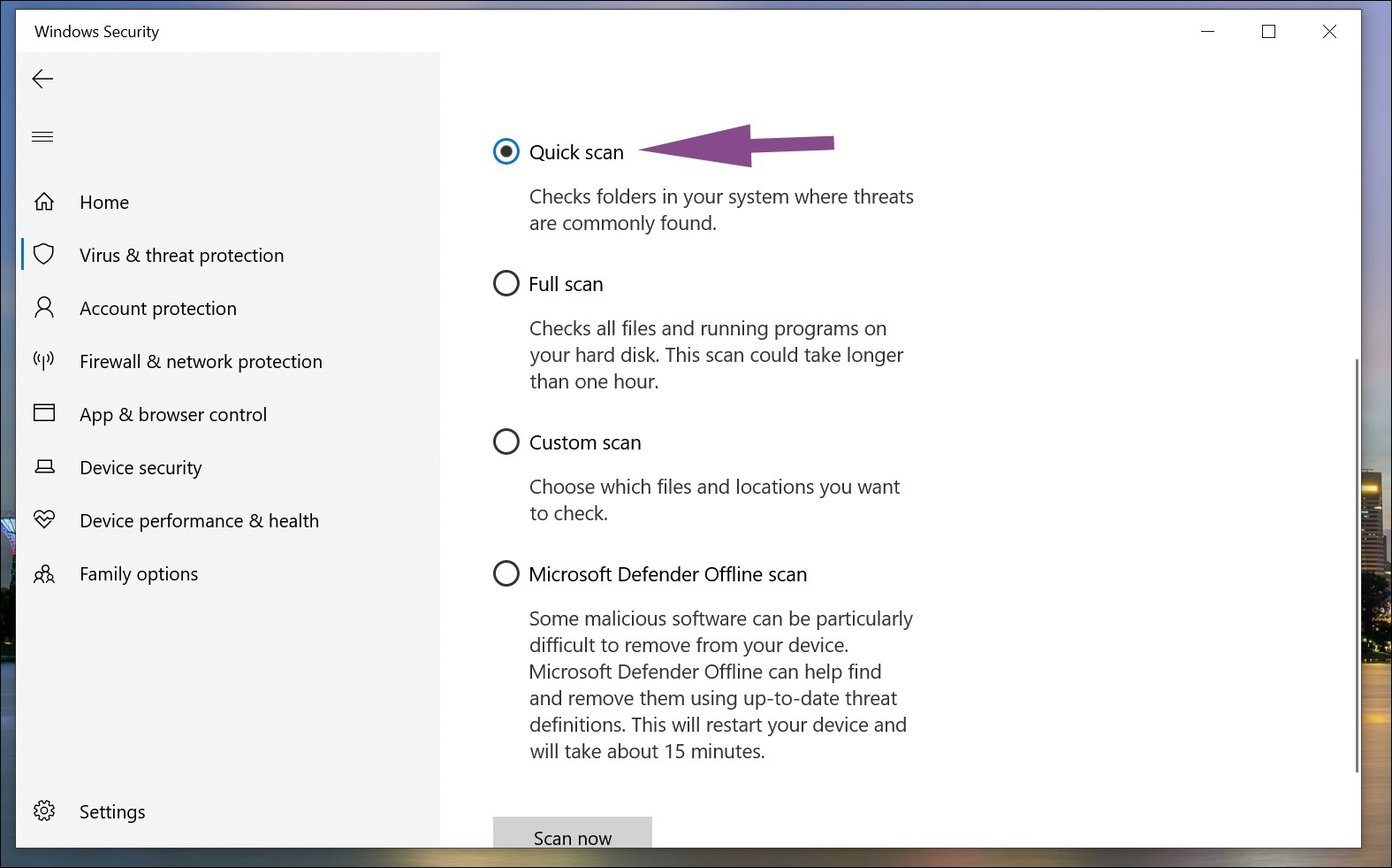
It usually takes around 15-20 minutes depending upon the stored files on your PC. Remove the threats and reboot the PC.
If the tricks mentioned above aren’t working for you, then it might be the hardware issue. Though that’s very rare, but still likely. The reason could be the physical damage, or an accidental hot coffee or water spilled out on the keyboard.
Fix Windows Key Issue on Windows 10
The Windows key not working on Windows 10 can be irritating, considering the number of times you use the Windows Key button daily. Of course, you can rebind another key to supplement that, but the location of that other key can be bothersome. Instead, check the tricks written above and solve the Windows key issue on the go.
Next up: Does Windows 10 mobile hotspot keep turning off for you? Read the post below to find ways to fix the issue.
Was this helpful?
Last updated on 07 February, 2022
Read Next
 7 Ways to Fix Windows Key Not Working in Windows 11
Basic Fixes Check for physical damage: There might be physical damage or dirt buildup on your keyboard.
7 Ways to Fix Windows Key Not Working in Windows 11
Basic Fixes Check for physical damage: There might be physical damage or dirt buildup on your keyboard.
 4 Ways to Fix Tab Key Not Working on Windows 11
Try These Fixes First Restart your computer: The Issue can occur due to a temporary bug or glitch on your computer.
4 Ways to Fix Tab Key Not Working on Windows 11
Try These Fixes First Restart your computer: The Issue can occur due to a temporary bug or glitch on your computer.
 How to Fix Enter Key or Backspace Not Working on Windows 11
Basic Fixes: Restart Windows device: Restarting your device can help fix any minor software issue that might be preventing the Backspace or Enter key from working on Windows after the
How to Fix Enter Key or Backspace Not Working on Windows 11
Basic Fixes: Restart Windows device: Restarting your device can help fix any minor software issue that might be preventing the Backspace or Enter key from working on Windows after the
 3 Quick Ways to Find Product Key on Windows 10 or Windows 11
1.
3 Quick Ways to Find Product Key on Windows 10 or Windows 11
1.
 4 Fixes When the Windows 11 Activation Key Is Not Working
Basic Fixes: Confirm the OS is running an updated Windows 11: You may use the built-in Winver utility to check your OS version and update status.
4 Fixes When the Windows 11 Activation Key Is Not Working
Basic Fixes: Confirm the OS is running an updated Windows 11: You may use the built-in Winver utility to check your OS version and update status.
 The List of All Excel Function Key (F1 to F12) Shortcuts
F1 Shortcuts Shortcut KeyActionF1Opens the Excel Help task pane.Ctrl+F1Hide/Unhide the taskbar.Alt+F1Create a chart from data in the current range.Ctrl+Shift+F1Hide/Unhide ribbon and taskbar.Alt+Shift+F1Create a new worksheet.
The List of All Excel Function Key (F1 to F12) Shortcuts
F1 Shortcuts Shortcut KeyActionF1Opens the Excel Help task pane.Ctrl+F1Hide/Unhide the taskbar.Alt+F1Create a chart from data in the current range.Ctrl+Shift+F1Hide/Unhide ribbon and taskbar.Alt+Shift+F1Create a new worksheet.
 How to Generate an OpenAI API Key
Here's how you can generate and download an OpenAI API key.
How to Generate an OpenAI API Key
Here's how you can generate and download an OpenAI API key.
The article above may contain affiliate links which help support Guiding Tech. The content remains unbiased and authentic and will never affect our editorial integrity.

