Fix 1: Clean the Trackpad or the Bottom Surface of the Mouse
Sometimes, the dirt accumulated on your laptop’s trackpad may hinder the cursor’s movement. The same goes for the bottom surface of your mouse.
Cleaning the trackpad is simple. Just take a microfibre cloth and wipe off any visible dirt. If you’re feeling extra, dig the edges of the trackpad with a brush to deep clean the trackpad. You can follow the same process for an external mouse too. If you’re using a mouse, it’s a good idea to use a mouse pad or mat for smoother movement.
Fix 2: Ensure the Trackpad Isn’t Disabled With Function Keys
Most laptops have a key combination involving the function keys that disables your trackpad and the mouse cursor. If the mouse cursor has gone to the edge of the display and has then been disabled, you may not be able to find it on the screen. Since the shortcut involves pressing a function key, you may trigger it by mistake more often than you would think.
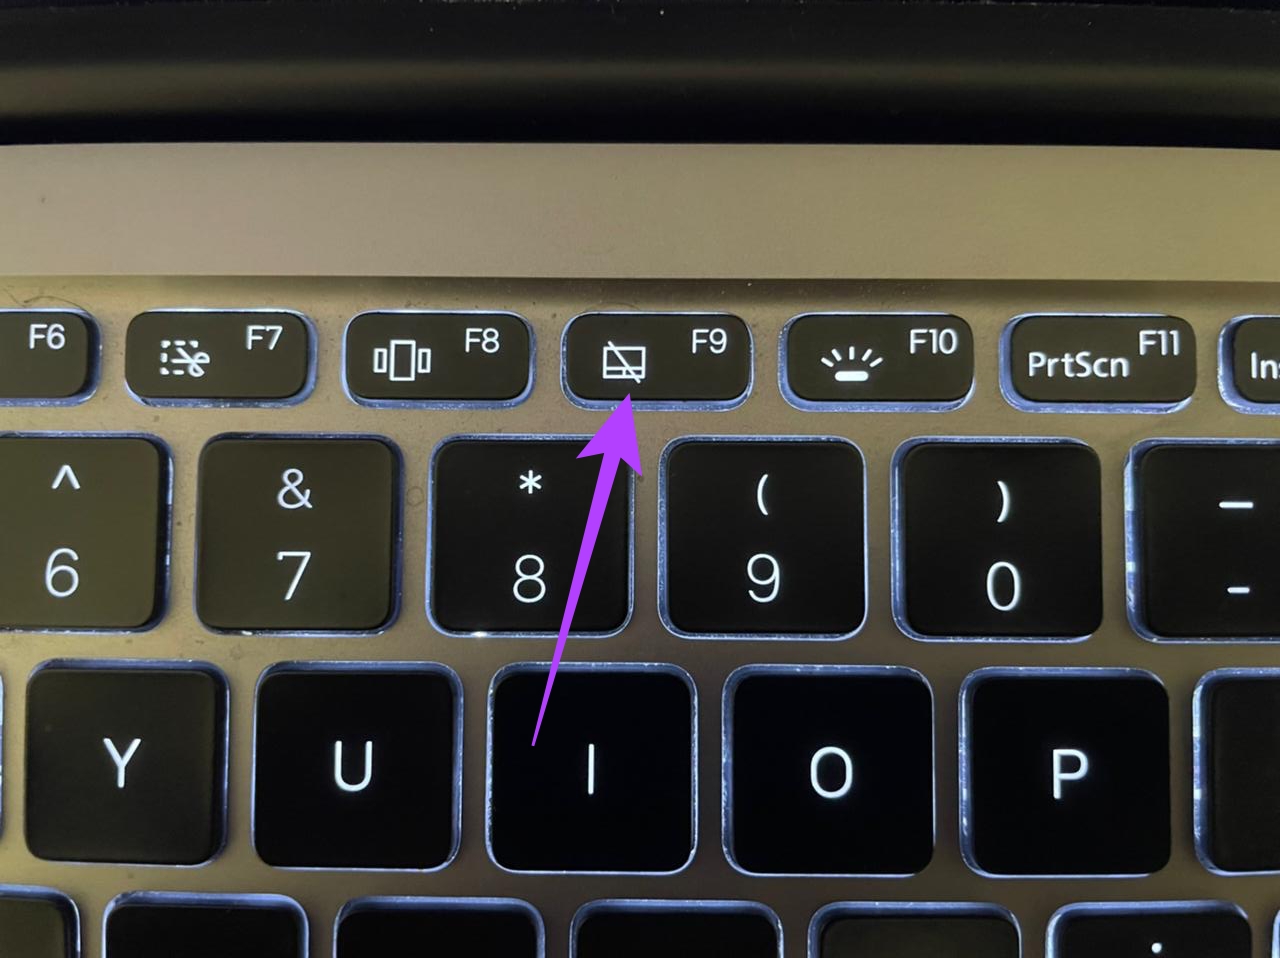
The way to enable the trackpad again is to press the same key combination. While this may differ based on your laptop manufacturer, try looking for the function key with the symbol in the image above. Once you find it, press the Fn key along with the key to disable the trackpad simultaneously and this should bring your mouse cursor back.
Fix 3: Connect the Mouse to a Different Port
Most wired mice nowadays connect via the USB port. Gone are those of the troublesome PS2 ports where a single bent pin would cause issues. However, a USB port may also conk off without your knowledge. So, try plugging your mouse into a different USB port on your PC or laptop to see if it brings your cursor back.
Fix 4: Unhide the Mouse Pointer While Typing
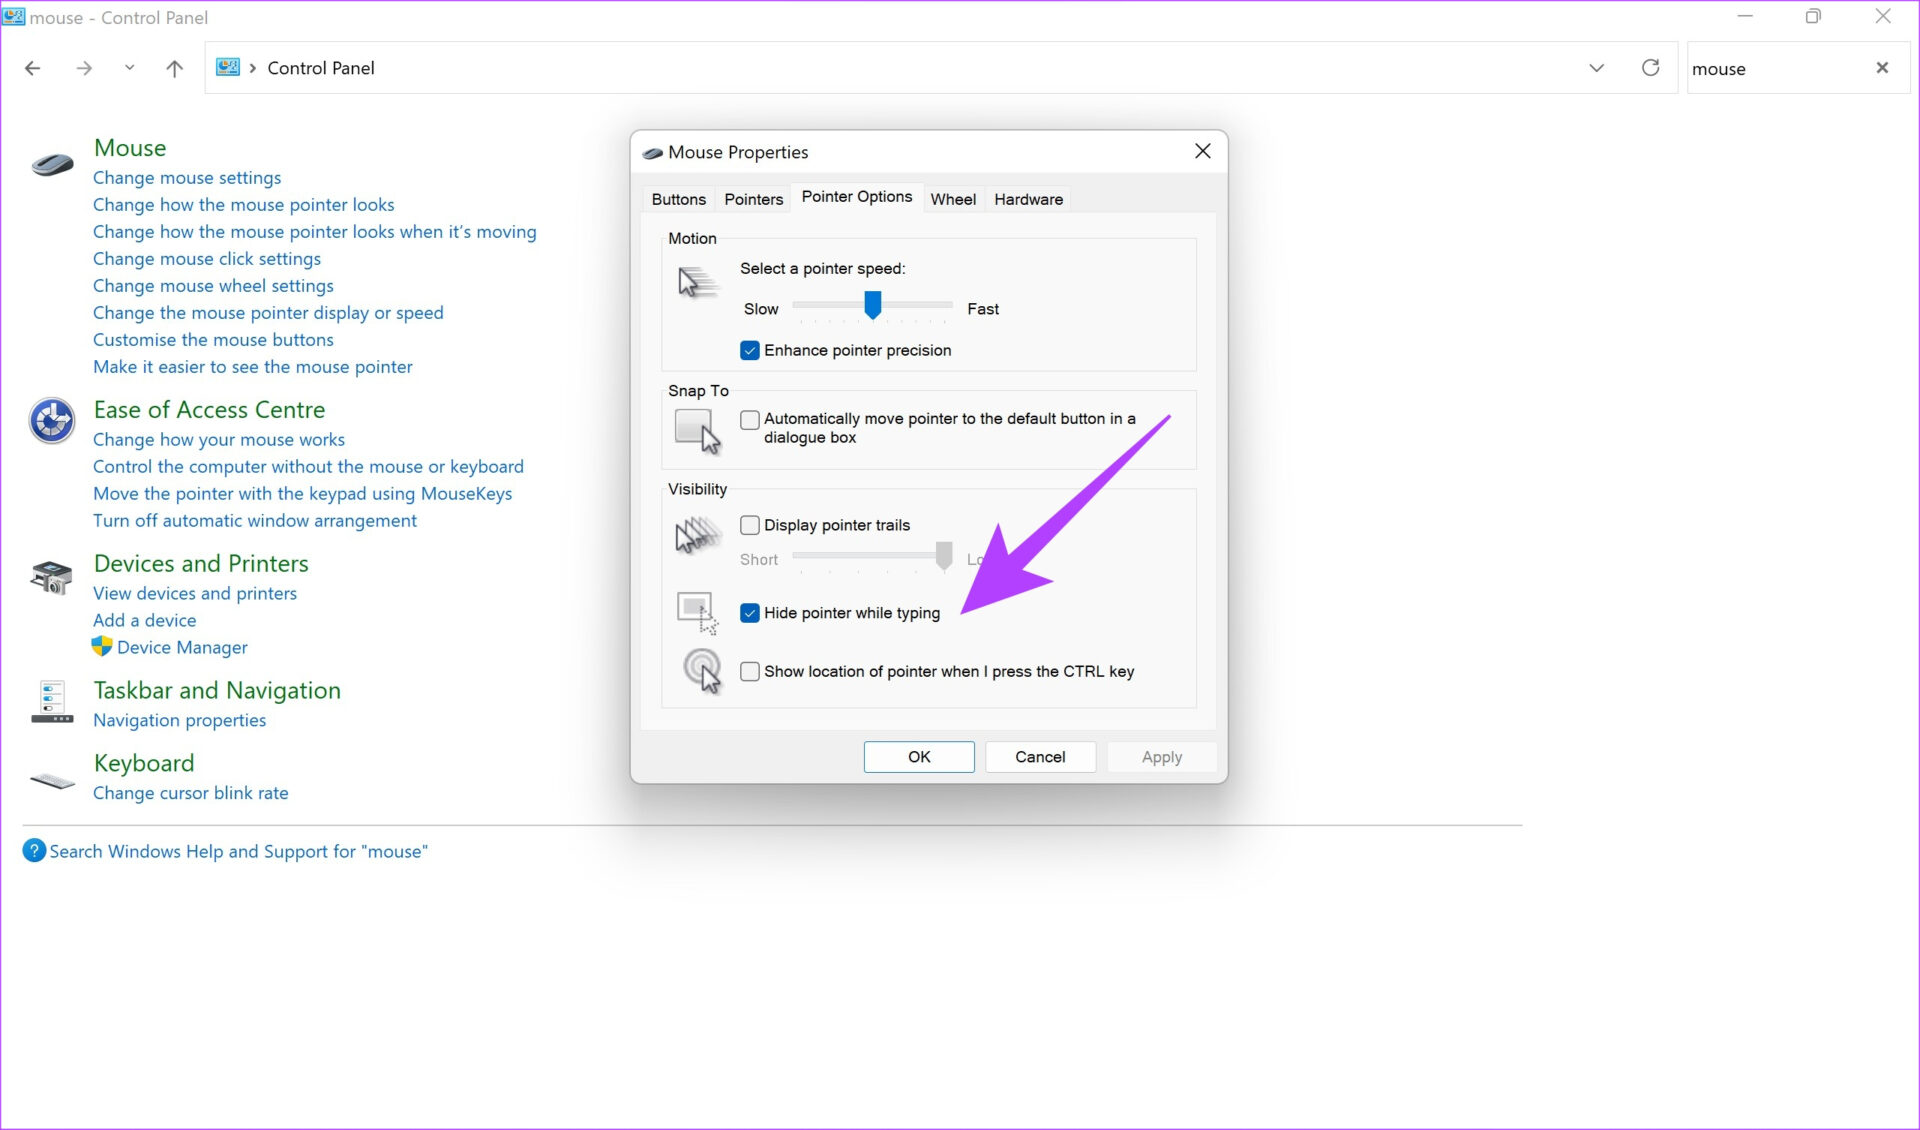
Windows 11 allows you to hide the mouse cursor while you’re typing. This may lead to the mouse pointer not showing up on your computer. So, it’s best to leave the ‘Hide mouse pointer while typing’ setting turned off on your Windows 11 PC. Here’s how to do it.
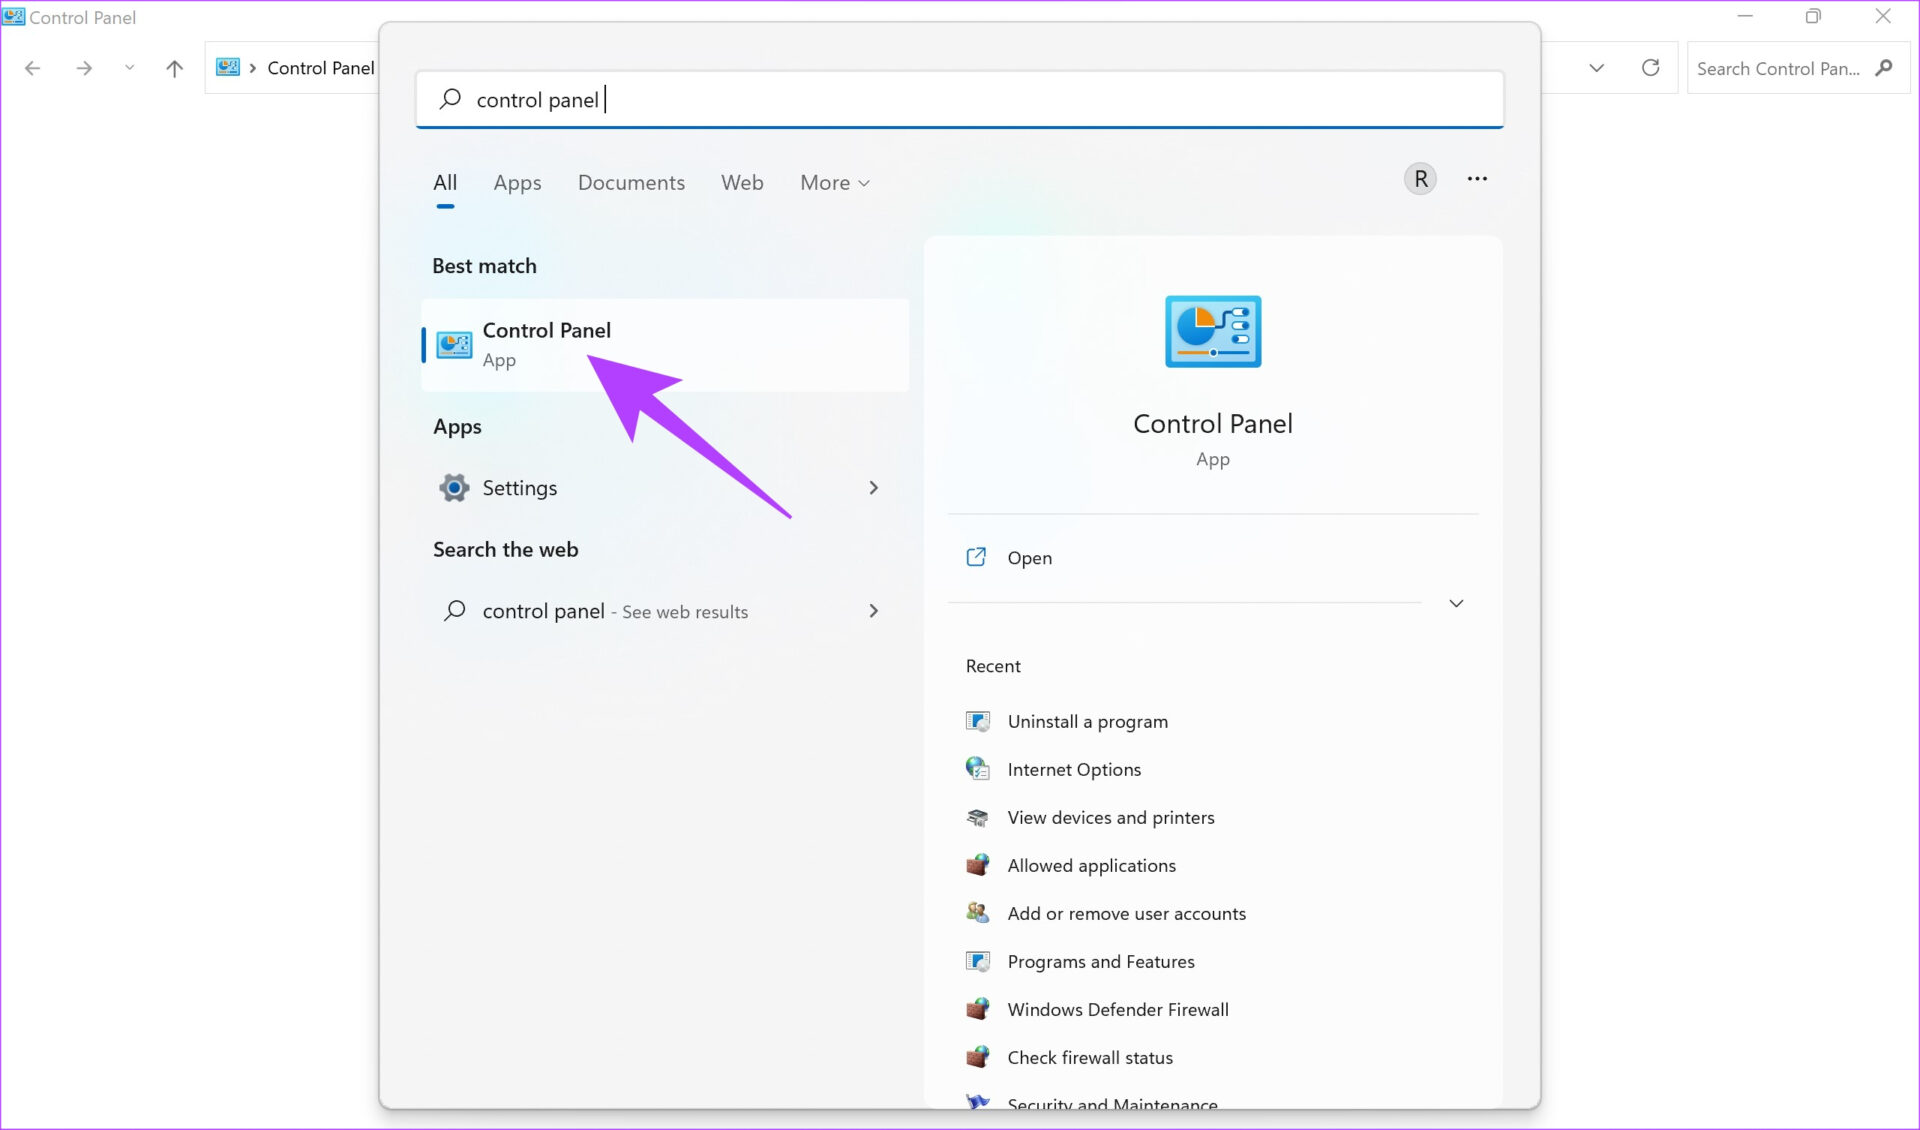
Step 1: Click on the search icon in the taskbar to bring up the Windows 11 search bar.

Step 2: Type in Control Panel and hit the Enter key.
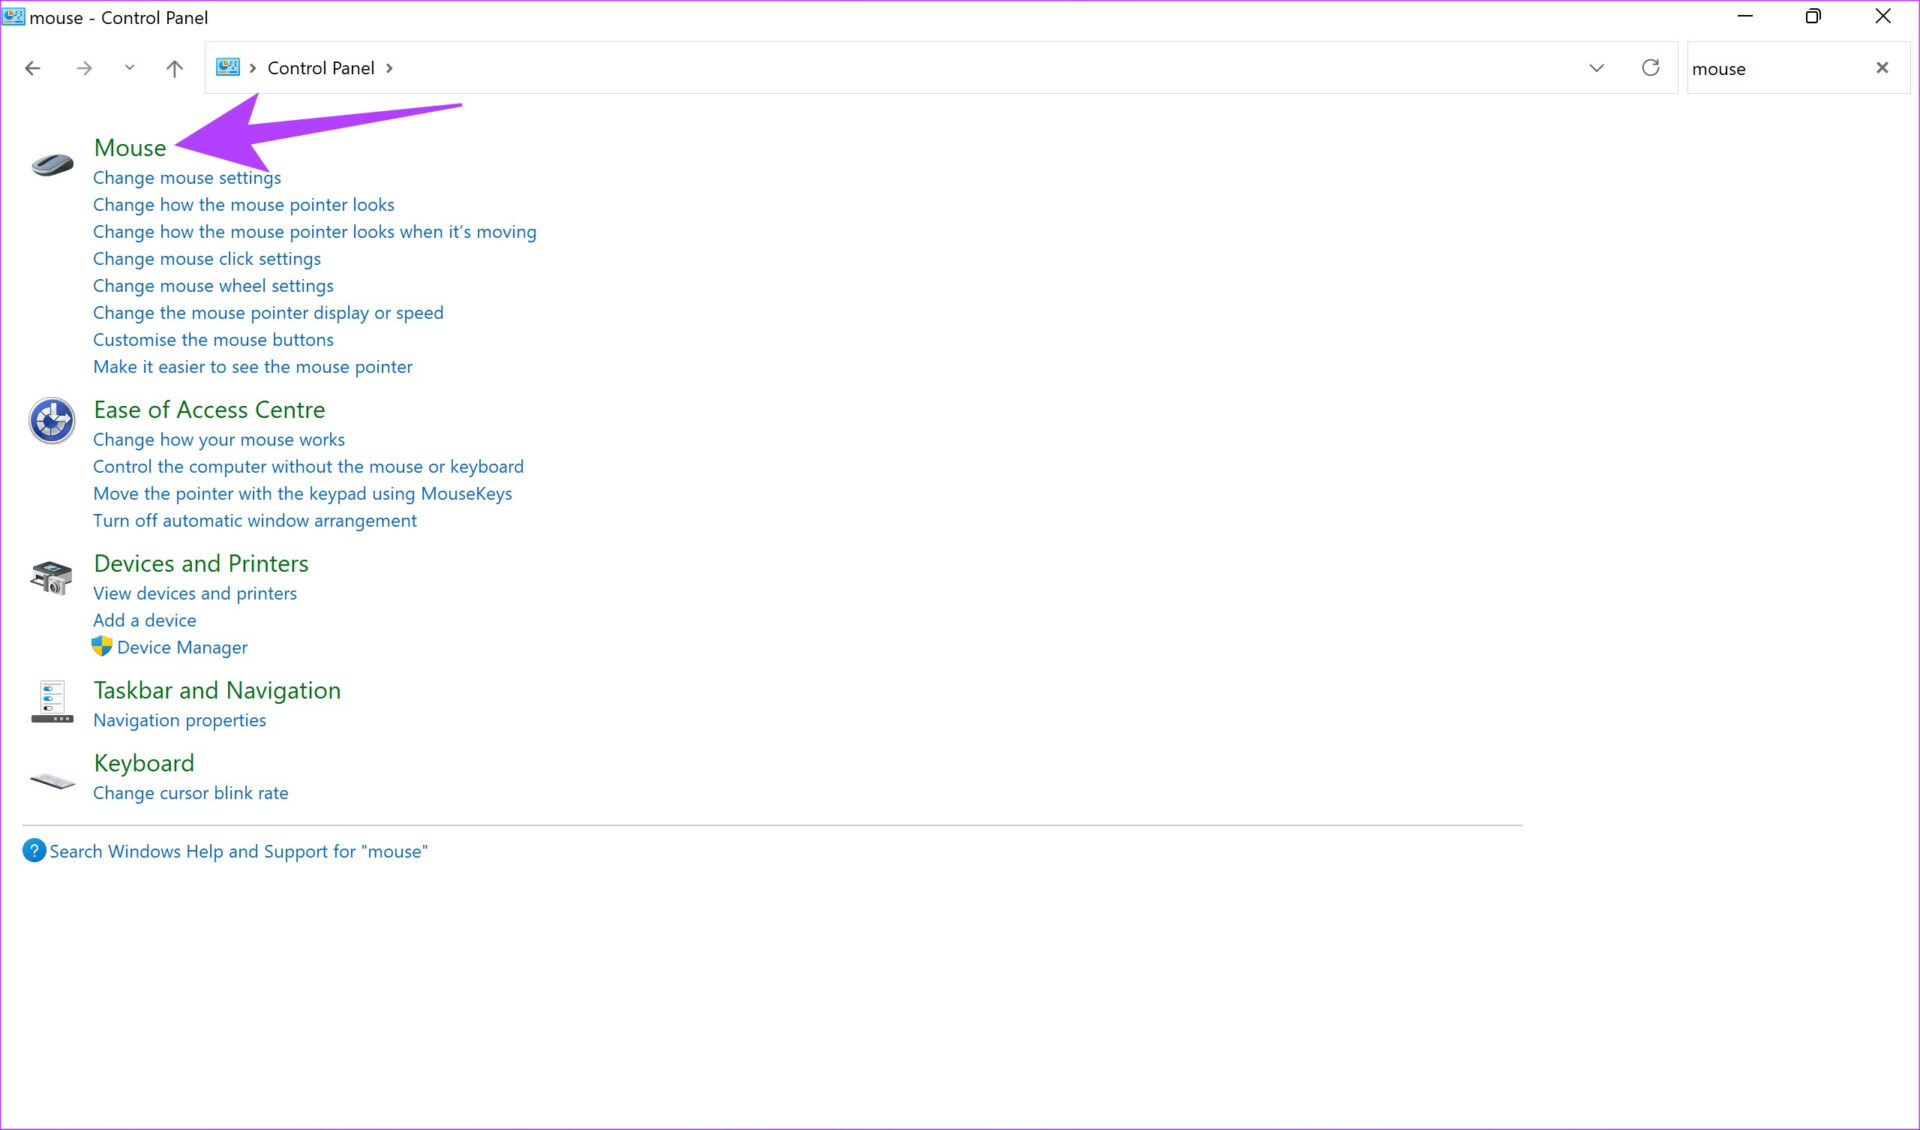
Step 3: Search for the Mouse option in the search bar within Control Panel.

Step 4: Click on the Mouse settings now.
Step 5: Navigate to the Pointer Options tab in the window that pops up.
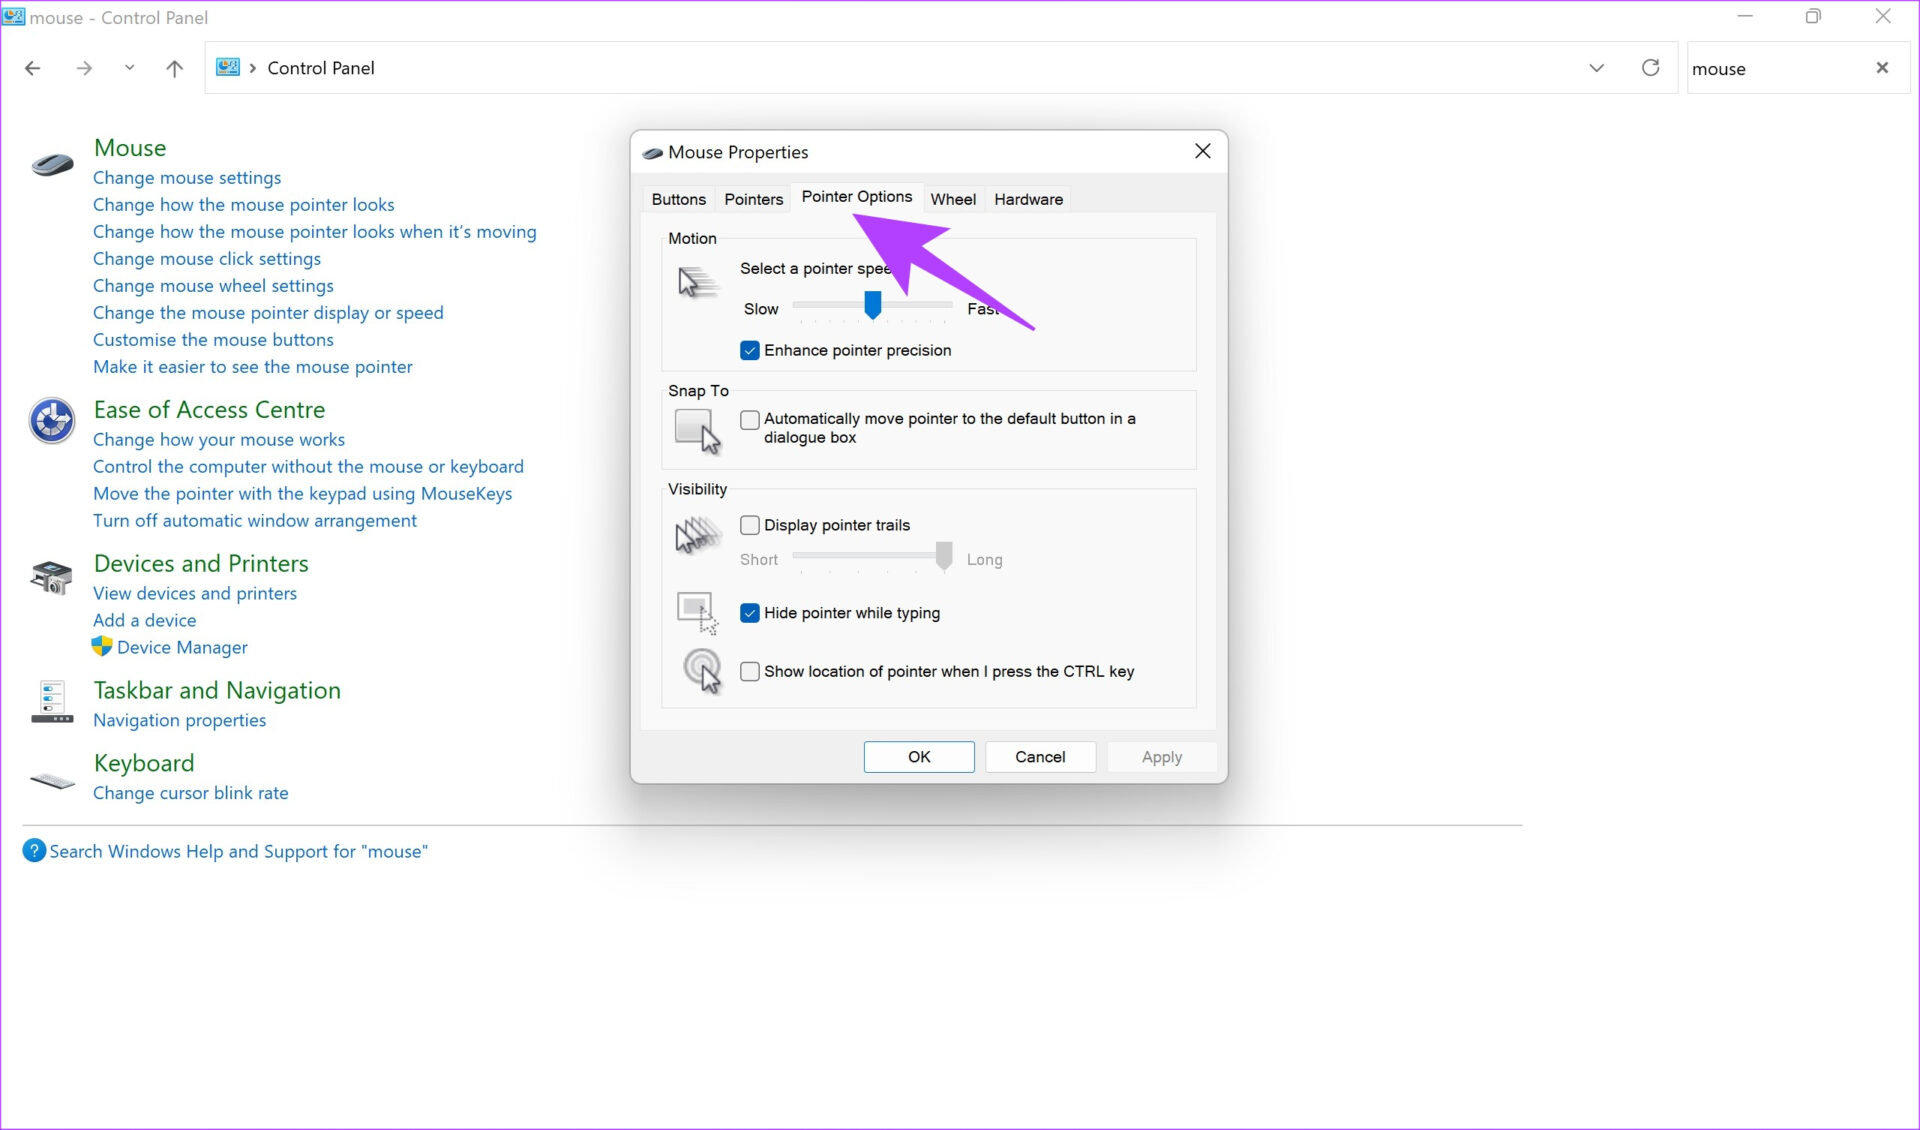
Step 6: Untick the checkbox next to Hide pointer while typing.
Fix 5: Update the Mouse Driver
When you connect any external peripheral to your PC, a driver will be present to allow communication between the mouse and your computer. If this driver stops working, you may face trouble while interfacing your wired mouse with the PC, resulting in the cursor not being shown. Here’s how you can update the mouse’s driver on Windows 11.
Step 1: Click on the search icon in the taskbar to bring up the Windows 11 search bar.
Step 2: Type in Control Panel and hit the Enter key.
Step 3: Search for Device Manager in the search bar within Control Panel.
Step 4: Click on the Device Manager option under Devices and Printers.

Step 5: Click on Mice and other pointing devices to expand it.

Step 6: Your mouse will appear under that option. Right-click on it and select Update driver.
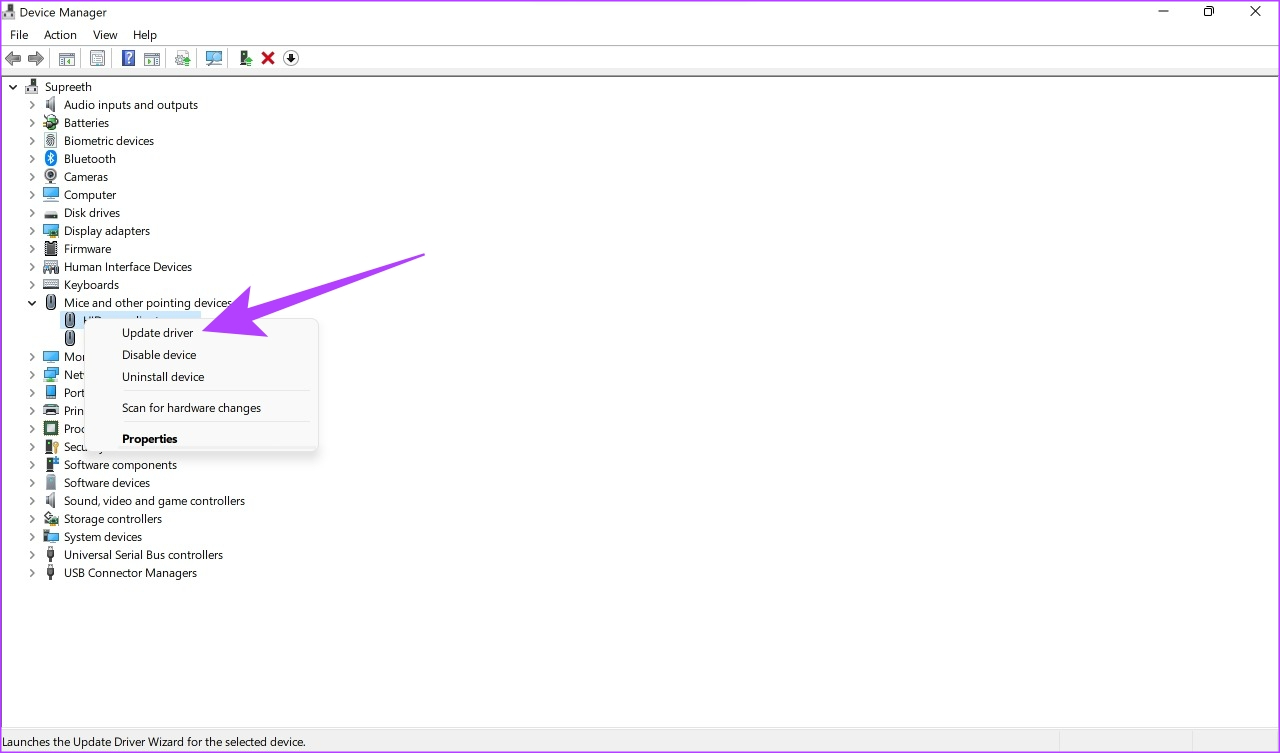
Follow the on-screen instructions to proceed with the driver update.
Was this helpful?
Last updated on 28 August, 2024
3 Comments
Leave a Reply
Read Next
 6 Ways to Fix Mouse Cursor Moving on Its Own in Windows
Basic Fixes Change old mouse pads: If a portion of your mousepad has faded and lost the coarseness needed to hold the mouse in place, it can make your mouse
6 Ways to Fix Mouse Cursor Moving on Its Own in Windows
Basic Fixes Change old mouse pads: If a portion of your mousepad has faded and lost the coarseness needed to hold the mouse in place, it can make your mouse
 How to Customize the Mouse Cursor on Windows 11
How to Change the Color and Size of the Mouse Cursor There are a few default cursor options in Windows 11 if you want to change the way the mouse
How to Customize the Mouse Cursor on Windows 11
How to Change the Color and Size of the Mouse Cursor There are a few default cursor options in Windows 11 if you want to change the way the mouse
 5 Ways to Fix Mouse Cursor Stuck on Mac
Basic Troubleshoot Remove connected devices - To ensure that the culprit isn't a connected device, say a Bluetooth mouse or keyboard, remove all devices and try again.
5 Ways to Fix Mouse Cursor Stuck on Mac
Basic Troubleshoot Remove connected devices - To ensure that the culprit isn't a connected device, say a Bluetooth mouse or keyboard, remove all devices and try again.
 Top 8 Ways to Fix Mouse Cursor Lagging on Mac
A Mac is generally known for its friendly UI and smooth performance.
Top 8 Ways to Fix Mouse Cursor Lagging on Mac
A Mac is generally known for its friendly UI and smooth performance.
 5 Ways to Fix Computer Boots to Blinking Cursor Error
What happens when you boot your computer?
5 Ways to Fix Computer Boots to Blinking Cursor Error
What happens when you boot your computer?
 3 Fixes for Roblox Cursor Going Off Screen on Windows
Fix 1: Repair or Reset Roblox First, you should use the app repair feature on Windows to fix Roblox.
3 Fixes for Roblox Cursor Going Off Screen on Windows
Fix 1: Repair or Reset Roblox First, you should use the app repair feature on Windows to fix Roblox.
 8 Fixes When the Text Cursor Turns White on Windows 11
Basic Fixes: Uninstall recent Windows updates: If the cursor problem starts after an update, rolling back the update will fix it.
8 Fixes When the Text Cursor Turns White on Windows 11
Basic Fixes: Uninstall recent Windows updates: If the cursor problem starts after an update, rolling back the update will fix it.
 Top 3 Touch Mouse Alternatives to Apple’s Magic Mouse
The Magic Mouse is useful for plenty of people, but some can get annoyed by its poor ergonomics.
Top 3 Touch Mouse Alternatives to Apple’s Magic Mouse
The Magic Mouse is useful for plenty of people, but some can get annoyed by its poor ergonomics.
The article above may contain affiliate links which help support Guiding Tech. The content remains unbiased and authentic and will never affect our editorial integrity.

I got a lot worry when this issue happened to me when I go through this article the error got solved I am very happy to see my cursor working again with 3 number solution
When you don’t have a cursor or working mouse, telling us to “click” on something is extremely UNhelpful.
None of these things worked.
Thank you very much for your article. I found this very helpful. I used solution number 6 and unchecked the box within the control panel that hides the cursor while I type. I also checked the box that shows the cursor location when I press the control key.
I appreciate that I can find experts on the web to help with these problems that otherwise I would never solve.