How to Share a Gmail Label With Other Users
To share your Gmail labels with another person, you will need a Chrome extension called Label Sharing for Gmail by cloudHQ. However, the extension requires permission to read and change email data, so proceed cautiously. You can revoke the permission whenever you want to.
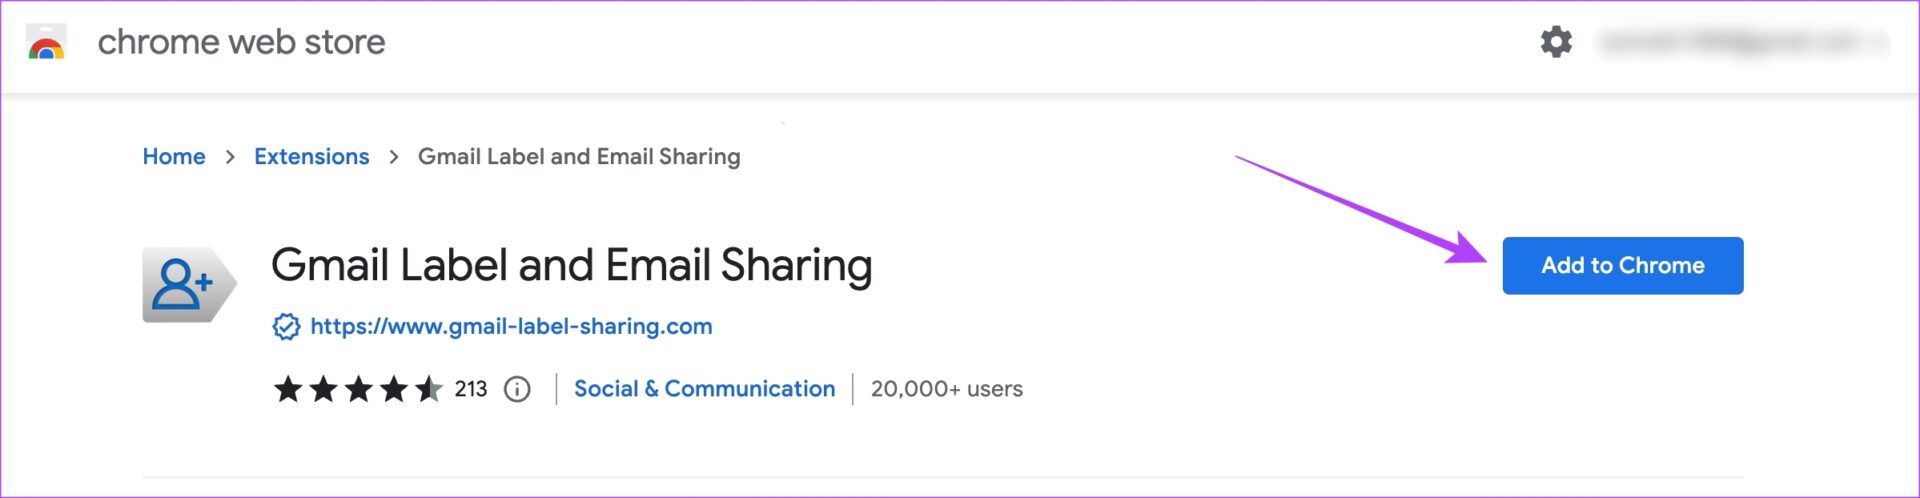
Step 1: Visit the Label Sharing for Gmail Chrome extension page and click on Add to Chrome.
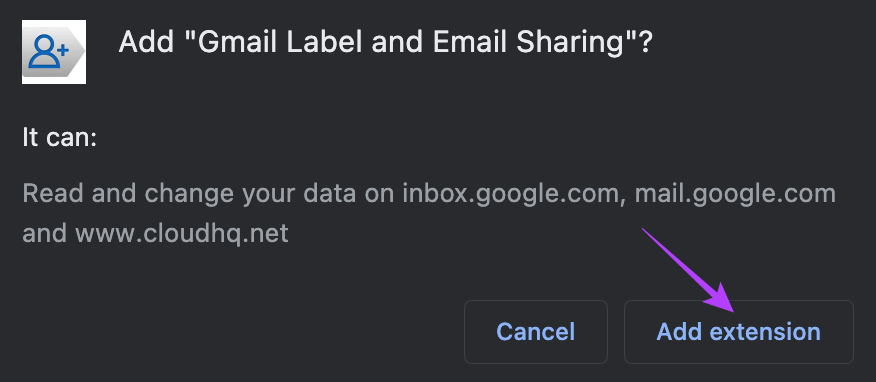
Step 2: Select Add extension again when prompted.
Google Chrome will show the extension icon next to your profile photo at the top-right corner.
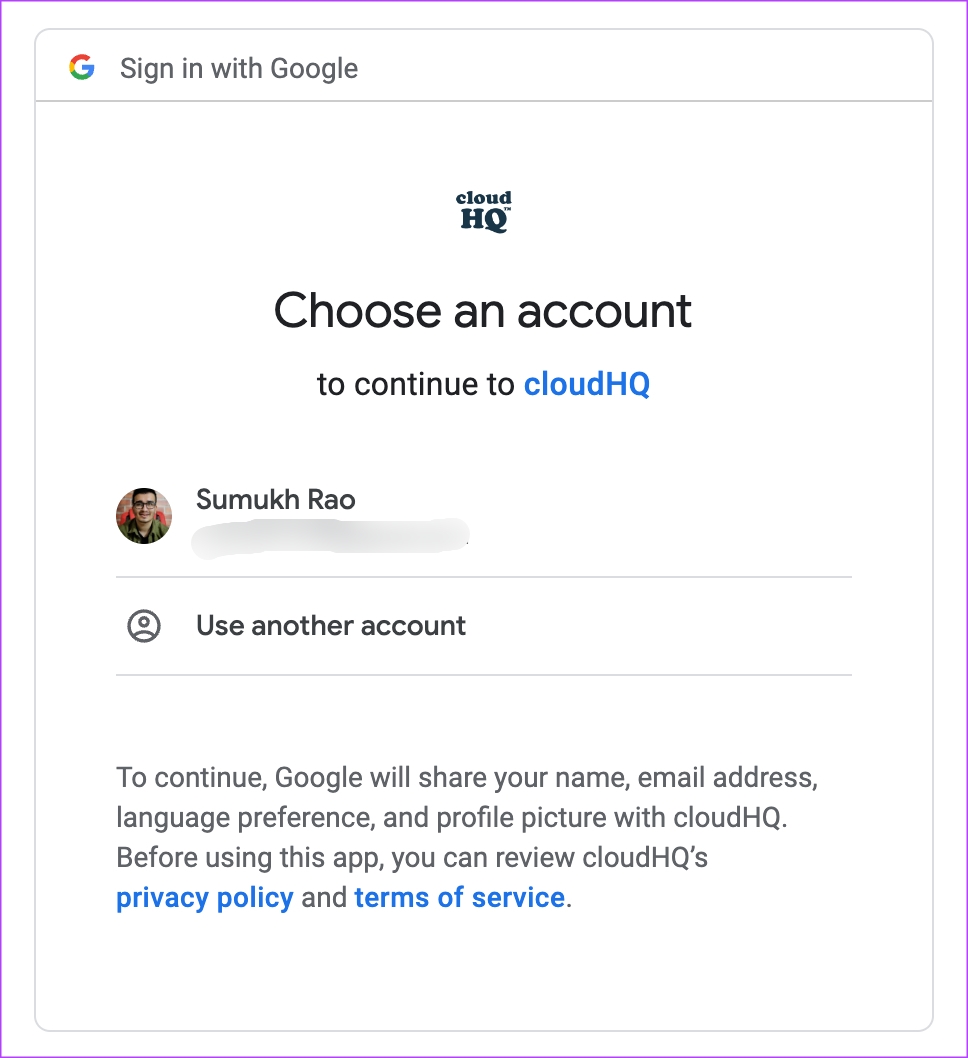
Step 3: You’ll see a pop-up inside Gmail to create an account to use this feature. Click on Create Account.

Step 4: Choose the Gmail account you wish to share the folders and emails from.
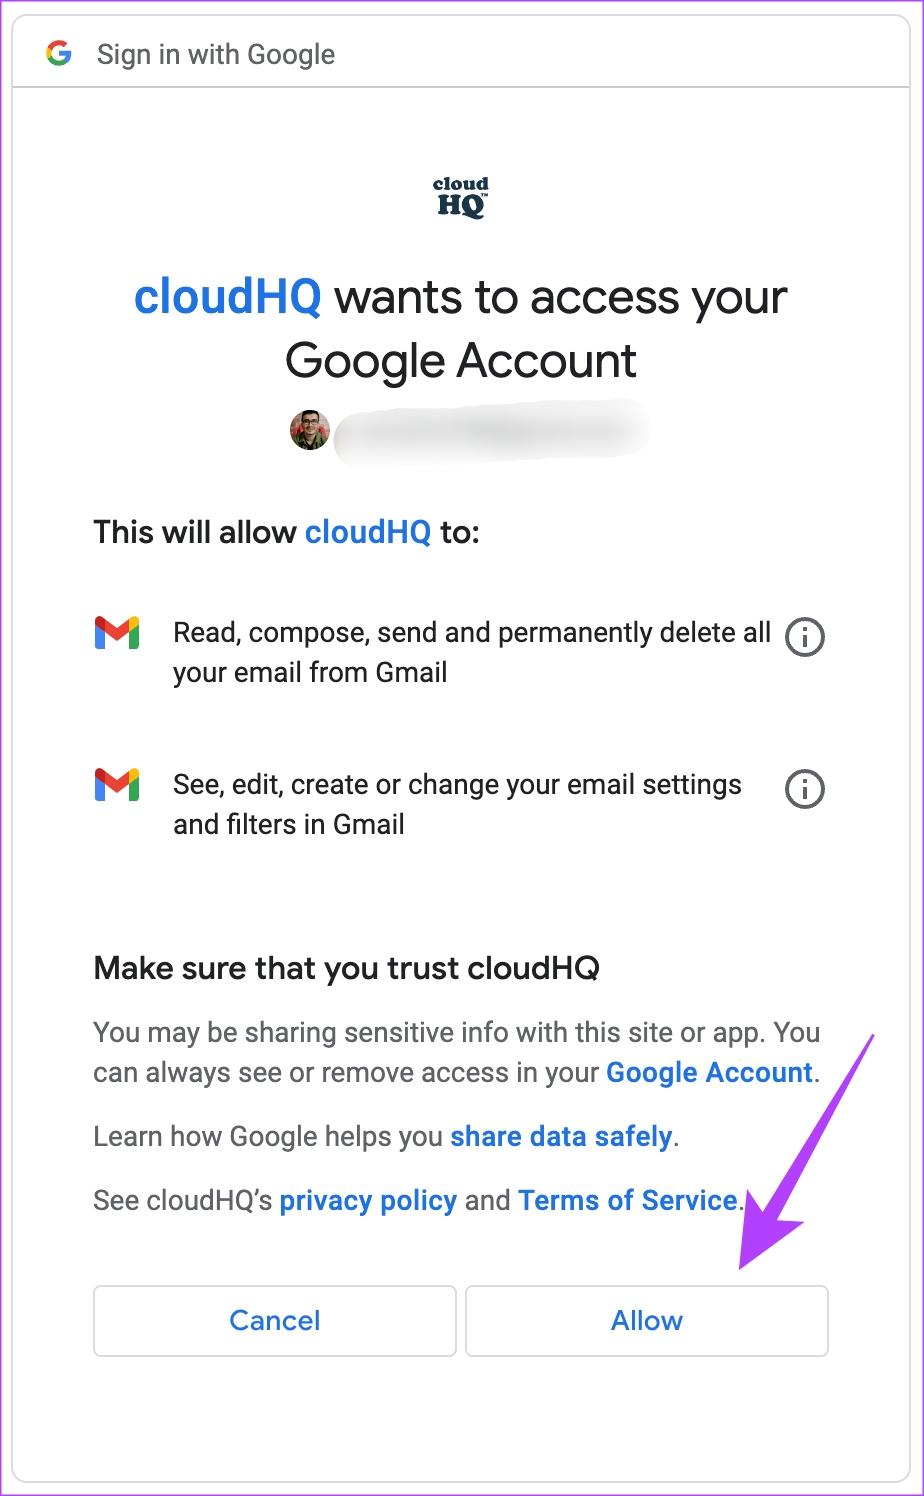
Step 5: Read the required permissions carefully and select Allow. The extension will integrate into your Gmail account.
Step 6: In Gmail, go to the folder or label you want to share with others by selecting it from the column on the left.
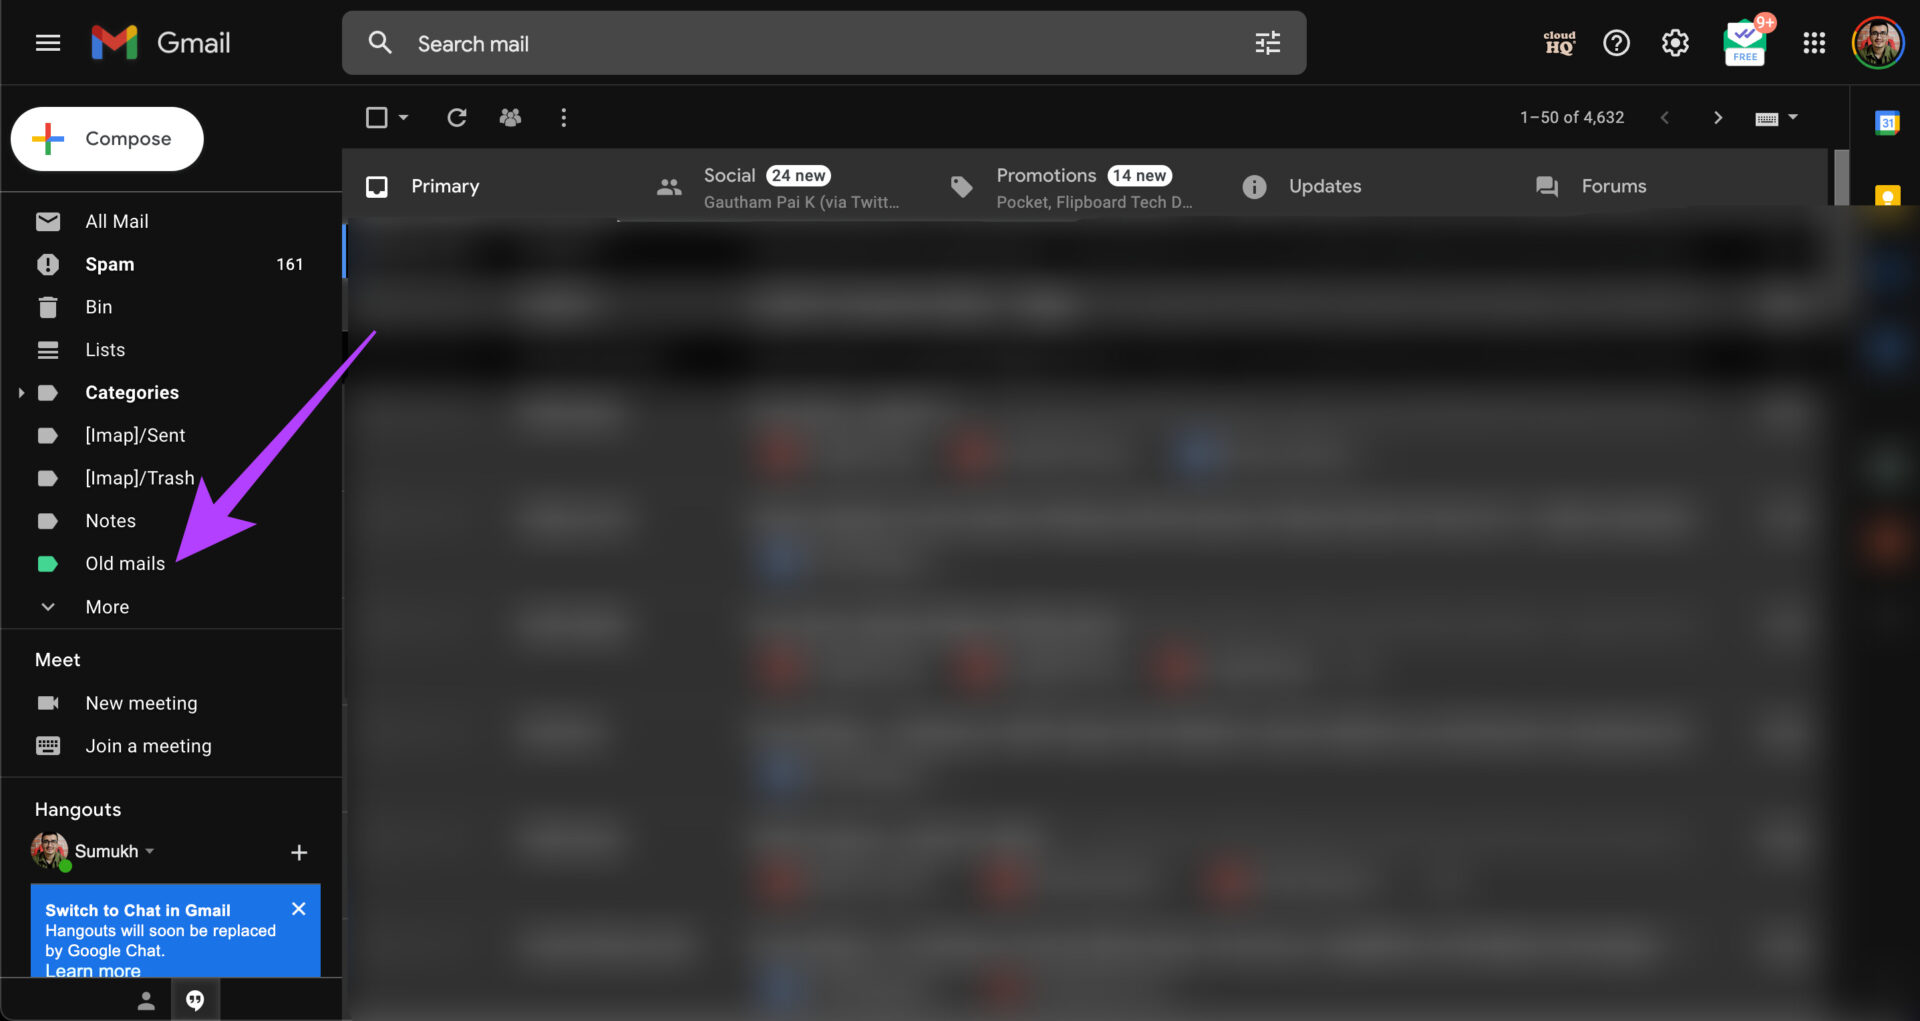
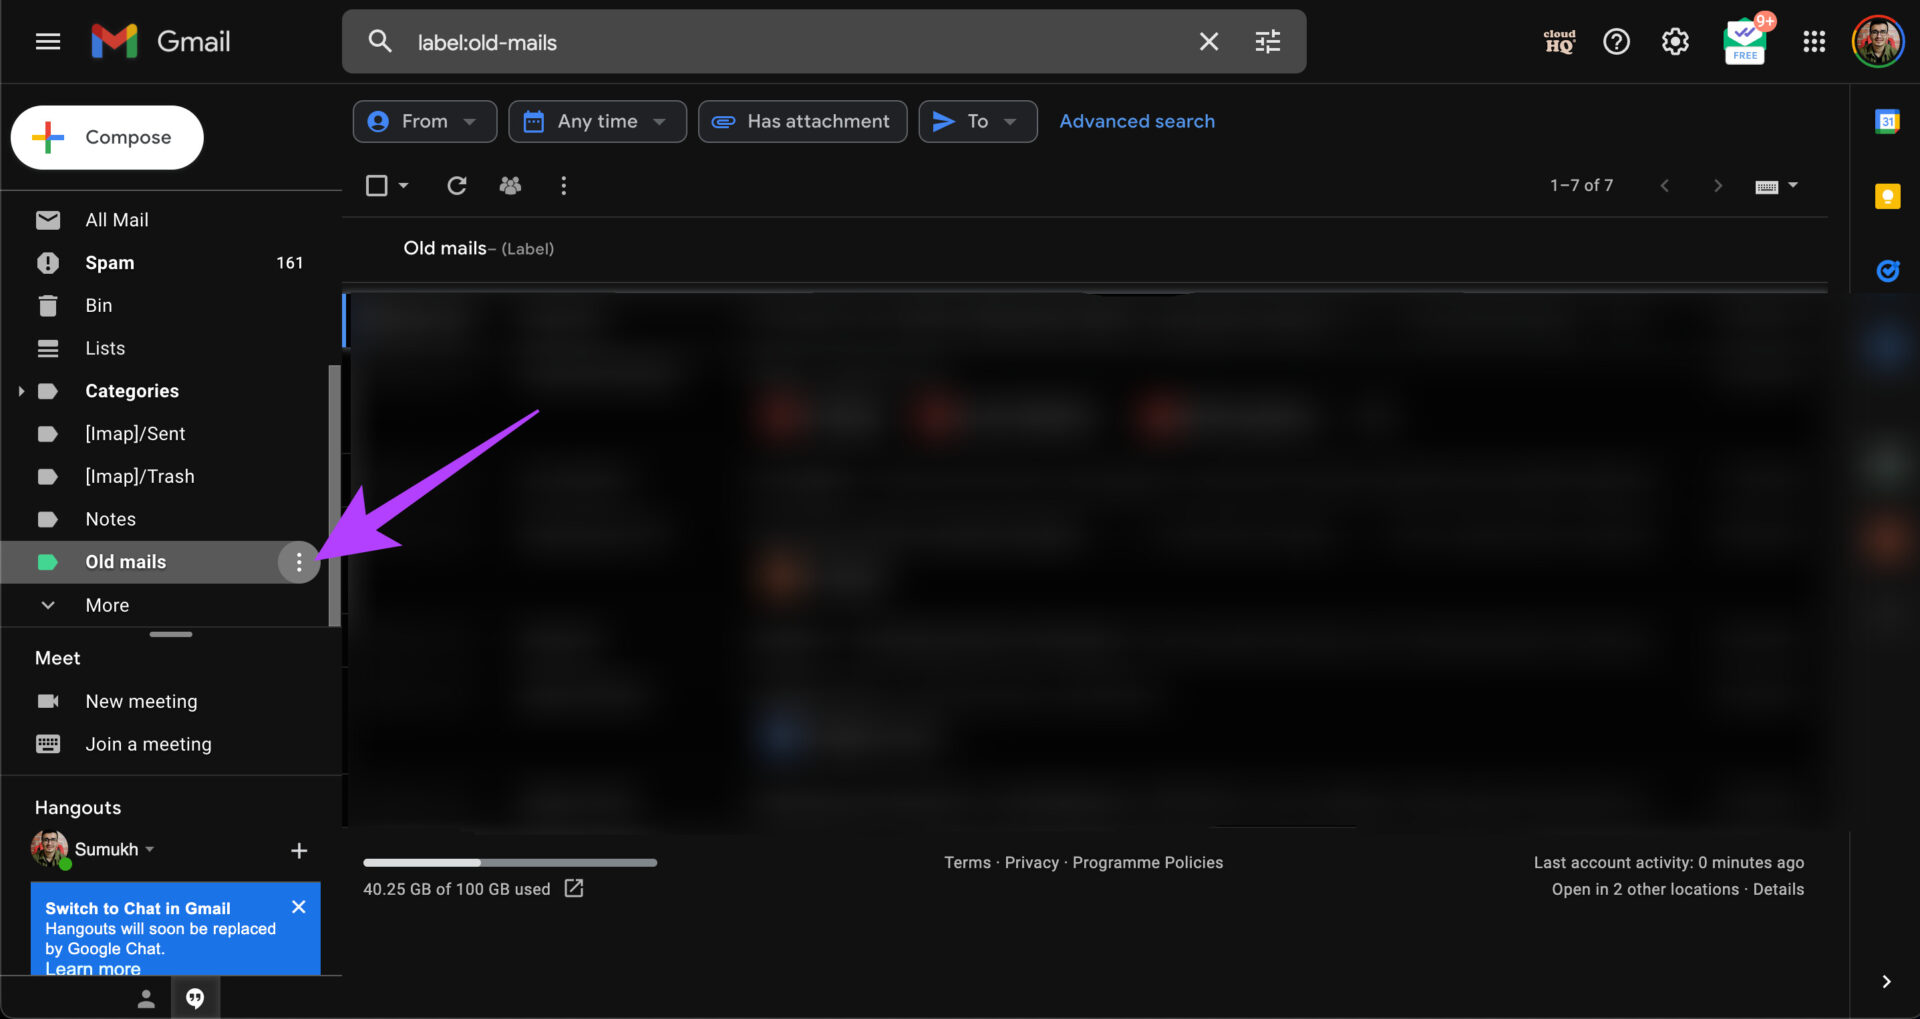
Step 7: Hover your mouse over the folder’s name and click on three dots next to it.
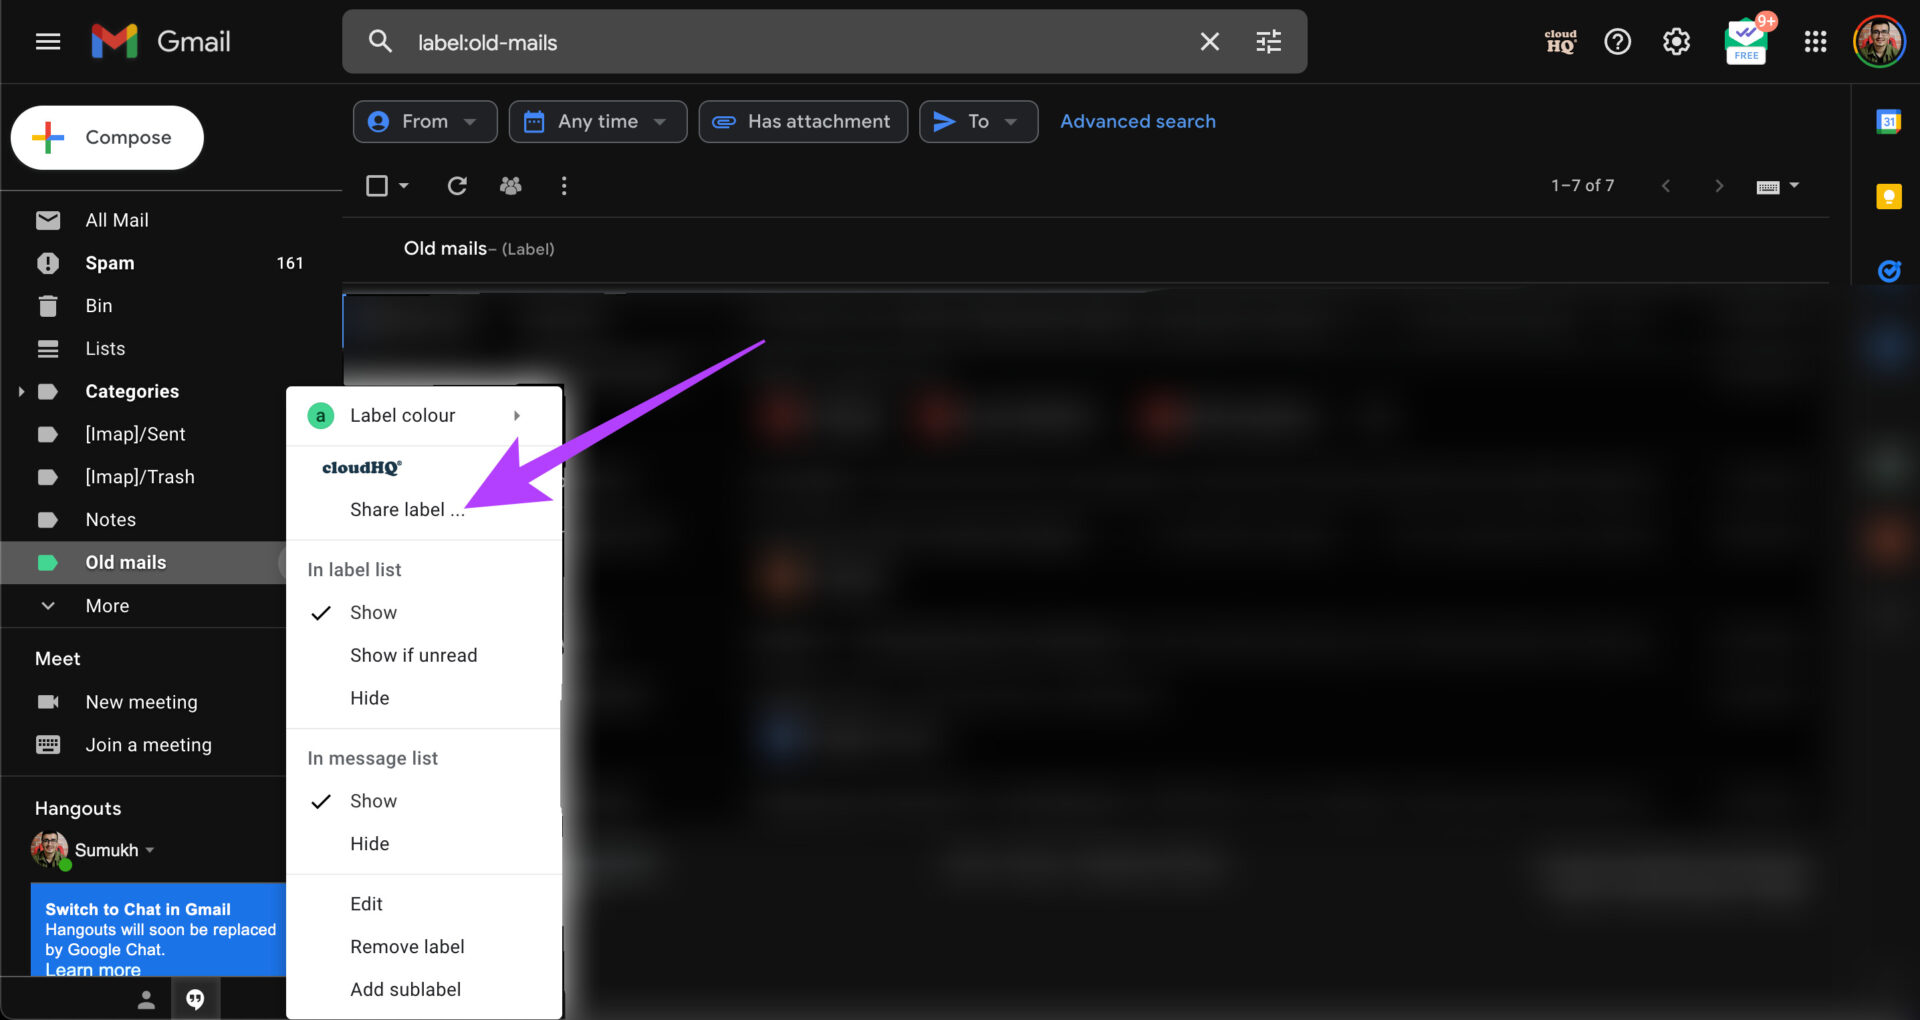
Step 8: Select Share Label under CloudHQ.
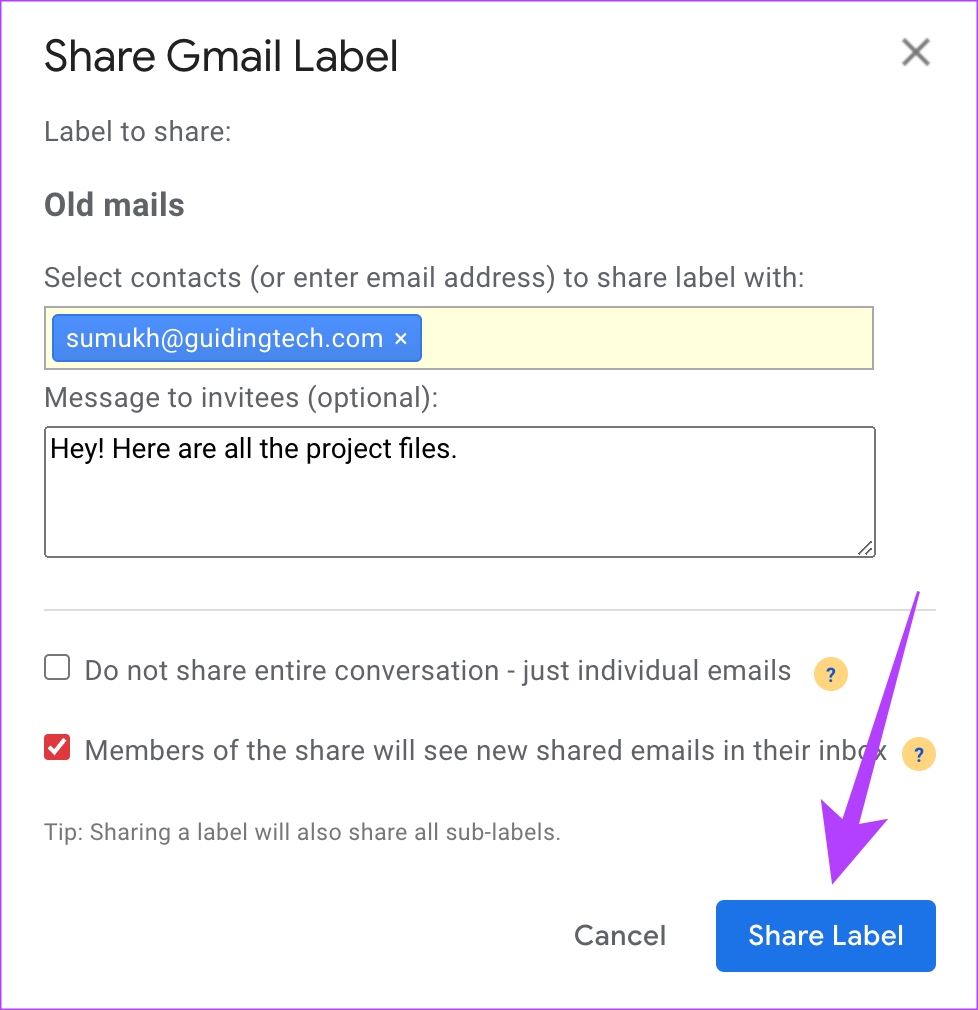
Step 9: Enter the email IDs of the recipients you wish to share the folder with, along with an optional message. Once done, click on Share Label.
You’ve now successfully shared the folder with all emails. Now, whenever you add this particular label to a new email, the people you have shared it with can also see it.
How to Accept a Gmail Label Shared With You
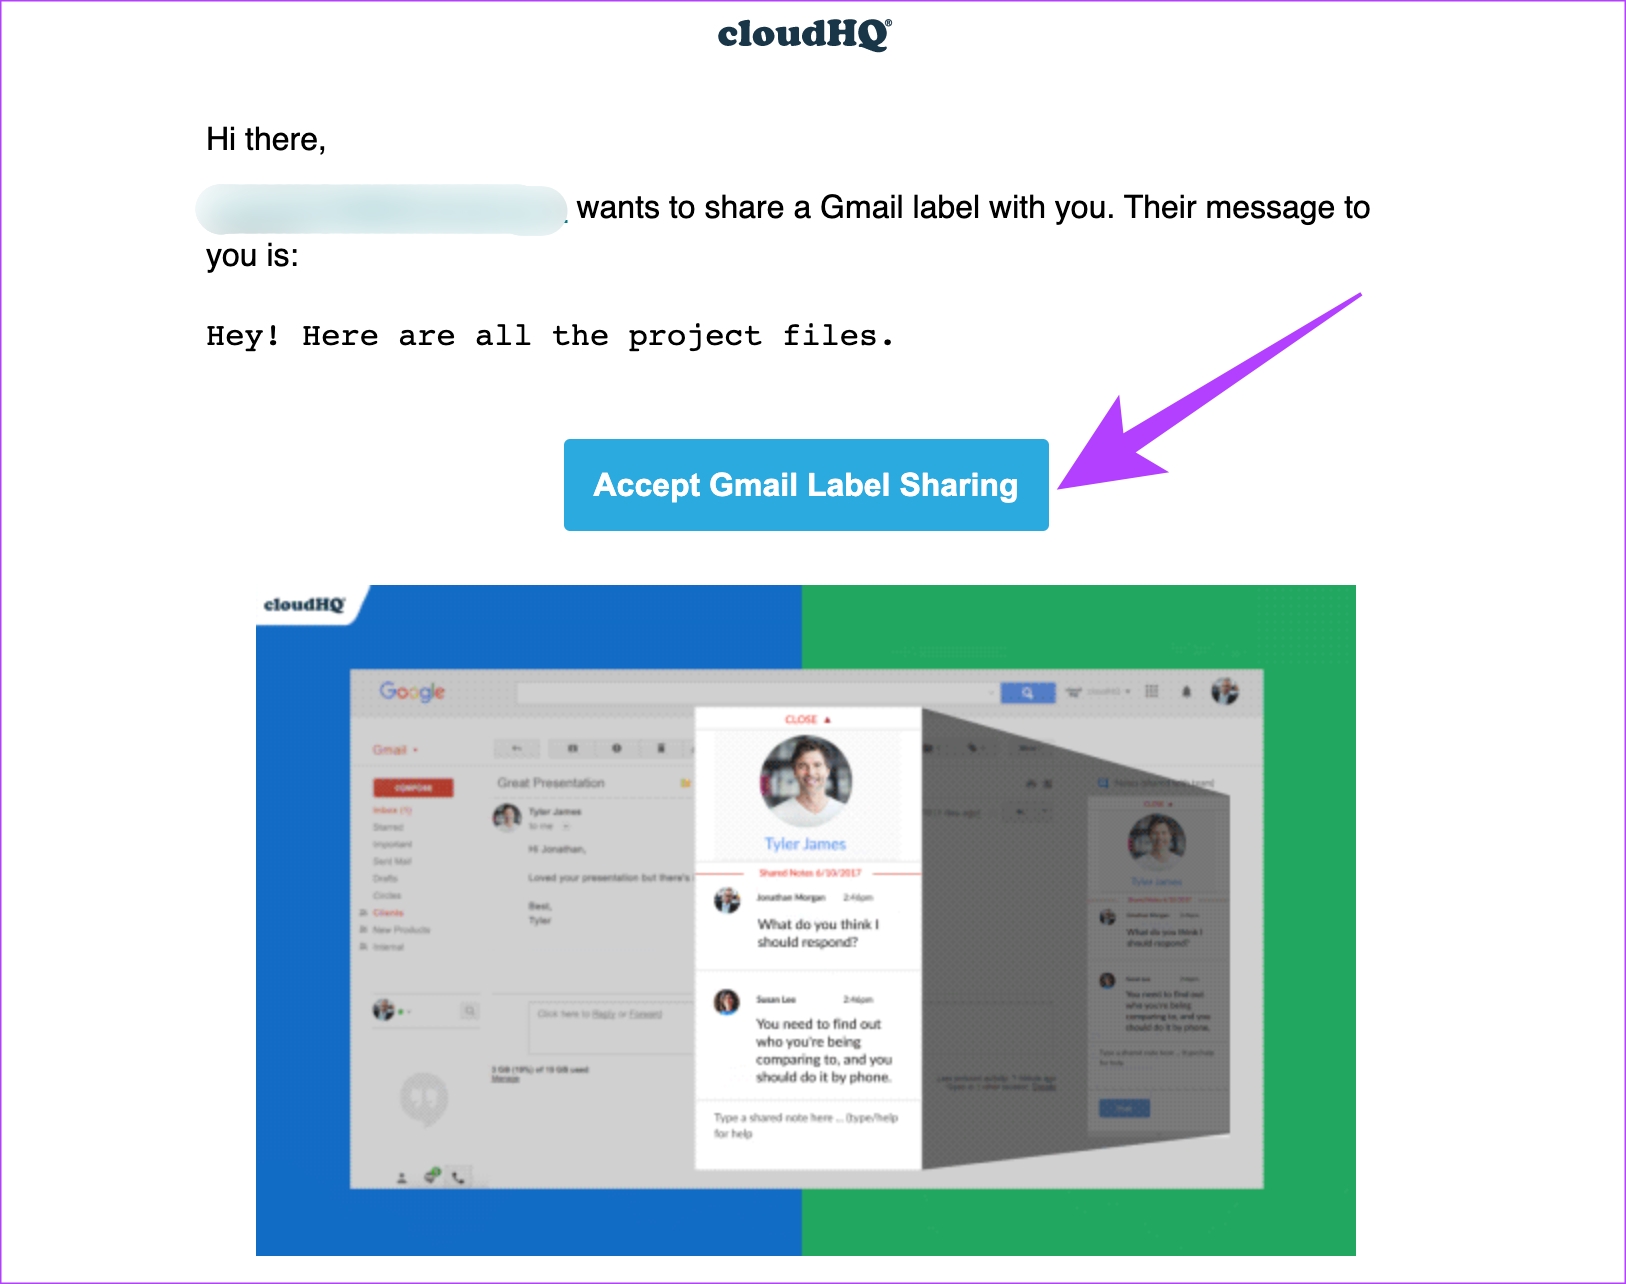
You have done your bit to share the folder. However, the receiver must also install this extension to view your shared folder and emails. After performing the above steps, the recipient will get an email saying that you want to share a Gmail label with you and if you want to accept it. They must follow these steps:
Step 1: Click on Accept Gmail Label Sharing.
Step 2: You’ll see a pop-up inside Gmail to create an account to use this feature. Click on Create Account.
Step 3: Choose the Gmail account you wish to share the folders and emails from.
Step 4: Read the required permissions carefully and select Allow. The extension will integrate into your Gmail account. After this, wait for Gmail to sync the folder.
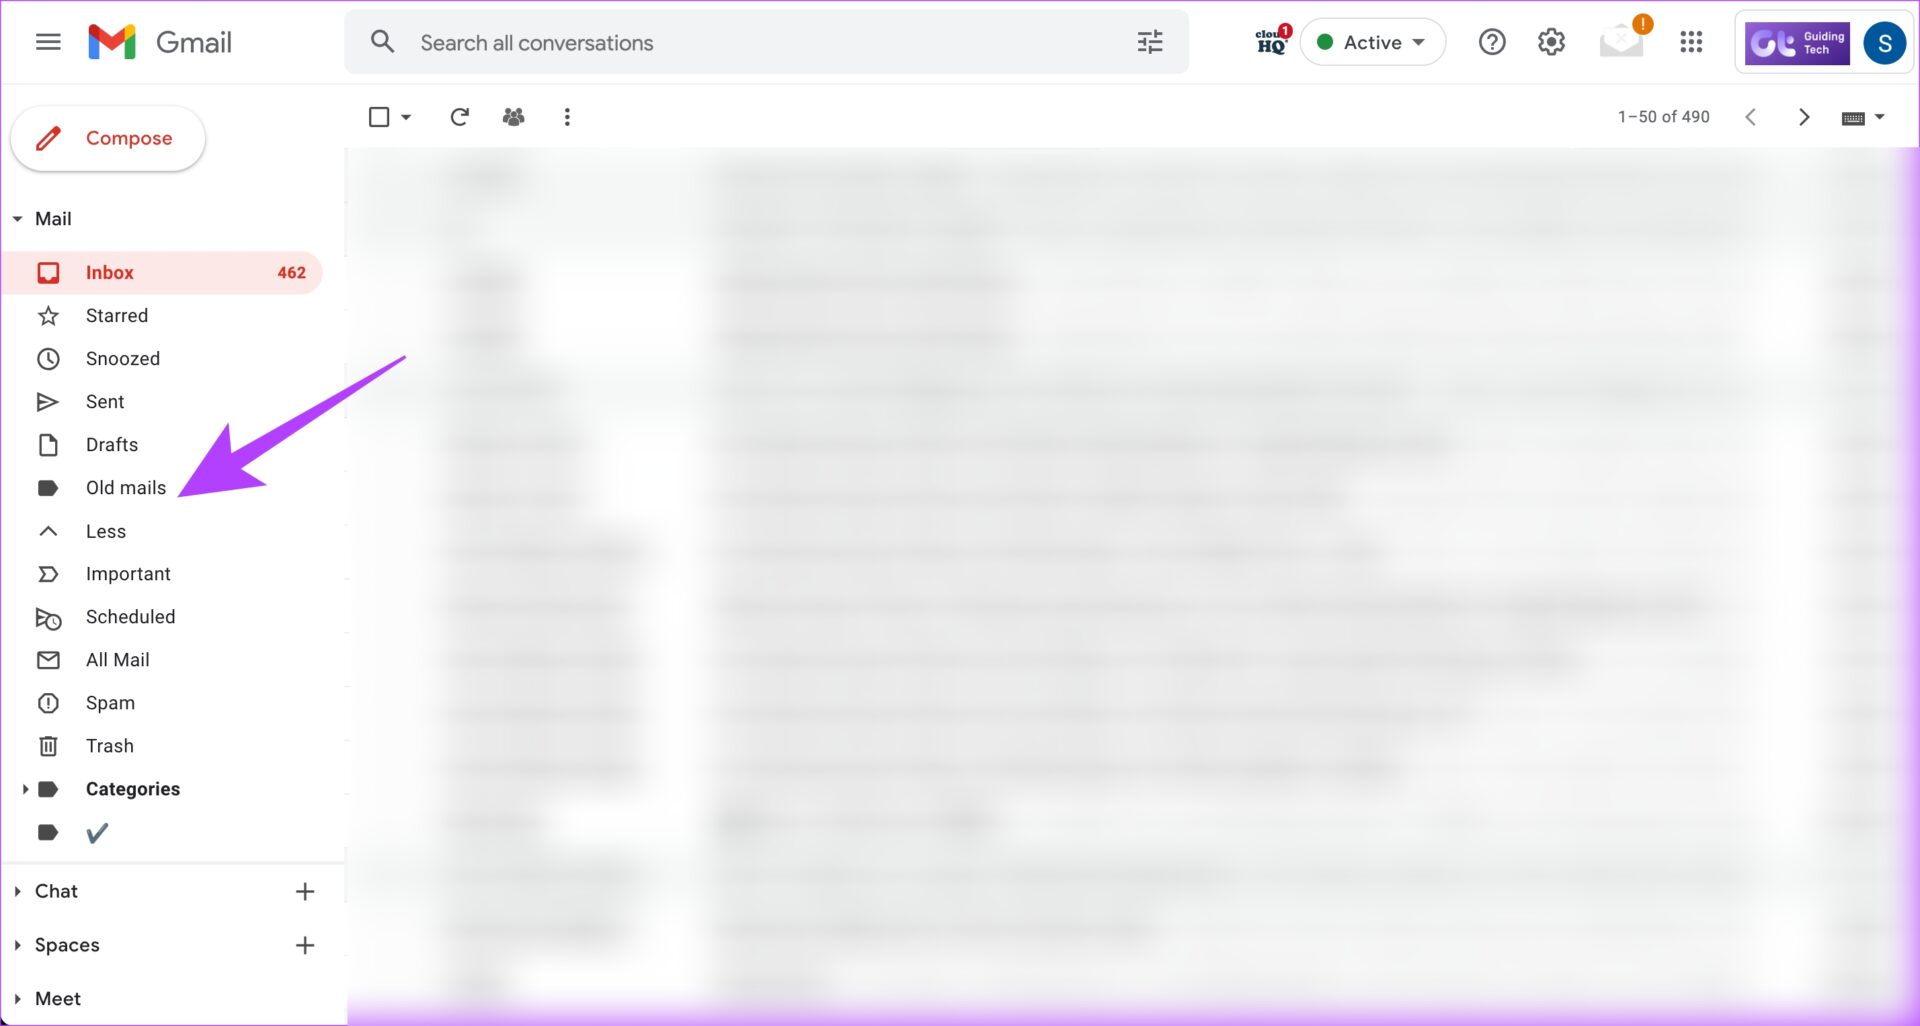
Step 5: The recipient will see the shared folder in the left pane on Gmail.
Step 6: Lastly, click on the folder, and the shared emails will be visible. Also, if you no longer need the third-party tool, you may remove the installed Chrome extension.
Was this helpful?
Last updated on 30 July, 2024
Read Next
 How to Rename the User Folder in Windows 11
https://youtu.be/CLd5GCQFMMs What Is the User Folder on Windows 11 Every copy of Windows 11 installed will have a folder named after the user account.
How to Rename the User Folder in Windows 11
https://youtu.be/CLd5GCQFMMs What Is the User Folder on Windows 11 Every copy of Windows 11 installed will have a folder named after the user account.
 How to Share a Facebook Post to Instagram Automatically or Manually
How to Automatically Post From Facebook to Instagram Before you can post content from Facebook to Instagram, there’s one prerequisite - link your Instagram and Facebook account/page.
How to Share a Facebook Post to Instagram Automatically or Manually
How to Automatically Post From Facebook to Instagram Before you can post content from Facebook to Instagram, there’s one prerequisite - link your Instagram and Facebook account/page.
 How to Automatically CC or BCC Yourself in Outlook and Gmail
How to Automatically CC or BCC Yourself in Outlook Step 1: Open Outlook and click on the three-dot menu.
How to Automatically CC or BCC Yourself in Outlook and Gmail
How to Automatically CC or BCC Yourself in Outlook Step 1: Open Outlook and click on the three-dot menu.
 How to Fix Outlook for Mac Not Receiving Emails Automatically
Basic Fixes Check email storage: If your email inbox storage is full, you won’t receive new messages in any app or on the web Switch between new and classic Outlook
How to Fix Outlook for Mac Not Receiving Emails Automatically
Basic Fixes Check email storage: If your email inbox storage is full, you won’t receive new messages in any app or on the web Switch between new and classic Outlook
 How to Manage and Share Files and Folder Access on Microsoft OneDrive
Like iCloud and Google Drive, Microsoft's OneDrive is a great cloud storage platform to store your data.
How to Manage and Share Files and Folder Access on Microsoft OneDrive
Like iCloud and Google Drive, Microsoft's OneDrive is a great cloud storage platform to store your data.
 How to Auto-Delete Emails in Gmail
Method 1: Using Filters Gmail offers filters to manage incoming emails automatically.
How to Auto-Delete Emails in Gmail
Method 1: Using Filters Gmail offers filters to manage incoming emails automatically.
 How to Mark All Emails As Read in Gmail
Method 1: Mark All Email as Read in Gmail Web Google doesn’t offer a direct option to mark all emails as read, so we must use special search prompts to
How to Mark All Emails As Read in Gmail
Method 1: Mark All Email as Read in Gmail Web Google doesn’t offer a direct option to mark all emails as read, so we must use special search prompts to
 How to Archive or Unarchive Emails in Gmail
What Does Archive in Gmail Mean?
How to Archive or Unarchive Emails in Gmail
What Does Archive in Gmail Mean?
The article above may contain affiliate links which help support Guiding Tech. The content remains unbiased and authentic and will never affect our editorial integrity.