Windows Defender has become integral to the Windows Security suite of tools. With it, you can actively protect your computer from online and offline threats and set up your computer to scan itself automatically at certain times. However, you can’t turn this feature on through the Windows Security app. Don’t worry, though! This article will guide you through two quick ways to schedule a Windows Defender antivirus scan.
You get multiple options when scanning your computer using Windows Defender. And by scheduling Windows Defender, you can not only leverage the program but also safeguard your files and folders on a daily, weekly, or monthly basis without interfering with settings. That said, let’s jump right into the methods.
How to Schedule a Microsoft Defender Antivirus Scan
When you aren’t working or have put your computer to sleep, you can simply allow Windows Defender to scan the device. Here’s how to do it.
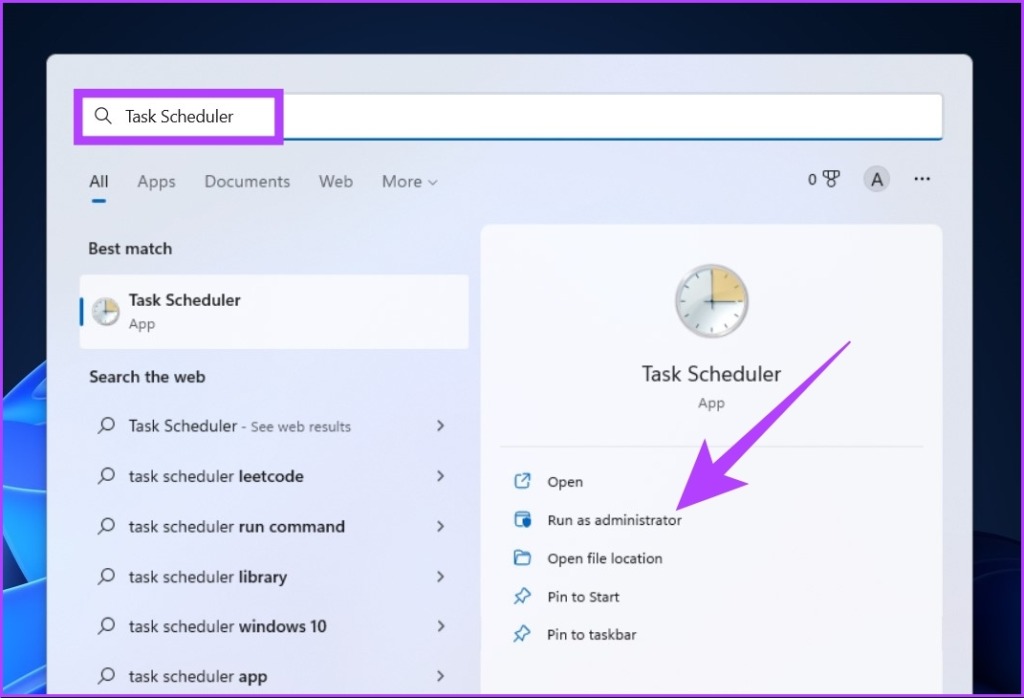
Step 1: Press Windows Key on your keyboard, type Task Scheduler, and click on ‘Run as administrator.’
Step 2: In the left panel, double-click on ‘Task Scheduler Library’ and double-click on Microsoft.
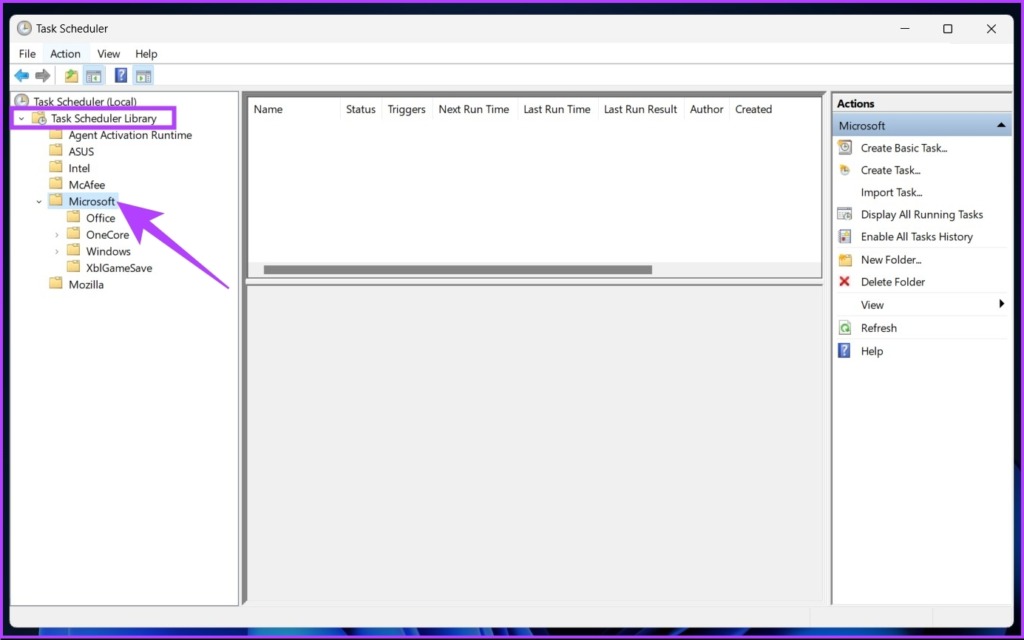
Step 3: Select Windows and double-click on it. Now, scroll down and double-click on Windows Defender.

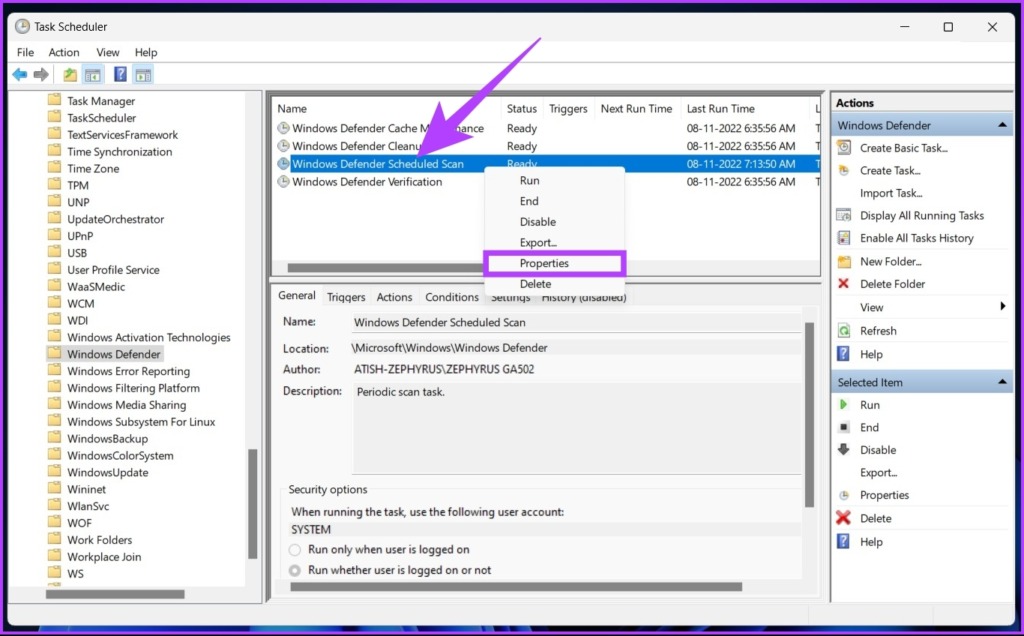
Step 4: In the middle pane, right-click on the ‘Windows Defender Scheduled Scan’ task and select Properties.
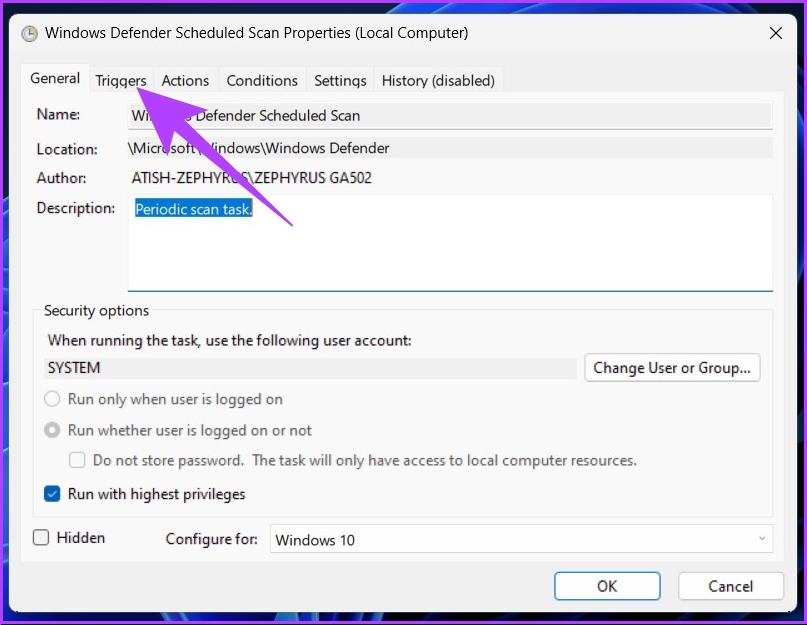
Step 5: Go to the Triggers tab.
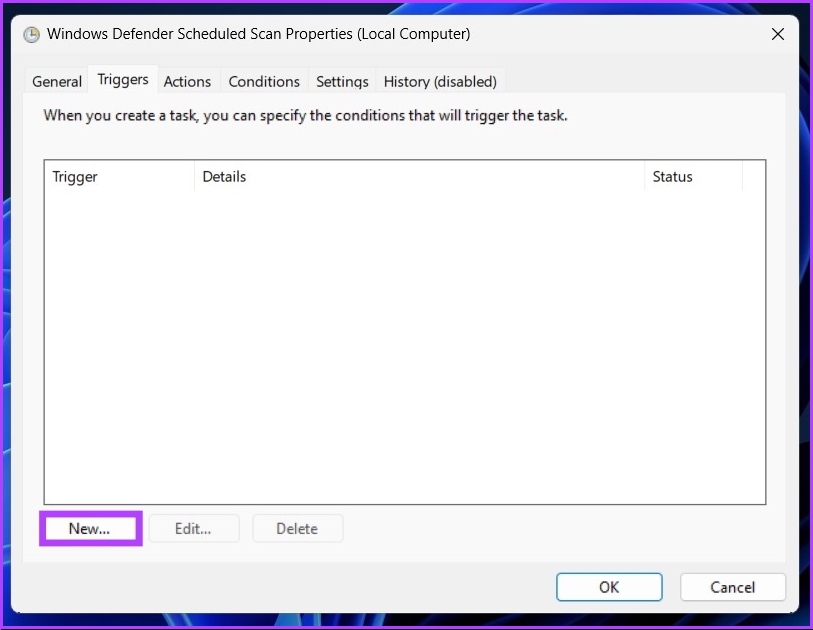
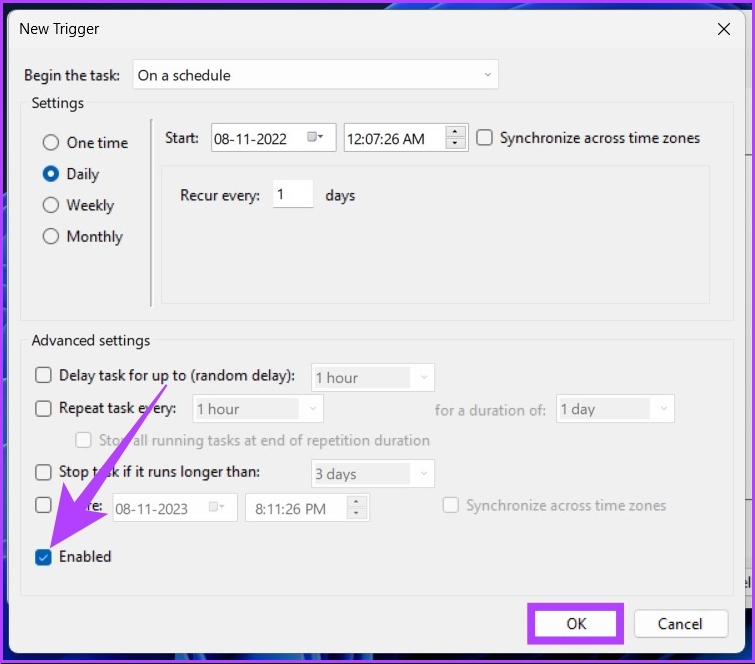
Step 6: Click on New at the bottom to create a new trigger.
Step 7: Select ‘On a schedule’ in the ‘Begin the task’ drop-down menu.

Step 8: Now, select the frequency of the scan from the Settings option.
Note: You can choose to run the scan once or multiple times in a day, week, or month.
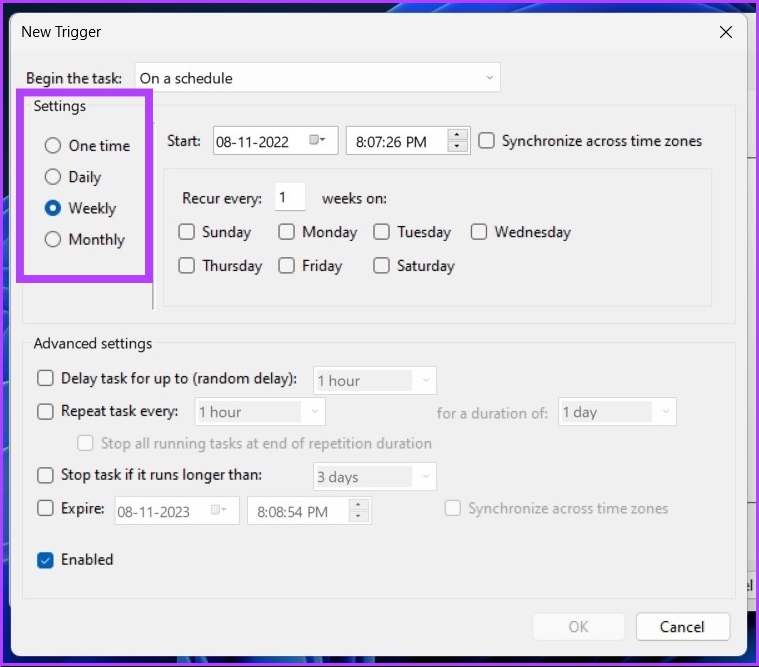
Step 9: Choose your preferred time to run the Windows Defender scan in Start.
Tip: You can play with the Advanced settings to tweak the functions.

Step 10: Finally, check the Enabled option and hit OK.
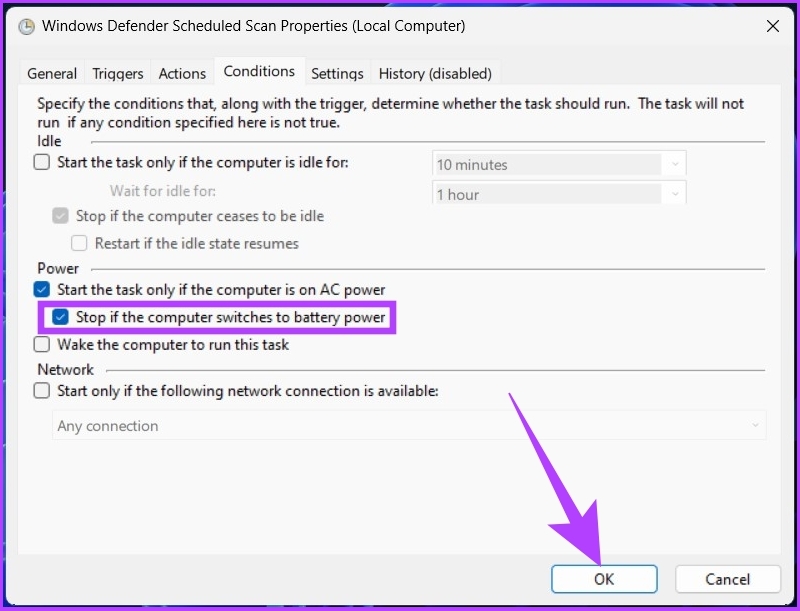
Now, if your PC is running on low battery power or has switched from AC power to battery power, you can also set a condition to void the Windows Defender scanning schedule.
Step 11: Now, select the Conditions tab.

Step 12: Check the ‘Stop if the computer switches to battery power’ option and hit OK.
That’s it! From now on, your PC will automatically run Windows Defender at the set time. Sometimes, the task or Windows Defender you set to scan your PC automatically doesn’t function properly. Moreover, there are instances where you might get an error 0x2. To avoid this, you can schedule a custom scan.
Schedule a Windows Defender Antivirus Custom Scan
You can set up a custom scan to automatically run Windows Defender without complications. Follow the steps below.
Step 1: Press Windows Key on your keyboard, type Task Scheduler, and click on ‘Run as administrator.’
Step 2: In the left panel of Task Scheduler, right-click on ‘Task Scheduler Library’ and select New Folder from the context menu.

Step 3: Type a custom name and hit OK.
Ex: CustomScan

Step 4: Double-click on ‘Task Scheduler Library’ and open the created task folder.

Step 5: Go to the Action tab and select Create Task.

Step 6: In the Name field, name the task descriptively.
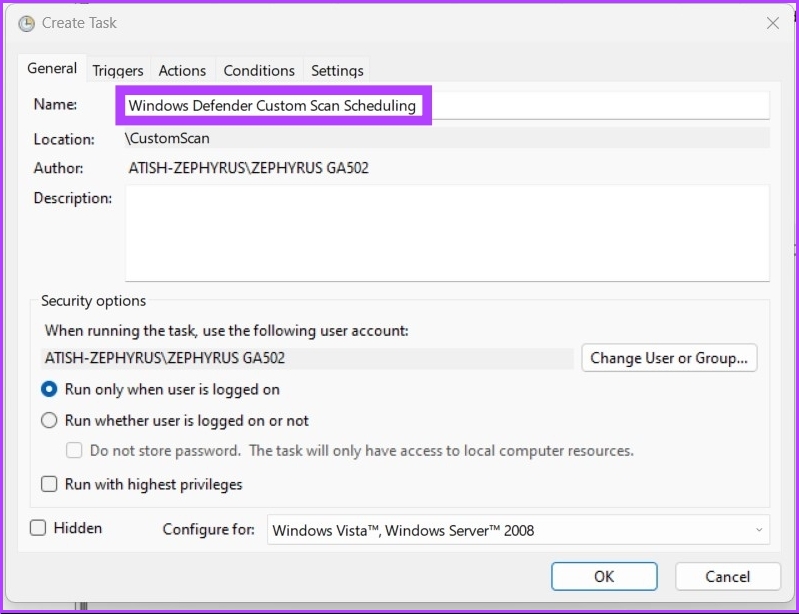
Step 7: Choose a user account for the scheduled task.
This is optional. If you’re using the Admin account, you can leave it unchanged.

Step 8: Check the ‘Run with highest privileges’ box, hit OK, and confirm again.

Step 9: In the Actions tab, click on New.

Step 10: Select ‘Start a program’ under the Action drop-down.

Step 11: Enter the path below in Program/script.
%ProgramFiles%\Windows Defender\MpCmdRun.exe

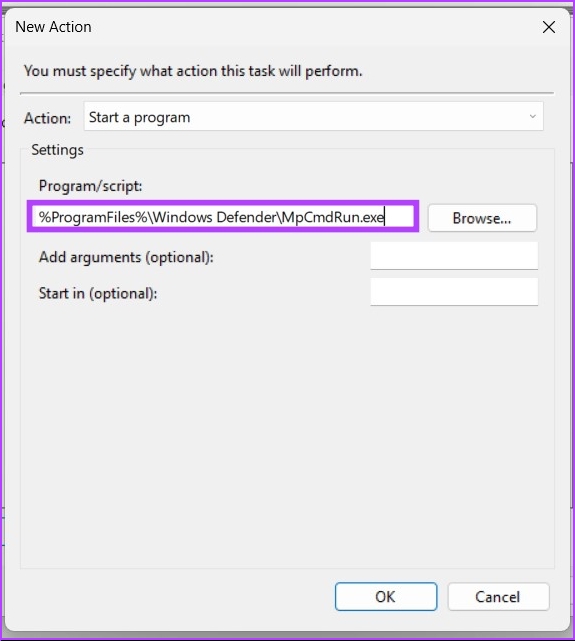
Step 12: In the Add arguments field, type any command from below and hit OK.
- For a full scan:
-Scan -ScanType 2 - For a quick scan:
-Scan -ScanType 1
- For a particular folder or location scan:
-Scan -ScanType 3 -File PATH/TO/FILE/OR/FOLDER
Note: Replace ‘PATH/TO/FILE/OR/FOLDER’ with the file or folder’s location.

Step 13: Now, click on New in Triggers.
Step 14: Similar to the previous method:
- Choose ‘On a schedule’ from the drop-down next to ‘Begin the task’.
- Select the option below Settings and set the time.
- Check Enabled and hit OK.
Step 15: Select the Conditions tab to stop the scheduled scan if your laptop’s battery is low.
Step 16: Check the ‘Stop if the computer switches to battery power’ option and hit OK.
That’s it! Now, authenticate your account credentials and let Windows Defender do its job.
FAQs on Scheduling Windows Defender Scan
The Task Scheduler might not work for a number of different reasons, such as a broken registry entry, corrupted programs, the Task Scheduler service being turned off, not having admin rights, a broken tree cache, and so on.
The active scan helps your Windows PC find and get rid of malware and other threats as soon as they get on it. And scheduling this manual work makes the whole process routine and efficient, ensuring active protection.
Schedule and Forget About It
Windows Defender is capable of actively scanning your Windows PC; however, it is highly recommended that you do a full or partial scan of your system manually every week. This weekly scan puts a halt to viruses, malware, and Trojans that come bundled with software and files you download online. Scheduling is a one-time task that, once implemented, you don’t have to take another look at.
Was this helpful?
Last updated on 04 September, 2024
Read Next
 Adobe Scan vs Genius Scan: Which Document Scanner App Is Better on iPhone
You can recollect the times you ran around looking for an actual scanner to get a digital copy of a document.
Adobe Scan vs Genius Scan: Which Document Scanner App Is Better on iPhone
You can recollect the times you ran around looking for an actual scanner to get a digital copy of a document.
 5 Ways to Completely Disable Windows Defender
Method 1: Using Command Prompt Step 1: Press the Windows key on your keyboard, type Command Prompt, and click Run as administrator.
5 Ways to Completely Disable Windows Defender
Method 1: Using Command Prompt Step 1: Press the Windows key on your keyboard, type Command Prompt, and click Run as administrator.
 Otterbox Defender vs. Lifeproof Fre: Which is the Ultimate Phone Case?
Otterbox has established a name for itself over the years as the supreme brand of protective iPhone and Android cases.
Otterbox Defender vs. Lifeproof Fre: Which is the Ultimate Phone Case?
Otterbox has established a name for itself over the years as the supreme brand of protective iPhone and Android cases.
 6 Ways to Scan QR Codes on a Windows PC
Method 1: Using the Default Windows Camera App Here's how to use the Camera app to scan a QR code on your computer.
6 Ways to Scan QR Codes on a Windows PC
Method 1: Using the Default Windows Camera App Here's how to use the Camera app to scan a QR code on your computer.
 3 Quick Ways to Find Product Key on Windows 10 or Windows 11
1.
3 Quick Ways to Find Product Key on Windows 10 or Windows 11
1.
 7 Quick Ways to Open Remote Desktop Connection Tool in Windows 11
Method 1.
7 Quick Ways to Open Remote Desktop Connection Tool in Windows 11
Method 1.
 5 Quick Ways to Show FPS Counter in Windows 11
Method 1: Using the Xbox Game Bar Xbox Game Bar is baked into Windows 10 and Windows 11.
5 Quick Ways to Show FPS Counter in Windows 11
Method 1: Using the Xbox Game Bar Xbox Game Bar is baked into Windows 10 and Windows 11.
The article above may contain affiliate links which help support Guiding Tech. The content remains unbiased and authentic and will never affect our editorial integrity.